2020 Overland Explorer Vehicles (OEV) CAMP-X pop-up slide-in pickup camper (renamed "Back Country" as of 2023)

ITTOG

Well-known member
The screws will go into the panel material of the Camp-X, the foam core panels. Existing screws that attach the fan to the foam core on the inside of the camper are loose, so when I remove the existing fan, I know there will be very little for the new screws to bite into when I install the new fan into the Camp-X foam core panels. I'm curious if I should fill the old screw holes with epoxy prior to screwing the new screws into the foam core panels on the interior to attach the new fan.
Yeah not sure in foam. I would be afraid putting epoxy in it may not work. I would be afraid when trying to put the screw in the epoxy it would just twist the epoxy and release it from the foam.
 

NOPEC

Well-known member
The screws will go into the panel material of the Camp-X, the foam core panels. Existing screws that attach the fan to the foam core on the inside of the camper are loose, so when I remove the existing fan, I know there will be very little for the new screws to bite into when I install the new fan into the Camp-X foam core panels. I'm curious if I should fill the old screw holes with epoxy prior to screwing the new screws into the foam core panels on the interior to attach the new fan.

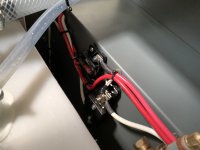
I find with a very thin substrate like aluminum or fiberglass, a 1/16th over rotation during tightening a screw will strip the thread anyway. I hardly use screws anymore where the "bond to" material is so thin. I have now gone just about exclusively to stainless rivet nuts, epoxied in and connected with small SS pan head bolts. A bit more fooling around but it seems to work every time for me.

As well, when I am doing one of these projects where sealing is so important, the threads on a conventional screw seem to always get gunked up with the the caulking material, which comprises the grip as well, at least in my experience.
 
Last edited:

Zach_F

New member
I was looking forward to installing my inverter today but ran into a huge snag. There’s only one hole running into the battery box and it’s completely filled with cable. No easy way to drill another hole. Really wish OEV would have put in another access point so I can actually use the inverter space provided.
IMG_5788.jpeg
 

MisterSmith

Member
I was looking forward to installing my inverter today but ran into a huge snag. There’s only one hole running into the battery box and it’s completely filled with cable. No easy way to drill another hole. Really wish OEV would have put in another access point so I can actually use the inverter space provided.
View attachment 781431

There are some pictures in my post #560 showing how I added holes and wired my Battle Born GC3 battery. It was a minor pain in the butt, all you need is a Step Bit to make the hole from the battery box side. I used some rubber hose I had lying around to keep the wire from chafing on the holes I drilled.
 

Zach_F

New member
There are some pictures in my post #560 showing how I added holes and wired my Battle Born GC3 battery. It was a minor pain in the butt, all you need is a Step Bit to make the hole from the battery box side. I used some rubber hose I had lying around to keep the wire from chafing on the holes I drilled.

Gotcha. I had thought at least two of your three holes were factory. I debated about using a stepped bit but didn’t think I had enough room in the box to get that in with a drill or an impact driver. I was also a little worried about getting shavings on a connection and risking a short. Guess I’ll just have to take the leap.
 

Chadx

♫ Off road, again. Just can't wait to get...
...I was also a little worried about getting shavings on a connection and risking a short.

Since you'll be drilling from the battery box side, best to simply disconnect and remove the battery(s) and the tray. Lay down a shop towel or paper towels to catch the bulk of the shavings. Vacuum with a shop vac afterards. Most of your shavings should stay on the battery box side so easy to capture and clean up. I agree that you'll want to protect your wires from wearing on edges of the new hole. Sand the edges of the new hold smooth (dremel, sand paper, chamfer/deburring bit, etc.) and use a nice thick piece of tubing (heater hose tubing, vinyl tubing, etc.) around the wires as @MisterSmith suggested, a thick wrap of silicon or electric tape in that area, a rubber grommet for the through-hole, or a combination of the above.
 
Last edited:

Zach_F

New member
@MisterSmith how did you attach your inverter fuse to the wall? Epoxy?

Now I’m thinking about putting a bus bar ahead of the positive cable running to the breaker, then attaching the inverter to the bus along with a fuse. It’d save the need to drill. Just need a short cable from the bus to the breaker.
 
Last edited:

Chadx

♫ Off road, again. Just can't wait to get...
You'll still need to get the negative cable through the cabinet wall and over to the shunt or the energy the inverter draws won't be read by your REDARC and your State of Charge, will read incorrect (higher than actual) any time you use your inverter. Or, I may be misunderstanding your proposed design...
 

MisterSmith

Member
@MisterSmith how did you attach your inverter fuse to the wall? Epoxy?

Now I’m thinking about putting a bus bar ahead of the positive cable running to the breaker, then attaching the inverter to the bus along with a fuse. It’d save the need to drill. Just need a short cable from the bus to the breaker.

The inverter fuse has two mounting holes. I drilled two small holes and used screws with nuts and washers. As a side note, this was not a 20-minute job. It took the entire day, as I had to remove everything from the battery compartment and then disconnect & replace the original battery wires. Each of the cables I used was precisely measured and then professionally made by a company here in Reno. You will want to follow diagram (B) below as chadx mentioned or your REDARC will not read correctly.

diagram.jpg
 

Chadx

♫ Off road, again. Just can't wait to get...
@Zach_F Will also mentioned it's a reasonable idea to precharge the inverter capacitor prior to connecting, particular with lithium batteries that have such low internal resistance and can dump huge amount of power quickly. Not as necessary if the inverter is around 1500 watts or smaller, but easy to do so why not. You can use a store-bought resistor or make-shift resistor such as a filament light bulb (do NOT use an LED lightbulb).
"DIY Solar Power with Will Prowse" has a good video ("How to Pre-charge Large Off-grid Inverters SAFELY") on the subject and the thought process behind it even if you are using a battery bank that is not touchy to the rush of draw. Again, not as important with 1500 or smaller inverters, but good to be aware and get in the habit of precharging inverter capacitors even for those smaller inverters, in my opinion. Similarly, it makes sense to discharge inverter capacitors, which is also covered in the video.
 

Zach_F

New member
You'll still need to get the negative cable through the cabinet wall and over to the shunt or the energy the inverter draws won't be read by your REDARC and your State of Charge, will read incorrect (higher than actual) any time you use your inverter. Or, I may be misunderstanding your proposed design...

Maybe I’m mistaken but isn’t the monitor shunt on the outside of the battery box, next to the breaker? I was going to run the negative straight to that, so only the positive would need to be addressed.
 

Chadx

♫ Off road, again. Just can't wait to get...
Maybe I’m mistaken but isn’t the monitor shunt on the outside of the battery box, next to the breaker? I was going to run the negative straight to that, so only the positive would need to be addressed.

I think I'm following now. My confusion was due to my unfamiliarity of the new battery box, inverter shelf layout since mine is an older cabin. So, if the location for the inverter is on the flat area, shown in your picture above, rather than within the battery box, then yes, you would have access to both the positive circuit (via the breaker) and negative circuit on the shunt. Only thing to calculate is if the breaker will handle both your inverter load and your entire camper load at the same time (if you are wiring inverter current through the breaker) and then if you still use a dedicated breaker or fuse for your inverter (which you probably should). And, of course, if you are sharing one positive cable to power both your inverter and the camper fuse block, you'll need to ensure the positive battery cable is also upsized to handle the max inverter load and the max camper load simultaneously which will likely require a much larger gauge for the positive cable.
 
Last edited:

MisterSmith

Member
Maybe I’m mistaken but isn’t the monitor shunt on the outside of the battery box, next to the breaker? I was going to run the negative straight to that, so only the positive would need to be addressed.
You are correct, it's next to the breaker. What size inverter are you adding? The stock battery cables are only 6 AWG, I changed to 1/0 for my 2000W inverter.
 

Forum statistics

Threads
188,019
Messages
2,901,228
Members
229,411
Latest member
IvaBru
Top