ramblinChet
Well-known member
My research indicates that failure of the A-pillar Molding in RAM trucks is not uncommon. Mine began to progressively fail months ago and it became so loose and weak that I stopped using it since my greatest concern would be one day having it fail and leaving me flat on the ground with a potential injury. After removing the A-pillar molding that was only marginally useful I recognized the design failure and hoped this has been corrected. BTW - that white rolled up fabric on the left side is an airbag.

Once I began using the Google to poke around the interweb I discovered both the original Mopar part (#6NF75TX7AD) and a revision (#7KF73TX7AA), were available. Based upon the new part number I suspected a significant revision had taken place so I took a chance and ordered the possibly updated part. Below you can see the original part up top while the revised part is below. The inset picture within the original part displays a common failure point while the inset within the revised part shows the reinforcement in the same area. It will be interesting to see if this new variant permanently corrects the issue or not.

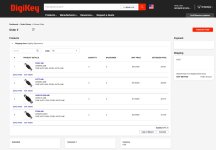
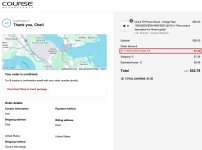
Here is my beautiful new A-pillar Molding installed. While preparing to place my order I checked pricing from a half-dozen parts suppliers and saved 25% with ten minutes of effort. Interestingly, the price for the actual part was less at all other sites except one, but shipping was 150-200% higher at all others.

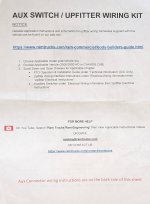
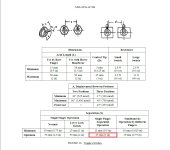
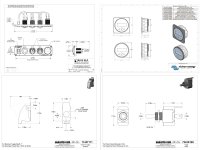
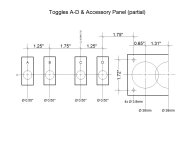
Now that I have the Baja Designs backup lights installed in the AEV rear bumper, it was time to wire everything up. I briefly considered ordering the pre-configured wiring harness directly from AEV but since I already had the supplies and the harness alone was $185, I decided to build my own. On the left you can see the Ancor 16 AWG marine grade tinned copper wire (red and black) that would be used. On the right you see the Mopar Aux Switch Upfitter Wiring Kit (#68398184AB) that came with my truck. If you have the auxiliary switches there is important information contained within this kit so attached to this post you will find JPGs of the information for reference purposes.
Down at the bottom you will see a roll of Tesa Triple A 51036 flag-resistant PET cloth tape which "provides excellent abrasion protection of automotive harnesses and withstands high temperatures and demanding environmental conditions." The tape is wrapped over top of black Electriduct 1/4" Flame Retardant Wire Loom Tubing Polypropylene Split Corrugated Conduit (5.5mm ID) that surrounds the Ancor wiring. "This polypropylene wire loom is used to protect and organize wire harnesses, harness assemblies, loose cable bundles, and is ideal for automotive and industrial applications." The roll of PP conduit was 100' so I did not include it in this picture.

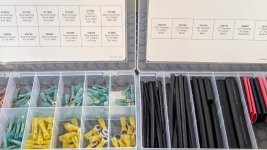
Some of the Ancor products I used for building this wiring harness - on the left is an Ancor Heat Shrink Terminals & Connector Kit (#320101) and on the right is Ancor Heat Shrink Tubing Kit (#330101). Tool used include Ancor Single Crimp Ratchet Tool (#703010), Wire & Cable Cutter (#703005), Klein heavy-duty wire strippers (#K12035), Bosch 15-amp professional heat gun, and others. Of course, you can spend less money and maybe the items you receive are fine. For my purposes, by default I usually search for the best within reason. for electrical components this is especially true and ultimately I consider it the price you must pay for some additional safety. The last event I am interested in experiencing is a fire inside my camper while sleeping alone miles away from any help. It just isn't worth it to me so the few extra dollars and attention to detail are well worth it.
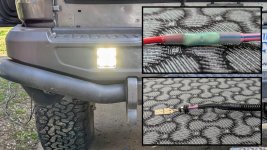
With the harness complete I was excited to see the lights finally come to life. Whomever at AEV came up with the idea of including integrated lights as part of the rear bumper deserves a firm handshake and pat on the back. The inset picture up top simply shows an Ancor heat shrink connector properly installed. Note the proper crimp ratchet tool did not damage any of the heat shrink and the adhesive inside the heat shrink was heated up to a temperature where the bonding agent began to weep from the ends signifying proper application. The inset on the bottom depicts the same wire from the Mopar Aux Switch Upfitter Wiring Kit attached to Ancor 16 AWG wire, encased in Electriduct, heatshrink applied, and waiting to be wrapped with Tesa cloth tape.
Note - the two wires off to the left are 40' extensions connecting my house battery to my solar panels sitting out in the sunlight in front.
Of course I ventured out at night to test the newly installed rear bumper lights and was happy with their performance. Unfortunately, I was unable to manually control the digital aperture, shutter speed, and ISO on the camera inside my phone so you must keep in mind the images you see are not as accurate as real life. In short, if the scene appears dark the phone exposes for a longer period to make it lighter, and vice-versa.
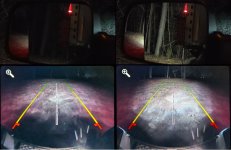
The top row is looking out the drivers window at the side mirror and seeing what is behind the truck. On the left is a picture taken with only the OEM black-up lights mounted in the LED tail lights. These do a good job but are nothing compared to the picture on the upper right which includes the AEV/Baja Designs rear bumper lights. The bottom row represents the same scenario when viewing my OEM back up camera through my dash mounted Uconnect 8.4". That unit attempts to do the same as the camera by increasing the exposure on dimly lit scenes while underexposing scenes that are well lit. I am happy with the performance and only wish I would have had these installed when my AEV Prospector was built years ago.
And finally, a tip of the hat to the fine folks at LockNLube for selling the proper brass coupling the connect their LockNFlate locking air chuck to my Milton 500 series inflator gauge. The white residue you see around the fittings is LOCTITE 565 which is a "general purpose thread sealant for an instant low-pressure seal." Once again, it only costs a few dollars more and takes a few extra minutes. I'm worth it and so are you...
...tryna make ends meet, you're a slave to money then you die...


Once I began using the Google to poke around the interweb I discovered both the original Mopar part (#6NF75TX7AD) and a revision (#7KF73TX7AA), were available. Based upon the new part number I suspected a significant revision had taken place so I took a chance and ordered the possibly updated part. Below you can see the original part up top while the revised part is below. The inset picture within the original part displays a common failure point while the inset within the revised part shows the reinforcement in the same area. It will be interesting to see if this new variant permanently corrects the issue or not.

Here is my beautiful new A-pillar Molding installed. While preparing to place my order I checked pricing from a half-dozen parts suppliers and saved 25% with ten minutes of effort. Interestingly, the price for the actual part was less at all other sites except one, but shipping was 150-200% higher at all others.
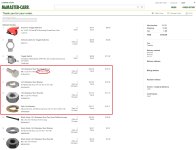
- $50.14 + $09.84 = $59.98 (moparonlineparts)
- $45.20 + $15.99 = $61.19 (worldpartsdirect)
- $47.68 + $15.35 = $63.03 (moparpartsonsale)
- $47.88 + $18.92 = $66.80 (tascaparts)
- $48.90 + $19.55 = $68.45 (mymoparparts)
- $68.50 + $12.01 = $80.51 (mopar)

Now that I have the Baja Designs backup lights installed in the AEV rear bumper, it was time to wire everything up. I briefly considered ordering the pre-configured wiring harness directly from AEV but since I already had the supplies and the harness alone was $185, I decided to build my own. On the left you can see the Ancor 16 AWG marine grade tinned copper wire (red and black) that would be used. On the right you see the Mopar Aux Switch Upfitter Wiring Kit (#68398184AB) that came with my truck. If you have the auxiliary switches there is important information contained within this kit so attached to this post you will find JPGs of the information for reference purposes.
Down at the bottom you will see a roll of Tesa Triple A 51036 flag-resistant PET cloth tape which "provides excellent abrasion protection of automotive harnesses and withstands high temperatures and demanding environmental conditions." The tape is wrapped over top of black Electriduct 1/4" Flame Retardant Wire Loom Tubing Polypropylene Split Corrugated Conduit (5.5mm ID) that surrounds the Ancor wiring. "This polypropylene wire loom is used to protect and organize wire harnesses, harness assemblies, loose cable bundles, and is ideal for automotive and industrial applications." The roll of PP conduit was 100' so I did not include it in this picture.

Some of the Ancor products I used for building this wiring harness - on the left is an Ancor Heat Shrink Terminals & Connector Kit (#320101) and on the right is Ancor Heat Shrink Tubing Kit (#330101). Tool used include Ancor Single Crimp Ratchet Tool (#703010), Wire & Cable Cutter (#703005), Klein heavy-duty wire strippers (#K12035), Bosch 15-amp professional heat gun, and others. Of course, you can spend less money and maybe the items you receive are fine. For my purposes, by default I usually search for the best within reason. for electrical components this is especially true and ultimately I consider it the price you must pay for some additional safety. The last event I am interested in experiencing is a fire inside my camper while sleeping alone miles away from any help. It just isn't worth it to me so the few extra dollars and attention to detail are well worth it.

With the harness complete I was excited to see the lights finally come to life. Whomever at AEV came up with the idea of including integrated lights as part of the rear bumper deserves a firm handshake and pat on the back. The inset picture up top simply shows an Ancor heat shrink connector properly installed. Note the proper crimp ratchet tool did not damage any of the heat shrink and the adhesive inside the heat shrink was heated up to a temperature where the bonding agent began to weep from the ends signifying proper application. The inset on the bottom depicts the same wire from the Mopar Aux Switch Upfitter Wiring Kit attached to Ancor 16 AWG wire, encased in Electriduct, heatshrink applied, and waiting to be wrapped with Tesa cloth tape.
Note - the two wires off to the left are 40' extensions connecting my house battery to my solar panels sitting out in the sunlight in front.

Of course I ventured out at night to test the newly installed rear bumper lights and was happy with their performance. Unfortunately, I was unable to manually control the digital aperture, shutter speed, and ISO on the camera inside my phone so you must keep in mind the images you see are not as accurate as real life. In short, if the scene appears dark the phone exposes for a longer period to make it lighter, and vice-versa.
The top row is looking out the drivers window at the side mirror and seeing what is behind the truck. On the left is a picture taken with only the OEM black-up lights mounted in the LED tail lights. These do a good job but are nothing compared to the picture on the upper right which includes the AEV/Baja Designs rear bumper lights. The bottom row represents the same scenario when viewing my OEM back up camera through my dash mounted Uconnect 8.4". That unit attempts to do the same as the camera by increasing the exposure on dimly lit scenes while underexposing scenes that are well lit. I am happy with the performance and only wish I would have had these installed when my AEV Prospector was built years ago.

And finally, a tip of the hat to the fine folks at LockNLube for selling the proper brass coupling the connect their LockNFlate locking air chuck to my Milton 500 series inflator gauge. The white residue you see around the fittings is LOCTITE 565 which is a "general purpose thread sealant for an instant low-pressure seal." Once again, it only costs a few dollars more and takes a few extra minutes. I'm worth it and so are you...
...tryna make ends meet, you're a slave to money then you die...

Attachments
Last edited:


