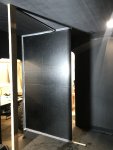
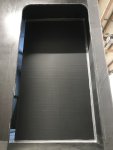
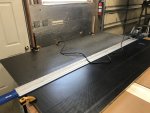
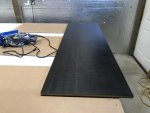
2022 Ford F550 - DIY - Adventure Expedition Vehicle Build Thread

Vance Vanz

Well-known member
Pass Through - Step Platform

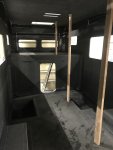
I apologize in advance for the pictures (poor lighting and odd angles) the shop is pretty cramped right now and the doors on the truck can only be opened about a 1/3 to maybe 1/2 of the way. It is soooo fun putting in and taking out the seats, floor storage box and back cab liner (a hundred times) when they barely fit through the space between the door and cab ?. Anybody want to lend me their HUGE shop for the remainder of the build, so I can open my doors all the way and build the camper while it is sitting on the truck ??;)!

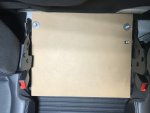
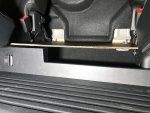
Since I want to maximize storage space in the crew cab area (have the entire space available for storage when the 40 jump seats are folded up), I decide to go with a smaller and simpler step platform for the pass through. I say smaller because I have seen some that are built up and out (level with the bottom of the pass through boot opening and extend from the pass through boot all the way to the center console between the front seats). I say simpler, because I am hoping to use one small piece of sheet steel with two small steel legs welded to it (powder coated and carpet/rubber floor mat for the top).

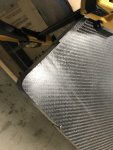
Here is what I'm working with
IMG_8768.jpeg

I decided to use the back bolt studs off of each seat to mount the back of the plate. The two steel front support legs will be welded to the bottom of the plate further in (width of plate) than the back bolt studs and will also be bolted to the factory channel/rail that the front legs of the seats are mounted to.

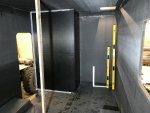
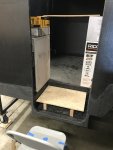
A to scale mock up of what it would be like climbing into the camper from the cab and into the cab from the camper, since the camper is not mounted and pass through not cut yet. I wanted to check the small drop, difference in height between the bottom of the boot and top of the platform and also ensure I didn't miss any other important detail. (Camper step box put to good use ?)
IMG_8779.jpeg

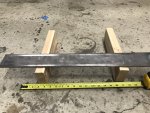
A little flex testing of the gauge/thickness steel I will probably end up going with (roughly 3/16") and where the support legs will need to be placed up front, so the platform feels/is solid when using it.
IMG_8791.jpeg

After a hundred measurements and considerations here is what I'm thinking
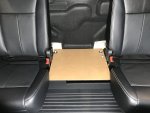
IMG_8788.jpegIMG_8784.jpegIMG_8785.jpegIMG_8780.jpegIMG_8790.jpeg

I'll slightly round off the front corners on the plate and the small stud coming through the cardboard (on the right side) will be cut off. I may also cut the back side of the floor storage box down to open up the storage area under the platform a little more. The front support legs will also get these on the bottom, like the seats,
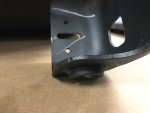
IMG_8792.jpeg
to have a solid mount to the channel while keeping everything above the carpet and hiding the cut outs in the carpet. Ohhh, the details can kill yah.

Clean, simple and sturdy is what I'm going for.

One thing to note. I thought of using aluminum for the platform, but this would have required thicker material that the back mounting studs would not have been able to accommodate. Also, there was not enough room to use end radiuses/turn downs on each edge of the aluminum to stiffen it up.

I'll post more pics once everything is finalized.

Crew Cab Pass through break over! It's time to head to the inside of the camper and start bonding the internal walls! Back to COMPOSITE shenanigans ???!
 

Vance Vanz

Well-known member
General & Humanness Check In:

Holy Smokes; it has been over three weeks since my last post!

I have to thank everyone for getting me home at a decent hour from the shop tonight :D. The guilt I have been feeling for neglecting the build thread has finally accumulated to a level that I left the shop early tonight for the sole purpose of updating the thread.

Since my last post, moving to the interior of the camper, it seems like I am all over the place and nothing is getting done. A bit of, or should I say A LOT OF, squirrel brain going on here. Time is flying by; a week feels like a day and a month feels like a week. And more specifically, the last three weeks have been a mix of anxiety ?, excitement :D and burnout ?o_O?.

The excitable energy is picking out final products and finalizing elements of the design/aesthetic, which lets me know that the end may be in sight. I get flashes of what it will be like traveling in this thing when it is finished..........., hopefully looking super cool and functioning flawlessly ?.

The anxiety just so happens to be tied to the excitement, the thousands of final decisions that need to be made and also figuring out how to build/construct those thousands of design/aesthetic decisions appropriately. I'm experiencing first hand how so many products that I thought I could just buy and/or bolt on, don't quite fit, work, or exist. The number of items that I am having to significantly modify and or make from scratch, is getting very large.

Oooooooohhhhhhh BURNOUT. It is definitely hitting me pretty strong for a day or two about every two weeks. Sometimes I just need to leave the shop because I can't think straight, or just simply don't have the motivation to pick up the next tool for the next project. I will literally stare at that tool for what feels like 10 minutes, trying to will my hand to pick it up, but nothing is happening. I'm literally just standing there frozen, locked in a motionless and psychologically void battle that I never win ??. I've been trying to anticipate/time when this will happen, so I can just stay at the house and use the day to research products that I still need to finalize/purchase. Although it is still technically work on the build, it feels like somewhat of a break and also allows me to keep moving forward on the build.

So in the spirit and experience of the ?, I thought I would update the build progress in the flow/manner of the squirrel brain. Enjoy the ride you little squirrel!
 

Vance Vanz

Well-known member
Composite Carbon Fiber - Interior Walls - Bonding:

I first wanted to check the entire roof for level, before bonding any internal walls. I was surprised given its size, it looked pretty dang good except for a tiny little sag in one area that was barely visible under the level. I decided what the heck, lets make it perfect since I'm only doing this once. I threw up some posts to keep everything where it needed to be for bonding.
Leveling Roof.jpeg

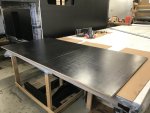
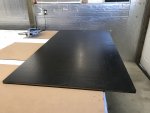
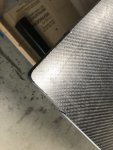
First up, the MTB/Gear locker since it is the least involved. Here is the most expensive 4x8' sheet of material that I will probably ever cut and/or work with in my life. CHA CHING!
IMG_8797.jpeg

Ripped to size and the corners notched to accommodate the tabbing on the inside corners of the camper
IMG_8801.jpegIMG_8800.jpeg

Back Wall: square, level, bonded, filleted and peel plied
IMG_8803.jpegIMG_8804.jpeg

Side Wall: Gotta love the composite particles/dust, especially when the carbon fiber gets electrically/statically charged and sticks to everything. I'm constantly vacuuming to prevent this stuff from getting all over the shop.
IMG_8806.jpegIMG_8807.jpegIMG_8808.jpeg

Dry fit, marked and ready to be bonded
IMG_8810.jpeg

Wait a minute, "What hinges exactly am i going to use on the vertical cabinets next to the MTB/Gear locker and how am I going to specifically mount them? Do I want to put an insert in the composite wall or build a frame out of wood. Yah, and the bathroom/shower compartment is next and therefore the shower door. How do I want to mount that? Piano hinges, probably, but what do I want to mount the hinge(s) to........ the bamboo or an insert in the composite wall? And the door handle, a push button or an actual door handle? CRAP, I'm going to have to figure all of this out before I get ahead of myself and miss something that may require me to have to move an already bonded composite wall.

I took the next few days to go through each area in the interior: MTB/Gear Locker, Vertical Closet, Bathroom/Shower, Refrigerator/Microwave Stack, Dinette Booth, Kitchen Counters, Overhead Cabinets, etc. to account for any/all items that I had not finalized and could affect a vertical composite wall possibly needing to be moved for some reason based upon something I had not accounted for.

Not to say that this is not a standard protocol that needs to be figured out on every build, but mine is a little unique. All of my internal walls/shelves will be composite and I don't have a frame like wood or 8020 Aluminum that the composite panels will be mounted/secured to. I also did not have the time, nor ability, to locate inserts in each composite layup exactly where each hinge would be located/mounted to. I knew in advance that I would have to figure this out on the fly during the build and I've finally reached that point.

Basically all of my composite walls are being built as if I am doing frameless cabinetry and I want the look/aesthetic of frameless cabinetry . I want the front/face of the cabinet (bamboo wood face) to cover the entire front of the cabinet/hide all of the composite walls/shelves. The problem is, I can't screw directly into the composite walls to mount the cabinet/door hinges that are normally used for frameless applications. I have two options for a frameless look given my situation/design (That I'm aware of/seemed to make the most sense): 1. Core out the foam in the composite wall/shelf and epoxy an insert anywhere/everywhere a hinge/door latch is needed, or 2. Build a small/thin internal solid frame inside the composite cabinet that the hinge/a latch can be mounted to.

I chose option #2, since it is the least labor intensive. I also wanted a 3/4" lip at the front of every cabinet/composite shelf in the camper, to help prevent things from sliding out of a cabinet/putting pressure on the cabinet door/latch if/when items shift around while driving/off roading. I've done this on all of my previous camper vans and it's works great. Since this lip was already going in regardless, which takes care of the door latches (being able to mount the cabinet strike plate to something solid), all I need to do is add another 3/4" piece to the side of any cabinet that will have a hinge, lift, etc. Yes, this will shrink the opening of the cabinet a bit, but all of my cabinets have been sized to accommodate for this. The 3/4" x 3/4" lip/frame will also be made out of bamboo, so it will match the cabinet door and in many ways look intentional, be a pretty cool looking accent on the inside of the cabinet.

So, the end result is as follows. I will have a frameless look, but will be using face frame cabinetry hardware, since I have an internal frame. I'll show detailed pics of all of this when I finally get to that point in the build (y).

Why am I sharing ALL of this detailed info? If anyone runs internal composite walls/shelves to save on weight, and/or match the aesthetic of their composite shell, and they don't want to construct a wood or aluminum frame, etc., to mount everything to, they will have to make one of the two decisions I had to make. Also, if I don't get this info out now, while it is fresh and at the forefront of my mind, I probably wont take the time to share it later in the build.

If I had years to plan this build and was a CAD wizard, I may have designed/imbedded inserts in all of the composite panels for all of the hardware. I would have even used hidden hinges on everything. Who am I kidding, all that stuff is for the professionals who do this for a living and are on version/revision #5-10 of their build, not prototype #1 and #1 of only one build :cool:
 
Last edited:

RAM5500 CAMPERTHING

OG Portal Member #183
Looking Great!

I know all about the "Burnout" firsthand man! Dont take it lightly!

I know we all create these imaginary deadlines of when we need to finish by, or something like that.

Ignore them and take a little break and think about everything and how its all gonna fit

The times i kept working when i was in burnout mode is when i made the mistakes i am still fixing.

Deep breath, take a break
 

StenchRV

Well-known member
Looking Great!

I know all about the "Burnout" firsthand man! Dont take it lightly!

I know we all create these imaginary deadlines of when we need to finish by, or something like that.

Ignore them and take a little break and think about everything and how its all gonna fit

The times i kept working when i was in burnout mode is when i made the mistakes i am still fixing.

Deep breath, take a break

AGREED 110%!

NOTHING worse than redoing something because you were spent, mentally or physically!

Amazing build!
CHEERS!!
 

DzlToy

Explorer


Vance Vanz

Well-known member


Thanks so much for sharing the info and knowledge DzlToy. Definitely a game changer. The wheels are turning.

I did a pretty extensive search for hardware on the web/many of the marine websites and I somehow completely missed these.

Have you used them personally, or know of anyone who has?

Thanks again!

Make your own: https://www.boatdesign.net/threads/carbon-piano-hinges.61551/

Or an alternative product:

Also, track down Peter as he first turned me onto carbon hinges and I'm sure knows way more about it than I ever will...
 
Last edited:

Vance Vanz

Well-known member
Bathroom & Shower - Initial Thoughts & Items

In my check of each area, to ensure nothing was going to cause a composite vertical wall needing to be moved, I made some decisions in the bathroom and also had a few questions.

The bathroom size is set, 27"W x 48"L and can’t be altered. Originally, I was going to run a typical (small-ish) modern looking residential right hand drain shower pan (Similar to what StenchRV used in his build).

(StenchRV’s-Picture reference only, may not be in the needed size or drain orientation)

https://shopanzzi.com/products/sb-a...AyERvlFn-qwQ6gzl6yODwGxrfPC-36TwaApZ3EALw_wcB

I want to ensure the pan actually drains properly and can be easily cleaned. So far, I can only find something 32”W x 48”L and this width is too big to try and cut something down that can also be properly sealed. I’ll be using nice/modern looking pre-made wall panels sheets of some sort (FRP-ish, etc.-cut to fit and the corners caulked/sealed) for the walls in conjunction with the shower pan.

Does anyone know of a vendor that makes a modern and/or basic looking right hand drain shower pan closer to the 27” width I have? Or, know of any company(ies) that will make a custom shower pan out of the typical material(s) most Residential/RV pans are made out of?

A custom-made shower pan out of stainless steel would be the next option, if I can’t find a typical residential/RV one. The stinker with this option is it will be 4-5 times the cost, $2,000-2,500 for a SS as opposed to roughly $500 for a Res/RV pan. I would also have to build a custom base/structure for the SS pan to sit on, because the pan would be designed to be a right hand drain and the drain flange would also be recessed in the pan (To prevent any standing water in the pan). Unfortunately, I’m not OK with the often standard SS pan (flat bottom and elevated drain cover) that always has a bit of standing water in it.

Conceptualizing what a SS pan would look like and where the break lines may/would be in the pan to accommodate the toilet
IMG_8812.jpeg

If someone is aware of other possible shower pan options I’m not considering, that are durable/leak proof, please share.

Next question is regarding a door handle for the shower door, in a material that will not rust (Marine grade SS, chrome, etc.). The plan is no shower curtain for the shower door. The door will be made out of ¾” bamboo, properly sealed, and/or a thin shower panel sheet layer 1/16-1/8” thick bonded/added to the inside of the door for water protection.

In the past, I have just used a push button latch for the shower door, but while you are using the bathroom, there is no way to lock/latch the door from the inside, without adding an additional clasp, latch, etc. Also, the push button required building something up to mount the 90 strike plate to it and it wasn’t all that clean looking. A recessed strike plate just trapped a lot of water. I know Earthroamer uses a push button latch on their shower door that matches their cabinets, but it also has a handle/turning mechanism on the back side of it. I’m not sure if they custom alter/make this.

Does anyone know of a smaller and thinner marine grade/water proof door handle that will fit in a ¾-1” wide door, or options that are water proof/will fit my design? I’ve done an initial search and am not coming up with much.

I pulled the trigger on a shower bar/head and mixing valve:


FYI: If you are looking for smaller (all in one) mixing handles/valves, as opposed to larger residential/multi-piece ones, that can be paired with just about any nicer looking SS, brushed nickel or chrome shower head/assembly, try Scandvik or Amassador Marine.

https://www.scandvik.com/index.cfm?method=products_Category&catID=325

https://ambassadormarine.com/head-faucets-showers-accessories/shower-mixer?page=3

Scandvik also makes a pretty cool All-In-One shower assembly I almost went with
https://www.scandvik.com/index.cfm?method=products_detail&productID=55
 
Last edited:

DzlToy

Explorer
Duravit, Dornbracht, Hansgrohe and Hansa fixtures and taps are all quite spiffy. You do pay more for them, but quality comes at a price. This is especially true in the days of a $100 Home Depot faucet (made in China) being complete crap, is a $400 - $600 tap really that expensive?

Any competent fab shop should be able to hand brake or CNC brake a stainless sheet to create a shower pan for you. A bit of TIG welding around the corners and Bob's your uncle. I can't imagine that costing two grand, but...

Edit: If the cost really is $2,000 - $2,500, I would seriously consider a sheet of Dow 60 XPS, some thickened epoxy for filleting compound and laying a few layers of carbon or fiberglass over the whole thing.
 

Vance Vanz

Well-known member
Make your own: https://www.boatdesign.net/threads/carbon-piano-hinges.61551/

Or an alternative product:

Also, track down Peter as he first turned me onto carbon hinges and I'm sure knows way more about it than I ever will...
Hey KiwiMtnClimber!

Thanks for adding info/input to the topic at hand. I will definitely check all of this out.
 

Vance Vanz

Well-known member
Duravit, Dornbracht, Hansgrohe and Hansa fixtures and taps are all quite spiffy. You do pay more for them, but quality comes at a price. This is especially true in the days of a $100 Home Depot faucet (made in China) being complete crap, is a $400 - $600 tap really that expensive?

Any competent fab shop should be able to hand brake or CNC brake a stainless sheet to create a shower pan for you. A bit of TIG welding around the corners and Bob's your uncle. I can't imagine that costing two grand, but...

Edit: If the cost really is $2,000 - $2,500, I would seriously consider a sheet of Dow 60 XPS, some thickened epoxy for filleting compound and laying a few layers of carbon or fiberglass over the whole thing.

I've price checked several fab shops in the local Boise area and this is the cheapest/ball park going rate for a custom SS pan of this size. SS isn't cheap. 3 years ago a smaller SS complete shower insert, without a door, was 10K for a campervan.

I thought about making my own pan out of fiberglass, but unfortunately I don't have the time, skills or equipment/tools to make one that is clean/factory looking.
 

Forum statistics

Threads
188,154
Messages
2,902,874
Members
229,582
Latest member
JSKepler
Top