2022 Ford F550 - DIY - Adventure Expedition Vehicle Build Thread

DzlToy

Explorer
Send me a PM if you are serious about having one made. A good friend owns a metal fab shop and I have access to a small composites shop. Do you have a dimensioned drawing, budget and time line for the shower pan?
 

Vance Vanz

Well-known member
Refrigerator & Convection Microwave Components/Cabinet Stack:

Refrigerator:
My refrigerator was already decided/purchased prior to the build, but I thought I would share some info on it, in-case others find themselves in a similar decision making process for an expedition vehicle.

Screen Shot 2023-04-04 at 12.32.30 PM.png
https://www.indelwebastomarine.com/us/products/product/show/cruise-200-inox/

In my previous campervan build for this trip, I ran the Isotherm Cruise 130 Elegance. The main problem was the freezer section was too small for extended trips/full time living.

Basically the next size up in Isotherm (Stainless finish required), to get a larger freezer section, jumpes way up, and the freezer actually becomes too big for my liking (Isotherm Cruise CR 195 Classic). This would have created wasted space and power consumption. I know there are dual compressor units and separate units that can be shut off, or used as a refrigerator and/or freezer, which helps on the power consumption side of things, but it still led to a larger freezer volume than I needed or wanted.

I found the isotherm undermount 200 stainless steel-INOX that basically was a perfect fridge and freezer size for two people living/traveling full time (IMHO ;)). The freezer size is in that middle range that I wanted, 30-50 liters. I'm more of a fresh food eater as opposed to frozen. The fact that the fridge is an undermount and only somewhat slightly wider, as opposed to way taller, was also a bonus. This would allow me to add a pantry cabinet where the top fridge or freezer would normally sit, if using the 195 Classic or a similar stackable model.

This alone was a huge selling point, getting a decent size pantry cabinet that I otherwise would not have. In fact, if I squeeze/place everything ever so perfectly in the refrigerator/microwave cabinet stack, I will also gain a small upper overhead cabinet that will be used for bedding or dirty laundry storage. The width on the fridge is also not too wide, as I still have a dinette booth area that will be 6' long when converted into a bed and my bathroom is still 48"s long. These are the two areas that sit on the left and right side of the Refrigerator/Micro cabinet stack.

My only worry about this fridge was, would it fit through a standard full size RV door? The spec sheet said No, but the answer is Yes, if you take off the front stainless steel mounting frame and the doors along with it. Nothing difficult at all, the whole front assembly comes off in one piece after removing a handful of screws.

Convection Microwave:
I'm not a huge baker but having something that can act as an oven, without actually taking up the space an oven would and requiring gas, is a bonus. After researching all of the visually pleasing options (Modern, stainless) and StenchRV sharing what he went with, I had it narrowed down to two models.

Screen Shot 2023-04-04 at 12.47.26 PM.png


Screen Shot 2023-04-04 at 12.55.17 PM.png
https://www.kitchenaid.com/major-ap...Tm5AsJUH1R6_jB0mjtYaAmWGEALw_wcB&gclsrc=aw.ds

They both look clean, modern and will match the SS throughout the interior. I chose the Kitchenaid for resale value and because the Panasonic had several reviews stating the coating on the main start button wore off prematurely. Not a huge deal, but that is the simple stuff that would drive my detail oriented OCD-ness bonkers (the coating wearing off). I did however have to pay a chunk of change for the Kitchenaid; I think it is the most expensive countertop version there is :(??.

I pulled these (Frig/Micro) out of their boxes for final measurements/clearances. I also crunched all of the measurements for the hidden bamboo cabinet frames and associated Blum compact hidden hinges that will be used. The needed space/bamboo frame to have something substantial to mount the piano hinge for the shower door was also accounted for. All of this required me to slide one of the composite walls out an addtional 1-1/2" from the original plans. Everything is all set and the vertical composite walls can now be bonded.
 

Vance Vanz

Well-known member
Send me a PM if you are serious about having one made. A good friend owns a metal fab shop and I have access to a small composites shop. Do you have a dimensioned drawing, budget and time line for the shower pan?
Will do, give me a day or two and I'll be in touch.
 

Vance Vanz

Well-known member
Awning Dry Fit:

So I bounced around to the dinette booth and then the kitchen counter area to account for anything that would affect any vertical composite walls. Nothing on the dinette booth (as the refrigerator stack accounted for/set this) and the kitchen only had one composite wall on the end near the main entry door.

I had to make sure this composite end cabinet wall for the kitchen was cut/mounted to the appropriate depth and height. No biggy on the depth, but the height required me to account for the countertop height and subfloor height, which required me to finalize my decision(s) on a countertop material and flooring material. Another rabbit hole and squirrel brain project, two actually, that are still in progress. I did dial in the MFG, material and associated/needed measurements I will use for the countertop and floor, but have not decided on the final colors. Kitchen counter/area good to go for now related to getting the composite wall bonded.

Next up, upper cabinets, which will also be composite. This one required me to account for everything that will need to be mounted in/to the ceiling area or installed in the 2" ceiling chase. Pretty much all of this is complete, except for dry fitting the awning. I technically could not find specific specs for the mounting hardware on the awning, prior to buying it, and several phone calls/inquiries about this info were never returned.

All of the detailed measurements and cross referencing placement on everything, so nothing is missed or SCREWED UP.
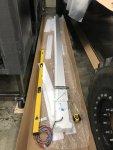
IMG_8813.jpegIMG_8818.jpeg

Drilling several hole in the shell always provokes some anxiety ? and the measuring 100 times and drilling/cutting once philosophy applies.

Fiamma has bolt throughs only on the ends of their mounting bracket and the field is screwed into the shell. Since I did not imbed a solid surface to screw into, in the layup, I decided to ditch the screws and just add a few more bolt throughs with backing plates. Not a big deal, actually less holes overall into the camper shell, but I did have to make three more galvanized backing plates to match the factory ones. I kept them large enough to prevent point loading on the shell.
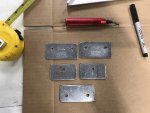
IMG_8820.jpeg

Lucky for me, the mounting bracket, which mounts to the outside wall of the camper and the associated location of the internal backing plates, just sit within my 2" ceiling chase, inside the camper. I don't have to drop the ceiling chase/headliner any lower than originally planned ?. They are snug towards the top of the inside wall, but also sit just under where the composite fillet begins in the corner of the wall.
IMG_8817.jpegIMG_8821.jpegIMG_8822.jpeg

FYI: I'm running the Fiamma F45 Eagle (Side Wall Mounted)

I thought about a recessed roof mounted awning, like ER has, but I decided against it for two reasons.

#1. I'm going to have a three panel solar rack that slides out from underneath another three panel solar rack on the passenger side. If I had a recessed awning, I would have had to build a frame that extended out over the awning to account for mounting the solar panels. The solar panels will need to be mounted right to the edge of the roof foot print given everything I have going up on the roof. I need every inch of width I have on the roof. A custom rack extended over the awning was another custom project I didn't want to try and tackle given the slide out is already going to be a project in itself.

#2. I did not want to give up the internal overhead cabinet space that a recessed awning would have taken up.
 

Vance Vanz

Well-known member
Pass Through - Finalizing Subwoofer:

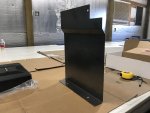
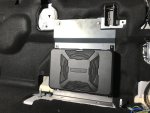
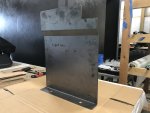
In the midst of the squirrel brain, the metal came back from the fab shop for the subwoofer bracket and step platform. Since I had to layout/drill holes and get things back to fab shop for final welding, and get everything off to powder coat, I got on top of this as soon as possible and paused the interior composite wall layouts for bonding.

Subwoofer bracket initial layout and mounting:
IMG_8825.jpegIMG_8824.jpegIMG_8826.jpegIMG_8827.jpegIMG_8830.jpegIMG_8836.jpeg

Rounding off the bracket and final hardware/mounting:
IMG_8839.jpegIMG_8840.jpegIMG_8841.jpeg

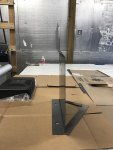
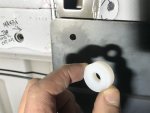
The back of the cab arcs, so you can have the bracket follow the line of the cab and not be parallel with the back of the 40 seat, or you can insert a nylon spacer behind the left-top-side of the bracket, like I did, to keep the bracket parallel with the back of the seat.

Off to powder coat.

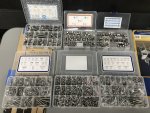
I also got tired of running to the store for smaller bolts, nuts and washers, so I loaded up on some 304 SS. Yah, it's the Amazon stuff, don't judge me!
IMG_8811.jpeg
 

Vance Vanz

Well-known member
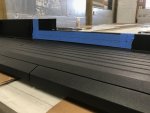
Pass Through - Finalizing Step Platform:

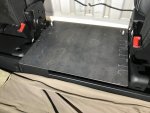
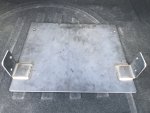
This thing fits super snug on the studs and in between the seats.
IMG_8842.jpeg

So, I changed my mind on the front mounting feet for the step platform after getting the steel plate installed and tightened down.

Basically, once the the C channel feet that I had made to support the front of the step plate, were sitting flush on top of the the factory aluminum rail/channel in the truck-that they would be bolted to, they were not parallel with the step plate. The angles were off and it would have required some re-fabrication and mounting legs/angles that I didn't visually like.

You know that stupid saying "That every problem presents an opportunity!" Well I took a couple of deep breaths, started scratching my noggin and tried to get in touch with that mantra :unsure:?.

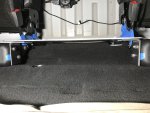
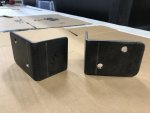
I cut the bottom legs off the C channel feet, which created an L bracket and started moving them around on the legs/mounting feet of each 40 seat. This allowed the brackets to sit flush with the bottom of the step plate and also created more open space under the plate for storage. I decided to drill some holes in the seat legs and see how much flex the plate would have with the support feet wider than originally planned.
IMG_8843.jpeg

I bolted it all up and started giving it some weight. The thing is pretty stout.
IMG_8852.jpegIMG_8853.jpeg

Perfect, why didn't I think of this to begin with, or maybe I did, but I thought it wouldn't have been sturdy/rigid enough. Who cares, we're moving forward ?.

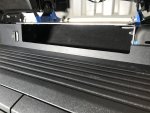
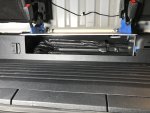
This allowed me to completely open up the little mini storage area under the step.
IMG_8855.jpegIMG_8859.jpegIMG_8867.jpegIMG_8863.jpeg

What is cool, or maybe I think so given all of my hard and tedious work thus far on the passthrough, is that I can slide the factory jack handles pretty much back to the general area they were originally at. They just barely fit. I may even be able to add a riv nut in the factory rail and re-install the factory bolt/wing nut/clamp that secures the jack handles to the floor, so they don't bounce around while driving.
I rounded off the feet, welding is complete and it is off to powder coat.
IMG_8870.jpegIMG_8892.jpeg
 

Vance Vanz

Well-known member
Composite Carbon Fiber - Interior Walls - Bonding - Continued:

Oh yah, I was simply trying to bond all of the interior vertical walls before ? brain took over for a couple of weeks o_O?. OK, lets get back to that.

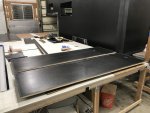
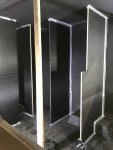
Vertical Closet walls cut, sanded, cleaned and ready for bonding
IMG_8846.jpegIMG_8847.jpeg

Bonded, filleted and peel plied
IMG_8849.jpegIMG_8850.jpeg

Dry fitting the right wall of the refrigerator/micro stack
IMG_8871.jpeg

Oh, don't forget prepping those consumables ?
IMG_8877.jpegIMG_8878.jpeg

Refrigerator/micro stack walls bonded
IMG_8883.jpeg
 

Vance Vanz

Well-known member
Composite Carbon Fiber - Interior Walls - Bonding - Continued:

Hey, maybe we are finally getting somewhere ??
IMG_8885.jpegIMG_8889.jpeg

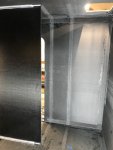
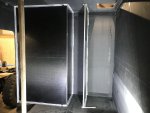
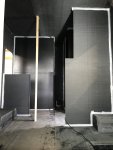
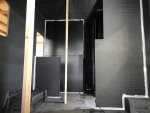
And the last vertical composite wall for the floor (Kitchen cabinet end wall by the door)
IMG_8893.jpegIMG_8895.jpegIMG_8896.jpegIMG_8897.jpeg

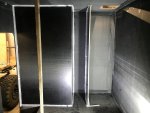
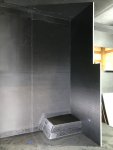
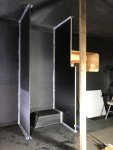
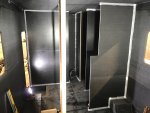
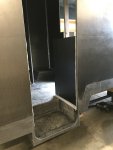
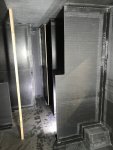
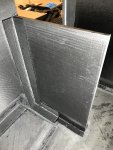
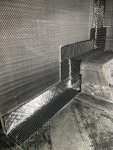
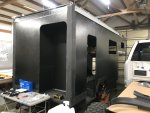
Sorry the lighting and angles of the pics are so cruddy. The support posts don't do the overall look any justice either. Everything is going to look pretty rough until it is all faired out. I guess taking pictures of the inside of a black box is not meant to be exciting or all that pleasing to the eye ;). We need to keep moving and get some paint on this Baby!

Now on to tabbing all of this and then doing my largest resin infusion layup yet. I will be infusing one large 1/2" thick composite panel for all of the overhead cabinets, shelving and a few cubbies/storage compartments in the cab over/bed area.

See you on the next go round ????!
 

Vance Vanz

Well-known member
i own a stainless fab shop. dm me and ill give you a quote
Thanks for reaching out and for the offer 180out!

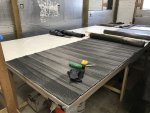
I will definitely get in touch when the next push on the composite work gets finished. It looks like I may be needing to find a new shop to finish the build in, so I'm scrambling to get the remainder of the resin infusion work done before the layup table needs to come down. I am definitely not going to set that thing up again.
 

Vance Vanz

Well-known member
Tabbing - Interior Vertical Composite Walls

I know we have seen a ton of tabbing on this project, but just keeping the build thread updated and going ?.

Lightly sanding, cleaning and then spray tacking the first layer in place
IMG_8903.jpegIMG_8904.jpegIMG_8909.jpegIMG_8912.jpeg

Dry fitting additional carbon fiber layers
IMG_8916.jpegIMG_8919.jpegjpeg-optimizer_IMG_8922.jpegIMG_8924.jpegIMG_8926.jpeg
 
Last edited:

Vance Vanz

Well-known member
Tabbing - Interior Vertical Composite Walls (Continued ......)

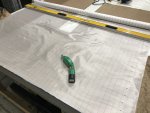
Cutting, dry fitting (if needed) and marking the peel ply
IMG_8934.jpegIMG_8937.jpegIMG_8936.jpeg

All materials cut and ready to go
IMG_8941.jpeg

Each day everything is staged for the associated walls being tabbed, as it is always a race to get everything tabbed and peel plied before the epoxy starts to gel.
IMG_8945.jpegIMG_8946.jpeg
 

Forum statistics

Threads
188,355
Messages
2,905,827
Members
230,117
Latest member
greatwhite24
Top