Alu-Cab Has Landed In The USA!

80t0ylc

Hill & Gully Rider
No doubt, excited to see what you whip up. Feel free to reach out if i can help.
Well, the design/construction phase of my Yakima system modification is done. This weekend I'm going to trial mount the Shadow (without the bag) and see if mount and roof rack are up to the task. I was able to get the 1/4"x3" (16.5 ft single rail) angle aluminum rail at my local welding shop at a bargain. Normally sells for $7 & change / foot. Being it was previously used with some flaws, sold to me for $4 / ft. Picked up the mounting hdwe (paint, u-bolts, bolts, nylock nuts and washers) at True Value Hdwe. Being thick aluminum it's fairly light, but very stout. I moved the rear gutter clamps & Yakama bar as far back as the RTT would allow. Then set the middle clamps and Yak bar equadistant to front and rear. The angle aluminum rail wraps around to both sides of rooftop rack at the rear. Bolted and welded at the joints with diagonal braces to furthur strengthen the mod. The weight and stress is distributed to both sides of all three Yak bars and I feel that it will provide a good base for the awning. The following pics show the unfinished roof rack modification in various stages which I plan to clean up and paint semi-gloss black after testing before I do final install with bag.


1st fitting of design
IMG_1369.jpg
Diagonal brace
IMG_1372.jpg
Side view 1st fitting
IMG_1370.jpg
U-bolt to Yak bar from front passenger side
IMG_1371.jpg
Awning mounting holes drilled
IMG_1377.jpg
IMG_1379.jpg
Welded corner joint
IMG_1380.jpg
Top view of aluminum rail from rear on driver's side
IMG_1383.jpg
 
Last edited:

80t0ylc

Hill & Gully Rider
You might want to think about building a HD bumper, and running a post up from there to mount the awing.
Maybe integrate a swing out tire carrier, and other stuff.
Just a though.
Thanks, DJ! I had considered moving my Kaymar spare tire swing to driver's side at one point, for just that purpose, early in my design..lol. And some may wonder why I got the R.H. side awning, since my spare is on the right. Well, as I've previously mentioned, the mounting to the Land Cruiser is temporary. It will eventually go on a trailer. I'm planning on the Lead Dog 4x4 trailer and the rear door on it, hinges on the left side.
 

rino

Supporting Sponsor - OK4WD
Well, the design/construction phase of my Yakima system modification is done. This weekend I'm going to trial mount the Shadow (without the bag) and see if mount and roof rack are up to the task. I was able to get the 1/4"x3" (16.5 ft single rail) angle aluminum rail at my local welding shop at a bargain. Normally sells for $7 & change / foot. Being it was previously used with some flaws, sold to me for $4 / ft. Picked up the mounting hdwe (paint, u-bolts, bolts, nylock nuts and washers) at True Value Hdwe. Being thick aluminum it's fairly light, but very stout. I moved the rear gutter clamps & Yakama bar as far back as the RTT would allow. Then set the middle clamps and Yak bar equadistant to front and rear. The angle aluminum rail wraps around to both sides of rooftop rack at the rear. Bolted and welded at the joints with diagonal braces to furthur strengthen the mod. The weight and stress is distributed to both sides of all three Yak bars and I feel that it will provide a good base for the awning. The following pics show the unfinished roof rack modification in various stages which I plan to clean up and paint semi-gloss black after testing before I do final install with bag.


1st fitting of design
View attachment 404467
Diagonal brace
View attachment 404468
Side view 1st fitting
View attachment 404469
U-bolt to Yak bar from front passenger side
View attachment 404470
Awning mounting holes drilled
View attachment 404471
View attachment 404472
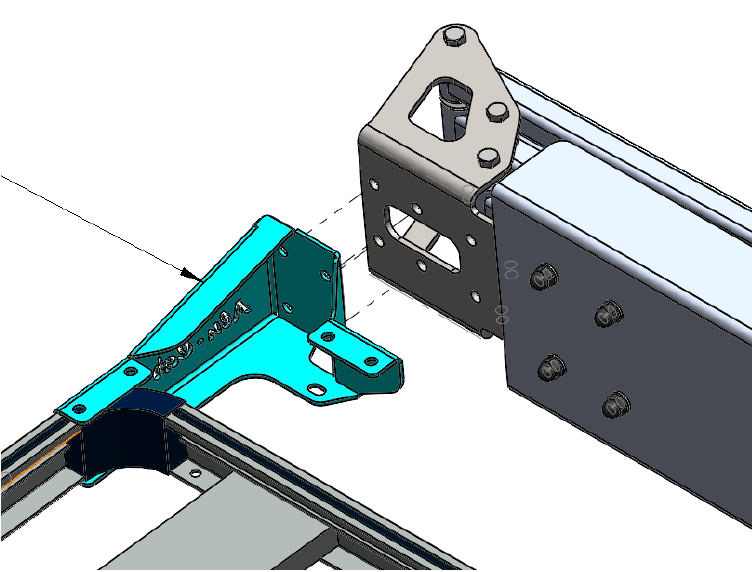
Welded corner joint
View attachment 404473
Top view of aluminum rail from rear on driver's side
View attachment 404474

Nice work! One thing you will need to create is a spacer between your aluminum rail and the awning to clear the bolts on the backside of the awning. Like this:
Front%20Runner%20Mount_zps2z5krc8e.png
 

80t0ylc

Hill & Gully Rider
Nice work! One thing you will need to create is a spacer between your aluminum rail and the awning to clear the bolts on the backside of the awning. Like this:
Front%20Runner%20Mount_zps2z5krc8e.png
Thanks, Rin! Already taken care of. If you look closely at the 6th pic it shows the notches cut to clear these bolts. Also shows the holes drilled at the other end of awning (opposite end from hinge end). I bolted up the awning to the piece of my rack mod (before it was welded) to find exact location to drill these holes and also to check and see if notches were correct. Had fun opening up awning on the floor of my living room to get to the holes to mark them on my rack piece. Should have took a pic of that...lol

Edit: Better pic to show notches and other end holes:
IMG_1378.jpg
 
Last edited:

rino

Supporting Sponsor - OK4WD
Thanks, Rin! Already taken care of. If you look closely at the 6th pic it shows the notches cut to clear these bolts. Also shows the holes drilled at the other end of awning (opposite end from hinge end). I bolted up the awning to the piece of my rack mod (before it was welded) to find exact location to drill these holes and also to check and see if notches were correct. Had fun opening up awning on the floor of my living room to get to the holes to mark them on my rack piece. Should have took a pic of that...lol

Edit: Better pic to show notches and other end holes:
View attachment 404487

Caught me sleeping :)
 

80t0ylc

Hill & Gully Rider
The trial mount of my Shadow awning went well. It revealed some problems, though - no show stoppers, but some minor issues. 1st issue: I really do like the awning and think it would be great for overlanding, but I should have went for the L.H. side awn like I initially wanted. The spare tire swing will get in the way if I keep it on the Land Cruiser. I made the decision to go with the R.H. side awn because I really want a trailer and the R.H. is what I feel will work better when installed on a trailer. 2nd issue is the tailgate lid hits the awning brace. It figures that I just replaced the struts because they were weak and the new ones want to shove the lid 3" to 4" higher which is right into the brace. Both of these issues are self inflicted. I also need to trim a plate that just touches the last awning brace at full open. It's a 1/4" plate between the awning and roof rack mount. Just need to trim 1/8" or so off the rear edge. Anyway, it's been raining so it needs to dry out, then I can close it up and take the awn off. Then take the mount off, clean, finish & paint it. Then re-install mount and awn with bag. Some pics from install so far:

You can see the plate that needs trimming in this one
IMG_1392.jpg
In case anyone wants to install by your self. The tiedown straps made it possible
IMG_1386.jpg
IMG_1387.jpg
IMG_1388.jpg
Once Awn is on straps, ratchet it up to line up holes.
Then use a couple of bolts to secure the rear once in position.
Then unstrap the awning to allow access to the front mount holes
IMG_1389.jpg
Install front bolts, and install rest of rear bolts and tighten all.
IMG_1390.jpg
Open awning and install securing strap and hdwe
IMG_1394.jpg
IMG_1395.jpg

Hope this helps anyone installing their own awning :)
 
Last edited:

80t0ylc

Hill & Gully Rider
The awn is bagged & mounted. When local conditions improve, I'll open and install securing clip. (Currently rain and cottonwood season are making for messy conditions...lol) In the pics, the white spots are cottonwood - it's everywhere:ugh:
IMG_1403.jpg
IMG_1404.jpg
IMG_1405.jpg
Couple days later weather cooperating
IMG_1407.jpg
Now to add the other 2 poles for setting up wall kit
 
Last edited:

rino

Supporting Sponsor - OK4WD
Well you win! :clapsmile Were you tied down?

The newer Shadow Awn no longer has welds but rather adhesive and rivets. I will get an arm ordered up for you on this incoming order and shipped out to you.
 

Scoutman

Explorer
These were the only wear and tear issues I had leading up to this. Looking forward to the new riveted model
7bc787857fabd6187630dacad2dc002f.jpg

I have to be careful with this spot too when deploying. If it catches that metal bracket when it swings open it looks like it would end up like that before too long.

I love ours and it always gets lots of compliments wherever I take it.
 

Forum statistics

Threads
186,798
Messages
2,888,146
Members
227,280
Latest member
Smithmds77
Top