Stroverlander
Adventurer
Installed the new sway bar bushings and end links tonight.
The Adjust-A-Link end links come with two different length bushings to fine tune fit. I wanted slightly longer than stock end links so am using the two smaller bushings on the outside and the longer bushings on the inside to give the most length.
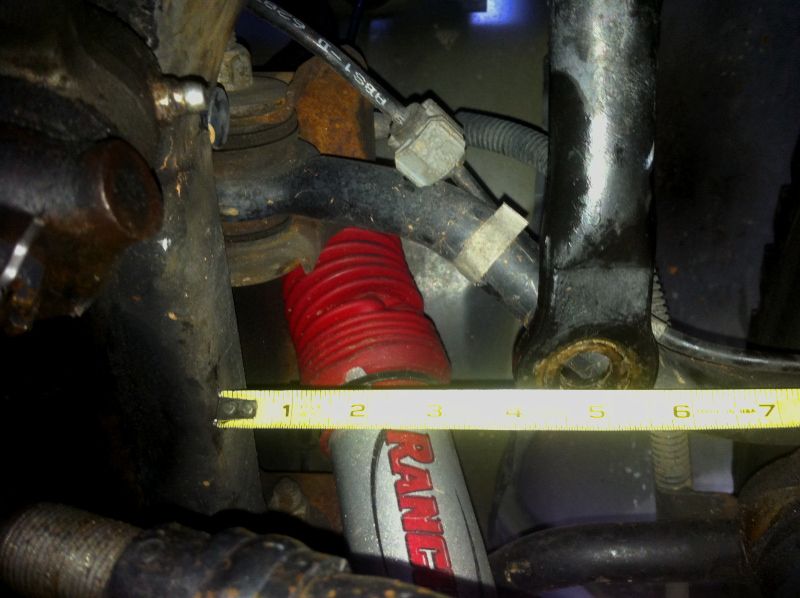
With new bushings in place, measuring both sides from subframe to eye to center swaybar before tightening shells.
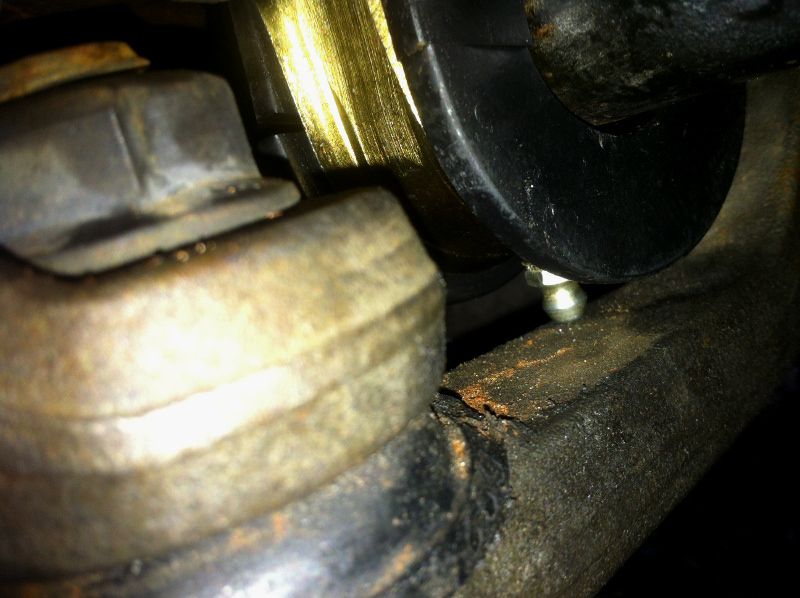
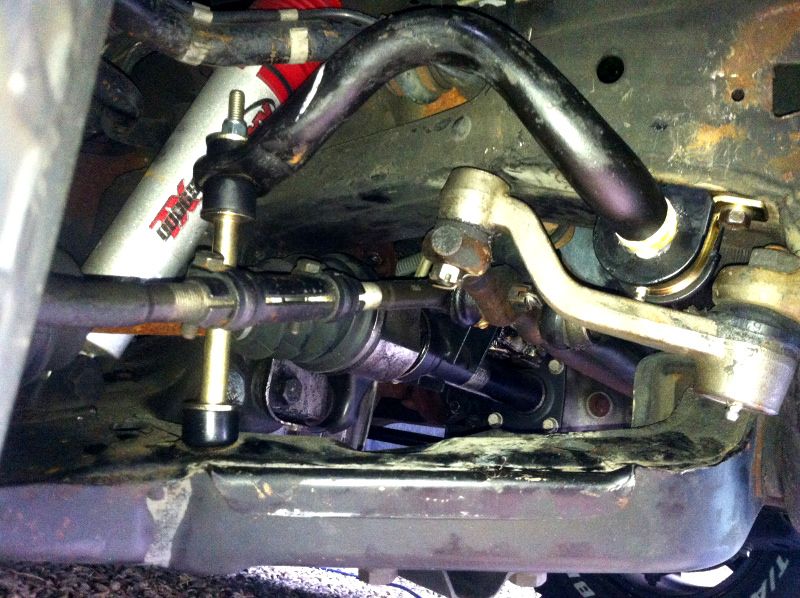
The swaybar bushings are greasable but clearance is too tight with the idler arm underneath so picked up some set screws to plug the holes with and I'll just remove the set screws when I need to lube the bushings. Easier than drilling new holes for the zerk fittings like I was originally planning on doing.
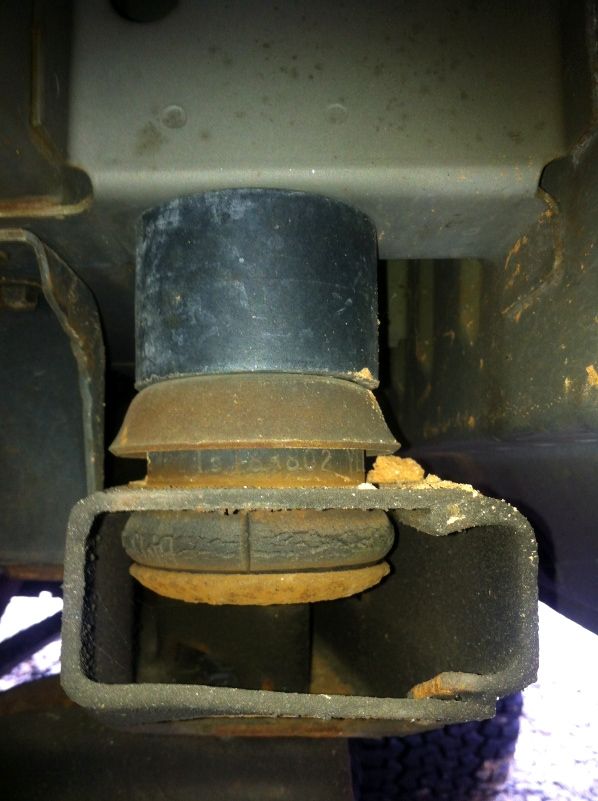
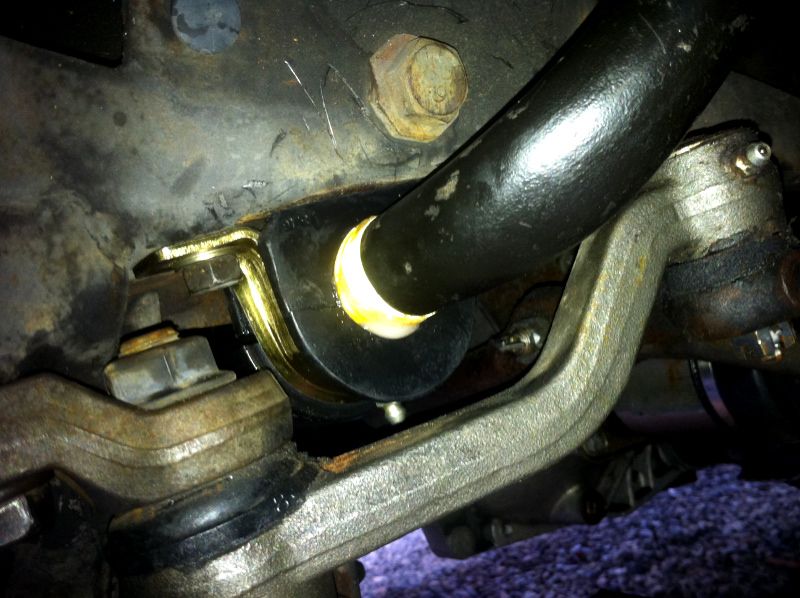
Swaybar bushing installed and lubed, the swaybar is also wrapped with teflon tape (yellow gas) to reduce the possibility of any noise.
Clearance (or lack of) for the zerk grease fitting to idler arm while test fitting.
End link installed and torqued to factory spec: 13 lb ft.
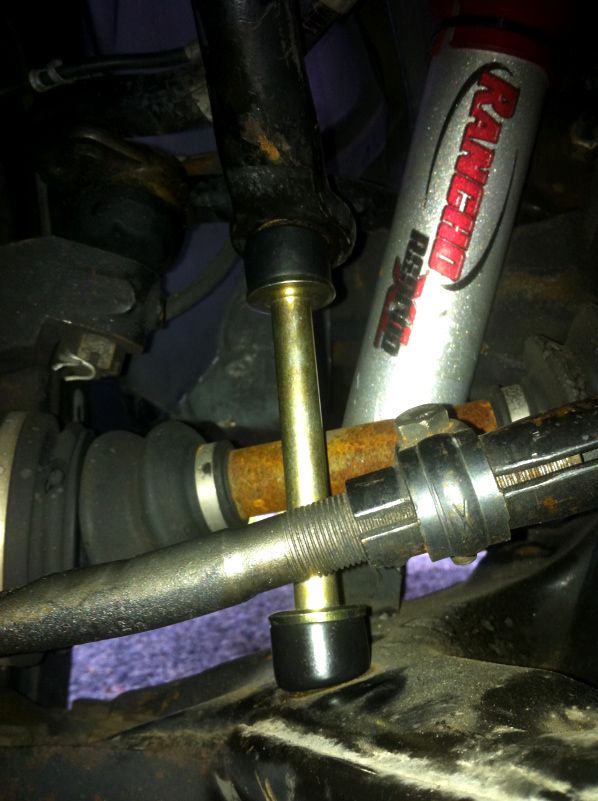
I opted to install the bolt through bottom of control arm this time around, the install goes much faster and don't have to fight holding the bushing and washer in place inside the control arm while trying to thread the nut.

Swaybar is still slightly low so may shim the center spacer with a couple of washers, there is enough thread should I choose to do so.
Test drive tomorrow to see if I notice any difference.
Couple of thoughts - I need to do some rust cleanup and painting on the subframe and suspension components! Any recommended products for rust coating? I've used some of the rust reformer type spray paint in the past to cover but is there anything better or more durable?
I'll probably get the chance to do the rust cleanup soon as my control arm bushings are not looking that good, especially the lower. I would wager that is where the Stevie Wonder (steering wander) is coming from lately. I am still undecided on whether or not to use Moog Problem Solver bushings or urethane bushings. The urethane bushings don't come with shells so would have to burn the rubber out of the old shells for use so potential for more work there.
The Adjust-A-Link end links come with two different length bushings to fine tune fit. I wanted slightly longer than stock end links so am using the two smaller bushings on the outside and the longer bushings on the inside to give the most length.
With new bushings in place, measuring both sides from subframe to eye to center swaybar before tightening shells.
The swaybar bushings are greasable but clearance is too tight with the idler arm underneath so picked up some set screws to plug the holes with and I'll just remove the set screws when I need to lube the bushings. Easier than drilling new holes for the zerk fittings like I was originally planning on doing.
Swaybar bushing installed and lubed, the swaybar is also wrapped with teflon tape (yellow gas) to reduce the possibility of any noise.
Clearance (or lack of) for the zerk grease fitting to idler arm while test fitting.
End link installed and torqued to factory spec: 13 lb ft.
I opted to install the bolt through bottom of control arm this time around, the install goes much faster and don't have to fight holding the bushing and washer in place inside the control arm while trying to thread the nut.
Swaybar is still slightly low so may shim the center spacer with a couple of washers, there is enough thread should I choose to do so.
Test drive tomorrow to see if I notice any difference.
Couple of thoughts - I need to do some rust cleanup and painting on the subframe and suspension components! Any recommended products for rust coating? I've used some of the rust reformer type spray paint in the past to cover but is there anything better or more durable?
I'll probably get the chance to do the rust cleanup soon as my control arm bushings are not looking that good, especially the lower. I would wager that is where the Stevie Wonder (steering wander) is coming from lately. I am still undecided on whether or not to use Moog Problem Solver bushings or urethane bushings. The urethane bushings don't come with shells so would have to burn the rubber out of the old shells for use so potential for more work there.
Last edited:
![IMG_20130726_064307[1].jpg](https://forum.expeditionportal.com/data/attachments/127/127953-22f303a16b3218448c98fd49c0fbe922.jpg?hash=IvMDoWsyGE "IMG_20130726_064307[1].jpg")
")