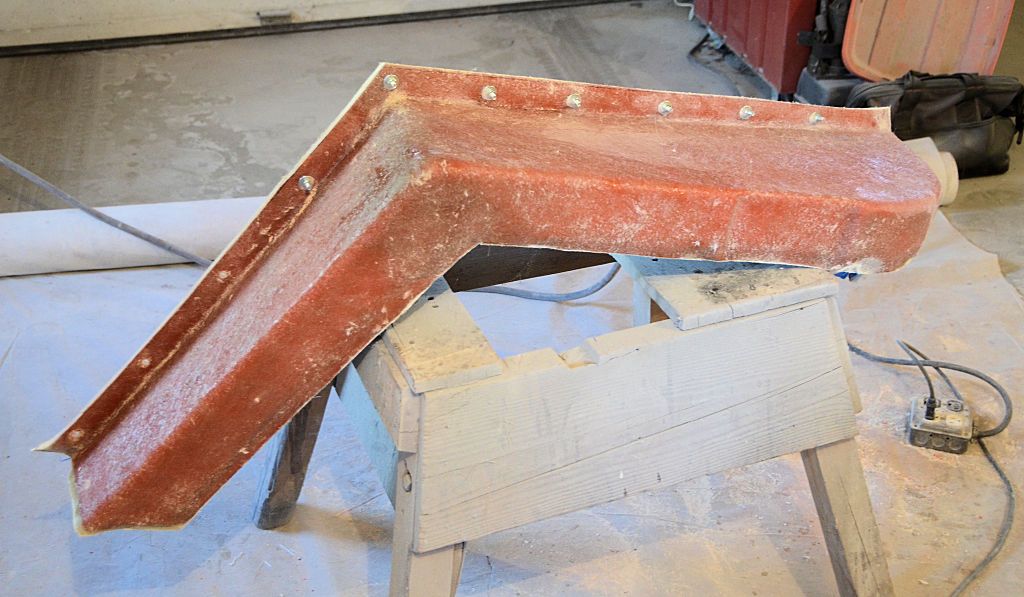
Barn Door for JK factory hardtops

rubicon91

Explorer
C'mon over, I'll put you to work laying up fiberglass and then you'll get the full experience. We could do a "make and take" session like they do for the kids on Saturday mornings at Home Depot :).

There's nothing in the techniques I'm using that couldn't be applied to pretty much any fiberglass project - custom hardtops, fenders, trailers, whatever...

Hahaha Jeff see what you started with that C'mon over LOL!!!!
 

SGNellett

Adventurer
Ahh, that is some pretty country up there.

Took a vacation up that way years ago w/ a 24ft Crownline open bow w/ a 454. The looks we got dropping that beast in the lake were pretty amusing, but blasting across that glass smooth surface was amazing!

Worth the 8 hour drive,

in an CC F-150,


with 3 teenagers...
 

jscherb

Expedition Leader
Yep, Instead of "Americas test kitchen" it would be "Americas Wrangler Kitchen" Staring Jeff Scherb and he could set up build classes and charge for admission. make it like a Jeep Camp or Jeepers School.
Wow that would be soooo boring!

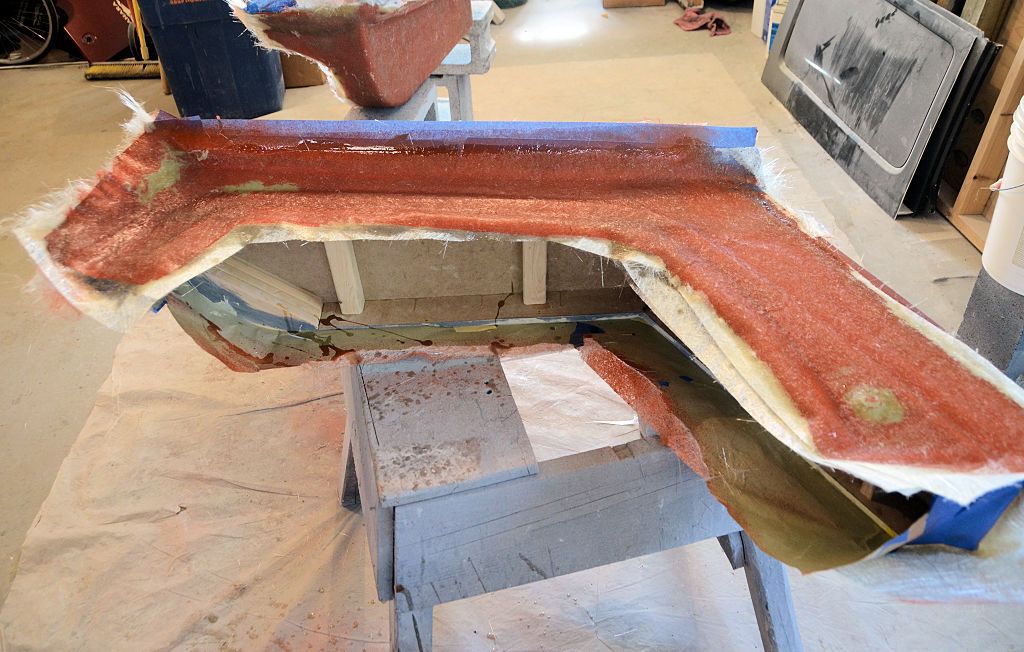
Almost as boring as me posting progress shots of the work today... this photo shows one of the molds with the layup of the second part done. The mold master fender is still inside, between the two parts of the mold. Tomorrow when everything is cured I'll drill the bolt holes that secure the two parts together, trim the parts, and pop the mold master out of the mold. Then the mold will be ready for molding fenders.

MoldPart2-1_zpsokr1z13f.jpg
 

jscherb

Expedition Leader
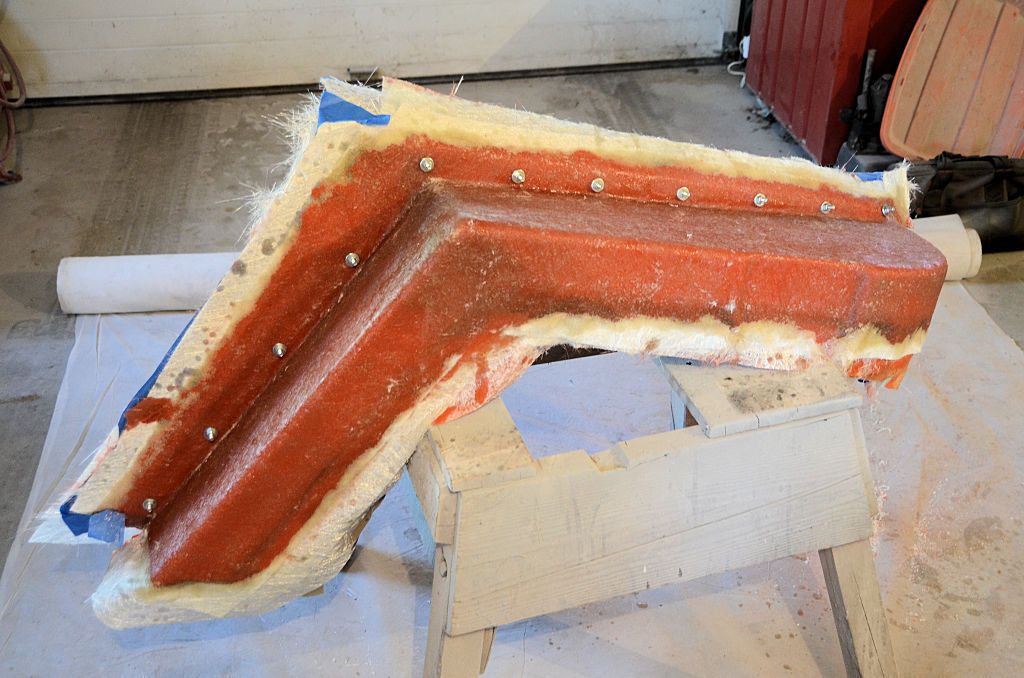
Step 1 this morning, before I took the mold halves off the master fenders, was to drill holes to bolt the two sections of each mold together. The halves are in perfect alignment before they're removed from the master, so it's best to do the bolt holes now.
MoldTrimming1_zpse6grx48d.jpg


Next the edges get trimmed:

MoldTrimming2_zpszvy1mmw5.jpg


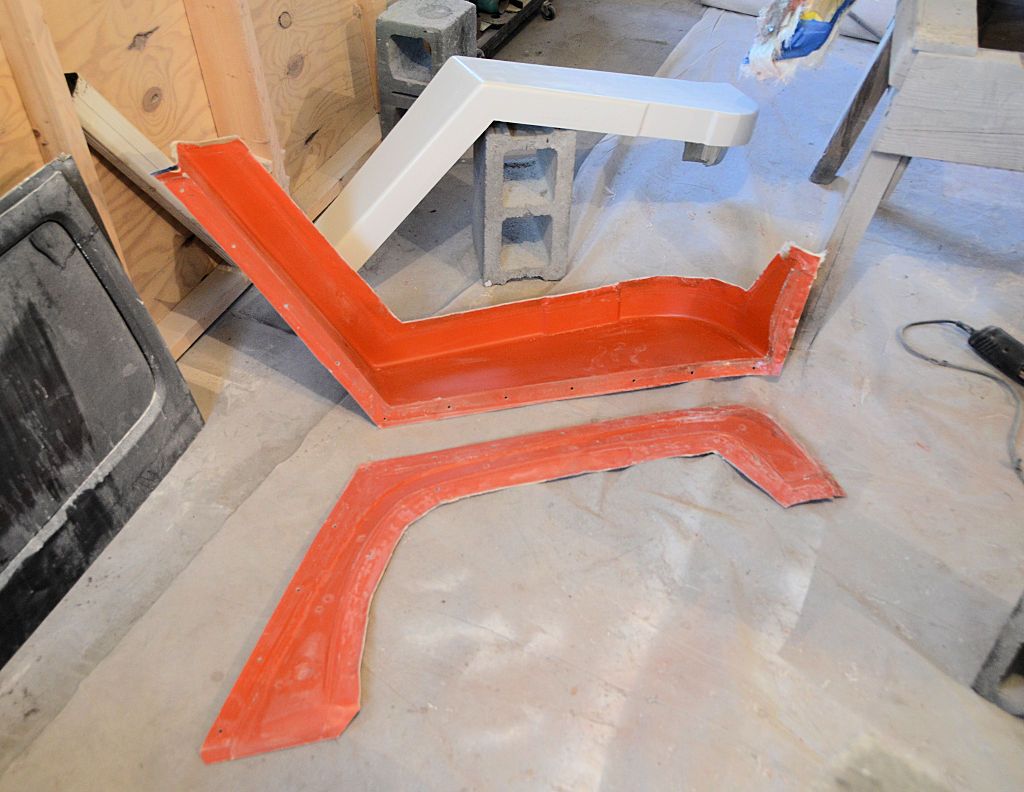
Then I removed the bolts and popped the mold halves off the master fender. The master fender is in the background and was unharmed by the moldmaking process.
MoldTrimming3_zpsm6z8rwic.jpg


A little final trimming and the molds are ready to use. The one in the background is assembled and the one in the foreground isn't.
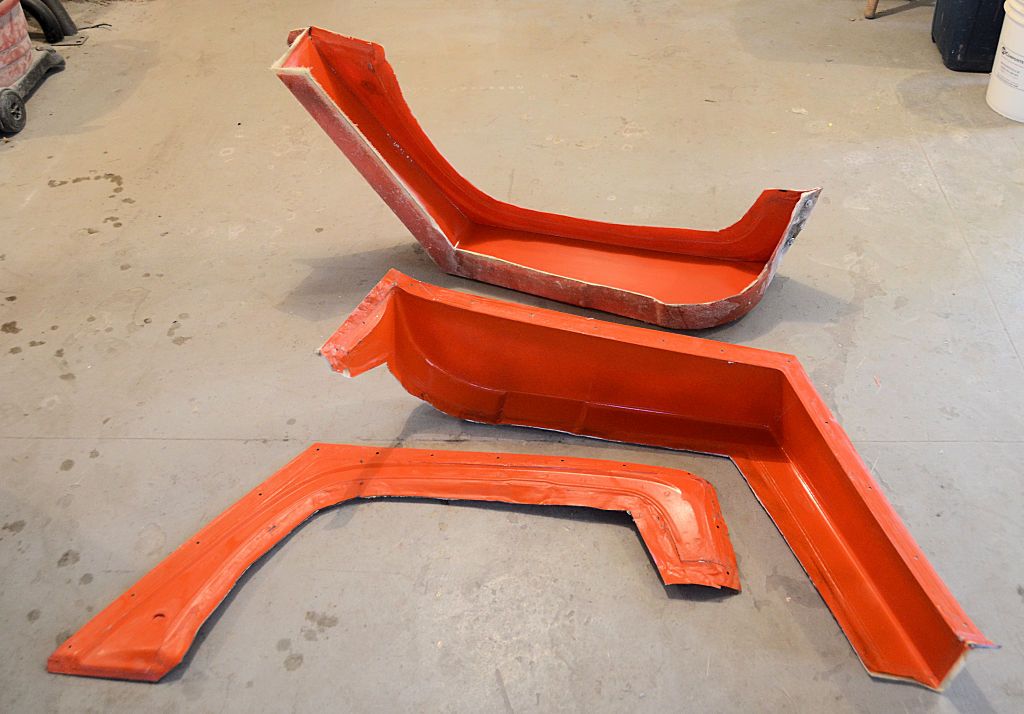
FlatFenderMolds1_zpsixdaggvz.jpg


I plan to mold the first set of fenders tomorrow.
 

02rangeredge

Adventurer
Step 1 this morning, before I took the mold halves off the master fenders, was to drill holes to bolt the two sections of each mold together. The halves are in perfect alignment before they're removed from the master, so it's best to do the bolt holes now.

MoldTrimming1_zpse6grx48d.jpg


Next the edges get trimmed:

MoldTrimming2_zpszvy1mmw5.jpg


Then I removed the bolts and popped the mold halves off the master fender. The master fender is in the background and was unharmed by the moldmaking process.

MoldTrimming3_zpsm6z8rwic.jpg


A little final trimming and the molds are ready to use. The one in the background is assembled and the one in the foreground isn't.

FlatFenderMolds1_zpsixdaggvz.jpg


I plan to mold the first set of fenders tomorrow.

your progress and idea turn around is really quick (from a guy who knows how to do almost known of the execution), out of curiosity are you retired, or just doing R&D all day? or worst of all making the rest of us look bad by working and being super productive?
 

jscherb

Expedition Leader
your progress and idea turn around is really quick (from a guy who knows how to do almost known of the execution), out of curiosity are you retired, or just doing R&D all day? or worst of all making the rest of us look bad by working and being super productive?

My situation affords me more time for my hobbies than most people :).
 

jscherb

Expedition Leader
HA! I guess if you got it flaunt it.. but Jeff's doing a great job making a lot of us look bad.. but on the other hand.. if you got the shop.. time to be creative. creative tinker.

It's never my intention of making anyone look bad - quite the opposite! I post lots of detail showing how to do things hoping that people will be inspired to take on their own projects and hopefully by seeing how I do things people can be successful. I also promptly respond to design questions people have in the hopes that I can help them with their projects - in the last week or so I posted design drawings for a rear rack that someone wanted to build and was wondering how to accomplish it.

My workshop is in my home basement. It's probably better than an average DIY-er's workshop, but it's definitely not over the top, especially compared to all the workshops that are featured in the woodworking magazines. I do my fiberglass and painting in my home garage (too smelly to do in the workshop). The only tools I have that aren't typically found in a home basement workshop is a metal-cutting bandsaw, and I have a welder in my garage. Other than that, just normal home DIY tools - table saw, etc.
 

Forum statistics

Threads
188,265
Messages
2,904,732
Members
229,805
Latest member
Chonker LMTV

Members online

Top