Blender, My LX450/FZJ80 + FJ45esk + GM + Land Rover crazy concoction

Metcalf

Expedition Leader
I was referring to a curved flange of a body panel like your rear panel.
The other applications of the 6L80E that have it all in the shifter, does that mean there are detents for all the gears?
I did understand about the switches for the M position. I mentioned the factory style shifters (Volvo) as a possibility to use as an example to study or maybe even use parts from to modify the Gennie shifter. I think the electric shift at a selected location is best with solid detents for PRNDM. That way any bouncing vehicle movement will not jostle the shifter and change gears inadvertently while in M. Once in M then you can electrically up/down shift.
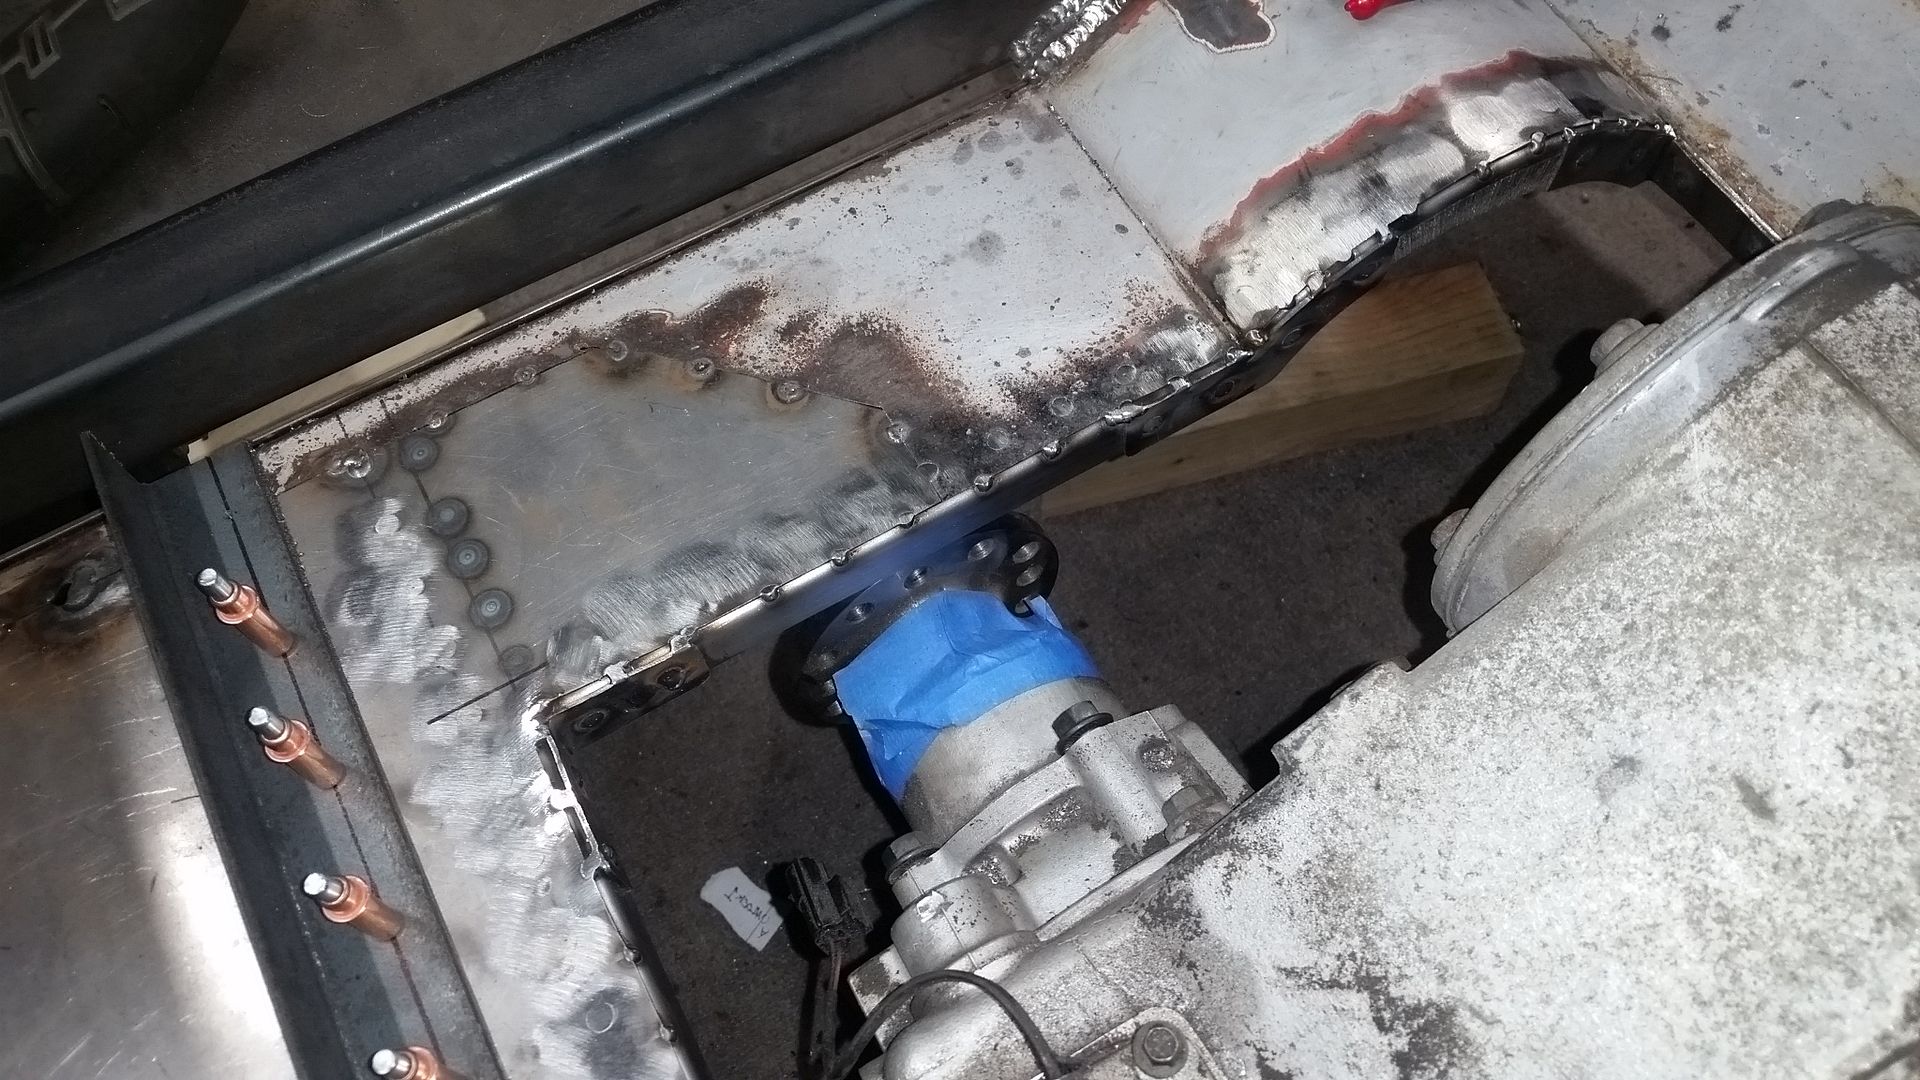
Yes. I had to shrink those flanges ( A LOT ) to form the rear corners. I also hand worked the 'belly' of the panel a bit over a big section of pipe with a towel.

There are other detents in the 'valve body' but everything is electronic. The gear selector, other than park, is just sliding switch. I believe there are PRNDM-M2-M3 positions. I believe with fancy enough computer programming you can make the other positions load different shifting tables. You could basically make each do something different. There is also the tow/haul button which changes transmission stuff. I think the 4-low switch also does stuff like that too. So basically you could have more options than you can shake a stick at.

A big one for me is also the ability to start in 2nd gear in low range. I think that will be handy for bumping things when 1st low is too deep.
 

Metcalf

Expedition Leader
One small step for....


....tunnel construction. I completed the new flange all the way around the edge of the floor opening. The addition of the flange, and the little gussets at the junctions, really firmed up the floor panel. It isn't rock solid, but it is pretty good. I am tempted to stick another small body mount in the middle of the floor to help support things a little more. I think that there was one in that location stock.

Making the little curved flange was fun. I used the shrinker again. It still doesn't like 16 gauge material.


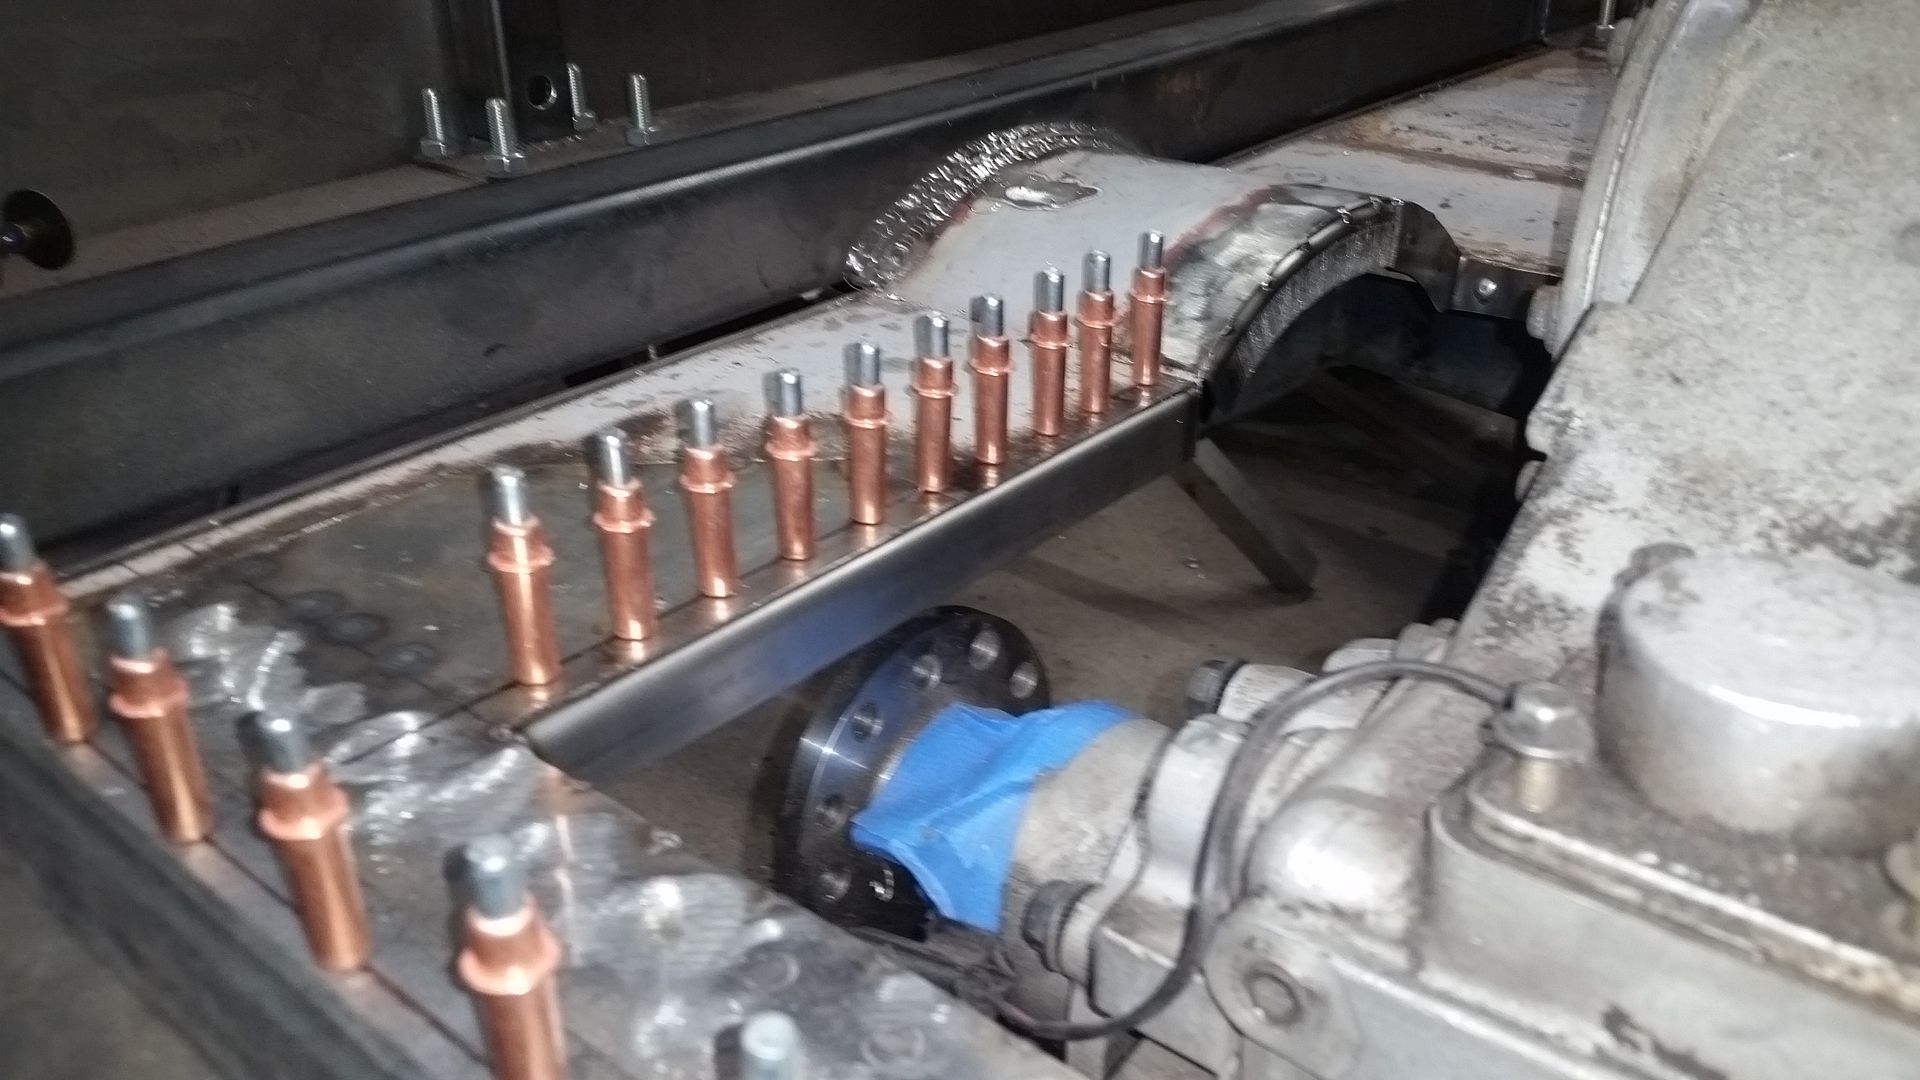
Cleco's are cool. I might be addicted. I did find that with the 1/8" hole for the cleco, I get a lot better weld if I drill out the top panel to 3/16".


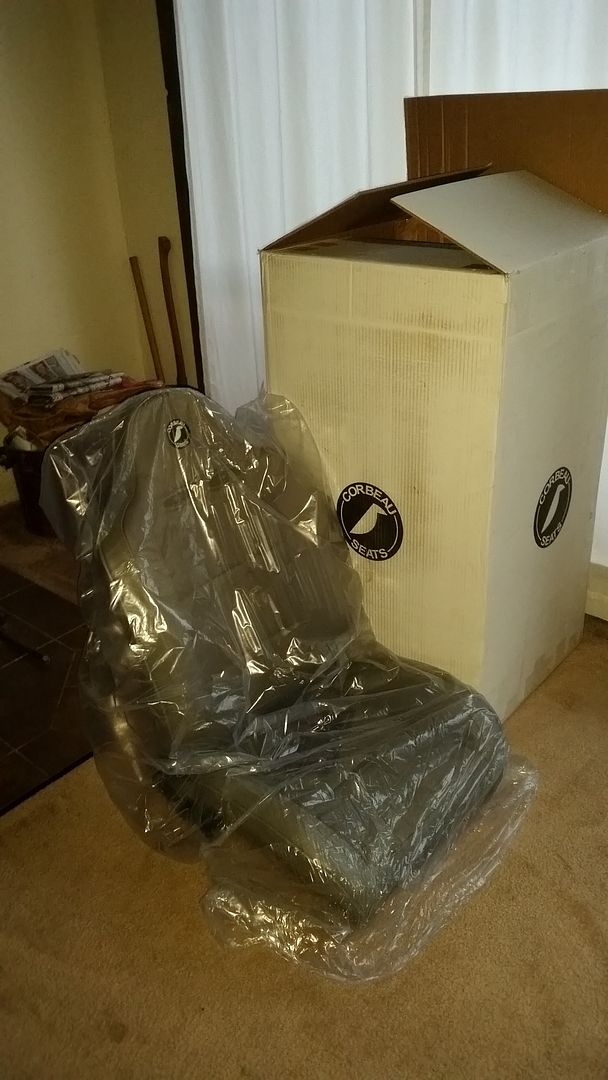
These showed up in the mail.

Now I just need to figure out the transmission and transfer case shifters, eliminate the safety thing on the transfer case, and make a wicked tunnel template using this new 'chipboard' stuff I got in the mail. Then turn that into metal....
 
If your seats/seat bracket are going to cover the rear portion of the tunnel cover, I might suggest making the cover in two pieces to make trial side repairs easier.

Looks good though.

I need to buy some more clecos...
 

Willman

Active member
One small step for....
20160915_175327_zps2qxq76d3.jpg
[/URL]

Sorry if this was discussed earlier....What are the cooper looking deals in this picture?
 

Metcalf

Expedition Leader
Sorry if this was discussed earlier....What are the cooper looking deals in this picture?

They are called a 'Cleco' fastener. It is a tool that comes out of the aircraft industry for holding sheetmetal parts together for riveting.

I use them for holding parts together prior to spot welding and stuff like that. They are spring loaded and use a small hole through each part. You can pull one at a time for each plug weld. and the part will stay in place. If you have to fit a part, they make it nice to remove/replace the same part in the same place.

http://www.aircraftspruce.com/catalog/kitspages/cleco.php
 

Metcalf

Expedition Leader
If your seats/seat bracket are going to cover the rear portion of the tunnel cover, I might suggest making the cover in two pieces to make trial side repairs easier.

Looks good though.

I need to buy some more clecos...

Yup, I was thinking the same thing, perhaps with a few access panels for the common access points so that I don't have to pull the tunnel that often.

I'm trying to figure out the seat position. That is always fun when starting from scratch with no reference.
I need to figure out where to mount the transmission shifter based on that too.
Fun Fun
 
Access to the shifter components would be nice.

I take it you're not using the FJ40 seat brackets? Building your own? The stock seat brackets are very tall, but they almost need to be to see over the hood.

What shifter are you using? For a trail rig, you can't go wrong with an Art Carr shifter. They have many shifting patterns depending on how you're going to use the rig.


Metcalf

Expedition Leader
Access to the shifter components would be nice.

I take it you're not using the FJ40 seat brackets? Building your own? The stock seat brackets are very tall, but they almost need to be to see over the hood.

What shifter are you using? For a trail rig, you can't go wrong with an Art Carr shifter. They have many shifting patterns depending on how you're going to use the rig.

Stock? What's that? I will be building the seat mounts, with the tub narrowed I don't suspect the stock parts would be much use if I did have them. I ended up with about 4" between the seats so far. Seat height. I'm not sure what to do with that just yet. I am going to try and cut a few inches of the overall height of things. I lowered the top of the door a little fit from stock. I also plan on taking some of the height out of the crown in the roof panel I will be making. I'm more worried about getting the seats low enough rather than too high. I figure I can always add a little shim under the seat/mount to bring up the seat high up if I need to. It looks like the mount on the inside passenger side rail is going to be very tight on the top of the transfer case. It might be tight enough that I can't get the seat low enough to make me really happy, we will see...

Shifter. I have been overthinking that one for months. I decided not to go with an art-carr/winters style shifter in the end. I'm not a huge fan of the cable shift mechanism. That seems to be the weak point. In this install, getting the cable around the exhaust and crossmember would be really difficult. I decided to go with a mechanical rod activated shifter, specifically a Gennie shifter. It is basically like a Lokar hot rod shifter, but with a gate instead of the button in the knob. I will see how it works out. I don't think the 6L80E is a shift happy transmission. You only need PRNDM settings. I also have to build a control system for the tap-shift stuff in the M setting. I have a few ideas for that....
 
I think a Gennie shifter would add a touch of class to that rig. I've used them before and aside from the erector set of brackets that comes with it, they look and feel really cool. I like how they rock with the engine revs too.

Paddle shifters on the wheel? Kidding of course...
 

Metcalf

Expedition Leader
I think a Gennie shifter would add a touch of class to that rig. I've used them before and aside from the erector set of brackets that comes with it, they look and feel really cool. I like how they rock with the engine revs too.

Paddle shifters on the wheel? Kidding of course...
No paddle shifters....probably. I am thinking about making a custom knob for the Gennie that has a two way momentary toggle switch flushed in the top for the tap shift function. Since the Gennie can have a hollow shift lever, I can run the wires down that lever and out under the boot.

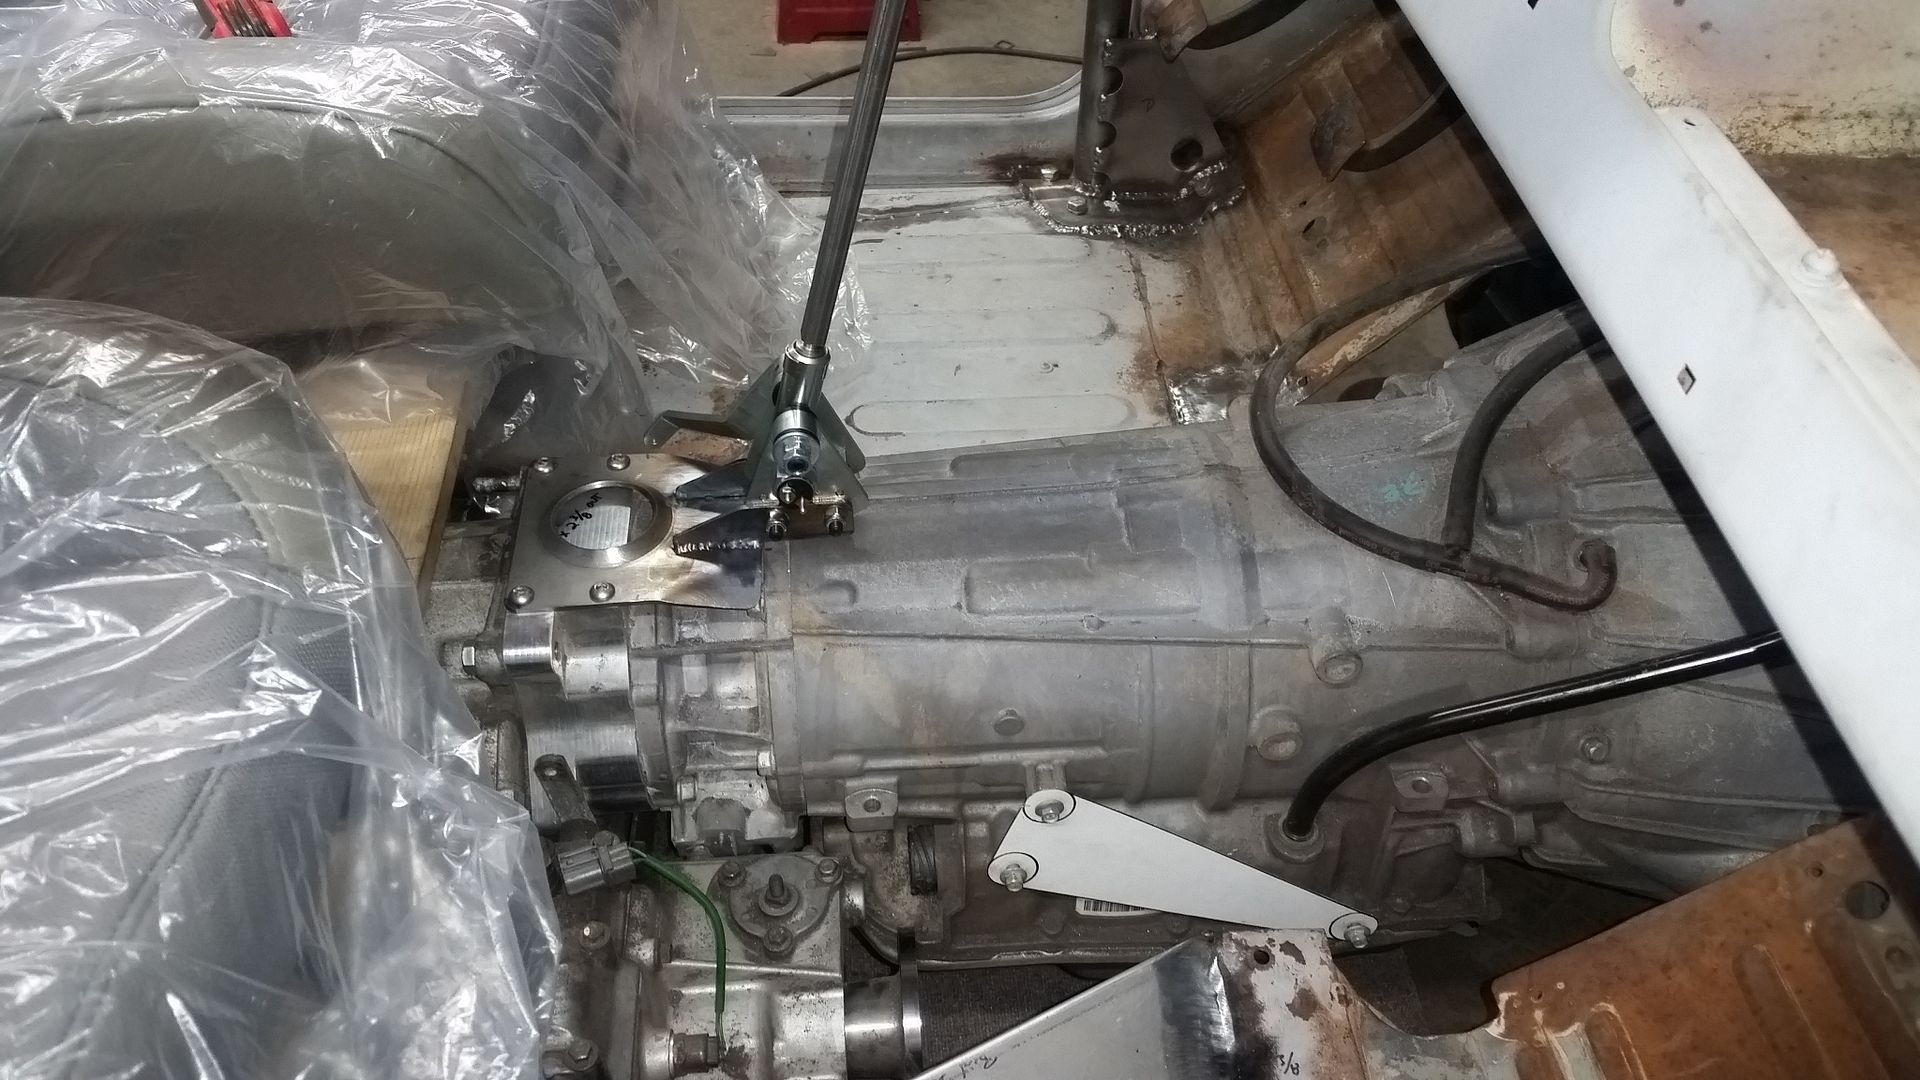
I am half-custom making the mount for the shifter. They don't have anything specific for the 6L80E.
I think I can make the mount off the 4-bolt pad on the transfer case adapter.
The hard part is knowing where to put the dang thing....basically how far forward.
 

justcuz

Explorer
On shifter location, have you ever seen the old fashioned low tech anti theft device on old Jeeps?
Two chain links, one welded to the bottom of the dash, the other on the shifter. Park, put Jeep in reverse drop a Master lock through the overlapping links and walk away.
Obviously not high tech enough for this build, but something similar(read nicer looking) could be done. Once the trans is in park, if the shifter is close enough to the dash or other tubing/dash structural reinforcement. I'm not a big fan of locking steering columns on off road vehicles.
 

Metcalf

Expedition Leader
Just little stuff that seems to big time....


I built a mount for the Gennie shifter mechanism on the top of the transmission. This position seemed to work out well for the possible seating positions. I did a little mock up with the seats to get a better feeling for the cab space. Overall I am pretty happy, but it is still a bit smaller cab. Leg room doesn't seem to be an issue with the slightly taller seating position compared to my flat fender.

The shape of the seats, especially the headrest, does waste a little space. It will work, but it would be better if the head rest had a little forward bend to it.

I did make one challenging part today...


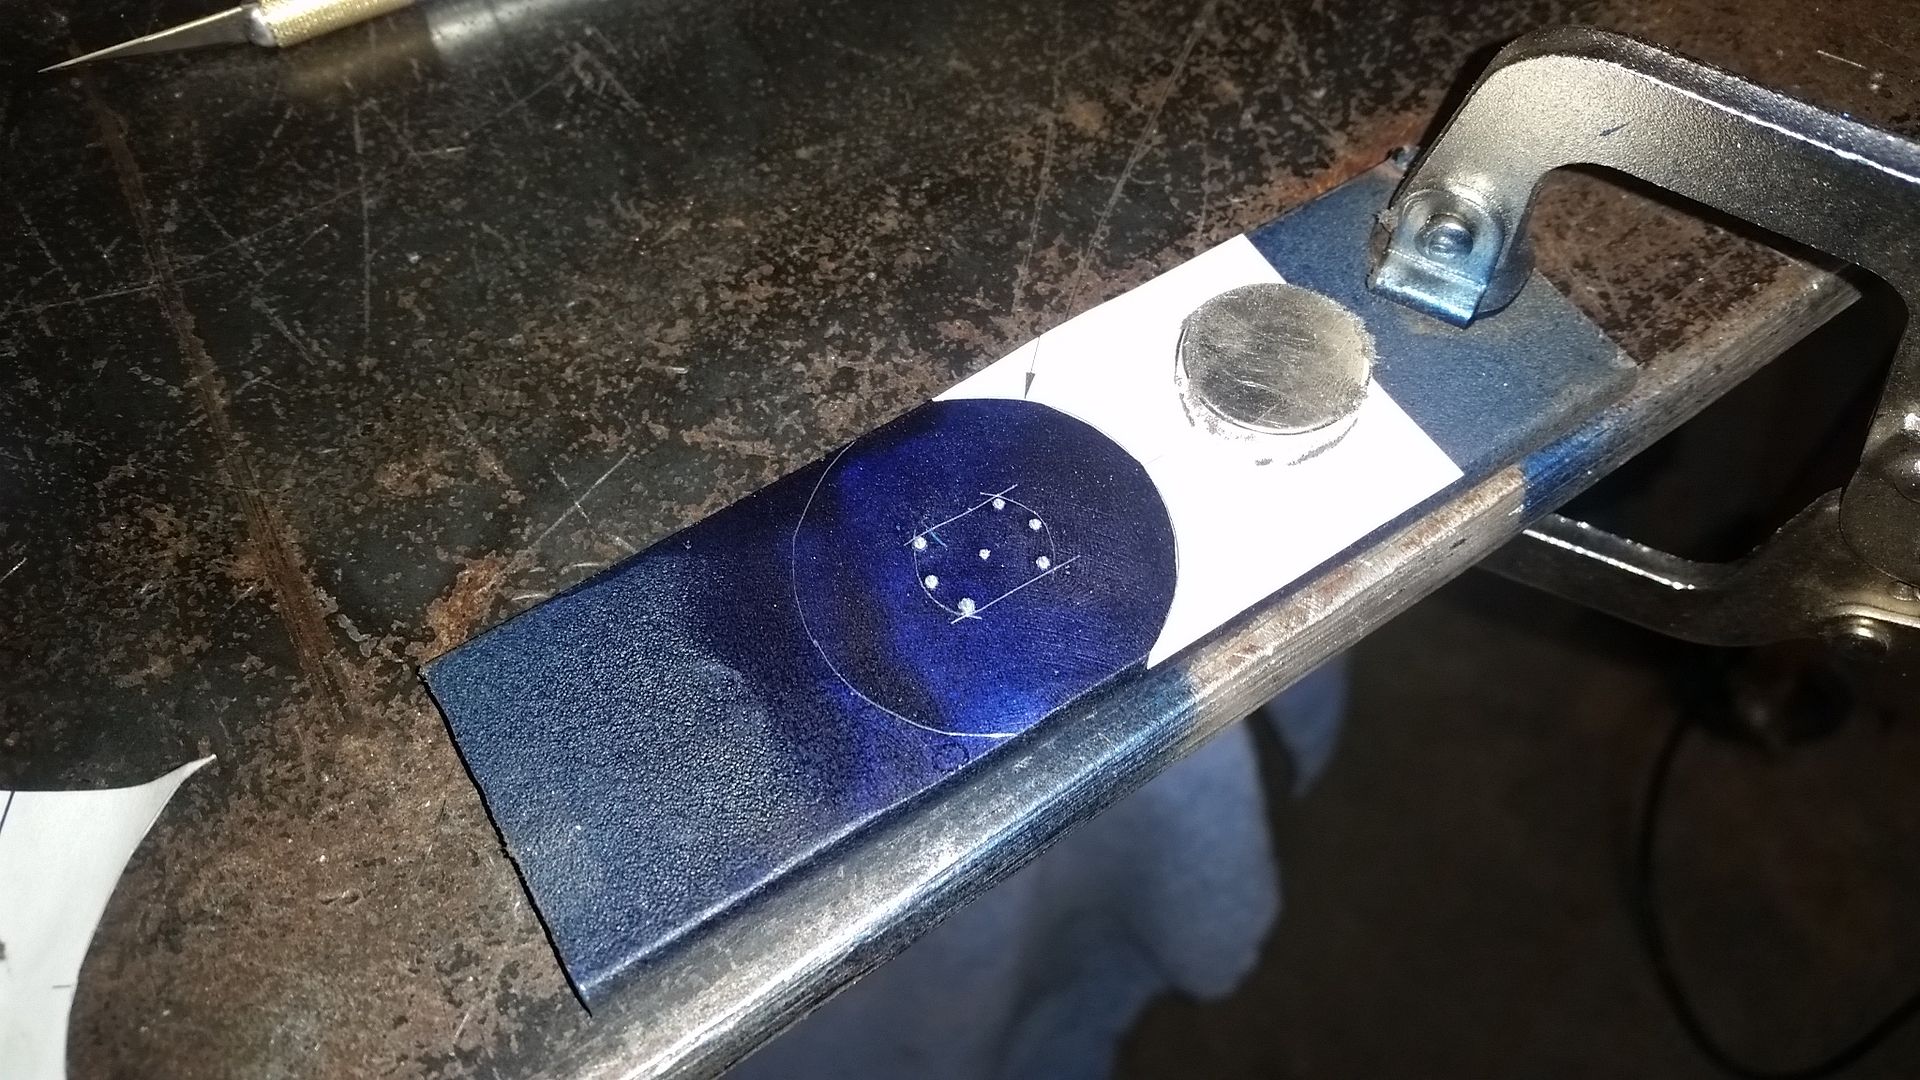
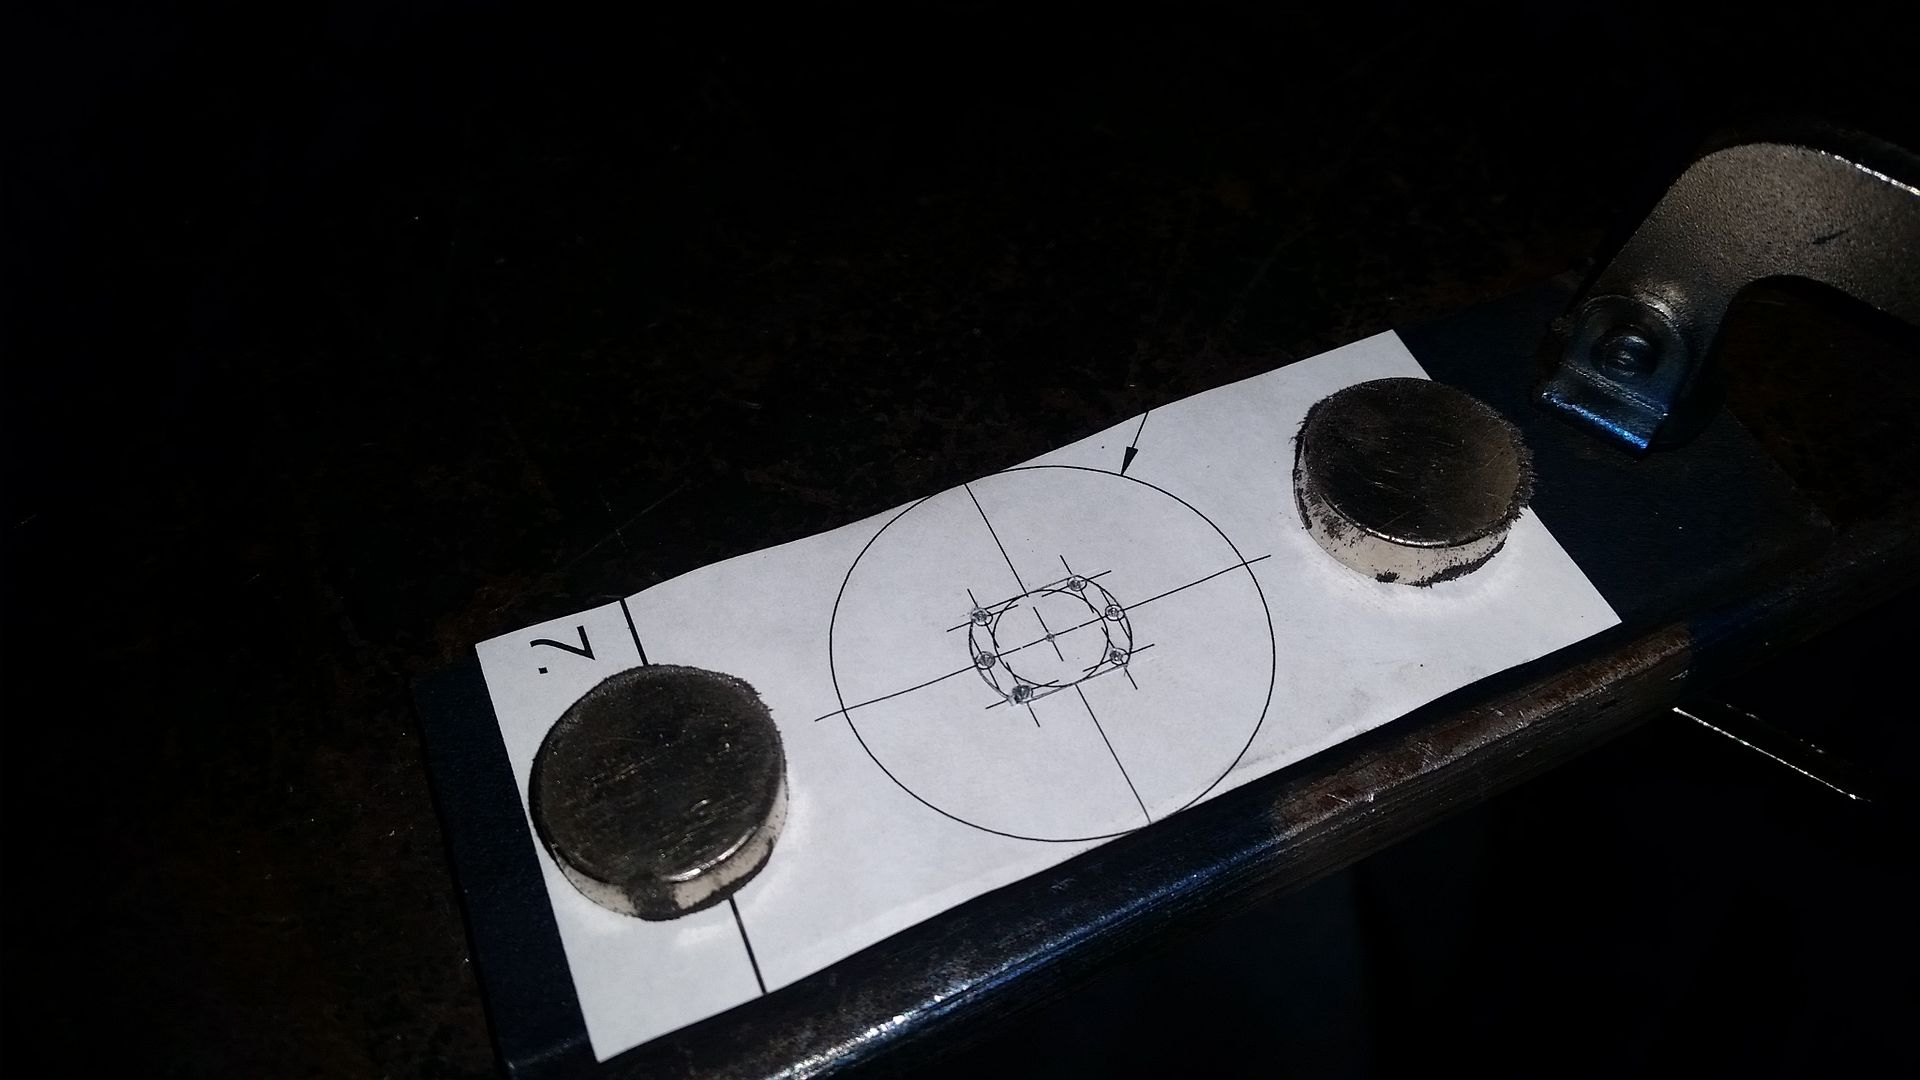
Make a paper template. I use Solidworks, but just about any CAD program will work including a lot of the free ones. Spray the base metal in layout die. Use a few magnets to hold the paper template on top of the steel and layout die.


Center punch all the hold locations using a very sharp center point. This part is pretty small with lots of holes close together that are small in diameter. Take your time.

One the holes are center punched, use a razor knife to mark the lines you need by cutting through the paper. If you work from the inside out the magnets till keep the paper in place. You can work out in layers to the most outside feature you need.


For this part I had a six very small 1/16" holes to define the corners and radii I needed. This part also had a 'flat' area along the middle.

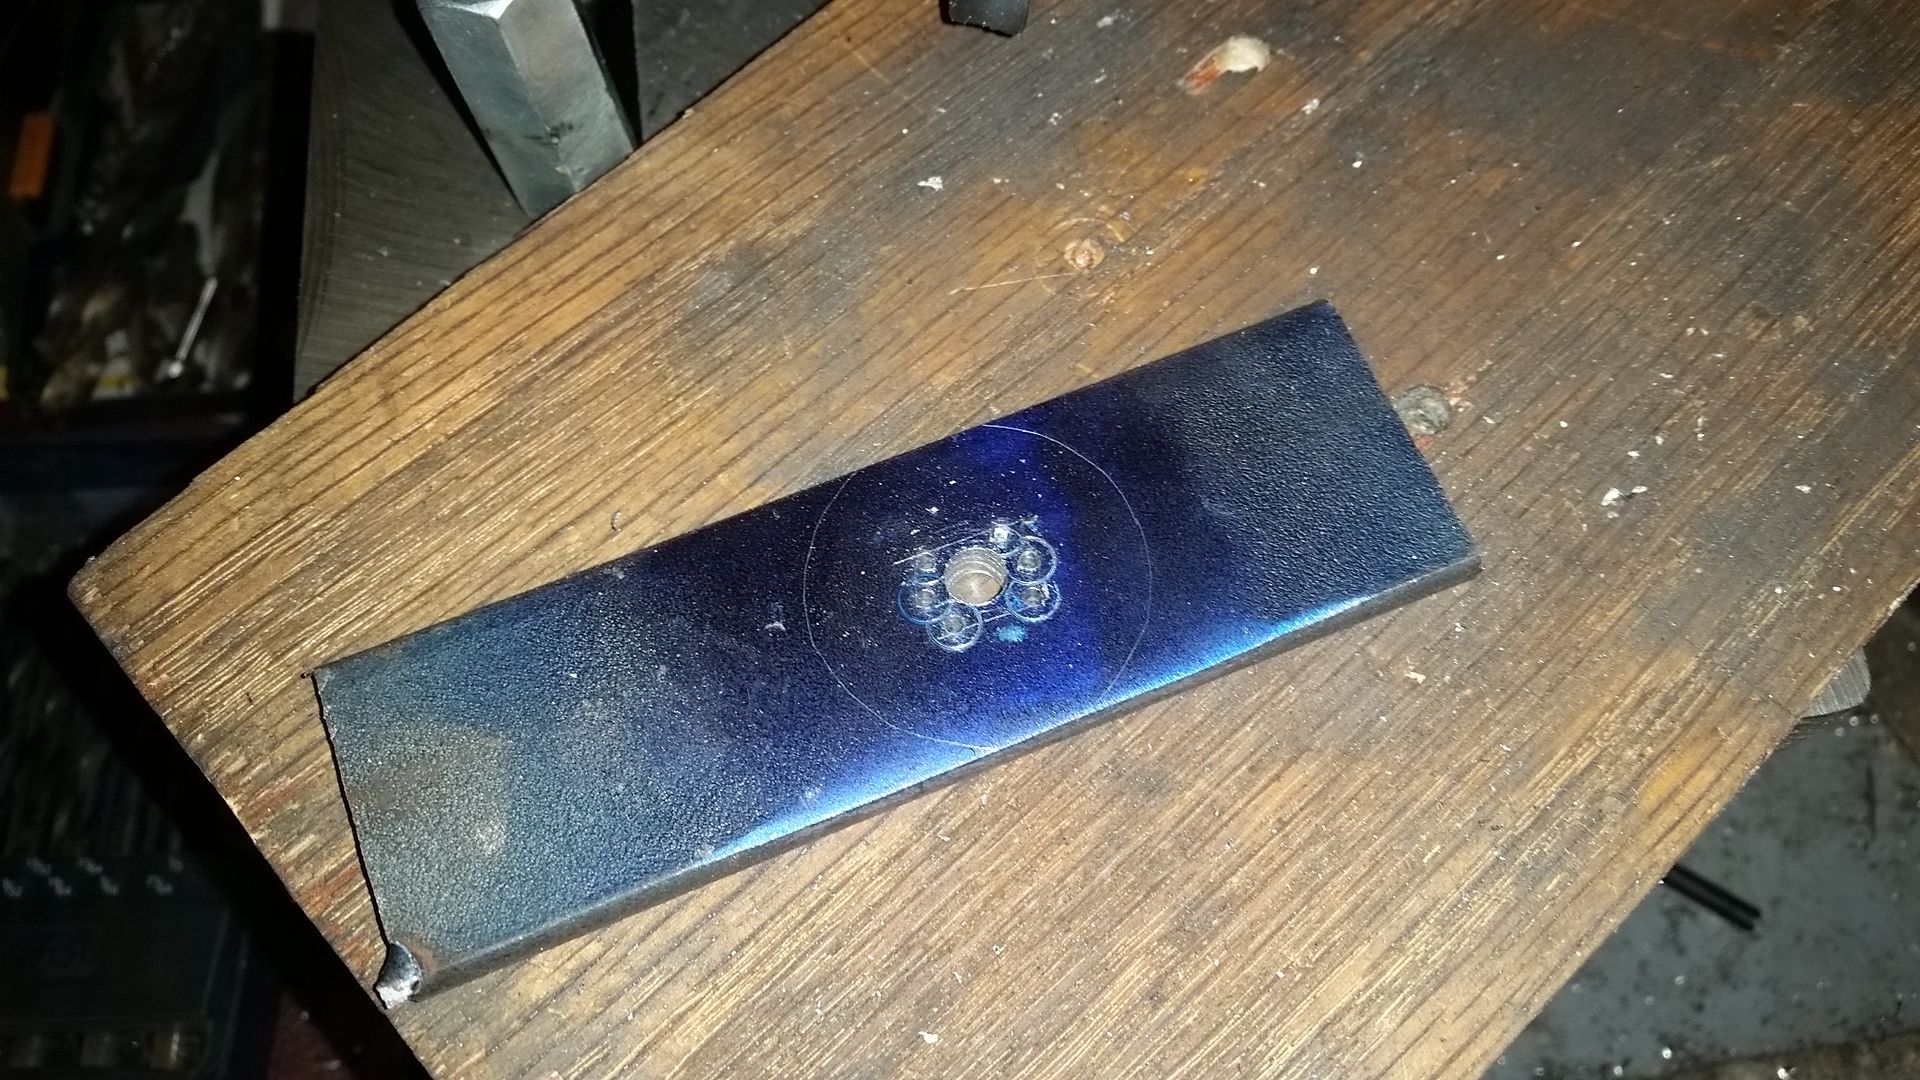
I was able to get close to the final slot width I needed by increasing the center drill size out to 25/64th in a few steps. You don't really want to break through to the other holes if you can help it. One or two isn't a big deal and didn't seem to have an effect on hole center.


Then I just had to break out the files and clean up the features I needed to the line in the layout die. It didn't really take that long to connect all the dots and close in on the final shape.


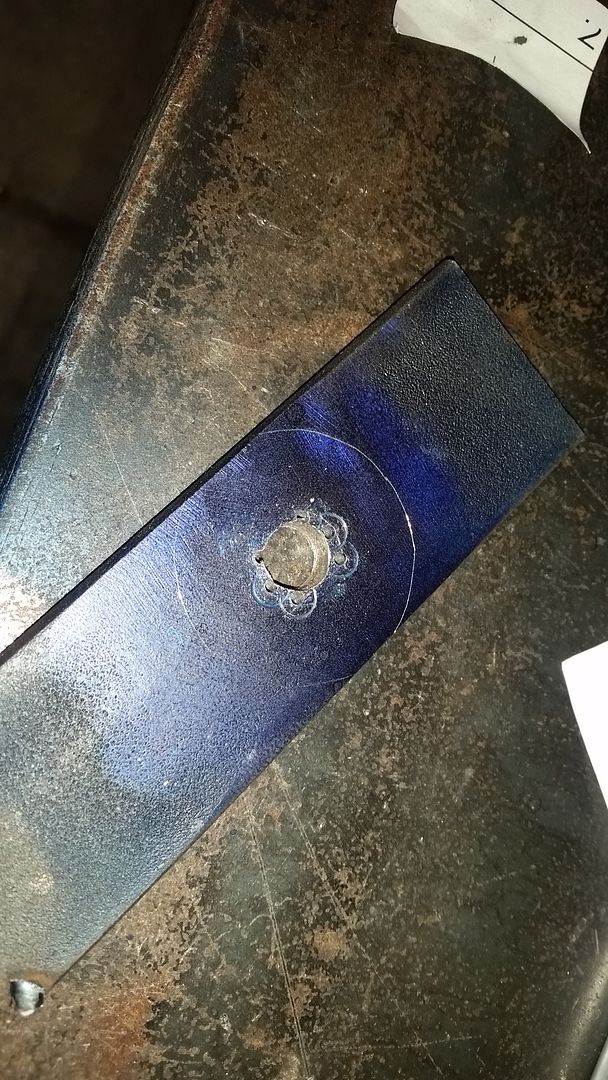
This is the final part....


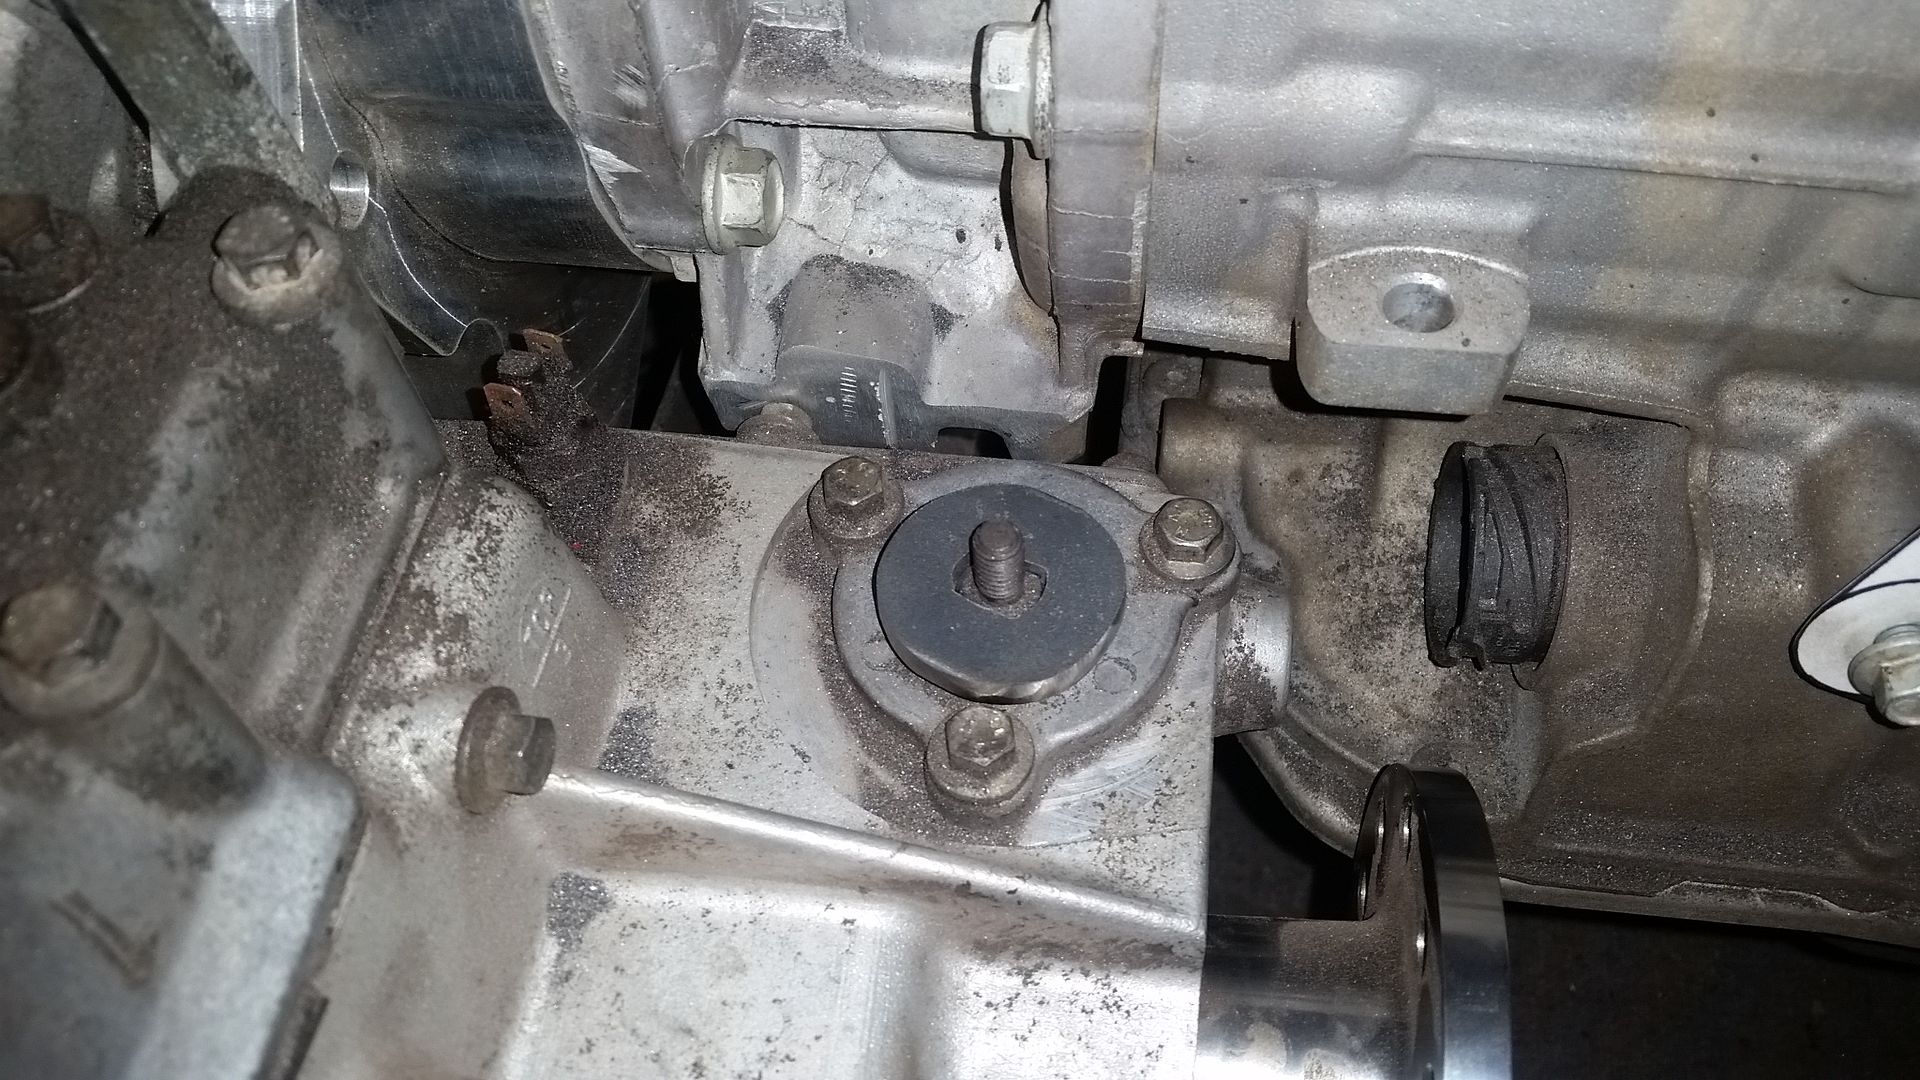
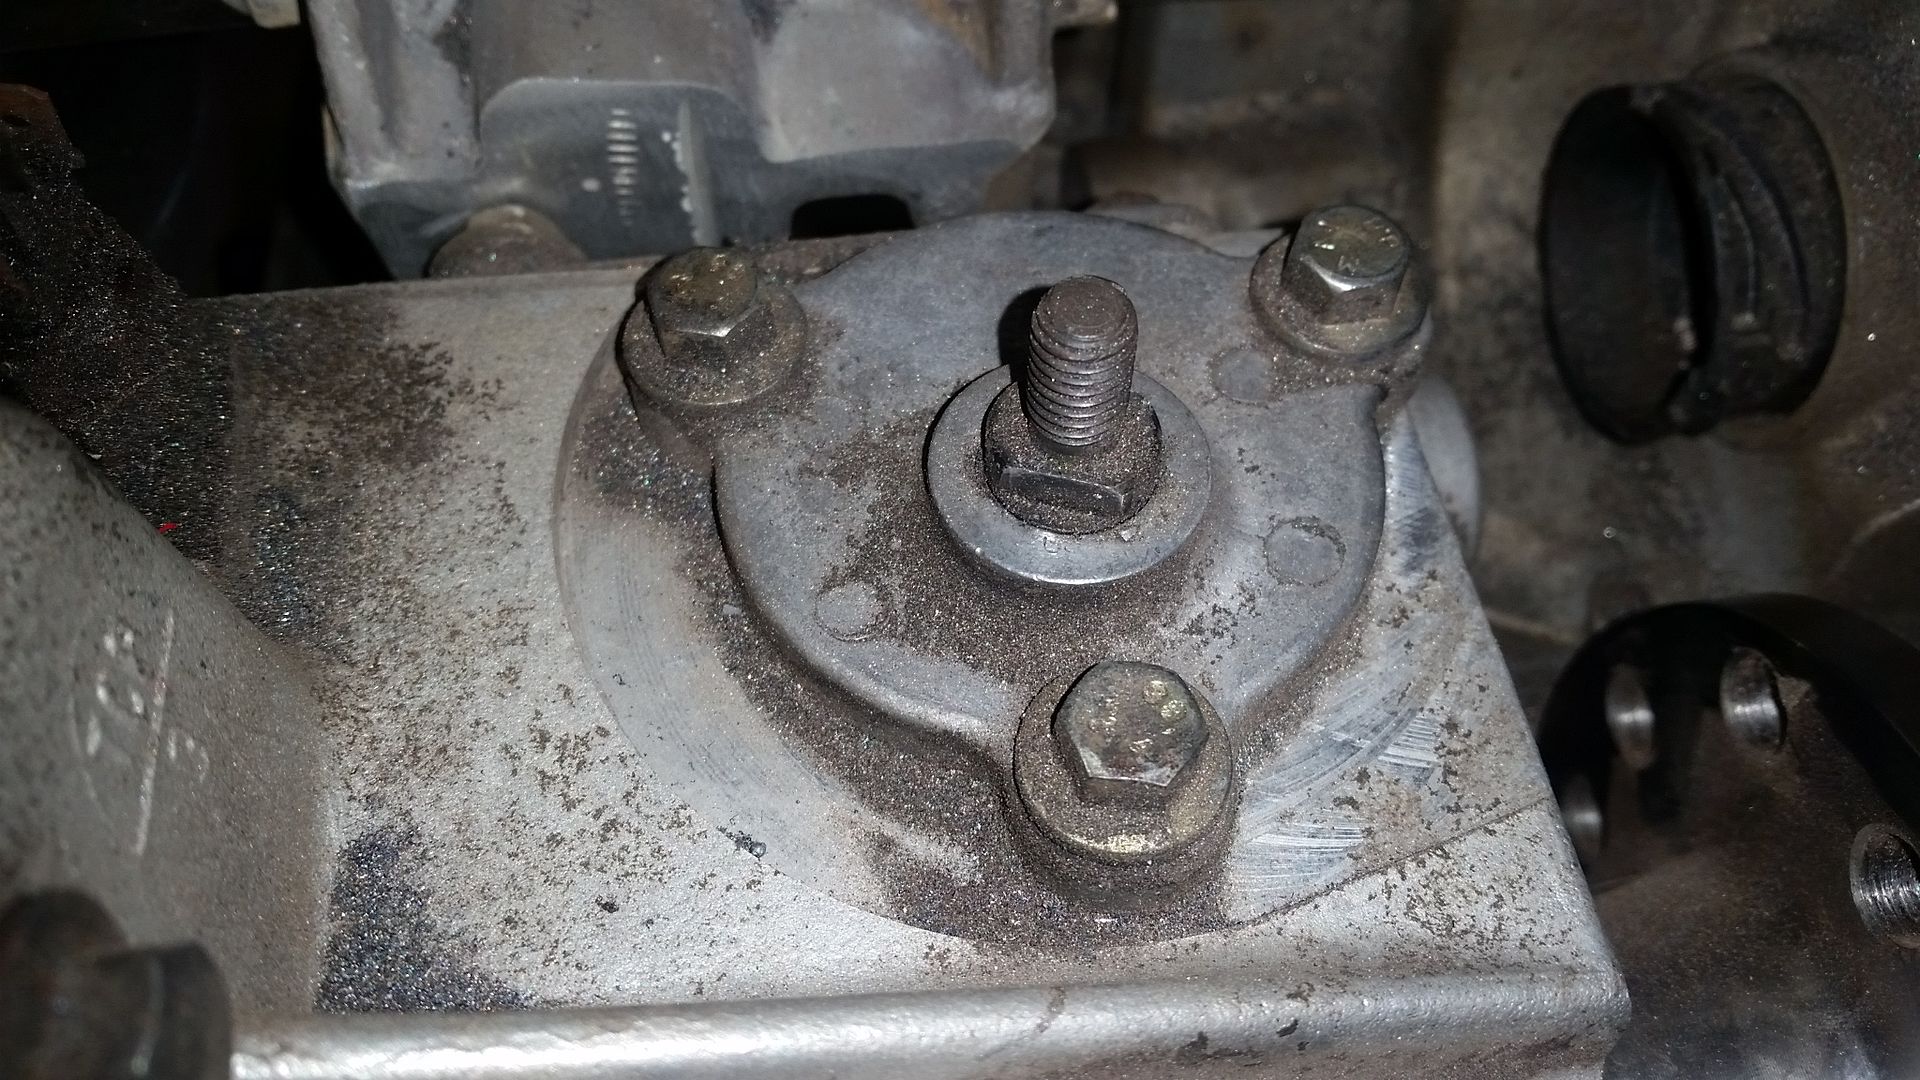
This is what it fits on. This is the center diff lock actuator on the LT230 transfer case. This little part will form the base for the air shift mechanism I am going to build for that.

Sorry it wasn't much, but the little stuff seems to take the most time...
 

VanIsle_Greg

I think I need a bigger truck!
Man I go away from Expo for a little while and BOOM...you have like 15 pages of updates to this build. 3rd build of yours I have followed, and they just keep getting better and better. Your fabrication skills and design work are fantastic Metcalf, and this is going to be one sweet rig when completed.

Keep up the awesome work sir.
 

Forum statistics

Threads
188,275
Messages
2,904,777
Members
229,805
Latest member
Chonker LMTV
Top