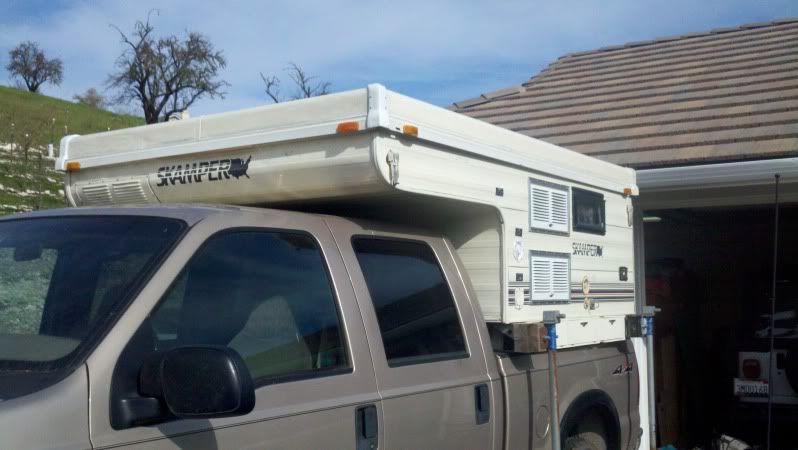
Budget Skamper Fix/Build

ToolBox Guy

Adventurer
Looks great on that truck also.

Still bummed that you parted ways from the Skamper family and moved to the Dark Side. Lol!
 

SLO_F-250

Explorer
Looks great on that truck also.

Still bummed that you parted ways from the Skamper family and moved to the Dark Side. Lol!

Haha, Does that mean we cant hang out anymore?! LOL! :costumed-smiley-007

There are definatly pro's and cons. I posted some of my thoughts yesterday on the hawk build thread. There were really only (2) big reasons for getting it, not counting that it was for sale 10miles down the road for the right price.

1) Big Bed. Since day one my girl has complained about the bed. We had over 60 nights in it and she was never full happy. I know a bigger skamper would have been better but we delt with it. When she saw the hawk bed folded out she could not spend my $$$ fast enough! haha :ylsmoke: Since the older FWC's only have a 2" thick foam matress on our trip I stopped in Wal-Mart and picked up a 1-1/2" thick memory foam topper. Dang bed is more comfortable than my one at home now! haha Happy girl camping = Happy me camping! :elkgrin:

2) The skamper was a bit heavier and because I had built those AWESOME boxes (I miss those) to shim it up the center of gravity was pretty high. I could really feel the camper on the truck. Now, fully loaded, I barely feel the hawk.
 

ToolBox Guy

Adventurer
Haha, Does that mean we cant hang out anymore?! LOL! :costumed-smiley-007

There are definatly pro's and cons. I posted some of my thoughts yesterday on the hawk build thread. There were really only (2) big reasons for getting it, not counting that it was for sale 10miles down the road for the right price.

1) Big Bed. Since day one my girl has complained about the bed. We had over 60 nights in it and she was never full happy. I know a bigger skamper would have been better but we delt with it. When she saw the hawk bed folded out she could not spend my $$$ fast enough! haha :ylsmoke: Since the older FWC's only have a 2" thick foam matress on our trip I stopped in Wal-Mart and picked up a 1-1/2" thick memory foam topper. Dang bed is more comfortable than my one at home now! haha Happy girl camping = Happy me camping! :elkgrin:

2) The skamper was a bit heavier and because I had built those AWESOME boxes (I miss those) to shim it up the center of gravity was pretty high. I could really feel the camper on the truck. Now, fully loaded, I barely feel the hawk.


Yeah we can hang. Haha!
I always have liked the FWC, in fact my first pop up was a FWC but the underbed storage and crank up roof are what keeps my liking the Skamper type construction.
In fact I found a local to me 6 foot Skamper that I am drooling over because I want the closed tailgate ability on my truck.

I might be doing a sell and buy soon!!
 

Cummins_expo

Adventurer
I know this is an old thread... But I have read through your build no less that 10 times. Its what inspired me to find an old Skamper. I scored a nice one off CL 2 miles away from work. It is the 60S model (91) and in great shape. Will be mounting it the same way you did ( 03 Dodge Cummins) I will start a build thread shortly. Between yours and Toolbox guy I have so many great ideas!
 
P4270002.JPGGreat reading your post! I just picked up a 1995 Hallmark LaVeta. I've had it off the truck the past week working on exterior fix-ups: multiple coats of linseed oil on the bed box, new calk all around, removed jack mounts to zip strip and repaint, new lid latches on the way along with a new fresh water drain...

Working on an older pop up camper is kinda like restoring an old boat. The camper I got is really simple and weighs in less than a FWC Hawk at a dry weight of just under 700 lbs. Camper has a heater, Dometic 2-way fridge, water pump is manual or electric, good stove- that's all ya need. I took off two of the jacks and can't believe how heavy they are- once the camper is dialed and on the truck, I'll remove the jacks for better side clearance and to shed about 150 lbs.

I've been buffing out the sides with 3M compound and the oxidation is coming off and she's shiny again!-Pretty gratifying.
 
Skamper060s Bed Size?

Hi,

Your skamper looks great!

My wife and I are picking one up for 750 in Maine. You have tried this out with your girlfriend? We are wondering about the size of the bed. Do you know the dimensions?

Thanks

D
 

Stereo

Adventurer
Bed size

We are wondering about the size of the bed. Do you know the dimensions? D

We don't know what model we have so yours might be different, but most of the older smaller ones are less than full size wide (front to back) and 6' in length (side to side). Ours was 39" originally but we took out a bump at the front of the camper that appeared to have no structural raison d'etre to gain about 6" inches, but the bed was still too narrow for us (we're 5'10" and 6'0") and it was cold being right up against the canvas. We slept separately for awhile - one in the bed, the other on the bench - but that was too cold too.

I then turned the bed into a queen dimensioned front to back by adding a plywood extension that stores under the bed until we're ready to call it a day. For support, I cut down the cabinet that originally had a cooler in it (I replaced the cooler with full-extension slide out drawers) to the height of the bed platform to support one side of the plywood and then put a post on the other side to hold up the other side of the plywood. Everything is held together with dowels and "pins" I made with nails. I had the bench foam redone so that the pieces fit together to make the queen bed. It only takes about 5 min to put the platform together and more minutes to make the bed. It goes like this:

1. Pull the plywood extension out from under the bed so that it's supported by the cabinet and a length of 1x2 that I screwed to the face of the under-bed storage lid I had made previously. The plywood is now supported along 2 edges.

2. Put a dowel in the shallow hole I drilled into the bench seat plywood. Put the leg, which has a hole drilled in the bottom to receive the dowel, over the dowel so that the other corner is supported.

3. Pin the plywood into place by slipping four nails through the plywood and into the supports so it can't shift.

4. Remove the bench seat cushions and position them to make the queen bed.

5. Hold the cushions together with a fitted sheet.

Before you do all this, make sure you get what you need (clothes) out from under the bed. All the other stuff is reachable from under the extension.

We sleep a lot warmer now. We're about 8" away from the canvas on both sides and having two bodies in a bed is always a lot warmer than just one. :)

To provide our dog with an enclosed area that is easier for her to heat, we velcro'd some flannel sheets around the edges of the bed extension that go to the floor and bench platform to form a "tent" with our bed extension serving as the ceiling. We don't winter camp but the temperature typically drops into the 40's or even the 30's early and late in the season at the higher elevations we summer camp at.

Sorry I can't provide pics right now. I'm busy with gardening this time of year and would have to clear out a bunch of stuff stored in the camper to be able to take the pics. We'll probably by loading up in a couple of weeks at which time I'll provide photos.

Good luck with your project. We've had a LOT of fun - except when camped near people shooting guns constantly. The rules overseeing this behavior are almost non-existent. It's an assault to those of us who are seeking solitude and a quiet communion with nature. But that's a whole other topic.
 

SLO_F-250

Explorer
Stereo, thanks for answering Dark's question and sound like you have done some excellent work. Glad to hear it.

Dark, camper has been sold for a few years so I can't take any measurements. I can tell you though the bed on the 060S was small. It was no bigger than a full. My fiance and I never slept that well cause of the size. It was one of the biggest reasons we ended up selling the camper and getting the FWC Hawk.

Good luck with your adventures!
 
The bed in my Skamper 720S is about 45W x 74L.

I discovered this thread about three weeks ago after I picked up mine at an estate sale. Thanks for posting all you did in this thread! I have learned so much about my camper from your adventures and I am excited to finish some repairs and get up in the mountains. I have some rot at one of the jack stands is that must be fixed before I even take it out of the bed again. I also have an F250 and I laugh when I see the pics of you loading it up. I had a very similar day. We used a railroad tie on one side and a stack of 4 x 4's on the other.

I have dipped my toe into your FWC rebuild thread too although I am taking my time with that. It makes me feel like a slacker.
 

SLO_F-250

Explorer
The bed in my Skamper 720S is about 45W x 74L.

I discovered this thread about three weeks ago after I picked up mine at an estate sale. Thanks for posting all you did in this thread! I have learned so much about my camper from your adventures and I am excited to finish some repairs and get up in the mountains. I have some rot at one of the jack stands is that must be fixed before I even take it out of the bed again. I also have an F250 and I laugh when I see the pics of you loading it up. I had a very similar day. We used a railroad tie on one side and a stack of 4 x 4's on the other.

I have dipped my toe into your FWC rebuild thread too although I am taking my time with that. It makes me feel like a slacker.

Glad to hear you scored on a skamper! You will not be disappointed. We loved ours and it would still be on the truck if it weren't for the small bed. haha

Yea, the day picking it up was touch and go! Just glad I got it on there and happy to hear you got it on there as well without too much damage!

Looking forward to seeing where your "build" goes. Keep us all posted with picts! And for the FWC rebuild... It goes on and on and on.... :coffeedrink:
 
You are correct to put "build" in quotes. I am not the handiest fellow but I am willing to try. I built a base with a drawer similar to what you made for your skamper and I scored happy jac tie downs off CL for $20. I had to have my truck's transmission rebuilt (yikes!) but once I get it back from the shop the next step is fixing the propane line. I am pretty sure I have a blockage in there somewhere. Then comes the battery set up, then the solar power, then I will probably decide I hate the fridge, then........looks like I have a bunch of fun projects in my future! I will have to figure out how to start a thread and post pics so you can point and laugh at my ineptitude.
 

dpt

New member
re: gluing

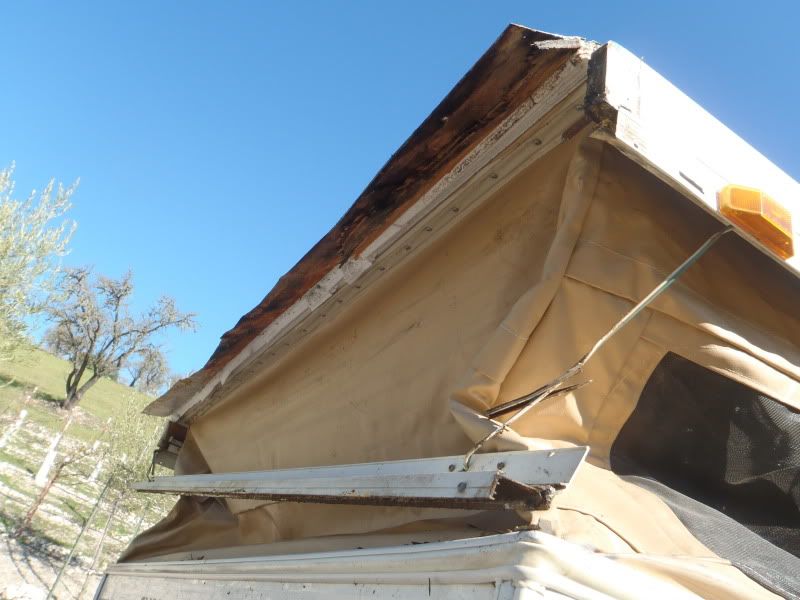
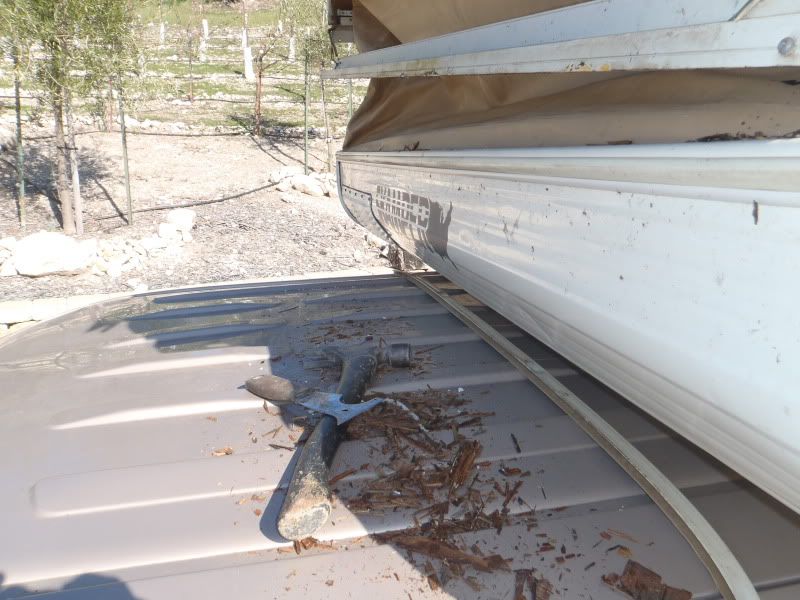
As you can see from one of the above posts, I was re-fiber glassing the roof corners because they were falling apart and I didnt want the roof to blow off driving down the road! haha I was getting ready to re-install them I found.... DRYROT! I was not a happy camper at that point, but decided I had to go for it since I plan on taking this thing on plenty of more trips.

So the repair begins....

P1230156.jpg


P1230157.jpg


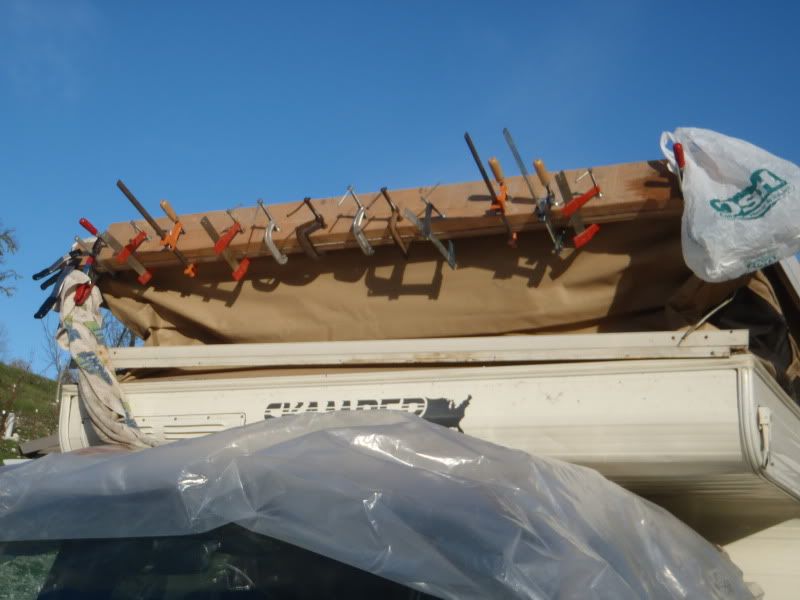
After finally scraping, scratching, and sanding I was able to get the older stuff off and had a good platform to make my new piece. It was simply two pieces of 1/2" Plywood glued together and then glued to the sheet metal roof covering. So I grabbed my gorilla glue, and all my clamps!!

P1230160.jpg


It all went back together fairly easy. While I was at it I re-sealed the roof, so now I am feeling good about the weather. Here's a picture of the fridge vents and fixed roof. It took up my whole weekend! haha

2011-01-29_13-54-45_48.jpg

I am enjoying the posts. I have the same model in a Palomino and am rebuilding the roof. I started a post on RV.Net hoping to get some input but not much activity over there. I may start a post here to get help! What did you use to glue the plywood to the aluminum roofing? Thanks, David
 

tdavis1515

New member
Skamper 060s cupboard question

I built the overhead 3 door cupboard with yours as a model. Same exactly as far as size. Weighs 15 lbs. Does that compare to the weight of yours and do you think it will stress the lifting mechanism too much? I tried to attach a picture (jpg) but it was invalid file? Thanks Terry Davis
 

SLO_F-250

Explorer
I built the overhead 3 door cupboard with yours as a model. Same exactly as far as size. Weighs 15 lbs. Does that compare to the weight of yours and do you think it will stress the lifting mechanism too much? I tried to attach a picture (jpg) but it was invalid file? Thanks Terry Davis

Hi Terry,
Mine probably only weighed 4-5 lbs. I used very thin material in order to keep the weight down. I was not concerned about the lifting mechanism.
 

tdavis1515

New member
Thanks! I appreciate the reply. I'll think about installing it. From the pictures you posted I thought I used the same material.
 

Forum statistics

Threads
188,194
Messages
2,903,706
Members
229,665
Latest member
SANelson

Members online

Top