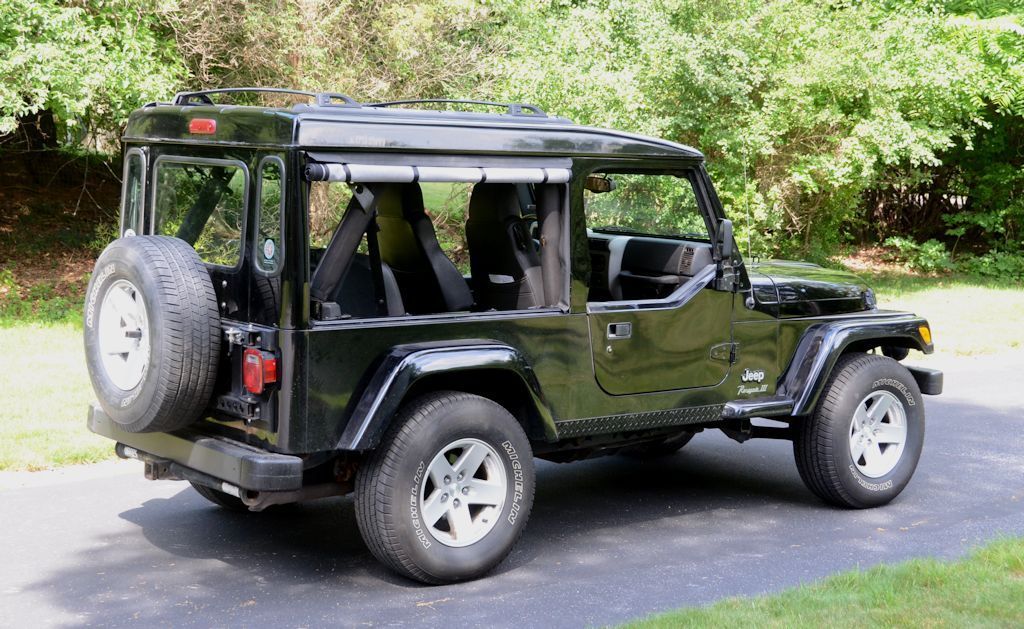
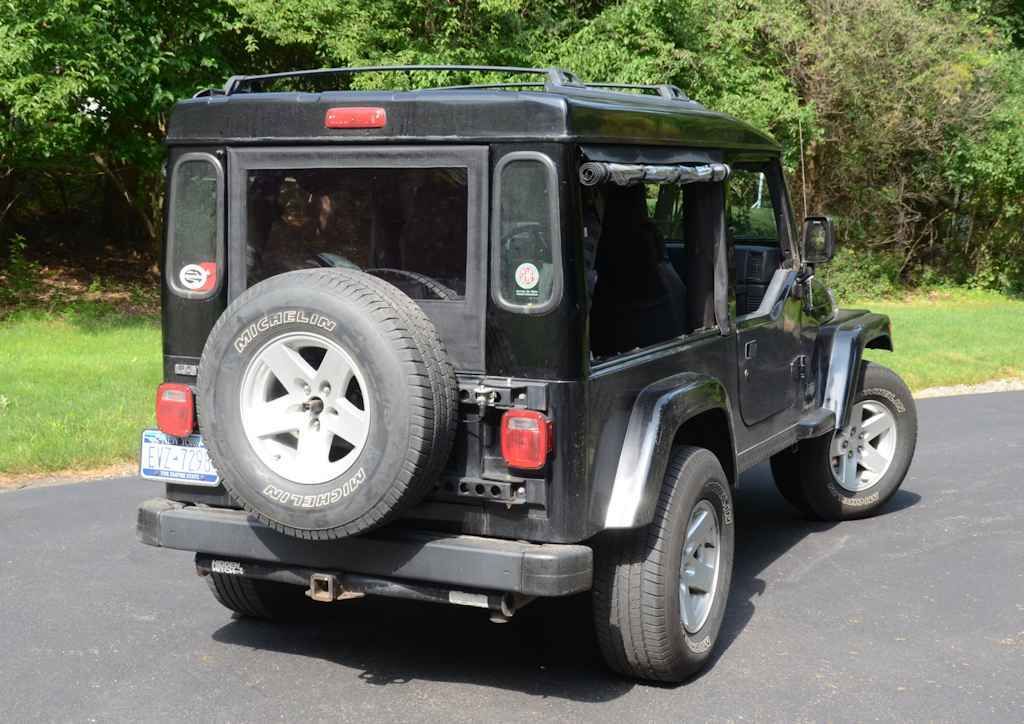
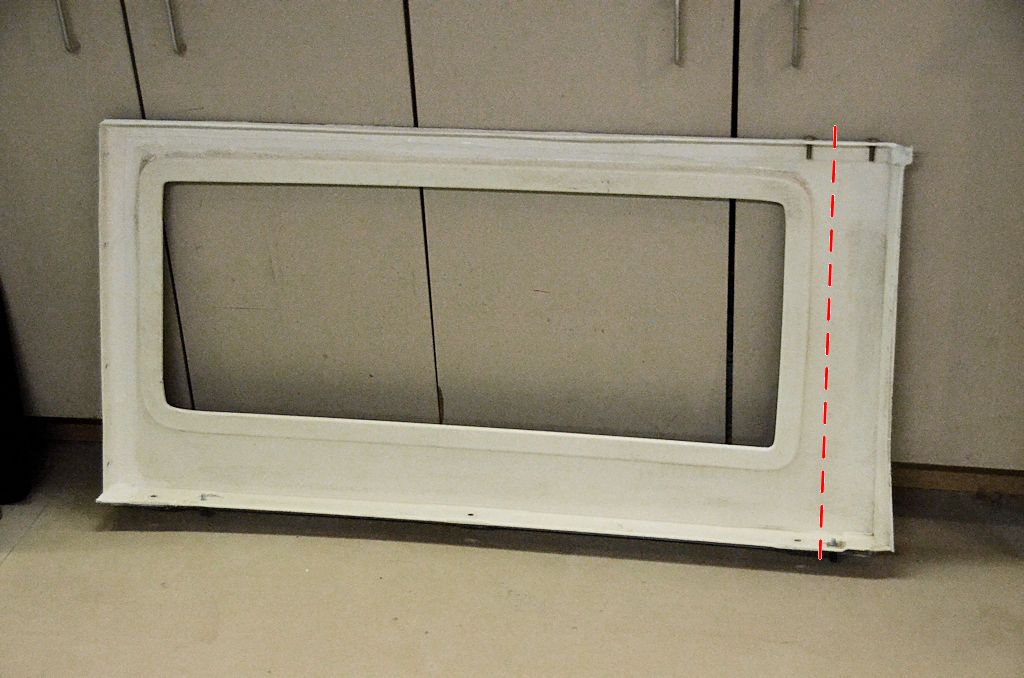
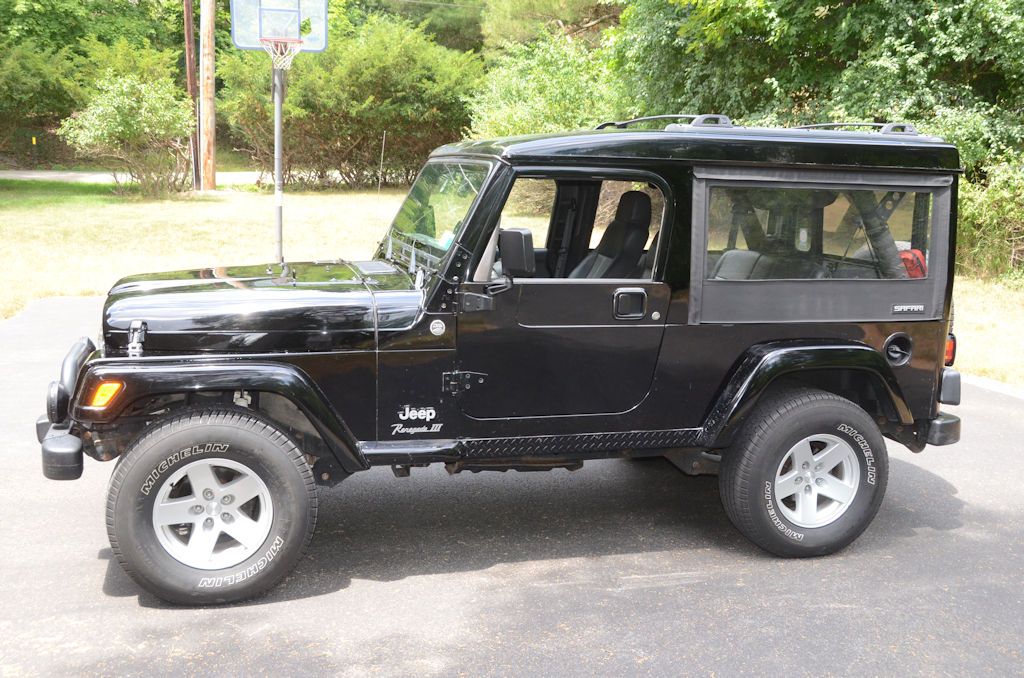
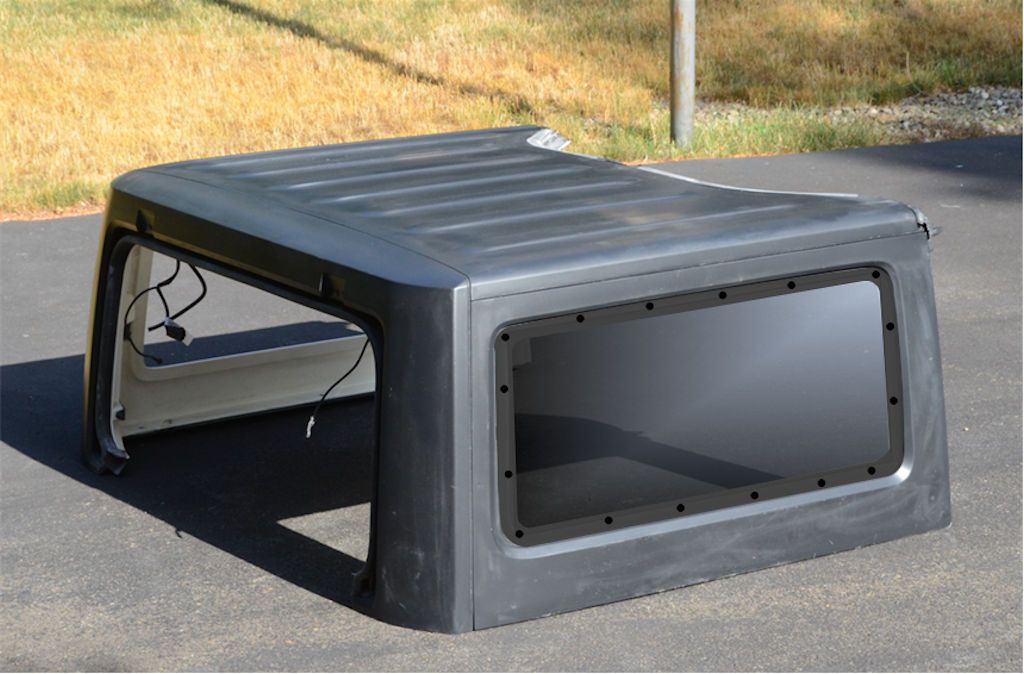
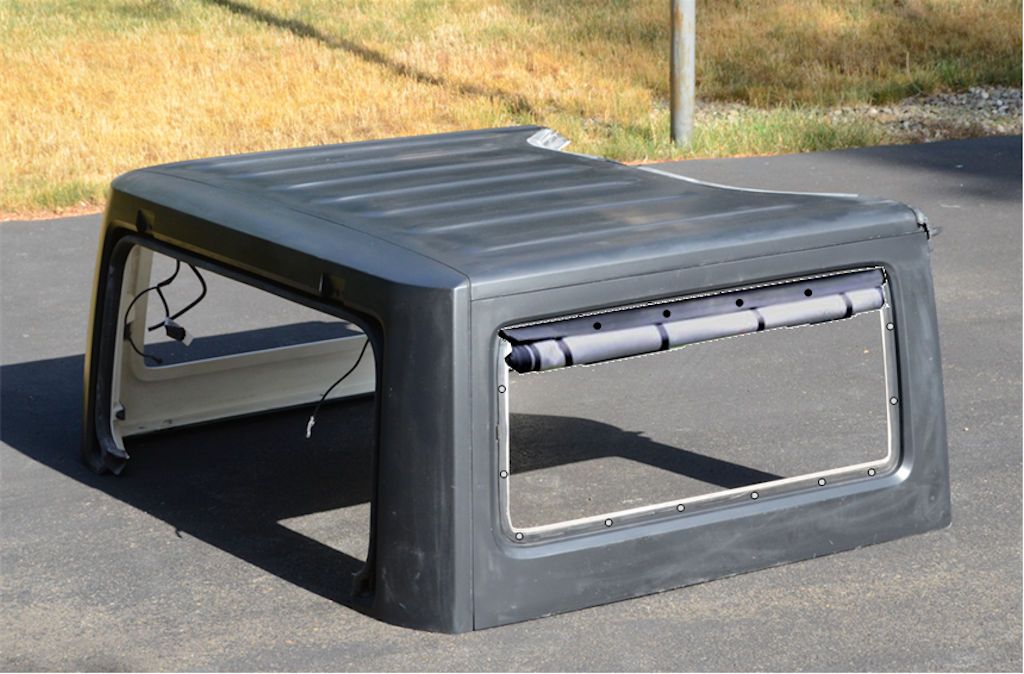
Converting a factory JK/JKU hardtop to modular

djb_rh

Observer
Excellent work as always, Jeff.

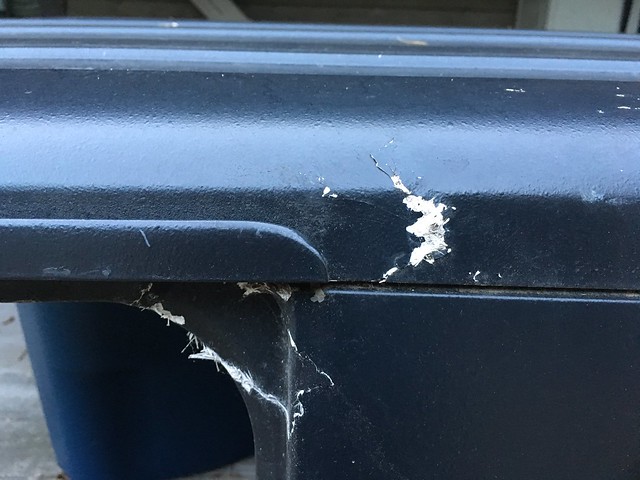
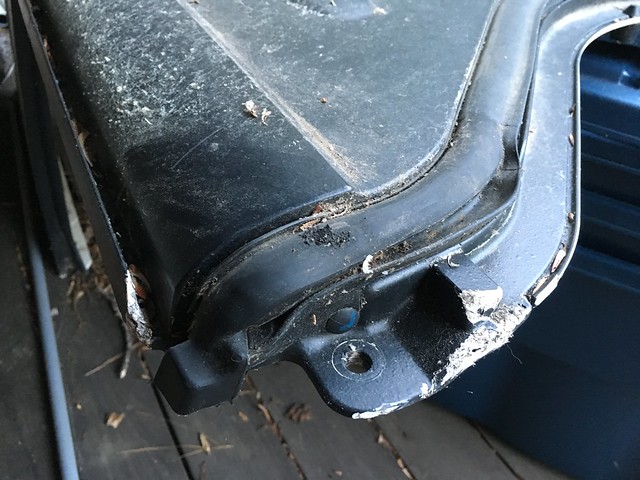
One additional question...the JKU hard top I bought off craigslist for this project was super cheap because it has minor damage. Not only was it cracked a tad in an accident, but when left sitting out it was able to "blow over" a few times onto the front part that extends over the rear seats, causing some more cracking between where the top extends forward and the area where the side windows starts. I plan to post pics, but I really believe the cracking, while visible, is pretty minor in the grand scheme. But it's got to be repaired.

Do you have any pointers on the best method to repair cracks in this type of fiberglass? The cracks in this case seem to extend less than two inches, but there are a tiny bit of exposed fibers.

I do plan to post my repairs (here, if that's okay) since I believe anyone who might be willing to tackle this project might also want to use lightly damaged tops like this since they are cheaper and should repair pretty well with many of the same materials already required to complete the conversion.


--Donnie
 

jscherb

Expedition Leader
Excellent work as always, Jeff.

One additional question...the JKU hard top I bought off craigslist for this project was super cheap because it has minor damage. Not only was it cracked a tad in an accident, but when left sitting out it was able to "blow over" a few times onto the front part that extends over the rear seats, causing some more cracking between where the top extends forward and the area where the side windows starts. I plan to post pics, but I really believe the cracking, while visible, is pretty minor in the grand scheme. But it's got to be repaired.

Do you have any pointers on the best method to repair cracks in this type of fiberglass? The cracks in this case seem to extend less than two inches, but there are a tiny bit of exposed fibers.

I do plan to post my repairs (here, if that's okay) since I believe anyone who might be willing to tackle this project might also want to use lightly damaged tops like this since they are cheaper and should repair pretty well with many of the same materials already required to complete the conversion.


--Donnie
Donnie,
I definitely have pointers on the best way to repair an SMC top, but first please post photos of the crack in this thread - based on where the cracks I'll advise on the best way to repair them. Shouldn't be hard to repair, but depending on exactly where the cracks are might dictate a best repair process for that location.
jeff
 

jscherb

Expedition Leader
Implementing Roll-Up Soft Sides.

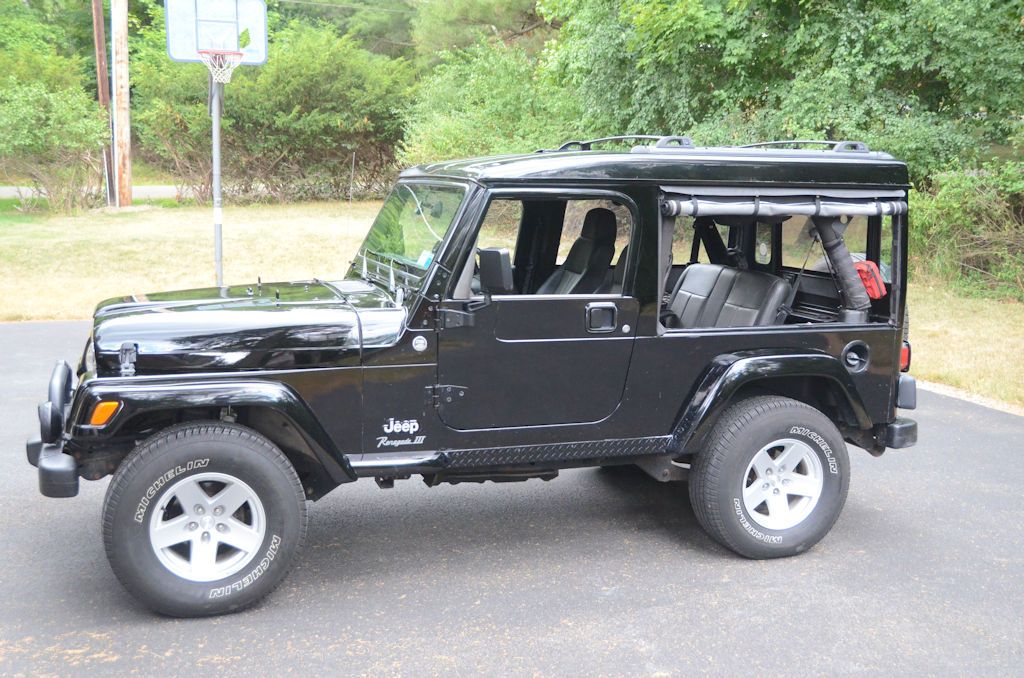
I've done two different soft side designs for my LJ Safari. One design has soft sides and a soft rear panel, and the other set has just soft sides and still uses the rear barn door (or a soft barn door).

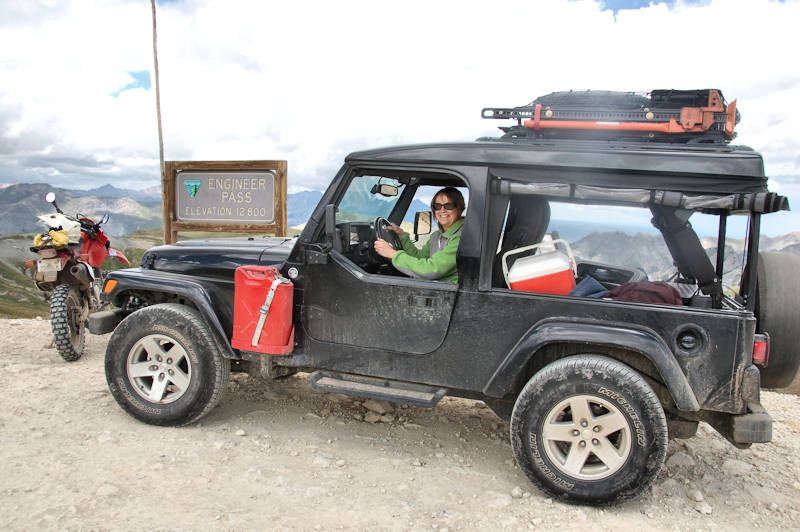
The design that is soft all around supports the back of the roof with brackets:

EngineerPass_zpsd39d8b00.jpg


The other design uses the Safari Cab back panel and barn door:

SidesRolled2_zps9eoi4jgp.jpg


Or the soft barn door:

SoftBarnDoor1_zpsgtiio8ud.jpg


Either design could be implemented for the factory modular conversion (including the soft barn door). Having both designs for the LJ, I prefer the version that uses the fiberglass rear panel over the "soft all around" design - retaining the rear barn door makes access to the cargo area much easier when the sides are rolled down. Over the next few posts I'll cover the details of that design for the LJ and show how the same could be done for the JK factory modular conversion. I do plan to implement soft sides for my JK Safari Cab and they would be almost identical to what's required for the factory modular top, but I haven't done them yet so using the LJ soft sides for the example will have to do for now.
 

jscherb

Expedition Leader
One thing that's needed for the soft sides is b pillar (jk) or c pillar (jku), a.k.a. "door surround", to anchor the front of the soft sides to. If you look at the photos of the LJ above, you can see the door surround. The way the modular conversion has been done up to this point doesn't provide for a place to anchor the front of the soft side, so one more mod to the side panels is required.

The side panels need to be cut about 3" behind the front edge, and bolt flanges need to be added to the joint so the panels can bolt back together. When the soft sides are to be installed, the back half of each side panel is unbolted, leaving only the front "door surround" piece in place, which is where the front of the soft side will be anchored. The panel should be cut so the cut line is behind the stud on the bottom near the front. When the pillar is installed on the Jeep, that stud will be replaced with a bolt that will secure the pillar to the tub. In this photo to make the holes visible I've got two bolts sitting in the holes in the upper flange - the cut goes between the two holes. If you'll recall, when I made the holes in the upper flange earlier in the project, I made two holes with cutting the panels here in mind.

BPillarPanelMod2_zps13ghszyh.jpg


The flanges for this joint can be made the same way as the original flanges - clamp a waxed paper covered form to the edge and use SMC-compatible resin followed by polyester resin to build up the flanges. If you're using t-nuts, put them inside the pillar panel, not the window panel, so the bolts go through the window panel.

Also, see my notes about running without the side panels, the details in that post have to be taken care of as well in order to run soft sides: http://www.expeditionportal.com/for...-JKU-hardtop-to-modular?p=2124564#post2124564
 

jscherb

Expedition Leader
In this and the next few posts I'll take you on a tour of the details of the LJ soft sides. The JK soft sides would be implemented in exactly the same way, only the dimensions would change.

First a few overall photos of the sides.

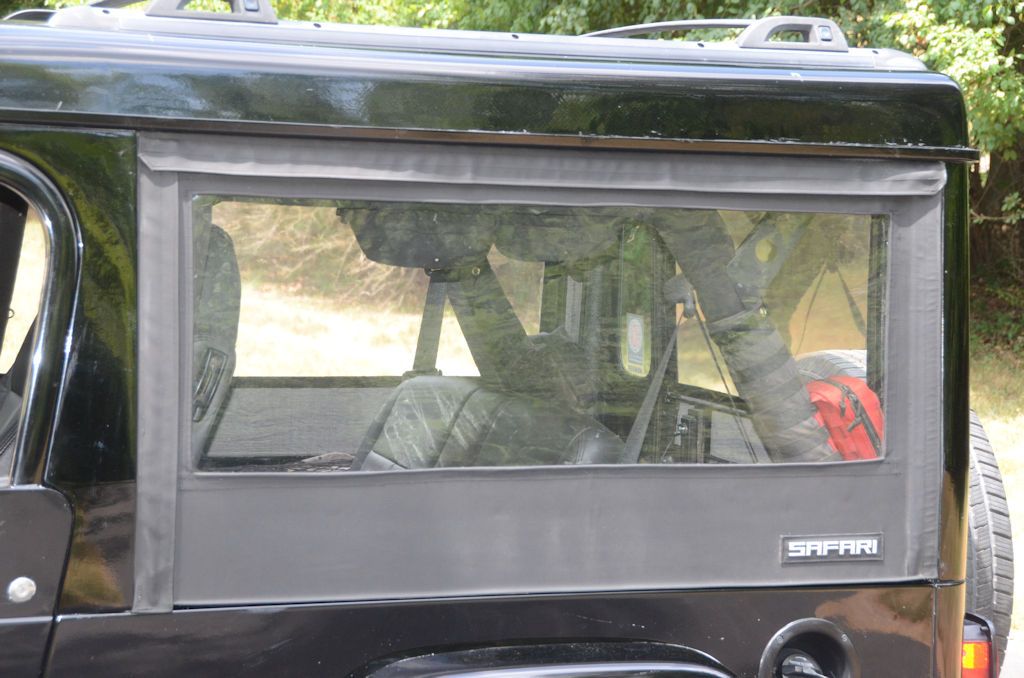
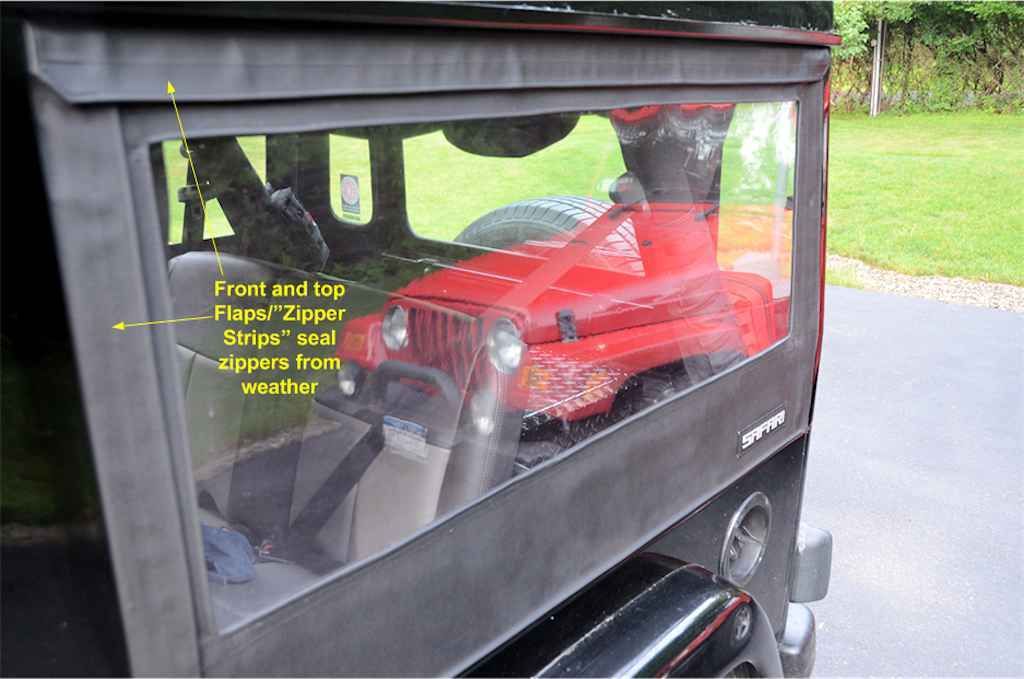
Rolled down. Notice there are flaps along the front and top edges of the side. They overlap the soft side panel. The flaps are attahed to the hardtop with aluminum retainer strips bolted to the same bolt holes that the hard side panel bolts to. There's also a flap along the back edge, but the side panel overlaps that one so it isn't visible.

SoftSides2_zps47qdgh9p.jpg


SoftSides1_zps81gn186l.jpg


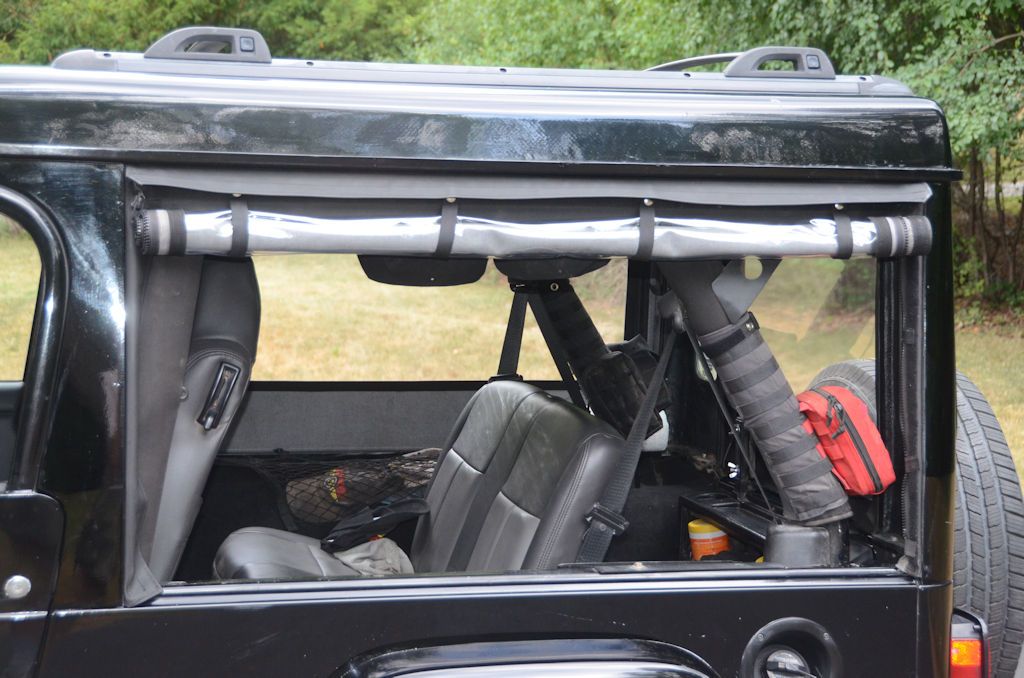
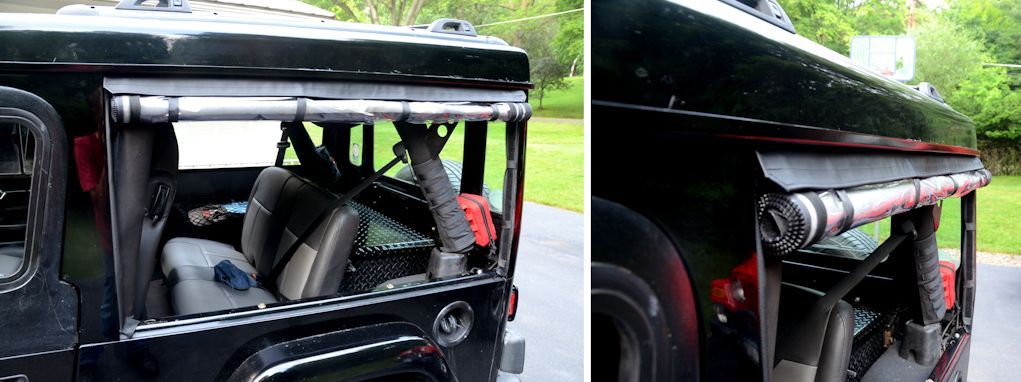
Rolled up. There are 4 straps to hold the panel in the rolled up position.

SoftSides3_zpsvlqttwgc.jpg


SoftSides4_zpsfyfrzn9k.jpg
 

jscherb

Expedition Leader
Key to the design are the three "zipper strips" that attach to the hardtop. Because zippers aren't waterproof, the strip along the top includes an outside flap that seals the top zipper, and the strip along the front edge also includes a flap. At the back edge, the side panel overlaps the flap, just like the factory soft top side panel overlaps in the back.

DetailRolledDownA_zpsxybkav9i.jpg


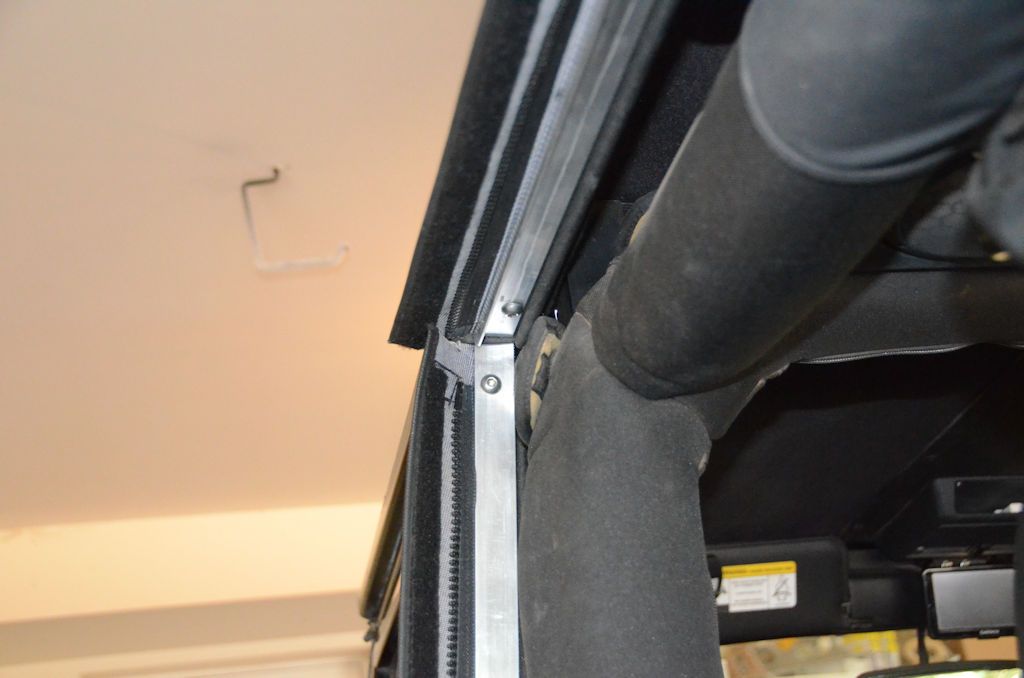
The zipper strips are held in place with aluminum retainers that bolt to the same bolt holes the hard sides use. This view is looking up at the top front corner of the side panel.

RetainerStrips_zpsuouabdpp.jpg


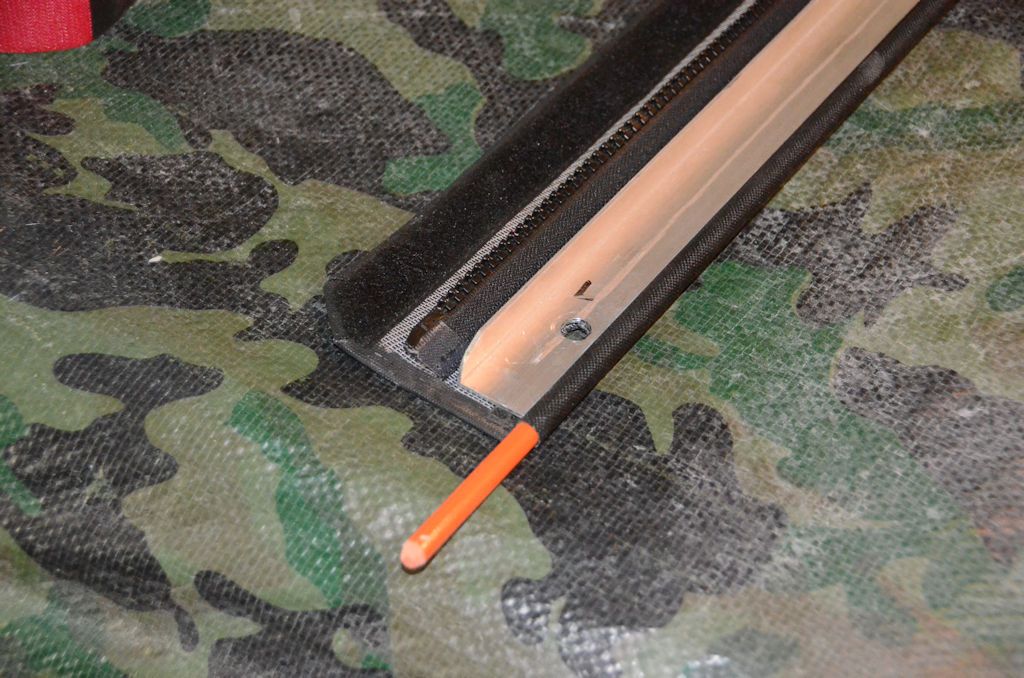
The zipper strip is sandwiched in between the aluminum retainer and the hardtop. To keep the strip from pulling out from the retainer, a fiberglass rod is sewn into the inside hem of the strip. The rods came from Lowes, they're fiberglass driveway marker stakes. This is a view of the top zipper strip. The side panel attaches to the zipper, and the velcro flap seals against the side panel. The orange fiberglass rod prevents the zipepr strip from pulling out from the aluminum retainer.

RetainerRod_zpslze3ef18.jpg
 

jscherb

Expedition Leader
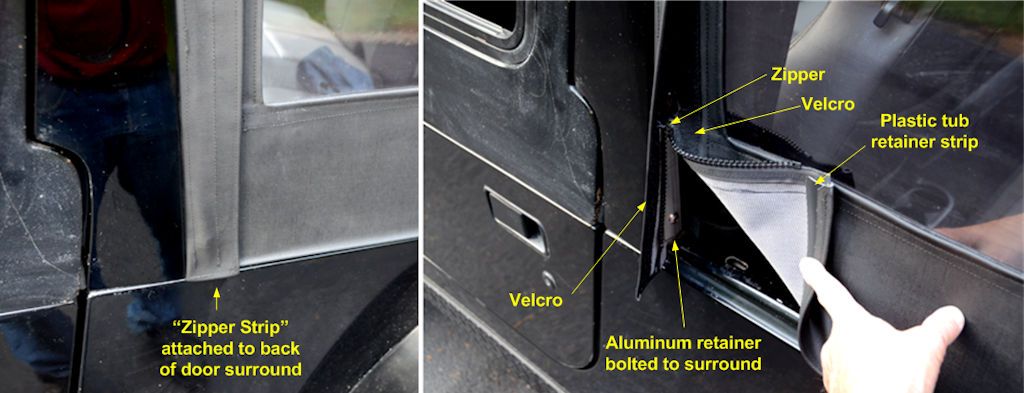
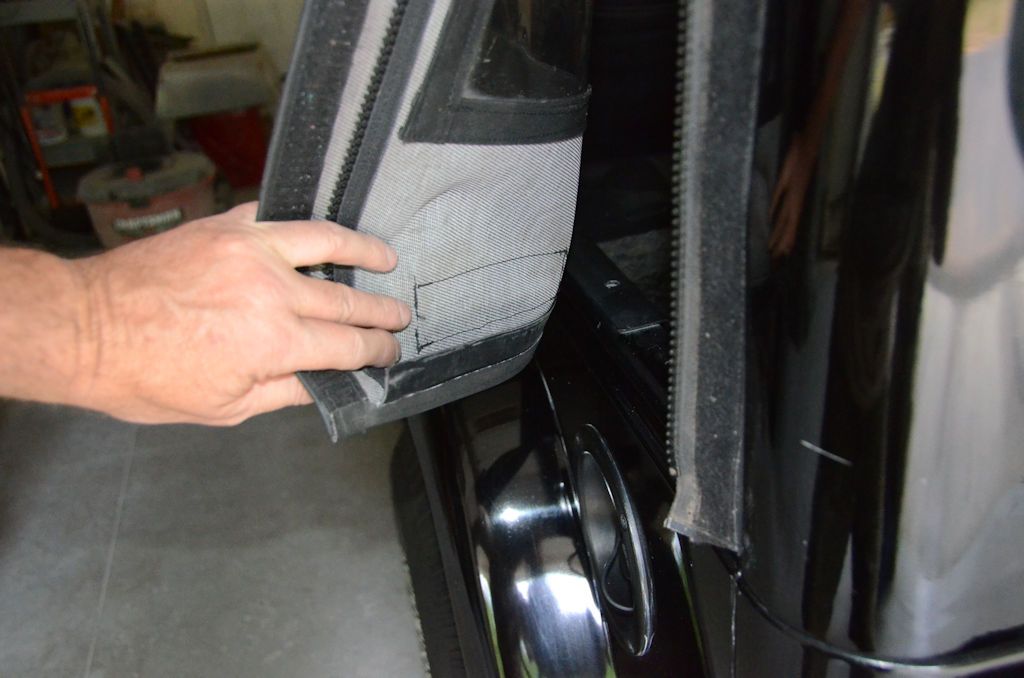
These next photos are detail views of the front zipper strip. There's velcro outside of the zipper to seal the zipper from weather getting in. In the right photo you can see the aluminum clamp strip that holds the zipper strip to the rear of the door surround. Also in this photo you can see the plastic retainer strip sewn into the bottom of the roll-up panel - the plastic slips under the retainer on the tub just like the factory soft top sides do.

DetailFrontZipperB_zpsgg3td13h.jpg


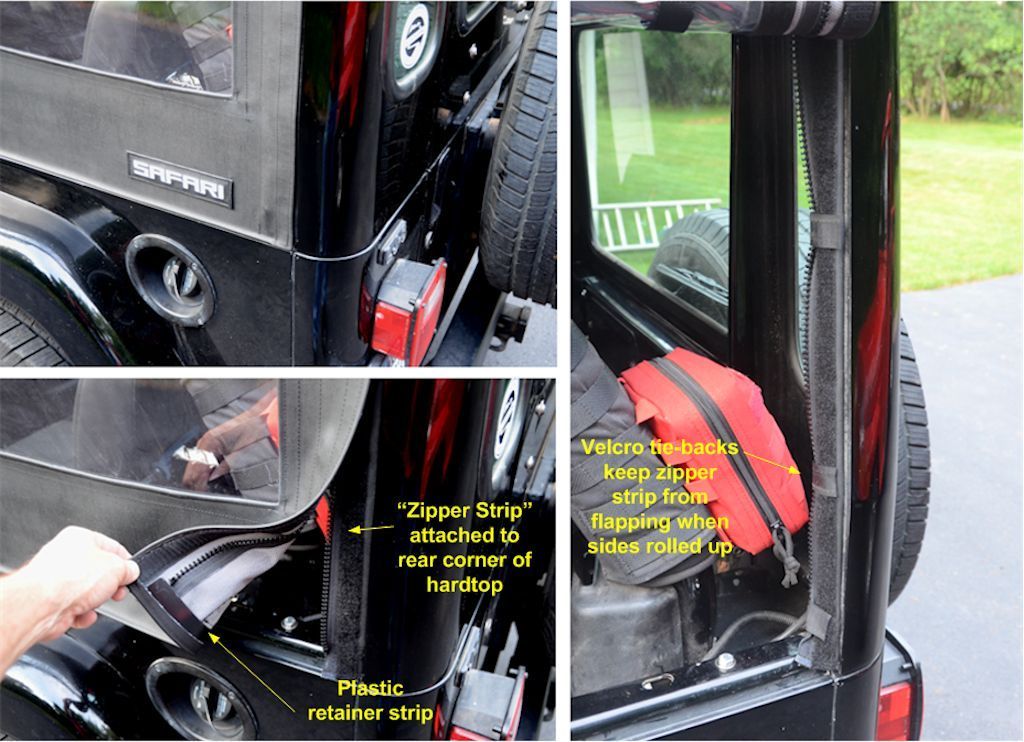
In the back, the zipper strip is on the inside, because if it was on the outside like the front one, it would be facing forward to scoop up rain while on the road. The factory soft top side panel overlaps in the same way.

DetailRearZipperA_zpsszultw6z.jpg


To keep the zipper strip from flapping in the breeze when the sides are rolled up, there are several velcro tabs to tie it back, these can be seen in the tall photo above.

Zippers are plastic, #10 size (same size as the factory soft top zippers).
 

jscherb

Expedition Leader
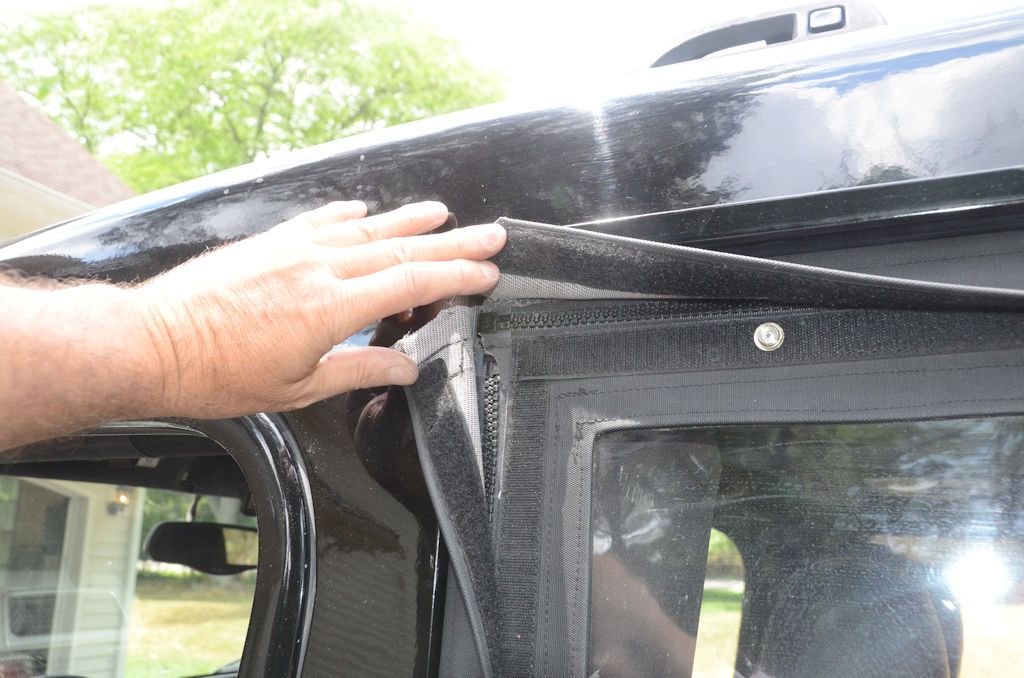
This next photo is of the top front corner of the side panel with the flaps pulled back to show the detail. The side panel zips to the zipper strips along the top and front. There are velcro closures to seal the zipper against the elements. One of the snaps for the roll-up straps is visible, it's normally hidden by the top flap.

FlapsOverlapAtFront_zpsv7rbtakj.jpg


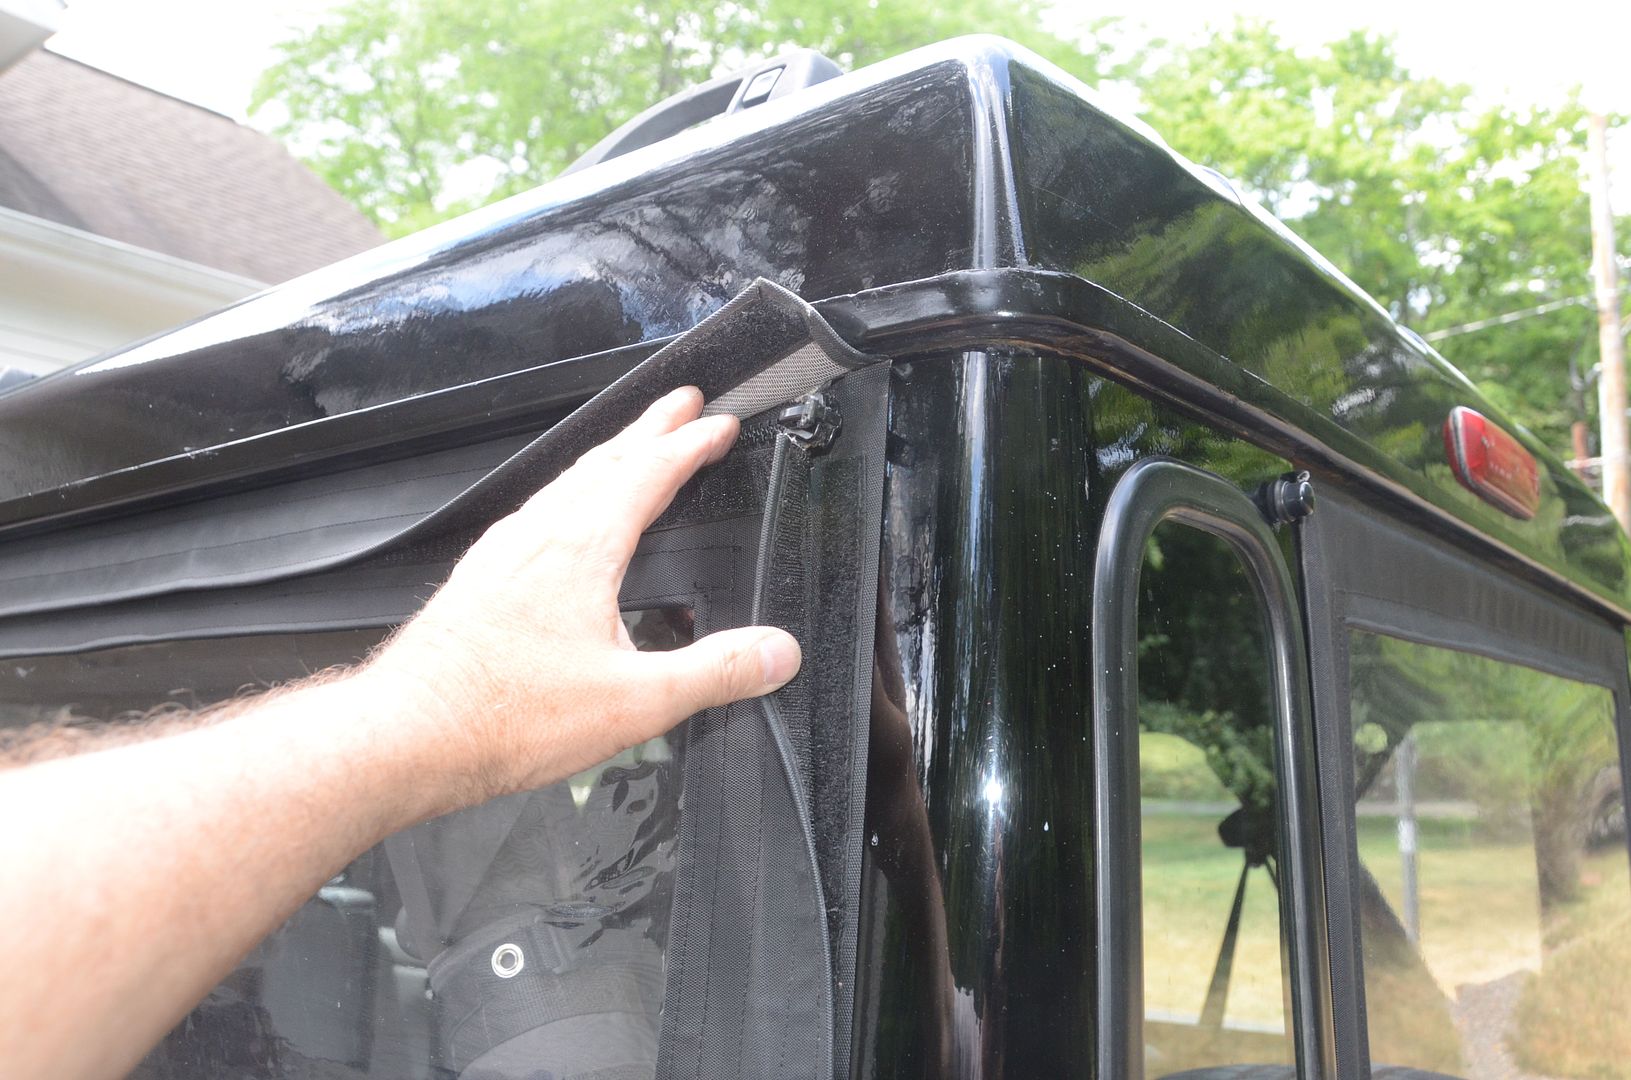
This is a view of the back top corner. The side panel overlaps the rear vertical zipper strip here, the same way the factory soft top side panel overlaps the soft top main shell. I havent pulled the side panel back far enough to show the vertical zipper, it's just forward of the velcro.

FlapsOverlapAtBack_zps6wcz9mfc.jpg
 

jscherb

Expedition Leader
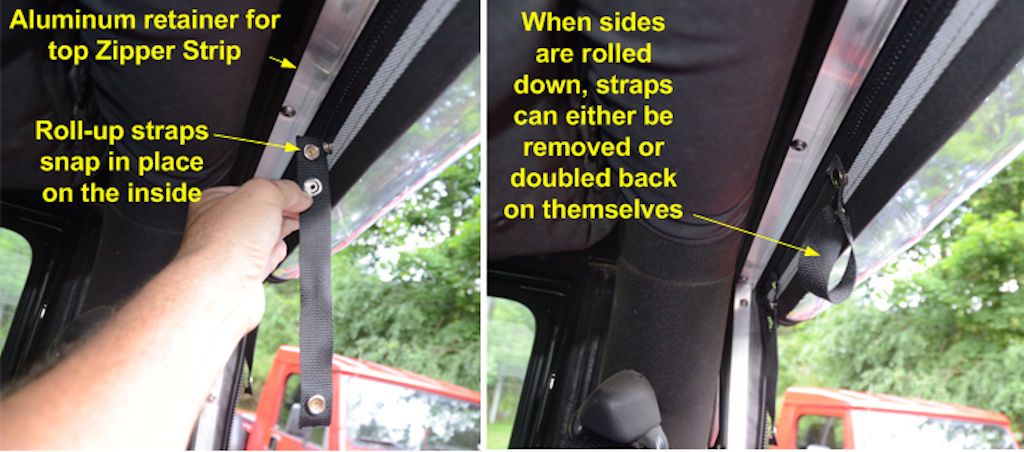
There are 4 straps on each side to hold the side panel in the rolled-up position. The snaps are removable, they snap to the inside of the side panel. That way they can be removed when the side is rolled down, or they can be doubled back on themselves and snapped as shown at right. The aluminum clamp strip holding the top and back zipper strips in place can also be seen in these photos.

DetailStrapsB_zpsxbtpzdo8.jpg


When rolled up, the 4 straps go around the outside of the rolled side panel and snap to hold it in place. Also, when rolled up the top zipper strip forms a bit of a rain guard over the rolled-up side, helping prevent water from dripping into the roll.

DetailRolledUp_zpsvrs2x9an.jpg
 

jscherb

Expedition Leader
Materials

The sides are sewn from factory soft top fabric - you can often find a used or damaged factory soft top on Craigslist. It doesn't have to be a JK top, used TJ tops seem to be more common and the material is the same.

The aluminum for the retainers is angle 1 x 1/2 angle, I can't recall but I got it at either Lowes or Tractor Supply, it's been a while since I sewed the soft sides for the LJ.

The plastic strips that retain the bottom of the side to the tub is cut from landscape edging. A utility knife and a straightedge will get you 40' of it from something like this: http://www.homedepot.com/p/Valley-Vi...O-20/100013884. Choose the thickest variety you can find. The plastic strip is sewn into the bottom hem of the side panels, it can be seen in this photo.

TubRetainer_zpsjodyocqo.jpg


I used a fairly inexpensive clear vinyl for my windows because it rolls up very easily; the downside of the vinyl I chose is that it does tend to wrinkle a bit when it's rolled and takes a while to relax when it's unrolled. But it's very easy to roll up into a small roll.

Windows are installed according to the steps in this video: http://www.sailrite.com/How-to-Install-a-Vinyl-Window-in-Canvas-Video

I get my zippers (#10), snaps, velcro and clear vinyl for the windows from Sailrite (www.sailrite.com).
 

jscherb

Expedition Leader
Tools

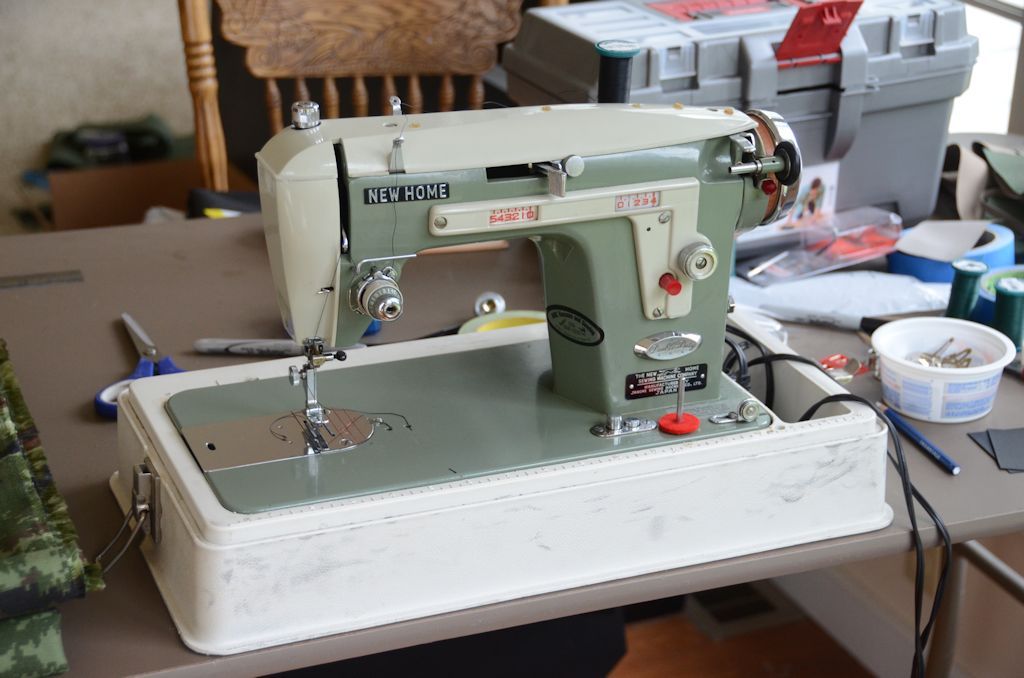
My sewing machine is a 50-year old Janome New Home model. Many of today's plastic home sewing machines aren't robust enough to sew several layers of soft top fabric or to sew through the plastic strips that are used to retain the soft panels to the tub, but older all-metal machines like this one work very well. Machines like mine are usually available on eBay for around $100.

SewingMachine_zpsjhbctdip.jpg


Hopefully I've shown enough detail that you know what's required to sew soft sides, but if you decide to sew your own and you need more detail or information please ask.
 

jscherb

Expedition Leader
A soft sides idea...

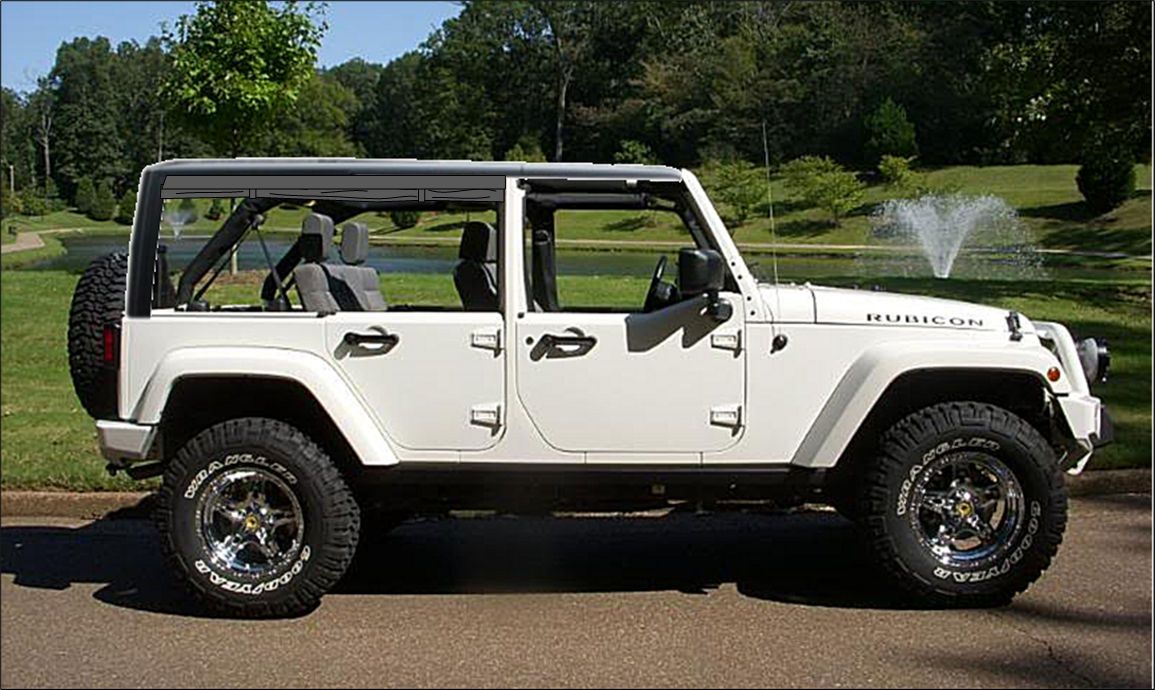
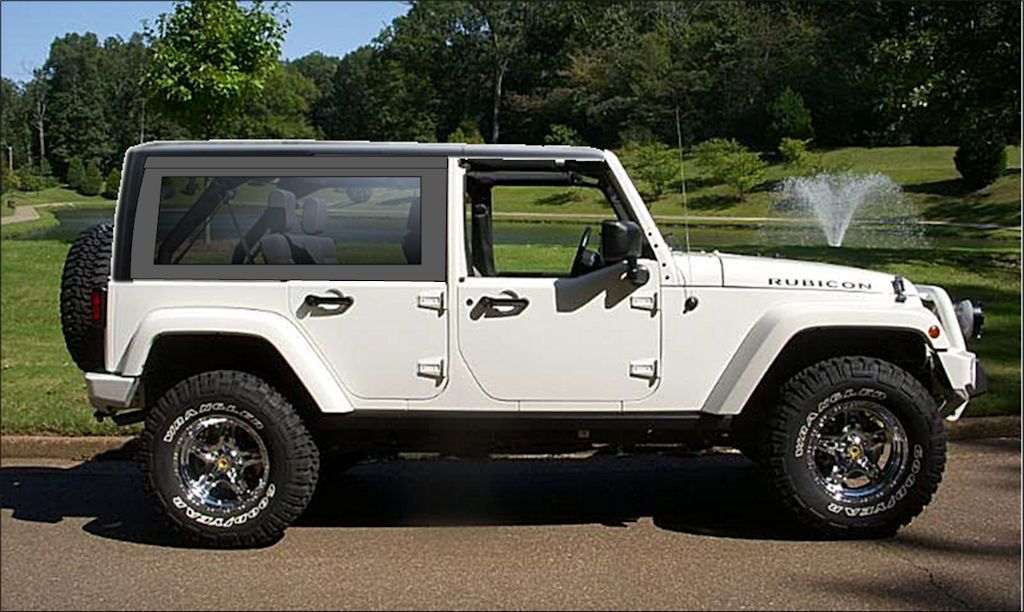
Here's something that might be interesting to do with a JKU modular conversion - soft sides that would open up the entire sides could be made to work with rear half doors, something like this:

JKULongSoftSides1_zpszqakgmza.jpg


JKULongSoftSides2_zpsypfgvqdr.jpg


A few details would have to be worked out, such as how to secure the front of the soft side to the back of the factory b-pillar, but there's nothing insurmountable about full-length soft sides like this, except perhaps the difficulty of getting in the back seat when the sides were rolled down :).
 

jscherb

Expedition Leader
Another idea - soft windows?

Since the hardtop shell I converted doesn't have side windows, I've been thinking about doing another experiment - snap-in soft side windows. They could either be completely removed, or rolled up to provide lots of air to the back. I haven't finalized all the design details yet, but I'm thinking about doing that and sewing a pair for the modular hardtop. Something like this:

SoftWindow1_zpsxha1k9pl.jpg


SoftWindow2_zpsxcxugjci.jpg


I've also got a preliminary design for snap-in hard windows, those and the soft windows above could cover all 4 seasons.
 

djb_rh

Observer
Okay, here you go:


The above is in the driver's side corner between the top and the side. I believe that happened from it blowing over a few times. Strangely the other side isn't similarly cracked, so I can only presume it was hitting something only on this side before the other side hit.

Then this is the crack that happened in the rear end collision that precipitated the vehicle getting a new top:


Yeah, I really think that's all it was. But body shops don't really do fiberglass work for insurance jobs. There was a lot of sheet metal bent below this, but apparently standard procedure is to replace this kind of thing. So they transferred all three windows and the wiper hardware from this top to a new one. And the body shop sold this one ultimately for cheap. Which might be a common thing to be able to find.

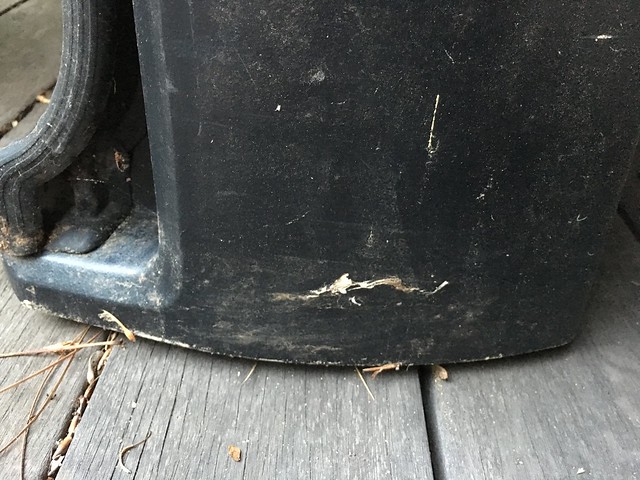
Here's some more damage on the other front corner:


I don't know how this happened if it wasn't hitting that corner when it fell over. At any rate, I'm not *sure* this is even worth fixing. The scuffed up stuff on top is hidden most of the time, and that corner chipped off the drip rail probably isn't a problem, either. I'd probably just smooth all that out and then just paint it.

But the other cracks are obviously somewhat significant, particularly that corner one.


--Donnie
 

djb_rh

Observer
Love that snap-in hard/soft window idea if it can be done in a manner that seals well. That obviously works in both converted modular tops and normal ones, so maybe there's a market for those? Not sure if the painted hard top crowd would do that mod, but it's available for them, too. Doing the modular mod on a body-color top doesn't seem as likely for many folks.

I do think if one is going full modular, though, that cutting the sides to make a b/c pillar isn't that big of a deal and the amount of extra openness one gets from removing that entire side and having a full soft side panel is significant. I feel like that's my most likely route.


--Donnie
 

Forum statistics

Threads
188,182
Messages
2,903,499
Members
229,665
Latest member
SANelson
Top