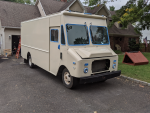
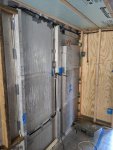
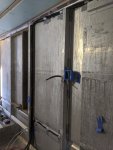
Cummins Canoe (A Stepvan Story)

screwball48

Explorer
Thanks guys, glad you enjoy! It's kinda disappointing that there is really only one other step van build thread that I have been able to find on here. They are giant and don't come stock with 4wd. You can't fix the giant, but you can fix the 4wd part at least. I don't know, we'll see how capable this thing is and where we can take it. But we do plan to get off the beaten path with this thing! Step vans are the coolest thing, change my mind...
I recall one and one half (kinda) the first was a full build out “Putts” if memory serves correct. The second Ujoint did a conversion on a unit with an Econoline chassis and running gear from the factory.
 

PlethoraOfGuns

Adventurer
Yea, Putts thread! He did a crazy awesome job! Above and beyond just a simple van build. His thread was definitely an enabler for me to go step van over regular van.
 

PlethoraOfGuns

Adventurer
Doing more interior work. The weather outlook is looking good, have a window coming up in order to paint this thing. Gotta do that before it gets too cold.

IMG_20200921_132041 copy.jpg
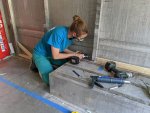
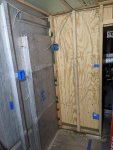
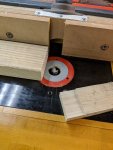
Ran these pieces of wood on the router table using a clamped fence to get them all shaved down the same so they fit snug in between the aluminum wall studs.

IMG_20200921_143853 copy.jpg
The idea is that these will sit flat and will give the bottom of the walls something to mount to and be sturdy.
 
Last edited:

PlethoraOfGuns

Adventurer
Ok, got a good span of sunny weather! Back to the exterior! Best to get at it while it's hot. Or just nice enough to apply paint.

IMG_20200921_162314 copy.jpg
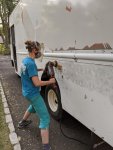
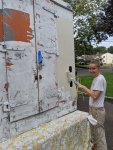
The entire shell had flaking and bubbling paint all over. We used a wire wheel on Big Bertha and made quick work of all that. Did the entire body with this.

IMG_20200921_174113 copy.jpg
Oh great, she looks even worse now...

IMG_20200922_144544 copy.jpg
Time for another well needed bath. Of course start from the top down.

IMG_20200922_160133 copy.jpg
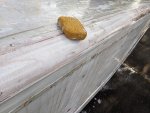
Ew, lots of paint dust and such came off. Not sure what all the red/pink stuff was about. When it pooled up, it looked like Pepto Bismol.

MVIMG_20200922_162831 copy.jpg
Boy, this is way too much work...
 

PlethoraOfGuns

Adventurer
Oh gee willy, it's time for paint! We're going to have like a brand new van! After washing the van, we let the whole things dry for a day. Here we go...

IMG_20200924_102728 copy.jpg
Next, we taped everything off and wiped down all the surfaces to be painted with paint thinner. Not sure who got more high, us or the van.

IMG_20200924_105906 copy.jpg
Mixed up the paint and went to town with a brush and a roller. Because, you know, that's how you paint vehicles.

IMG_20200924_111929 copy.jpg
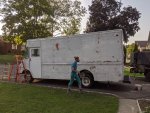
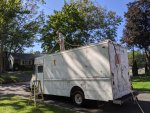
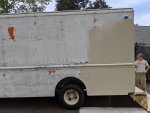
It actually doesn't look all that bad! Much better than the multicolor scheme it had before.

IMG_20201001_181657 copy.jpg
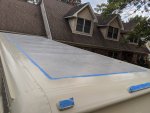
Don't forget the roof! we mostly just wanted to protect the seams with paint. The middle area of the roof is a solid, single sheet of aluminum. So we left that bare, and that should be fine forever.

Screen Shot 2020-10-21 at 10.26.38 PM.png
Coat #1 done! Only took two people 6 hours to do! It is quite a bit of surface area. We like the 1950's delivery vibe that the color gives it.
 

PlethoraOfGuns

Adventurer
Drying time is looking to be a few days. So while we wait for first coat to dry, back to the interior stuff!

IMG_20201004_173117 copy.jpg
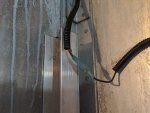
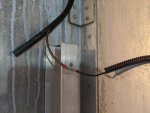
The stock body lights had all these quick connectors for the wiring. These will be covered with insulation and wood, no longer will ever be accessible.

IMG_20201004_173830 copy.jpg
So we replaced them with something a bit more permanent. These all in one heat shrink solder connectors are great, especially when you have so many to do! Definitely good time saver.
IMG_20201002_211812 copy.jpg
Then we did an electrical layout. First we taped the locations of anything electrical, then started throwing in boxes for the high voltage stuff. We used plastic boxes to avoid any bimetal corrosion, since steel and aluminum don't like each other. We tried to wire everything to code, but we couldn't find very much in the book on wiring bread vans!
 

Mwilliamshs

Explorer
Those all-in-one electrical connectors use a low-temp solder that's inferior to the normal stuff.

You should definitely support the wire so there's no weight on the connector and so its own weight can't cause it to break.

Keep in mind as you build a camper that everything is going to move and bounce.
 

PlethoraOfGuns

Adventurer
Darn, I thought those would be better than the disconnect connectors. Thanks for the advice. I'll wireloom them and strap them up before insulation. How do ya'll do your electrical connections that you bury and never see again?
 

Betarocker

Adventurer
Your best connection will be solder and adhesive lined shrink tube. Nothing is guaranteed to not fail, even a continuous wire/cable could break mid-length.
 

Gtdad

Adventurer
This project makes me smile. I have spent 23 years driving Grumman Aluminum vans that are mobile kitchens in the film industry. I have driven them into some of the craziest locations in some of the worst weather conditions in the dead of night , these vans make me feel at home. The ones I drive are much longer than yours 30+fters with room 4-5 chefs working to feed the crew.Always though they would make a great basecamp biking /paddling camper. Also I am very long time canoe tripper 45+ years of canoeing starting at wilderness summer camps and often we had Grumman canoes for the 7+ days canoe trips. Once we had someone tip upstream of a small dam and the Grumman canoe broaches the dam blocking it 80% , A nearby cabin owner came to out rescue with a high lift off-road jack, with ropes and pulleys we jacked the canoe off the dam face and pulled away with ropes... Canoe only had a few dings but perfectly fine, tough canoes.
 
Last edited:

PlethoraOfGuns

Adventurer
Well, we're gonna hope the connectors we used will stay. Time will tell. I will do my best to secure them.
This project makes me smile. I have spent 23 years driving Grumman Aluminum vans that are mobile kitchens in the film industry. I have driven them into some of the craziest locations in some of the worst weather conditions in the dead of night , these vans make me feel at home. The ones I drive are much longer than yours 30+fters with room 4-5 chefs working to feed the crew.Always though they would make a great basecamp biking /paddling camper. Also I am very long time canoe tripper 45+ years of canoeing starting at wilderness summer camps and often we had Grumman canoes for the 7+ days canoe trips. Once we had someone tip upstream of a small dam and the Grumman canoe broaches the dam blocking it 80% , A nearby cabin owner came to out rescue with a high lift off-road jack, with ropes and pulleys we jacked the canoe off the dam face and pulled away with ropes... Canoe only had a few dings but perfectly fine, tough canoes.

Oh man, I can't wait to drive this thing terrible weather! I'm hoping to take it into blizzard conditions, just because! For years I never looked twice at step vans driving by. But ever since I got into one and drove them, I get excited just seeing a Fedex or UPS truck! Everyone looking for a van should just get a step van. I also enjoy canoes. I have an old 17' made by Grumman Aircraft. Very fitting if I were to carry the canoe inside the van for a river trip.
 

MANUCHAO

Aventurero
Well, we're gonna hope the connectors we used will stay.
I see you are using wire loom....
That'll offer plenty support for those solder connections...
If you got sections that you are concerned about..
Use some expanding foam spray close to the wires.. that'll give yah all the support needed...

Looking great..!!
??
 

PlethoraOfGuns

Adventurer
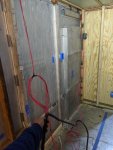
More wire loom! Working on the low voltage today! High voltage stuff is all ran and tied in.

IMG_20201004_203240 copy.jpg
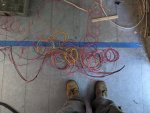
First, we ran all the wires to where they are meant to go.

IMG_20201007_111107~2 copy.jpg
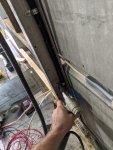
Oh boy, we had a mess. Lets tape everything together.

IMG_20201004_210427 copy.jpg
Then we pulled them out, and encased everything in wire loom.

IMG_20201008_103621 copy.jpg
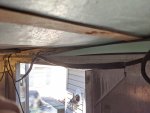
Of course, properly secured all the wire loom.

IMG_20201008_121538 copy.jpg
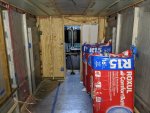
Above the rear door, there is a channel behind some aluminum. This aluminum we were going to use to screw the interior to, and we didn't want wires falling into that space. So we cut some foam board and shoved into there.

IMG_20201008_122957 copy.jpg
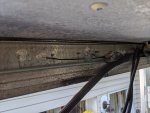
No wires falling into the no-no zone!

IMG_20201008_144404 copy.jpg
Wire loom all done!

IMG_20201009_080624 copy.jpg
Hope everything is in the right spot. :oops:
 

Attachments

  • IMG_20201007_111107~2 copy.jpg
    IMG_20201007_111107~2 copy.jpg
    2.7 MB · Views: 20

Forum statistics

Threads
188,211
Messages
2,903,841
Members
229,665
Latest member
SANelson
Top