DIY Composite Flatbed Camper Build

Terra Ops

Adventurer
What a difference 65lbs makes. After more driving and playing with the airbag psi, the truck is dialed in nicely. My last camper that weighed over 3,000lbs, needed the airbags maxed
at 100 psi. This camper with the awning at just over 2000 lbs drove nicely at 60 psi but with some wobble over uneven terrain. Without the awning the truck feels and handles better at
40psi. I think a lot of this also has to do with my suspension having coils and not leaf springs.
I recall from my Tiger days that if you put too much weight such as canned food in the top cabinets, the rig would begin
to get tipsy. Weight placement definitely makes a difference.
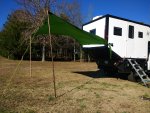
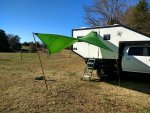
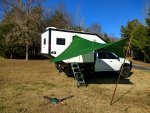
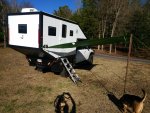
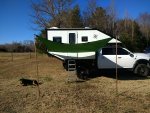
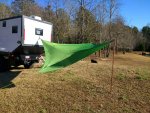
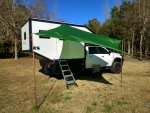
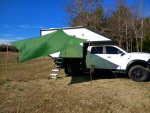
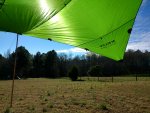
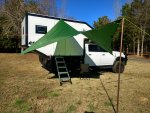
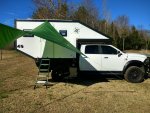
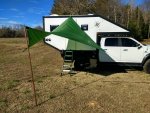
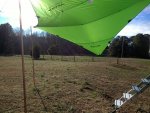
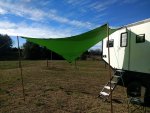
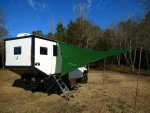
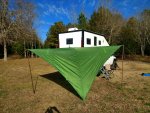
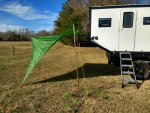
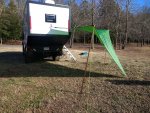
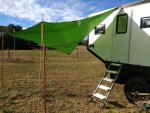
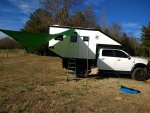
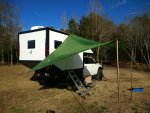
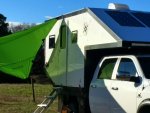
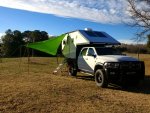
So with no awning I decided to go with Noah's Tarp. While it does not set up as quickly as the awning, it can be configured at different points on the rig and also free stand.
It was worth the trade off. https://www.amazon.com/Kelty-408202...09771&sr=8-2-spons&keywords=noah's+tarp&psc=1
 

Attachments

  • IMG_20181216_142618471.jpg
    IMG_20181216_142618471.jpg
    3.3 MB · Views: 201
  • IMG_20181216_143616704_HDR.jpg
    IMG_20181216_143616704_HDR.jpg
    3 MB · Views: 208
  • IMG_20181216_143632149_HDR.jpg
    IMG_20181216_143632149_HDR.jpg
    2.4 MB · Views: 211
  • IMG_20181216_144659232.jpg
    IMG_20181216_144659232.jpg
    3.3 MB · Views: 215
  • IMG_20181216_144710375.jpg
    IMG_20181216_144710375.jpg
    3.5 MB · Views: 198
  • IMG_20181216_145620673_HDR.jpg
    IMG_20181216_145620673_HDR.jpg
    3.7 MB · Views: 173

Terra Ops

Adventurer
Installed a hook above the door for easy attachment. While this tarp requires more set up time, I definitely like the different variations for shelter.
Will probably purchase a third pole.
 

Attachments

  • IMG_20181218_140532344_HDR.jpg
    IMG_20181218_140532344_HDR.jpg
    3 MB · Views: 60
  • IMG_20181218_140558616_HDR.jpg
    IMG_20181218_140558616_HDR.jpg
    1.1 MB · Views: 60
  • IMG_20181218_141253563_HDR.jpg
    IMG_20181218_141253563_HDR.jpg
    1.7 MB · Views: 57
  • IMG_20181218_141325537_HDR.jpg
    IMG_20181218_141325537_HDR.jpg
    2.7 MB · Views: 63
  • IMG_20181218_141338280_HDR.jpg
    IMG_20181218_141338280_HDR.jpg
    2.3 MB · Views: 66
  • IMG_20181218_141346172_HDR.jpg
    IMG_20181218_141346172_HDR.jpg
    3.1 MB · Views: 62
  • IMG_20181218_143805950.jpg
    IMG_20181218_143805950.jpg
    3 MB · Views: 57
  • IMG_20181218_143822869.jpg
    IMG_20181218_143822869.jpg
    2.4 MB · Views: 56
  • IMG_20181218_143913131.jpg
    IMG_20181218_143913131.jpg
    2.8 MB · Views: 54
  • IMG_20181218_144647969_HDR.jpg
    IMG_20181218_144647969_HDR.jpg
    3.2 MB · Views: 52

Terra Ops

Adventurer
More pics :)
 

Attachments

  • IMG_20181218_144706519_HDR.jpg
    IMG_20181218_144706519_HDR.jpg
    3.2 MB · Views: 64
  • IMG_20181218_144738094.jpg
    IMG_20181218_144738094.jpg
    4.2 MB · Views: 62
  • IMG_20181218_145756858.jpg
    IMG_20181218_145756858.jpg
    2.9 MB · Views: 69
  • IMG_20181218_145811984.jpg
    IMG_20181218_145811984.jpg
    3.2 MB · Views: 76
  • IMG_20181218_145834856.jpg
    IMG_20181218_145834856.jpg
    2.9 MB · Views: 73
  • IMG_20181218_153434458.jpg
    IMG_20181218_153434458.jpg
    2.8 MB · Views: 74
  • IMG_20181218_153510340_HDR.jpg
    IMG_20181218_153510340_HDR.jpg
    423.9 KB · Views: 77
  • IMG_20181218_153518378_HDR.jpg
    IMG_20181218_153518378_HDR.jpg
    1.8 MB · Views: 76

b. rock

Active member
Seriously impressive build. Since the thread jumped to a camper shell being completed by post #2, about how long did just the shell construction take? Also, I was looking through the pics and didn't quite see how it's attached to the frame - maybe I missed that, or how is that being done? Cheers
 

Terra Ops

Adventurer
Seriously impressive build. Since the thread jumped to a camper shell being completed by post #2, about how long did just the shell construction take? Also, I was looking through the pics and didn't quite see how it's attached to the frame - maybe I missed that, or how is that being done? Cheers

Thanks. Shell construction took about 4 months working on it in spare time. Also have to take into consideration the learning curve. Now that I have the experience, I would guess a couple of weeks working full time. Actual panel construction is not that hard or time consuming. You can probably knock out a single panel in a couple of hours. It's the cure time of the epoxy and sika flex that is most consuming.
Camper is attached to a flatbed not the frame for easy removal. I used 4 tabs that are bolted to the camper frame and slide into the pockets of the flatbed. Each tab has a horizontal bolt hole that attaches directly to the flatbed. In addition to the tabs are 4 clamps. See posts 192 and 197.

In the picture you can see hooks at each end of the bed. This is where the clamps attach. The tabs slide into the two center pockets of the bed.
 

Attachments

  • IMG_20180715_122947859_HDR.jpg
    IMG_20180715_122947859_HDR.jpg
    1.1 MB · Views: 242
Last edited:

Terra Ops

Adventurer
With the recent temperature drop, I decided to do some driveway camping to test the efficiency of the panels and propex heater.
I was hoping the temperature would drop into the teens, but we only saw a low of 20 degrees here in S.C.
It didn't take much to heat and maintain a temp of 62. At one point I raised the temp to 70 but for me its not ideal for sleeping.
Needless to say I was very pleased with the performance of the panels. I think the heater may have come on 2 or three times, not too sure
about this as I was asleep, but it was very minimal. Love this heater as it uses very little propane and electricity. Also noticed there was no
condensation inside the camper.
Another feature I'm still very pleased with is the REDARC charger and lithium batteries. I have not needed to use shore power at all to recharge
the batteries. Between the solar and truck alternator, the batteries get back to 100% charge very easily.
"So far, so good"
 

opp

Observer
Thank you for all good information. I been using a fiberglass outer ring on the trailers. I have. If using the panels you have do you think it oil can. The fiberglass ring dose not expand much thank you for all the info
 

Terra Ops

Adventurer
Thank you for all good information. I been using a fiberglass outer ring on the trailers. I have. If using the panels you have do you think it oil can. The fiberglass ring dose not expand much thank you for all the info

Please forgive me, I'm not sure what you are asking.
Are you referring to the outer ring as the extrusions or frame that holds the panels in place/shape? If so, then yes FRP extrusions are another method for joining the panels instead of the aluminum L channels that I used. If you choose a "wet" fiberglass application, I would be concerned about cracking when the camper flexes.
 

opp

Observer
Been using wet outer ring fiberglass. Then infill foam back wet fiberglass sheets. If I could use the infill you use it would be faster just worried about oil caning if the FRP expand more. Than wet laid fiberglass outer ring. Would be bonded to the reset 1.5 lip with sika flex .On the outside. Can see lip better on door jam. Thank you for any in put
 

Attachments

  • Picture 441.jpg
    Picture 441.jpg
    19.7 KB · Views: 148
  • Picture 409.jpg
    Picture 409.jpg
    52.3 KB · Views: 145
Last edited:

Terra Ops

Adventurer
Been using wet outer ring fiberglass. Then infill foam back wet fiberglass sheets. If I could use the infill you use it would be faster just worried about oil caning if the FRP expand more. Than wet laid fiberglass outer ring. Would be bonded to the reset 1.5 lip with sika flex .On the outside. Can see lip better on door jam. Thank you for any in put

Not really sure what to tell you as I have no experience with that method.
Try doing a test sample to see if it meets your objective.
 

opp

Observer
Ok thank you for the input .Really like the way you did this build and put out all the postings
 

Terra Ops

Adventurer
Just returned from a short trip to Missouri and Illinois. Did a Wal mart overnight for the first time. Temps got down to around 40 but no heat was required. Seems our body heat helped maintain a temp of around 63 inside, perhaps some refrigerator heat too.
Prior to this trip I was concerned about the temps staying below freezing the majority of the time. Such temps are not good for the lithium batteries.
As we approached St Louis we hit freezing rain. After a while I could feel the weight build up on the camper. As for maintaining temperature in the camper, the pass through provides plenty of heat from the truck cab. No need to run the Propex heater yet. This was also the case during the summer for cooling. The pass through is not only convenient for access but for temp regulation while traveling as well.
While visiting family, if we were not going to be in the camper for a period of time I would set the heater on its lowest setting to protect the batteries. I was pleasantly surprised at how little this thing runs and a maintained temperature of around 59. During our 4 day visit, temps remained in the teens and twenties the whole time. The last night in St Louis we woke to snow.
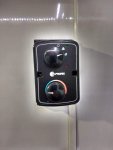
We then headed to the bluffs of the Mississippi In Illinois where my daughter attends college. This would turn out to be the coldest night yet. Temperature was 1 with a wind chill of -15. Heat setting was at 1/4 and we were too warm! I'm very happy with how well insulated this thing is.
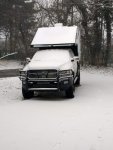
As we left, there was still some snow from the previous day and parts of the Mississippi river had ice. Below are pics of snow in St Louis and the temp setting for the coldest night.
 

Attachments

  • IMG_20190303_074848152_HDR.jpg
    IMG_20190303_074848152_HDR.jpg
    798.4 KB · Views: 117
  • IMG_20190303_085028879_HDR.jpg
    IMG_20190303_085028879_HDR.jpg
    903.1 KB · Views: 131
  • IMG_20190305_073243255_HDR (1).jpg
    IMG_20190305_073243255_HDR (1).jpg
    460.3 KB · Views: 128
  • IMG_20190304_073127862_HDR.jpg
    IMG_20190304_073127862_HDR.jpg
    683 KB · Views: 121
Wonderful build! Love the design and build and great job documenting this process. I'm checking out the Kalori Electrik for my build- nice find! Thanks. Seems there are very few smaller (BTU-wise), rugged A/C options out there in 12v. Residential mini-splits just aren't made for the road, although their high efficiency makes them very attrractive. I did however notice that it appears that Stark is now out of business, which seem unfortunate. see https://www.bbb.org/us/nc/mooresville/profile/battery-manufacturers/stark-power-inc-0473-744605

Keep up the posts, hoping you get to enjoy all of your hard work.
 

Terra Ops

Adventurer
Thanks, we are definitely enjoying it! Didn't seem like hard work at the time, until I start thinking about another build:)

The 12v Kalori combined with the lithium batteries has worked out well. I too considered the residential mini-splits, but as soon as you add an inverter all efficiency is gone.
Kalori makes a 12v split too. Almost went this route to keep it off the roof.

Not sure what happened to Stark, hopefully us customers will have a long trouble free experience with their batteries.
 

Forum statistics

Threads
188,030
Messages
2,901,371
Members
229,411
Latest member
IvaBru
Top