Doc's 05 Tacoma Build Thread

flyingwil

Supporting Sponsor - Sierra Expeditions
Dave-
When you come back out to PHX to pick up the Taco, if you need a place to stay you are more than welcome to use our guest room. Just let me know.
 

Dave Bennett

Adventurist
A Happy Ending...

Finally have the truck back from the dealer after my Trophy carnage in Arizona :wings:
A new carrier assy would have cost me upwards of $1,400. Toyota warranty rocks!
It was good to get it back, and it drives so quiet now with a full set of teeth... :smiley_drive:

100_0884.jpg


I now have a nice, new MADE IN JAPAN differential :shakin:

100_0883.jpg
 

Dave Bennett

Adventurist
New Opener!

A favorite new mod is this stainless Land Cruiser bottle opener I found at CruiserCrap.
Muey Bueno! :costumed-smiley-007

100_0891.jpg
 

Dave Bennett

Adventurist
Engel Hinge Lock

I got this Engel hinge lock from Sierra Expeditions and it has proved to be a great accessory. It prevents the lid from coming off the hinge unexpectedly (usually when I was in a hurry) and still allows for removal when cleaning of the interior becomes neccessary.

Here you can see the lock, just push the thumb tab for lid removal.

100_0919.jpg


Here you can see how the hinge lock prevents the hinge from sliding sideways..

100_0918.jpg
 
Last edited:

Dave Bennett

Adventurist
Mobitherm Coffee Maker by Waeco

Here is another new mod I'm working on - gotta have some Expedition Joe On The Go! :coffee:
I got this on Ebay for $25 plus shipping.

MOBITHERM Coffee-Maker de Luxe for 8 cups, 12 volts

Capacity: 8 cups (750 ml)
Voltage: 12 volts DC
Average power consumption: 200 watts
Colour: Pearl-white
Dimensions (WxHxD): 285 x 320 x 100 mm
Weight: 1.8 kg
Quality features: Attractive flat design, removable water tank, water level indicator, robust relay technology, LED indicator, cut-off after brewing
Scope of delivery: Insulated pot, fixing kit for wall or desk mounting
Test marks: e-approved according to 95/54/EC (EMC guidelines for vehicles), complies with the German Foodstuff and Consumer Goods Act (LMBG)

http://www.waeco.com/za/261.php

100_0889.jpg


I'm considering mounting it here by my Engel. There is about 3 inches of free airspace for the Engel behind the coffe maker.

100_0922.jpg


To make coffee I would need to flip up the back seat bottom, then flip down the plate and put in the coffee jug. Then just add water and my favorite coffee.

100_0923.jpg


This unit is made for RV type installation so it's slim and saves space.
After I brew up a few pots I'll post a review of the unit...
 
Last edited:

Lost Canadian

Expedition Leader
Nice work! I love the bottle opener, I just stole that idea from ya, in fact I just ordered myself a nice TEQ one. I like the old school stuff, and I think I may just have to mount it to my front bumper.:friday:
 

Dave Bennett

Adventurist
Ezy-Move by Two Zone Install

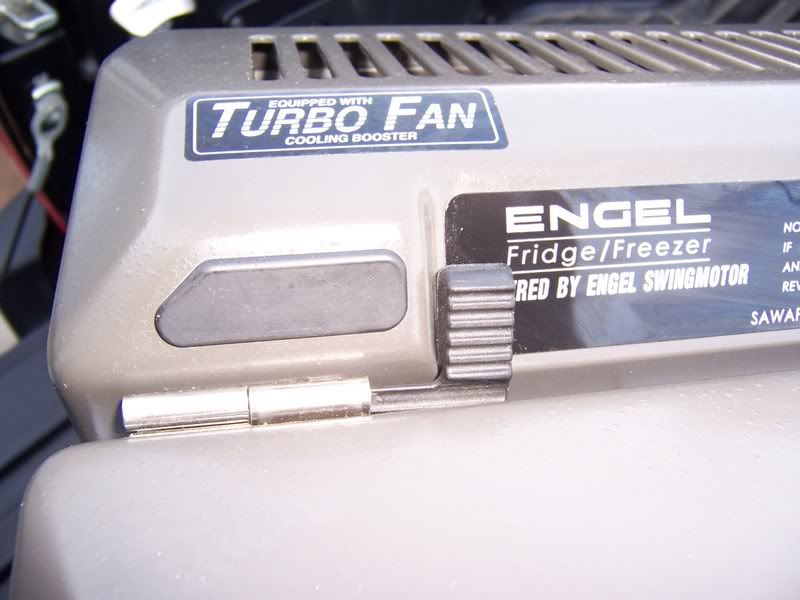
I acquired this cool Ezy-Move for my Engel MT-45, courtesy of Sierra Expeditions.
The Ezy-Move is made by Two Zone, Australia.

http://www.sierraexpeditions.com/index.htm

Total install time was 5 minutes
Tools required: 1 phillips screwdriver.
Difficulty of install on a scale of 1 to 10 (10 being way too hard), this was only a 1...

100_0895.jpg


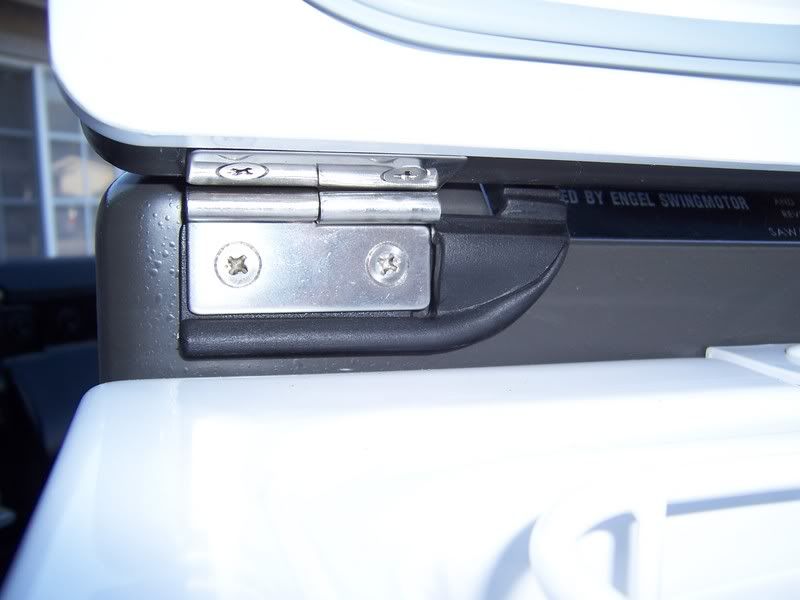
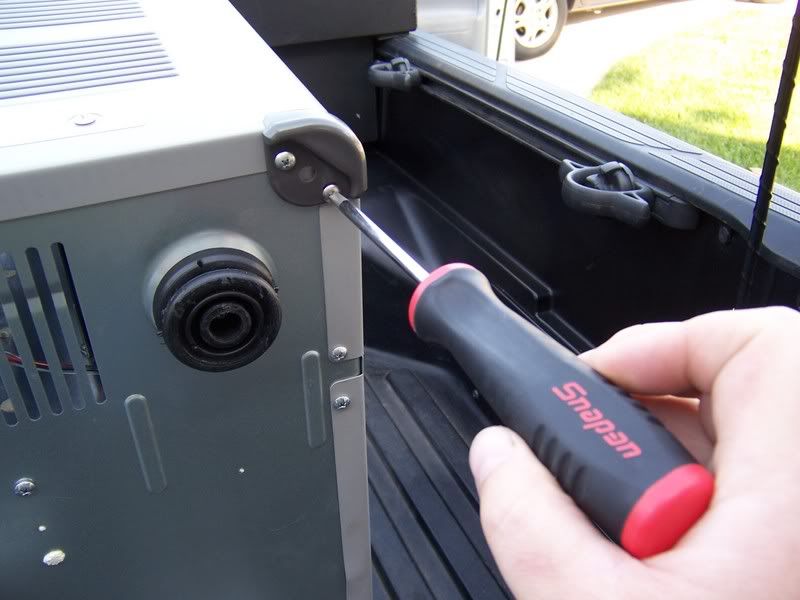
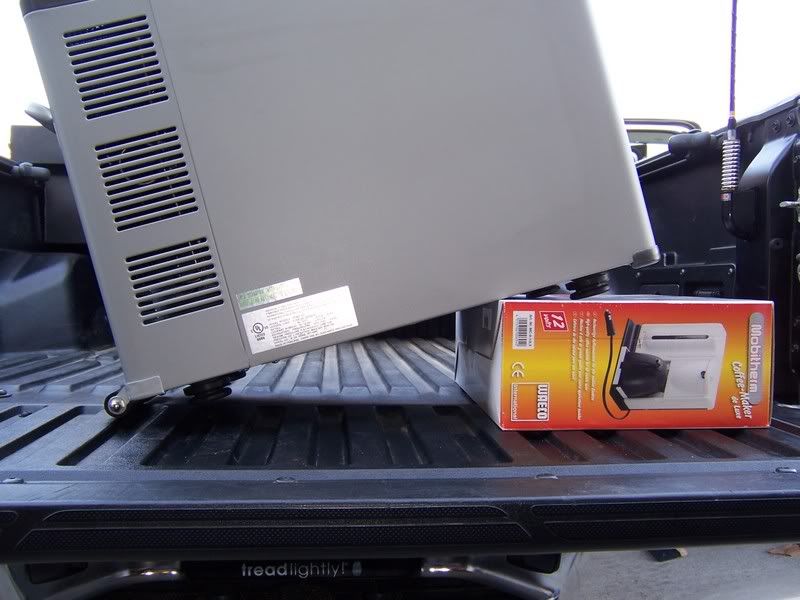
Step 1: Expose the bottom rear edge of the Engel.

100_0899.jpg


Step 2: Remove corner protectors. They are not needed once the Ezy-Move is installed so I put them away in my toolbox. The screws are used to attach the Ezy-Move later on.

100_0907.jpg


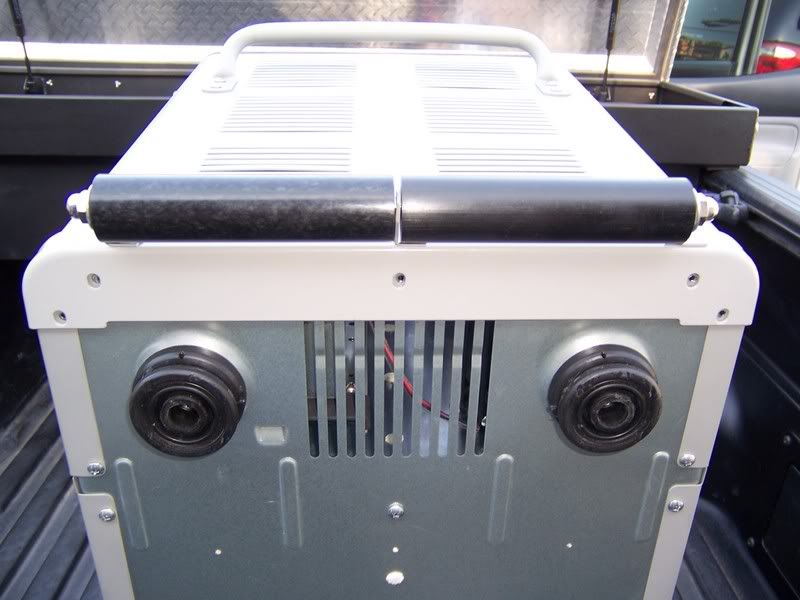
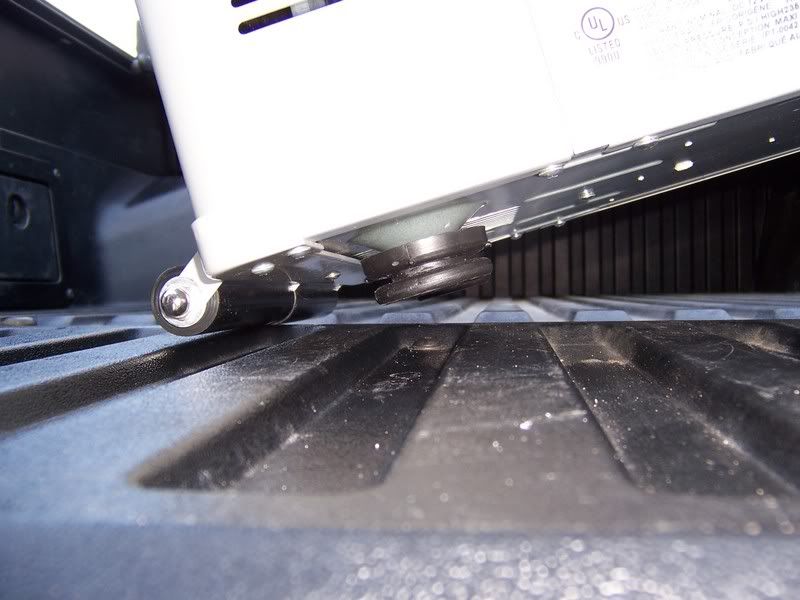
Step 3: Slip the Ezy-Move in place. It is a perfect fit.

100_0909.jpg


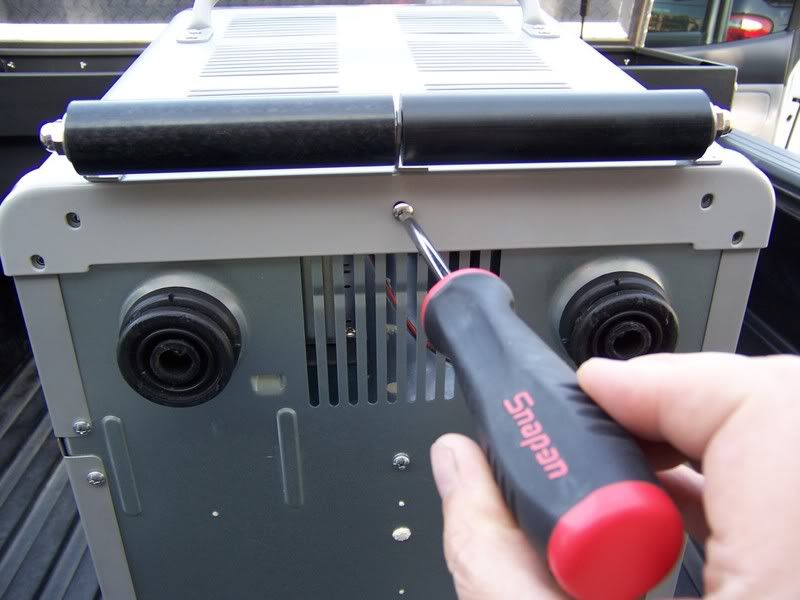
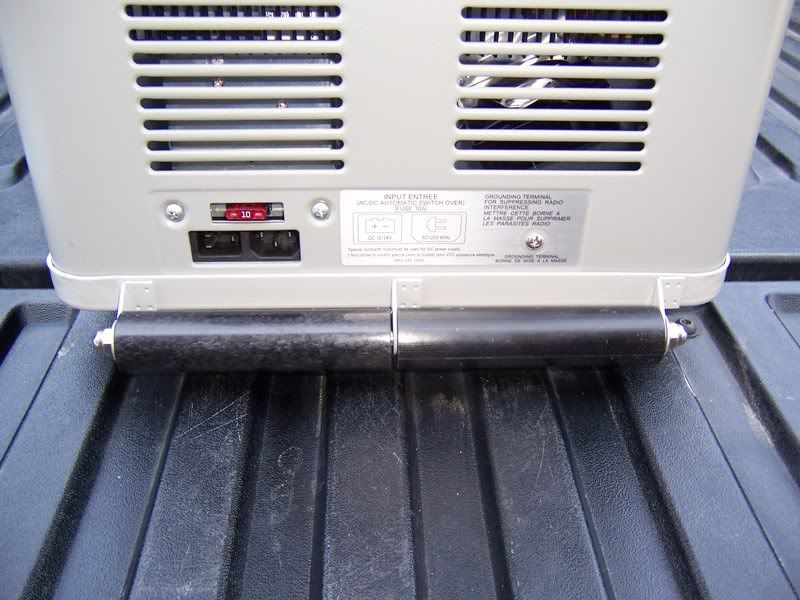
Step 4: Attach the Ezy-Move using the screws removed during Step 2. Do not overtighten!

100_0911.jpg


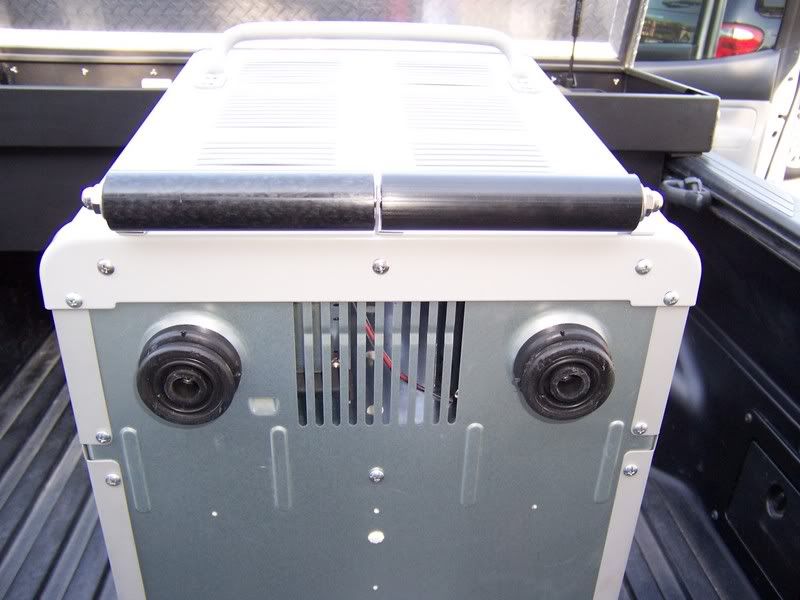
Step 5: Admire your work!

100_0912.jpg


The Ezy-Move turns your Engel into a rollable, mobile unit.

100_0916.jpg


Due to it's elongated roller design, the Ezy-Move handles most any surface with ease.

100_0915.jpg


100_0913.jpg


The Ezy-Move slides in easily now and interfaces perfectly with my Engel Transit Lock.

100_0921.jpg


My overall impression of the Ezy-Move is very positive.
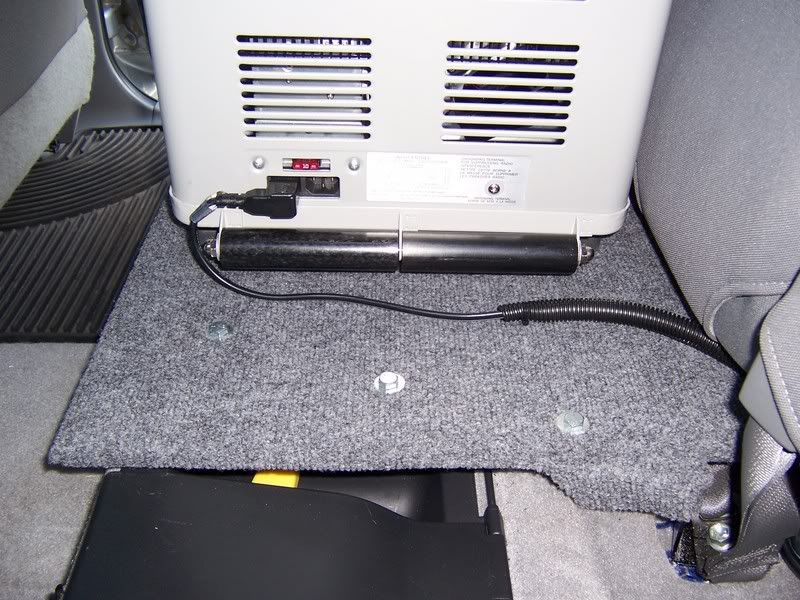
Now, when loaded down with goodies, it can be easily rolled out to the truck for loading, and rolled back in at journey's end. Adding the Ezy-Move to an Engel transforms it from a two-handle carry to a rolling fridge.
The rollers are a Delrin type material and should last for years, this is a heavy duty accessory made for Expedition use.

And, considering the fact that a fully loaded Engel MT-45 can easily exceed 100 lbs when loaded up with goodies, this accessory is a real back saver and a must have!!!
 

Mlachica

TheRAMadaINN on Instagram
wow, this is good stuff! I think my favorite is the LC bottle opener!

Glad you got your truck back in good order. Well now you know your diff isn't one of the weaker early 05 versions...Did that apply to the front diff as well?
 

Dave Bennett

Adventurist
Mlachica said:
wow, this is good stuff! I think my favorite is the LC bottle opener!

Glad you got your truck back in good order. Well now you know your diff isn't one of the weaker early 05 versions...Did that apply to the front diff as well?

No one has had a problem with the front diff that I know of. And it passed the test since it pulled me out to the pavement all by itself in 4HI after the carnage... clunk clunk clunkety clunk :Wow1:
 

Willman

Active member
Whens the dishwasher, can-opener, and oven coming?????

:Wow1:

Love the truck and keep the awesome mods coming!!!

:elkgrin:
 

Dave Bennett

Adventurist
05 Tacoma Swaybar Removal

I removed my swaybar for increased IFS articulation off road. I have noticed a tiny, tiny increase in body roll on road, no problem if you just slow down. Off road it has gained a noticeable travel = better traction.
I also lost about 50lbs up front by losing the bar.

Tools Required: WD-40, Metric wrenches, Allen wrench set, Vise-Grips, rubber hammer, jack, and jackstands. Also, a 10mm socket and ratchet are used to remove the skidplate once you're ready to lower the swaybar out.

Difficulty: 3 on a scale of 1 to 10. This requires some muscle (or air if you have it) and about 30 minutes.

Step 1: Loosen lug nuts, jack up truck, place jackstands and lower vehicle onto jackstands for safety. Remove front wheels.

Step 2: Spray bolts liberally with WD-40. Place wrenches as you see here (for leverage) and place allen wrench, using the vise-grips to keep the allen wrench from spinning.

100_0805.jpg


Step 3: Hold the allen wrench still, turn the wrench and remove the nut completely.

100_0806.jpg


Step 4: ********** the exposed bolt out using a rubber hammer.

100_0807.jpg


Step 5: Remove the 4 bushing bolts (not shown), remove the four 10mm skidplate bolts and the skidplate, then work the disconnected swaybar out. Be careful not to rip a CV boot with the ends of the bar as you work it out.

Step 6: Reassemble and enjoy increased IFS articulation! :smiley_drive:
 
Last edited:

blupaddler

Conspirator
DUDE YOU'RE ON FIRE!!!


:jump: :jump: :jump:


Hurry up, I can't wait too long for the review of the coffee maker. (insert coffee deprived & shaking smilie here)


BTW...Congrats!
When are we doing a San O expedition weekend?
 

Forum statistics

Threads
188,570
Messages
2,907,016
Members
230,666
Latest member
Cvonruex
Top