Doc's 05 Tacoma Build Thread

heeltoe989

Explorer
A very cool truck and trailer.

I love the terrain down there! Got to get my butt down there. I'm hoping to do a little bit a wheeling while I'm there for Baja.
 
Last edited:

Dave Bennett

Adventurist
Safari Snorkel Install Part 1

slogo_anim_250.gif


100_3282.jpg


Safari Snorkel SS135HFD

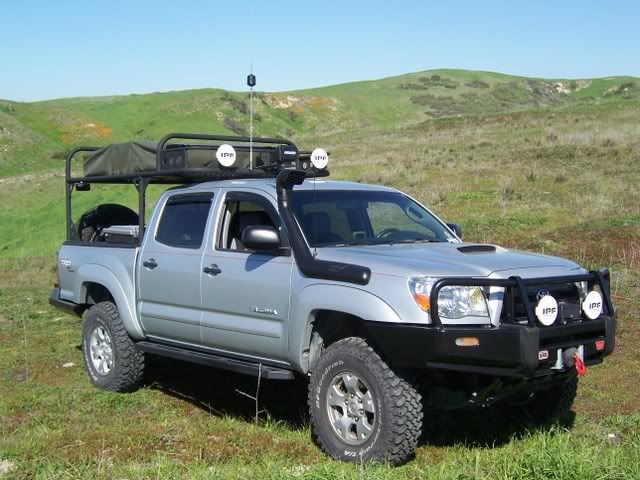
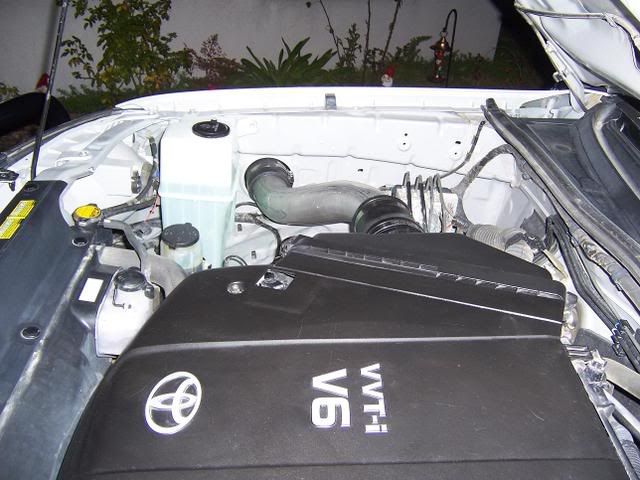
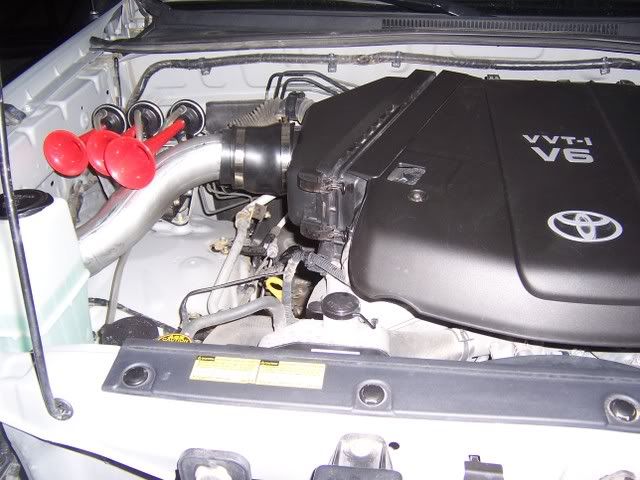
Modified for 2005+ Toyota Tacoma 1GRFE 4.0 Liter-V6


DETAILED PARTS LIST​

ITEM - DESCRIPTION - QTY - PART NO.
1 BODY-SNORKEL - 1 - 315-133-500
2 1/2" AIR RAM ASSEMBLY - 1 - 000-135-650
3 BRACKET-UPPER MOUNTING - 1 - 315-032-500
4 BOLT-HEX 6mm x 1.0mm x 14mm - 3 - 000-002-100
5 SCREW - S/T 4.2mm x 13mm - 3 - 000-951
6 BODY CLIP - PLASTIC - 3 - 000-960
7 HOSE-AIR ENTRY - 1 - 315-024-500
8 STUD - S/S 8mm x 1.25mm x 25mm O/L - 1 - 000-110
9 WASHER-BODY 8mm x 30mm - 5 - 000-311
10 NUT-NYLOC 8mm x 1.25mm - 5 - 000-205
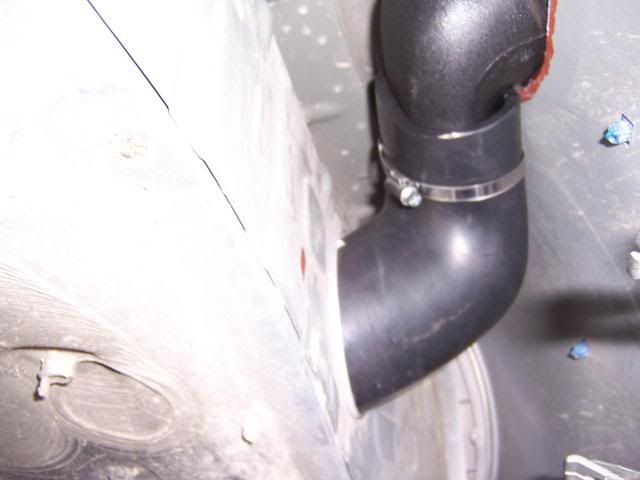
11 CLAMP-HOSE 70/90mm - 2 - 000-908
12 TEMPLATE - 1 - 315-017-500
13 HOSE CLAMP-SIZE 56 (BLACK) - 1 - 000-914/B
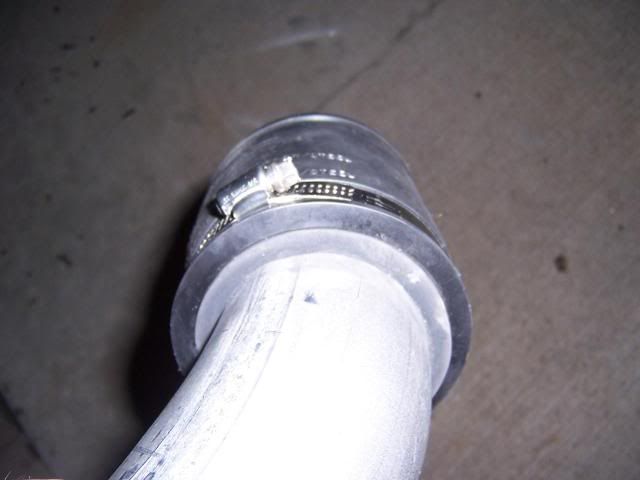
14 JOINER - STEEL - 70mm O.D x 40 - 1 - 315-025-400
15 POP RIVET - 5.0mm x 12mm - 3 - 000-958-300
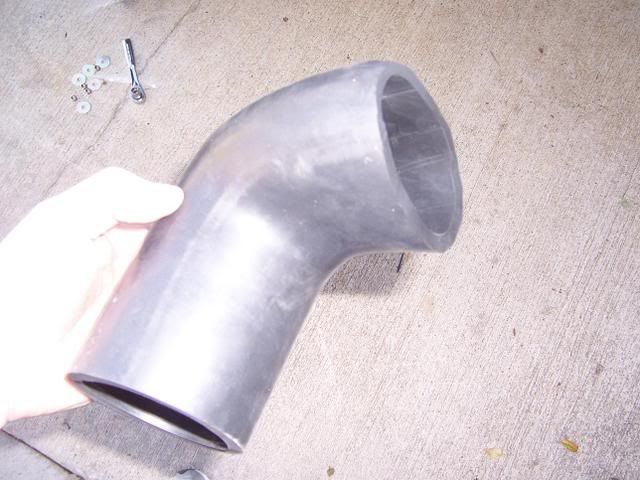
16 HOSE - RUBBER - 70mm ID x 25mm - 1 - 000-804-100
17 SLEEVE - AIR INLET (SS) - 1 - 315-025-500


PARTS NOT INCLUDED IN THE SS135HFD KIT:
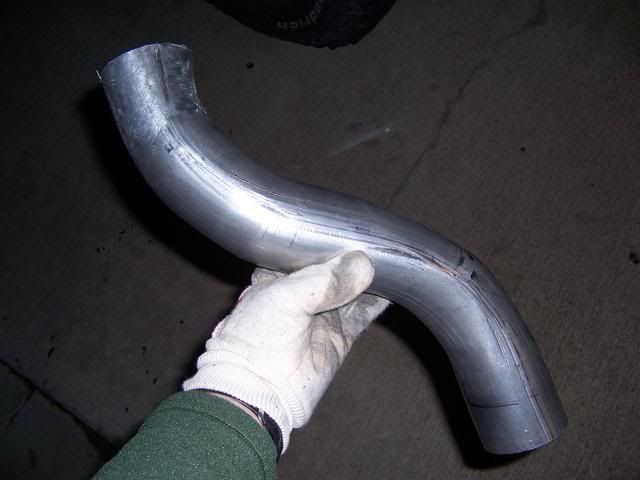
3 foot section of 3 inch Exhaust Pipe (1)
3x3 inch Heavy Duty Rubber Plumbing connector (1)
3 inch hose clamps (2)
4 inch hose clamp (1)
Black Silicone Sealant (RTV)
Silicone spray lubricant
Primer
Touch up paint

NOTE: These parts are all available at your hardware store or auto shop.

Fitment To: Passenger Side Fender / A-Pillar
Fitting Time: 8 Hours (Depending on Skill Level)
Special Tools:
• 92mm hole saw
• 3/8 Drill with assorted drill bits
• Hack saw/air hack saw
• Round file
• Tube bender

Prior to commencing the installation, it is the Installer's responsibility to verify that all components and particularly the template placement (Item 14) are correct!

Ensure you have all parts and tools accounted for before you begin work!


STEP 1
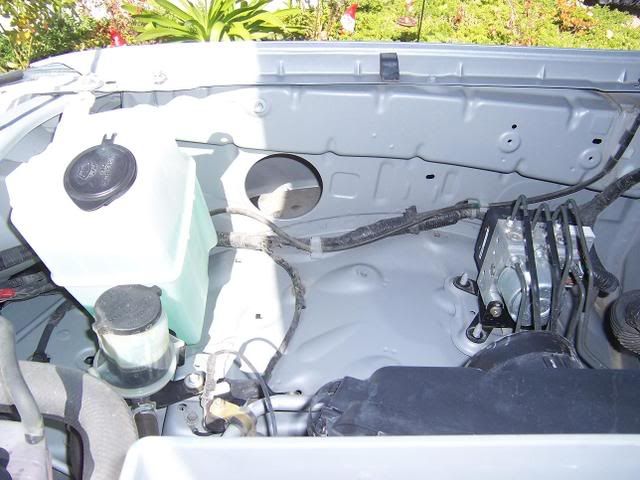
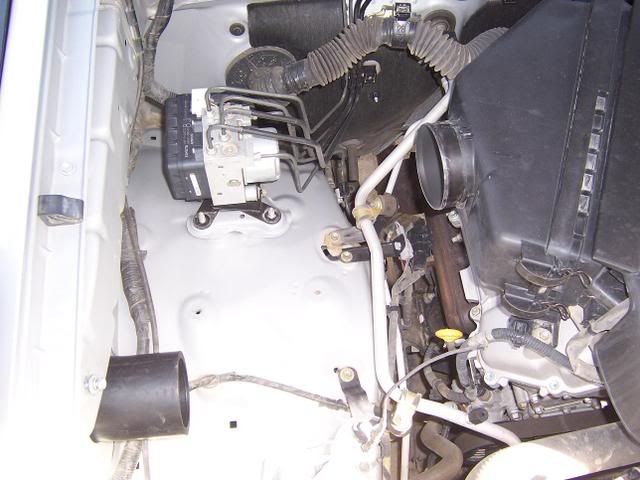
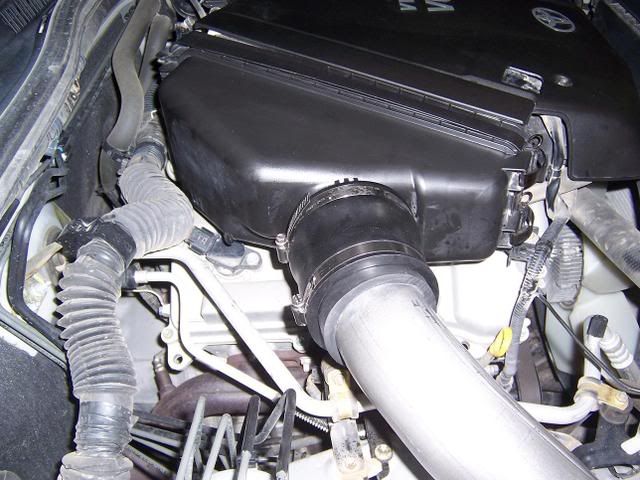
Open hood. Remove the OEM air intake duct from inner fender/engine intake using a screwdriver and 10mm socket/ratchet. Leave intake air filter in place.

stepone.jpg


STEP 2
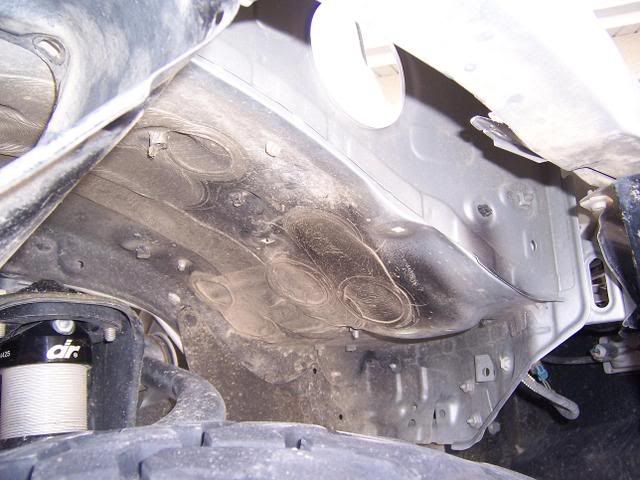
Remove the RHS inner fender liner and the engine air intake duct from engine bay in accordance with the factory service manual.

There are 6 plastic inserts and 2 10mm screws retaining the fender well liner to the inner fender well and fender flare.

From the inside of the engine compartment, remove the plastic inserts carefully using a flat tip screwdriver, popping them out toward the tire. Using a 10mm socket, remove the screws from the edge of the flare and remove the last 2 plastic clips hidden under them.

Fold the liner back out of your way as shown (this will all be re-installed in reverse order later).

steptwo.jpg


STEP 3
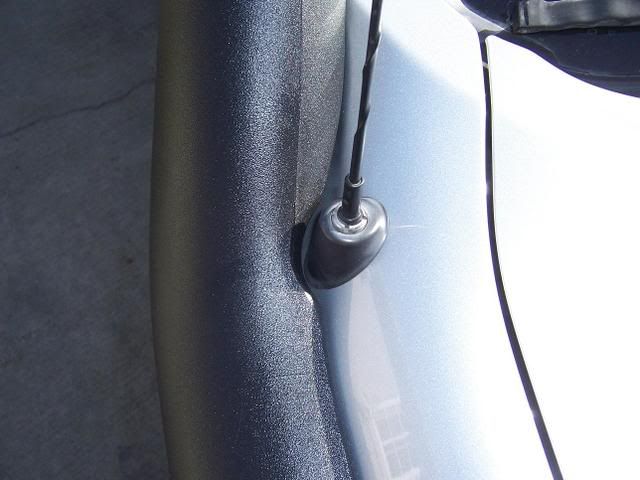
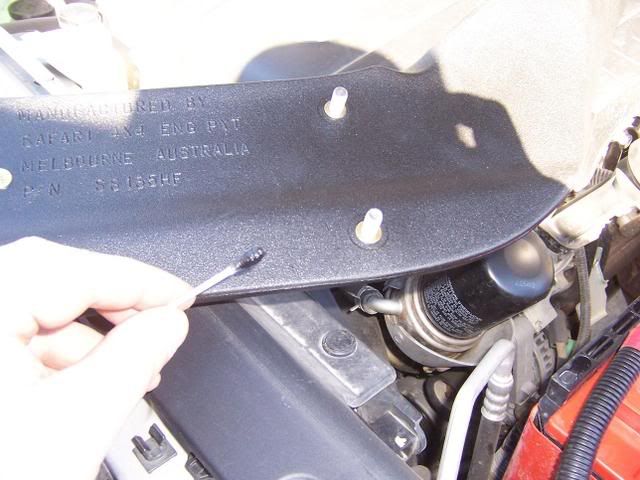
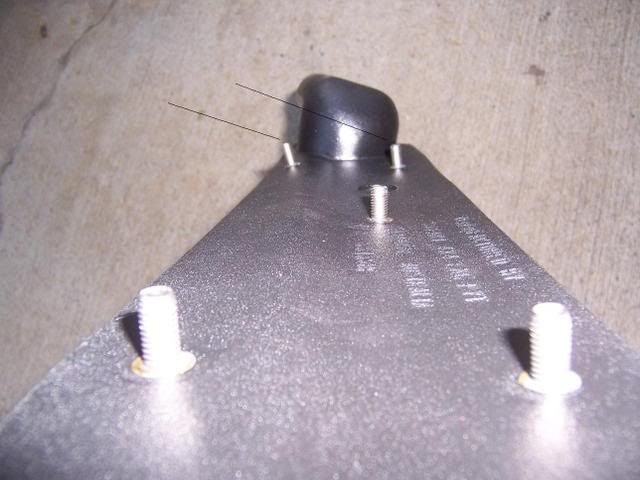
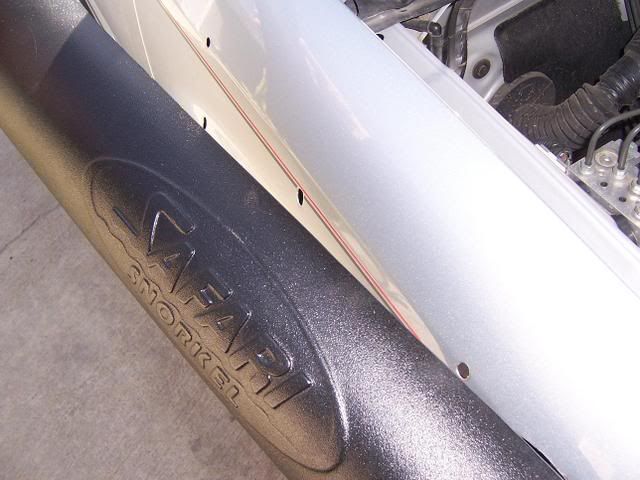
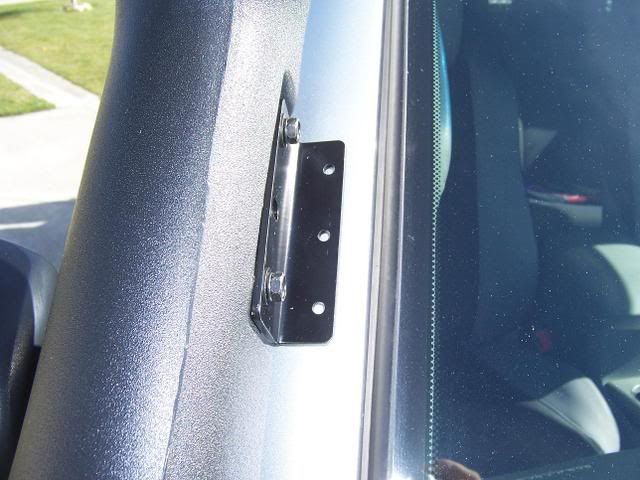
Hold the snorkel up to the fender where you want the snorkel to mount, paying special attention to the indentation in the snorkel for the antenna.

antennafitment.jpg


Attach the studs and then mark them with paint.

CAREFULLY (have a buddy help out if possible) hold the snorkel back up where you just had it and lightly touch the painted studs to the sheet metal.

Pay close attention to the antenna indentation mentioned earlier as well as the rake of the snorkel at the windshield and the level appearance of the snorkel on the fender.

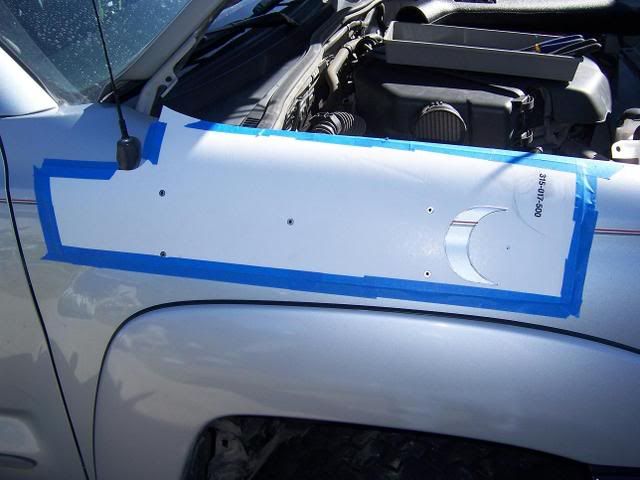
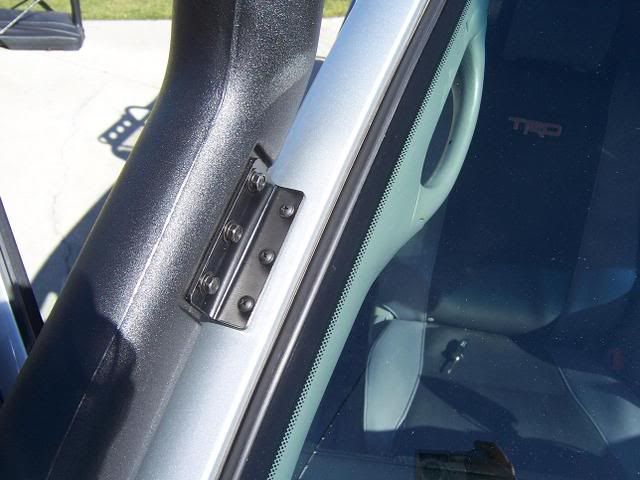
Using the stud marks you have chosen, align your template and firmly tape it on.

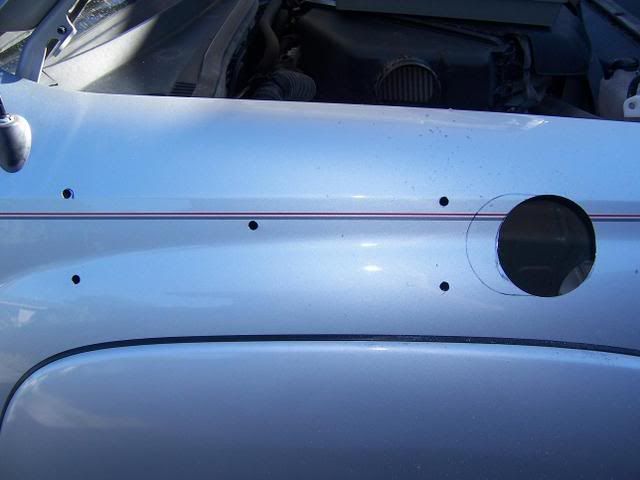
Mark all holes and cut-outs with a black marker.

This will mark the location for attaching the template to drill the 5 holes and the use of the 92mm hole saw.

NOTE: This is all necessary as this template is cut out to fit the contours of a HILUX fender and not a TACOMA (see picture for detail).
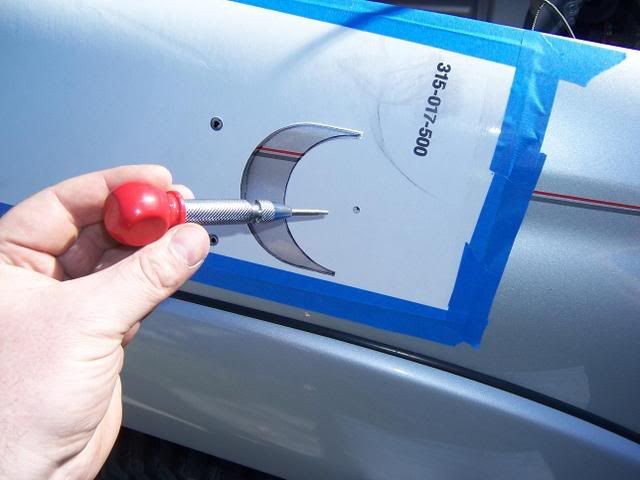
studmarking.jpg


templateplacement.jpg


STEP 4
Using a spring loaded punch, mark the exact location for drilling your 6 pilot holes.

pilotholemarking.jpg


STEP 5
Using a small drill bit, drill pilot holes.

Drill the 5 snorkel mounting stud hole positions to 16mm.

Using the 92mm holesaw, drill the main hole.

Enlarge the main hole with hacksaw as per template cut away section.

Test fit snorkel to fender.

Use round file to adjust any mounting stud holes that are not true for smooth fit (this is not a cause for alarm as studs may protrude slightly irregularly).

De-burr and paint all holes. Allow sufficient drying time.

crookedstuds.jpg


allholesdrilled.jpg
 
Last edited:

Dave Bennett

Adventurist
Safari Snorkel Install Part 2

STEP 6
Test fit and trim down the Hose – Air Entry.

It is beneficial to fit this air entry hose to the entire snorkel body assembly and then do a test fit before final install of the snorkel body to the fender.

Pay close attention to the tight fit inside the fender and take your time.

I trimmed about 5 inches+ off mine (an inch at a time!) where it mounts to the snorkel inside the fender. Trim the oval end, DO NOT trim round end!

This is necessary as it is a tight turn inside the fender for the air entry hose to fit through the inner fender well air intake opening.

Once you are satisfied with fit and length, move on to next step.

NOTE: Save a 2 inch wide piece of the air entry hose for use later on the intake.

snouttrimming.jpg


rubbersnout.jpg


STEP 7
Carefully mount snorkel to fender using supplied washers and locking nuts.

Start at the front nut and tighten evenly as you go, using a cross pattern.

Install air entry hose on snorkel inside fender and tighten hose clamp for water tight fit.

Re-install inner fender liner, replacing all plastic inserts and the 2 10mm screws at the fender flares.

finalsnorkelmounting.jpg


completedinnerfenderview.jpg


STEP 8
Mount upper bracket to snorkel body using supplied 10mm bolts.

Using bracket as a template, carefully mark 3 screw locations on A-pillar with black marker.

Punch, drill pilot holes and finally drill these out to 8mm.

De-burr and paint. Allow sufficient drying time.

Insert plastic body inserts.

Install all 3 10mm bolts and all 3 screws at A-pillar. DO NOT OVERTIGHTEN!

A-pillar1.jpg


finalA-pillar.jpg


STEP 9
Measure the distance from the rubber snout to the opening on the air filter assembly.

Using a tube bender, carefully bend the 3 inch pipe (Intake Connector) and cut to desired length as shown below.

DO NOT cut the pipe too short, it must insert fully at both ends!

enginebayminusintakeconnector.jpg


intakeconnector.jpg
 

Dave Bennett

Adventurist
Safari Snorkel Install Part 3

STEP 10
Remove the air cleaner housing and inspect. There are 2 small holes, waterproof these holes by applying the black silicone sealant (RTV). Replace the housing.

Using the 2 inch piece left over from the air entry hose (Step 6), slide this over the end of the Intake Connector and then apply the 3x3 heavy duty rubber plumbing connector over this as shown.

Using the bare metal and of the Intake Connector, lubricate with silicone spray and insert it into the rubber snout at the fender.

Rotate the Intake Connector to the desired angle and, lubricating with silicone spray, insert the rubber connection at the air cleaner housing.

Ensure that angles are good for airflow and then install and tighten the remaining hose clamps (this assembly requires 4 total including the one hidden inside the fender).

NOTE: It is YOUR responsibility to ensure a watertight seal at the 4 clamps – these are the ONLY possible source of leaks so if done right you have no worries!

enginesideofintakeconnector-1.jpg


aircleanercompleted-1.jpg


fenderconnectioncompleted-1.jpg


completedintake-1.jpg


STEP 11
Position the air inlet sleeve (Item No.17, looks like a large washer) onto the snorkel body and secure into position using black silicone (RTV).

The air inlet sleeve functions as a diverter for any ingested water (see pic).

Install air ram assembly and fasten with the black hose clamp provided.

clip_image002.jpg
 
Last edited:

maxama10

Welcome to Nevadafornia
I've seen the finished product and it looks awsome! But.... you have to put it at the end of the write up too! :elkgrin:


You should make a thread over on TN for this.

-Max
 

Willman

Active member
Very detailed Dave!

Congrates on a job well done!

I'm sure guys on TTORA are going to have a hay day with this......Get ready for lots of PM's!!!!!

:bowdown:
 

cell4soul

Adventurer
It was really great to meet you and your family Dave. Hopefully we can all get together for a trip soon when my girlfriend can make it is well.

I've seen Dave's Snorkel first hand, and let me just say he did an amazing job. The write up was about the most detailed I've seen and it shows in the finished product, top notch work. His truck is really second to none, but anyone who has seen it knows that.
 

heeltoe989

Explorer
cell4soul said:
It was really great to meet you and your family Dave. Hopefully we can all get together for a trip soon when my girlfriend can make it is well.

I've seen Dave's Snorkel first hand, and let me just say he did an amazing job. The write up was about the most detailed I've seen and it shows in the finished product, top notch work. His truck is really second to none, but anyone who has seen it knows that.

ABSOLUTELY.

I can hardly wait to see it in person.
 

Dave Bennett

Adventurist
2005 Tacoma Automatic Transmission

My 4WD Tacoma has the 5 speed automatic transmission, the A750F made by Aisin-Warner and the VF2A transfer case.

(Effective Ratios)

- 1st Gear 3.520 (14.43)
- 2nd Gear 2.042 (8.372)
- 3rd Gear 1.40 (5.74)
- 4th Gear 1.00 (4.1)
- 5th Gear 0.716 (2.936)
- Reverse Gear 3.244 (13.3)

Diff Ratio 4.1

Time to do some math for my re-gearing project!

Axle Gearing: How to choose the ratio.

Survey says: I need 4.88 gears to compensate for all the gear and taller tires!
 
Last edited:

heeltoe989

Explorer
TACODOC said:
My 4WD Tacoma has the 5 speed automatic transmission, the A750F made by Aisin-Warner and the VF2A transfer case.

(Effective Ratios)

- 1st Gear 3.520 (14.43)
- 2nd Gear 2.042 (8.372)
- 3rd Gear 1.40 (5.74)
- 4th Gear 1.00 (4.1)
- 5th Gear 0.716 (2.936)
- Reverse Gear 3.244 (13.3)

Diff Ratio 4.1

Time to do some math for my re-gearing project!

Axle Gearing: How to choose the ratio.

Survey says: I need 4.88 gears to compensate for all the gear and taller tires!

what were the other numbers you used for your Calcs?
 
TACODOC said:
My 4WD Tacoma has the 5 speed automatic transmission, the A750F made by Aisin-Warner and the VF2A transfer case.

(Effective Ratios)

- 1st Gear 3.520 (14.43)
- 2nd Gear 2.042 (8.372)
- 3rd Gear 1.40 (5.74)
- 4th Gear 1.00 (4.1)
- 5th Gear 0.716 (2.936)
- Reverse Gear 3.244 (13.3)

Diff Ratio 4.1

Time to do some math for my re-gearing project!

Axle Gearing: How to choose the ratio.

Survey says: I need 4.88 gears to compensate for all the gear and taller tires!

It is starting to look like I am going to have to do this soon. Thanks for the info. I will deffintly pay attention to this part of your build.
 

heeltoe989

Explorer
TACODOC said:
Axle Gearing: How to choose the ratio.

My truck: peak torque= 4,000 rpm, tire diameter=33.5, overdrive=.716, desired cruising speed=80 and I prefer economy over power.

(4000x0.75)x 33.5x1.284
_____________________

80x336


= 4.88 :D


thank-you.

I've been looking at 4.56 gears for a while but haven't taken the plunge due the I have to change out the front locker if I want a gear change. 4.56 seems to be the only ones out there right now. Unless you know something else? :)
 

Forum statistics

Threads
188,529
Messages
2,906,285
Members
230,547
Latest member
FiscAnd
Top