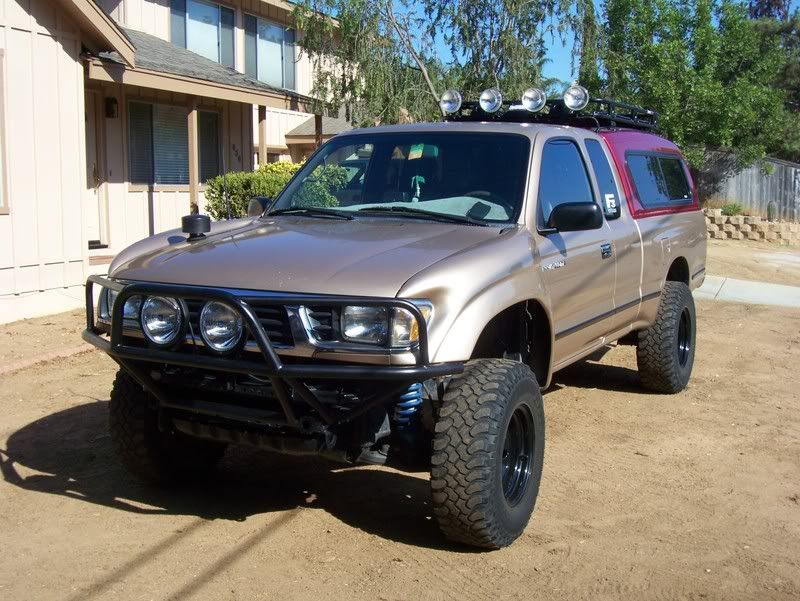
Fbksurferjoe's 2 tone expo-taco

fbksurferjoe

Adventurer
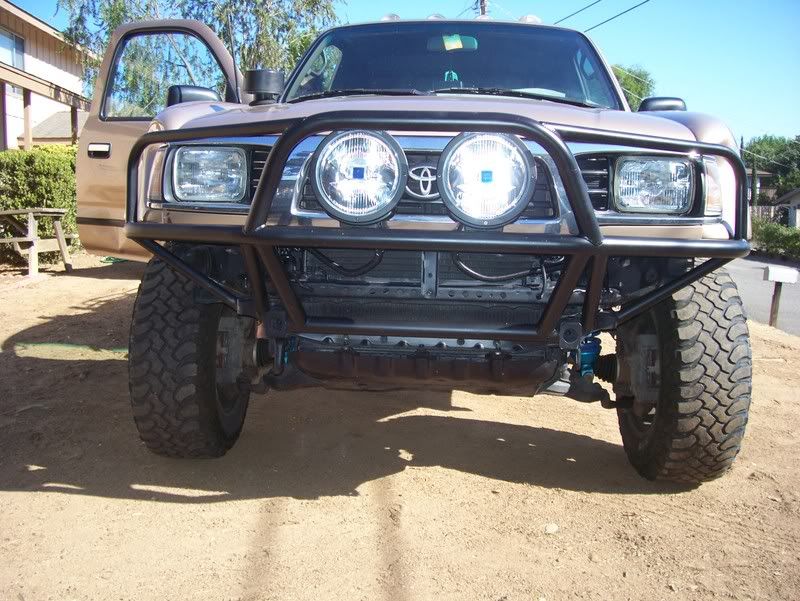
Got my bumper!! So after close to 6 months of searching I finally decided and had my bumper installed. Apparently I had a friend who had a brother that did fab work and I didnt even know it. So I took about 10 designs to him and we narrowed it down to the one that he built for me. Ill post some pictures in the morning along with the snorkel mod that I never put pictures up for either.
 

fbksurferjoe

Adventurer
Here are the pictures as promised I apologize for the wait as im sure everyone was anxiously awaiting these.....:). The first couple of pictures are of the bumper as you can see it looks very similar to a few members on this site... *cough* oldsven *cough*.

IMG_1068.jpg


IMG_1069.jpg


IMG_1070.jpg


IMG_1071.jpg

These pictures are of the low budget snorkel that I built. A few reason I will throw out there as to why I went with this over the others I needed a snorkel to begin with to re route my intake due to the fact that I no longer have an inner wheel well. The dirt was coming right off my tire and going directly into the intake. Im not an expert but I think that was bad. The snorkel that I made i cannot take credit for, it is a design that I got from Shannon, a member on the ttora site. Parts list was all abs plastic products and were as follows; 4 inch cap, 4 inch to 2 inch reducer, 2x 2 inch to 2inch thread adapter male and female, 3x 90 degree 2 inch bends, 3 inch to 2 inch rubber reducer and about 4 feet of 2 inch abs plastic pipe. I started the process by removing all the extra plastic all the way up to the intake that is underneath the fender. It was suprising how cheap that 3 feet of factory intake tube was, I was happy to be removing it from the system. Of course when i took it off about a half pound of sand fell out of the tube onto the driveway :(. I started by attaching the 3 inch to 2 inch rubber reducer onto the factory airbox I tightened the hose clamp and tested the seal it felt good.

IMG_1077.jpg


I then cut a 6 inch or so piece of 2 inch tube and attached it to the 2 inch side of the reducer followed by a 90 degree bend on the other end of it. I cut another 1 foot tube and attached it to another 90 degree so that it was now facing the firewall portion of the fender I marked it and cut a hole, cut another 6 inch or so long piece and ran it through the hole.

IMG_1078.jpg


I attached another 90 degree piece which faced the system toward the hood. Suprisingly it lined up in a perfect location to drill through which relieved some stress of mine. The hardest part was next which involved me drilling through the hood. I marked, double triple and quadroople checked everything and then took a 3 inch hole saw and put a nice hole in the hood.

IMG_1075.jpg


IMG_1072.jpg


I cut another foot long piece of tube and attached the threaded adapter to the end of it i ran it through the hood and threaded it in. Cut and adjusted the tube to the height that i liked and put on the cap which consisted of the 4 inch to 2 inch reducer with the cap on top of it. The reducer has 7 openings that require you to take a dremel to and make them actual openings for the air to draw in. After making sure everything was where it needed to be i took it all apart and sealed it using sensor safe silicone. I sealed everything up a few hours later and fired up the truck. It ran perfect i held my hands around the cap and sure enough i felt vacuum. I ran my truck around town on the freeway and did some drag tests up the street. I felt no loss in performance or mpg. Let me know what everyone thinks
 

KG6BWS

Explorer
just happened on this thread. truck looks good. one thing i thought id mention is that you really need to put limit straps on your air bags. i got about a year out of mine before they tore from overextension. another problem to watch out for is bending where the frame sits on the bag. my frame bent a little right there. i only noticed it when i was removing the torn bags but it potentially could have been worse.
 

fbksurferjoe

Adventurer
Thanks for the info, I was considering puting the straps on the rear end when I first put the airbags on but talking to a few people I decided against it for no other reason then it just didnt seem necessary. I dont really do any hi speed runs offroading and the several trips that I have used them on thus far have had no problems flexing and stretching. I have a lifetime warranty on the bags so im not to worried about it.
 

KG6BWS

Explorer
fbksurferjoe said:
Thanks for the info, I was considering puting the straps on the rear end when I first put the airbags on but talking to a few people I decided against it for no other reason then it just didnt seem necessary. I dont really do any hi speed runs offroading and the several trips that I have used them on thus far have had no problems flexing and stretching. I have a lifetime warranty on the bags so im not to worried about it.

yeah mine failed from stretching too much. i got about a year ro so out of em though. if you start noticing that theyre losing air and the fittings are all tight check right where the flange and the bag tie together. thats where mine tore but you couldnt see it unless they were fully inflated. needed enough air to stretch the bag out a little.
 

fbksurferjoe

Adventurer
Ill have to keep a close watch on them. I need to re valve my fox shocks and get the seals re done so hopefully that should keep them from ripping as well.
 

KG6BWS

Explorer
fbksurferjoe said:
Ill have to keep a close watch on them. I need to re valve my fox shocks and get the seals re done so hopefully that should keep them from ripping as well.

that would definately help. my shocks were POS autozone specials.
 

fbksurferjoe

Adventurer
A few new projects in the works. The first is getting rid of the surco rack and replacing it with the new defender rack that showed up at my doorstep. The second is converting the 4 piaa lights to HID with the conversion kits that also just showed up. Third is installing the new hella rallye 4000 euro's and converting them over to HID as well. 6 HID's should be fantastic, and with 6 im still pulling less power than 4 halogens, figure that one out. The last and final upgrade will be the 2 corbeau seats that I was given to by a friend. So with all that said I better get to work, ill have pictures in a few wish me luck.
 

fbksurferjoe

Adventurer
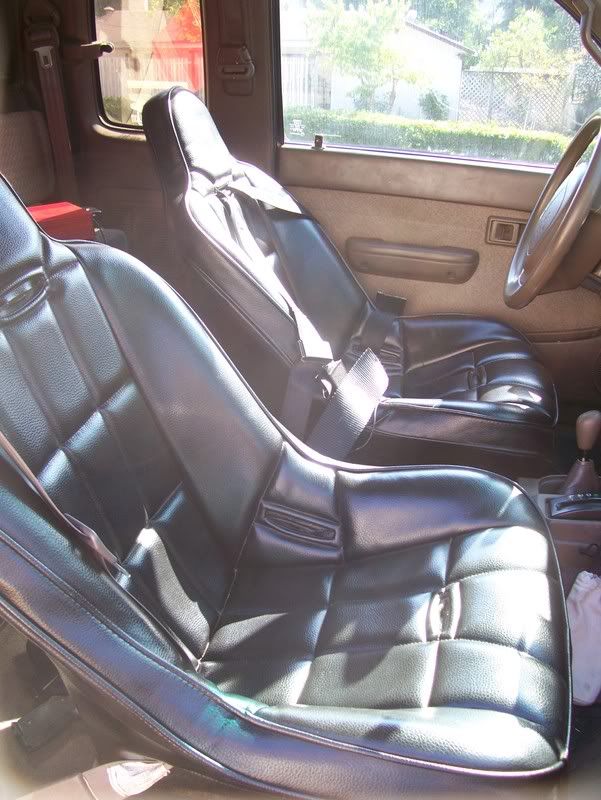
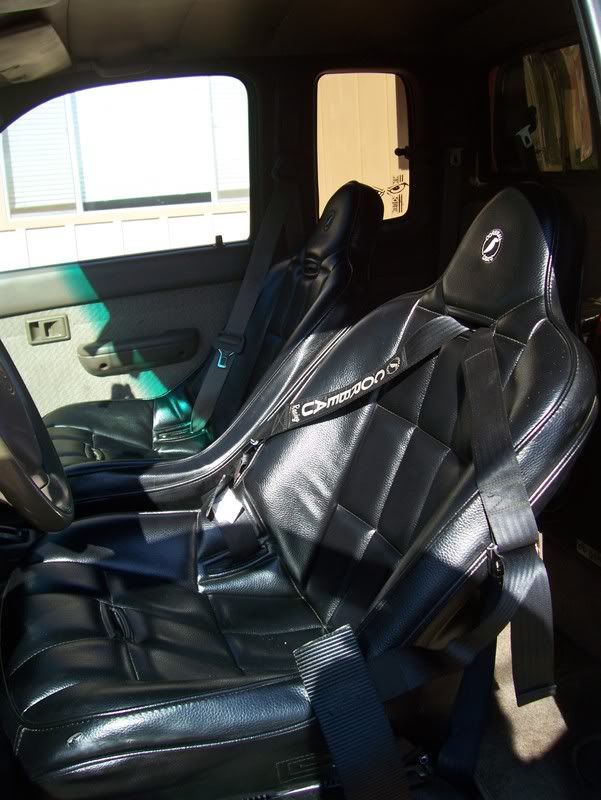
Spent the entire weekend working on the truck and am very happy with the results. I bought 3 HID conversion kits online and converted all 4 of my piaa's and my 2 new hella rallye 4000's. I mounted the new defender roof rack which is amazing compared to the surco safari rack that i used to have. Lastly I installed the corbeau seats and drove around town, they are amazing you feel as though you are being hugged the entire time you drive. Bumps and turns can be taken faster than before because you dont have to hold on with my other arm to keep me from moving. Anyway here are some pictures of the finished product, enjoy.

101_2044.jpg


101_2055.jpg


101_2045.jpg


101_2054.jpg


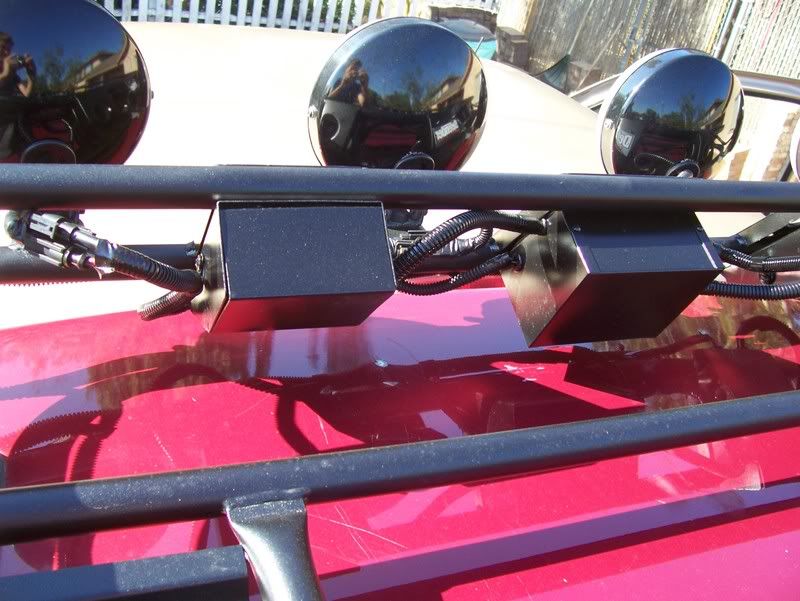
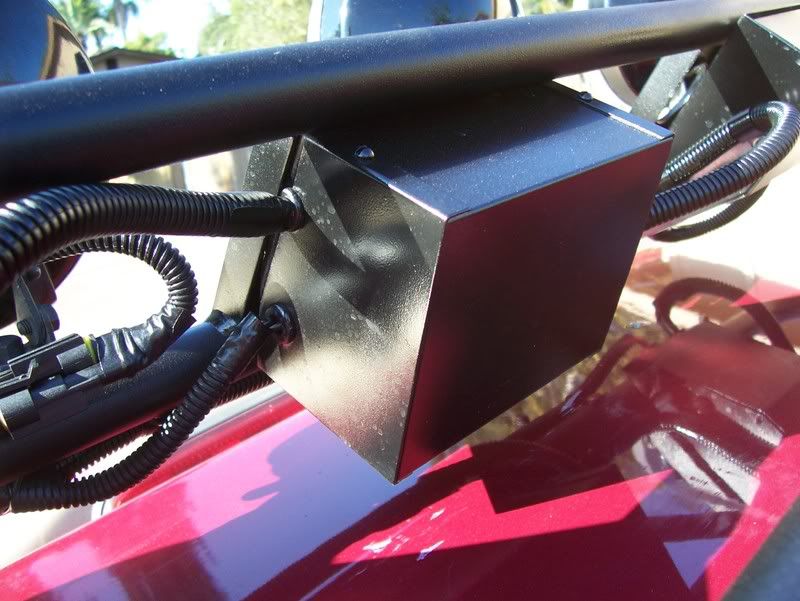
This picture is of the boxes that i used to put the ballasts into. Found them at fry's electronics for a couple bucks. They are made of aluminum and I believe are used for computer electronics. Had to drill a couple holes in them and stick in some gromets, turned out better than i thought.
101_2051.jpg


101_2052.jpg
 

fbksurferjoe

Adventurer
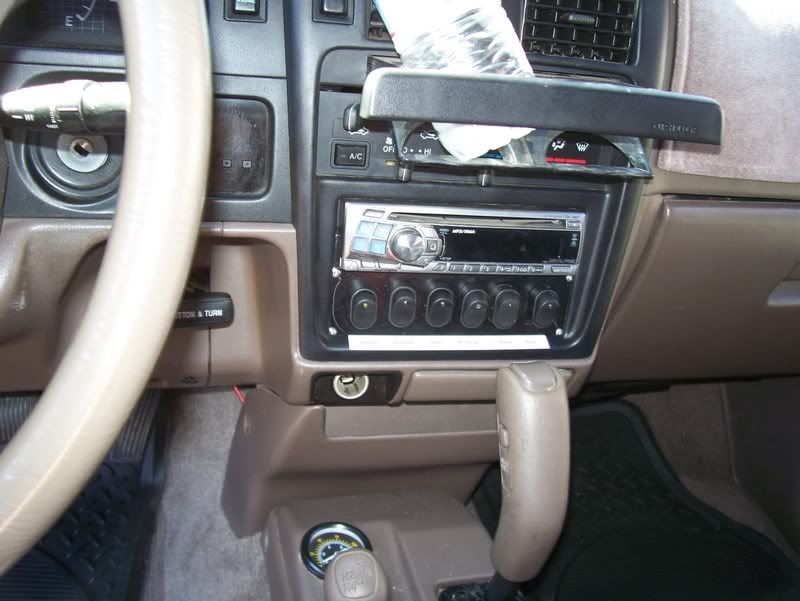
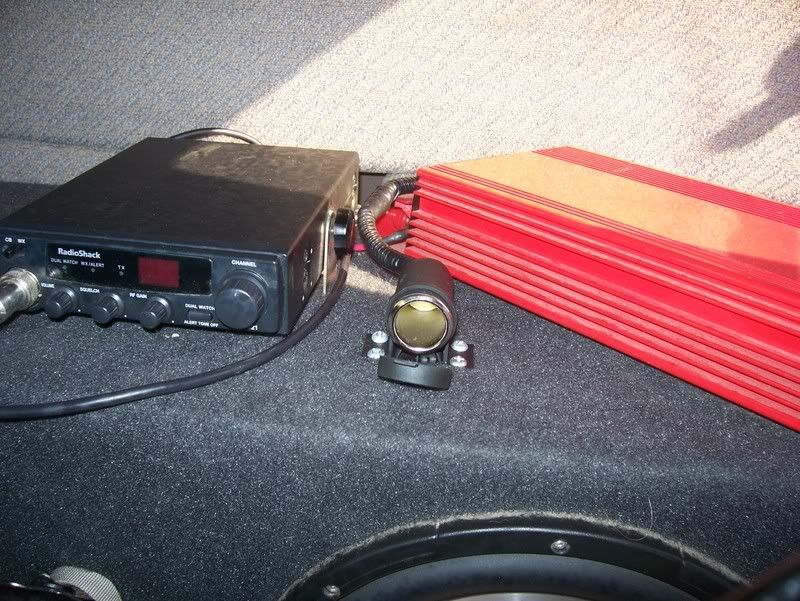
Just some more pictures of misc things I added. 1 shows the new switch panel with now 6 led switches ( I highly recommend not putting that many switches in line of site. I had no idea that those leds were as bright as they were. With 5 of them on its as if I have a cab light on, I may need to figure out a solution for this problem. The other picture shows the new 12v auxillary power that i installed, my factory one broke a while back so this should be a good replacement
101_2057.jpg


101_2058.jpg
 

fbksurferjoe

Adventurer
Ill take some action shots this evening to show how bright these lights really are. 1 of the piaa HID's that i converted are as bright as all 4 of the piaa's combined when they were halogen, the best part is I am only pulling 35w per light compared to 55w when they were halogen, doesnt make sense that they are as bright as they are but pull less wattage. The 6 lights I am running only pull approximately 210 watts total where as with 4 of the piaa halogens I was pulling 220 watts. Thats 17.52 amps vs. 18.4 amps with halogen. :)
 

fbksurferjoe

Adventurer
As promised
Ignore the random girl trying to scam on my truck.

7.jpg


8.jpg


12.jpg

Look at how damn bright these things are if anyone has a solution other than covering them up with tape let me know.
11.jpg
 

Forum statistics

Threads
188,220
Messages
2,903,972
Members
229,805
Latest member
Chonker LMTV
Top