rayra
Expedition Leader
INDEX for the topic -
Roster of GMT800 folks in ExPo - https://www.expeditionportal.com/fo...pickup-suburban-yukon-etc.155266/post-2302987
EGR Oil Ingestion, Remediation - page1
Heater Core connection Ts - page1
KNock Sensors - page1+
Idle Air Control (IAC) & rough idle - pg2, 23
Brake Fluid Flush/Change - pg2
Instrument Cluster Bulb replacement - pg2, 19
Oil Pump Pickup Tube O-ring replacement, Tahoe - pg2+
Vent Blend Door Actuator Repair / Replace - pg3
Torsion Key Leveling Kit Install - pg3-6
Discussion of H2 Springs - pg6-7
Mystery Coolant Loss / CasTech 706 heads cracking & repair - pg8, 17, 30 follow-up
Spark PLugs, platinum, iridium - pg9, 23, 49
Oil Pump Pickup Tube O-ring replacement, Sub - pg9
Toyota Tundra V-6 DOHC Timing Belt change - p10
Vortec Knock Sensors and Limp Mode - p10
Sub Rear Coil Spring replacement - p11+
Ignition Coil diagnostics - p11-12
Inner Tie Rod Sleeves - p12, 14
Rear brake Pad Replacement - p13
Driver window regulator and motor repair - p13
Rear Suspension Bump Stops - p15, 29, 48
Discussion of Scan and Temp gauges - p16
Steering Wheel 'clunk' / intermediate shaft - p17
Steering components and sway bar bushings - p18
PowerStop GMT900 Front Brake swap - pg18, 35 follow-up
Instrument Cluster Stepper Motors - p18-19
Rear Hatch and window releases - p20
Alternator Issues and mid-series design change - p21, 50-51
POtential Transfer Case wear-thru issues - p22, 31
Refueling early cutoff / purge valve / vapor cannister - p22-27
Throttle cable slack adjustment - p25
Fuel Pump Replacements discussion - p28, 32, 33 how to cut floor
Oil Pressure Switch / Sender - p29, 34 re-work
Radiator Crack, Patch, Replace, cooling system refresh - p29-31
Transfer case actuator / solenoid replacement - p34
front wheel bearings / hubs - p34-35
Torsion Key crossmember mount bushings - p35-36-37 temp shimming, 38 homemade bushings, 39 dorman, 40 replacement
Control arm wear and discussion - p35
CV joint dismemberment / reassembly - p36
Upper Control Arm and CV replacement - p42
Trans Cooler install discussion - p42
And my own build topic has a lot of installs and changes to my '02 Sub.
The 'Suburban Mafia' Roster - FIXED THE LINK
https://www.expeditionportal.com/fo...pickup-suburban-yukon-etc.155266/post-2302987
*******************************************
This is a repost of some stuff I just put up in the 'project vanilla' topic, I've been meaning to get around to a dedicated posting about it, akin to the 'show us your adult rigs' topic and the idea of known problems and preventative maintenance.
I have some more pics and descriptions I'll add after
the repost, the context was in relation to knock sensor failure, and GM's placement of them under the intake manifold:
Recently had the wife's '05 Tahoe 5.3 apart for another reason*, had the whole intake etc off. Was staring at those knock sensors thinking long and hard about them, but at $50 apiece and no trouble and no visual issues, I let them be. Probably should have replaced them while I had the opportunity.
The issue - and I think it's 2003-2007 engines - GM in their inifiinite wisdom replaced a simple $5 PCV valve with a metal baffle integral to the driver side valve cover. And when the internal weep holes in this baffle plate crud up - her engine is crossing 160k mi - the engine starts breathing in oil. She told me about a puff of smoke, I dreaded a head gasket problem as she's had a small bit of heating and whiff of coolant in the last several months, but nothing I could ever track down. Couple days later, it's laying its own smoke screen on startup. She kills it, takes my Sub to work and leaves me a note. I fire up and it's plainly oil smoke. Some googling and some poking around confirmed this PCV trouble. The chambers in the intake manifold had puddles of oil in them.
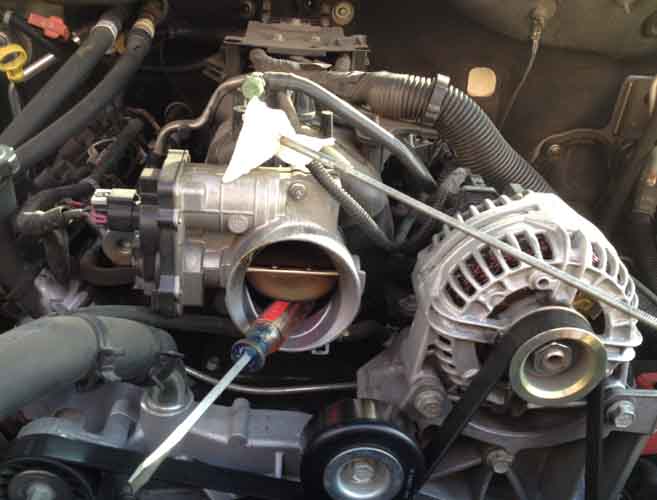
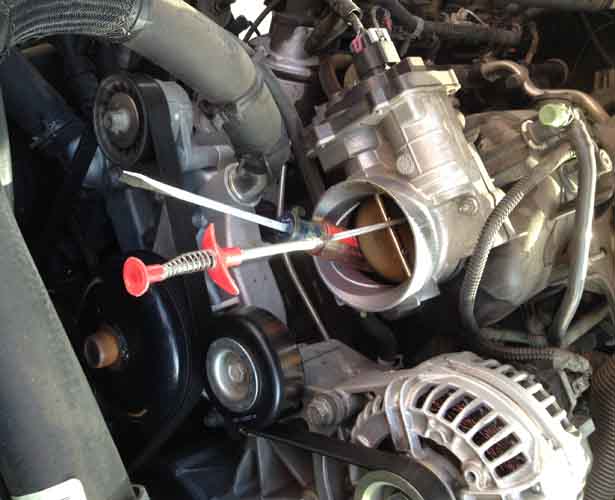
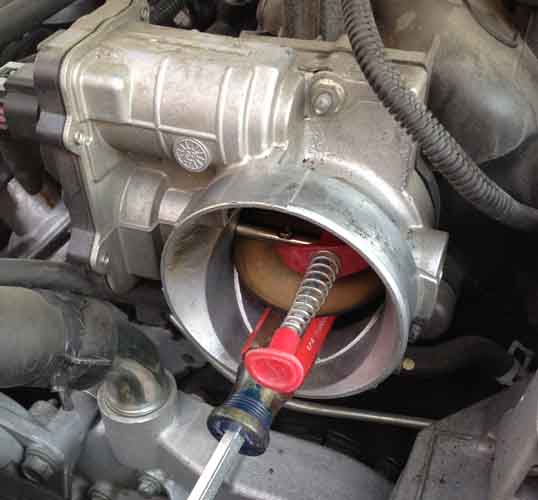
This was the test, a swatch of paper towel on a spring / claw probe, shoved in past the throttle plate.
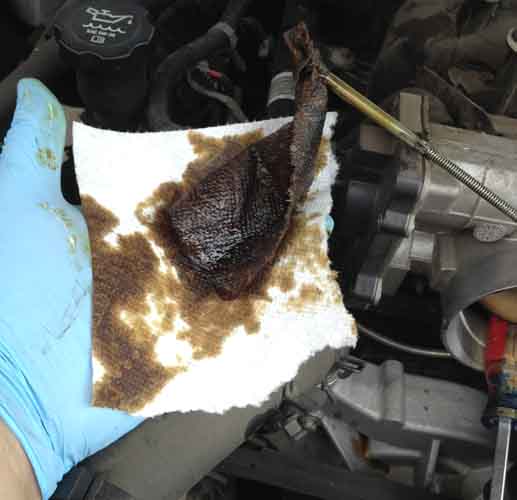
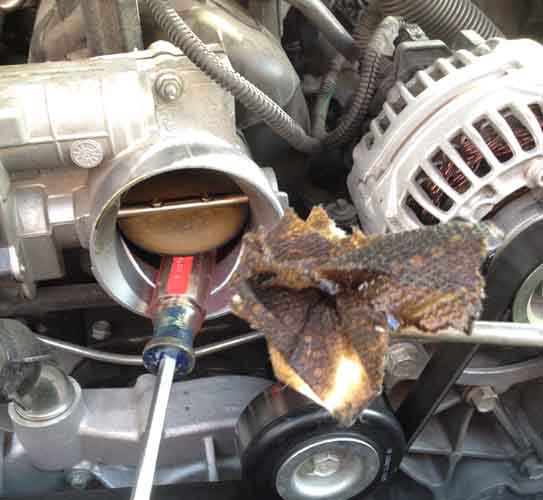
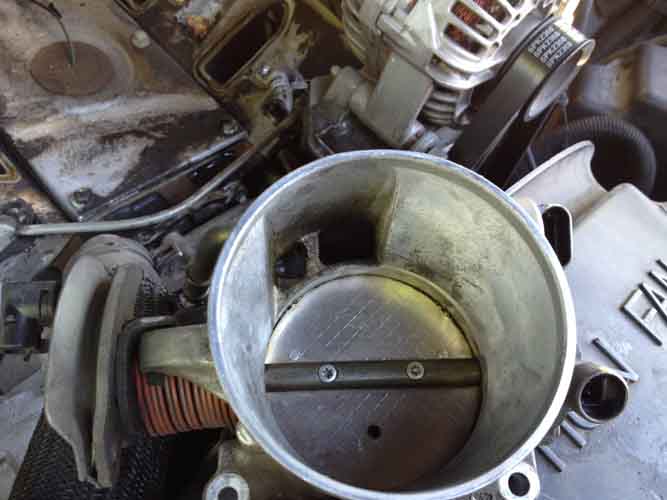
After much repeated swabbing, still no end of oil. Along the way I discovered the chamber is pinch-waisted with a quarter-sized hole into the back half. I swabbed back there and got even more sopping towels for my efforts. Then a towel slipped loose, lost in the intake. I pulled the throttle mechanism off, to get a better view trying to fish out the towel, you can see there was still oil puddling in the intake manifold.
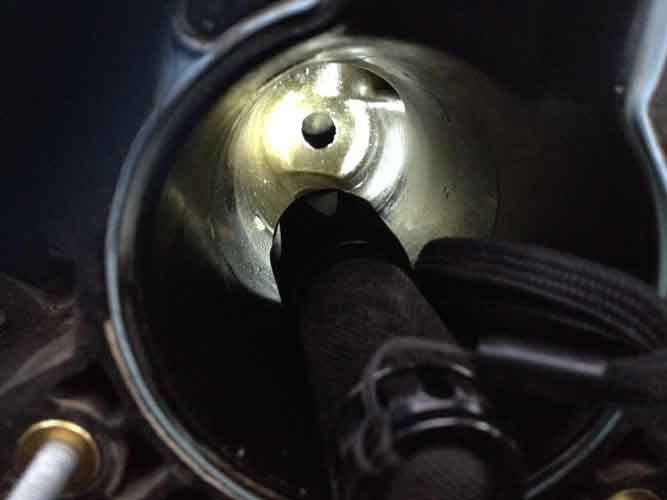
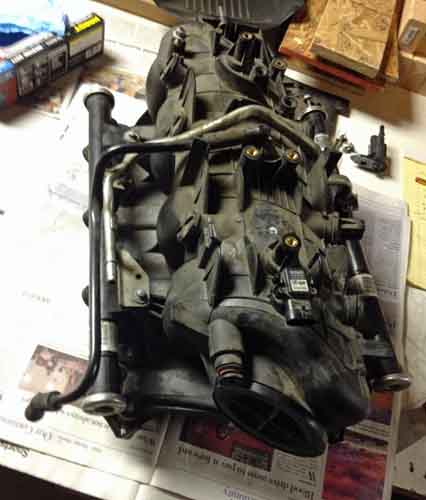
Decided I had to pull the manifold to get the towel and all that oil out. This was after pulling the valve cover and cleaning out the clogged weep holes
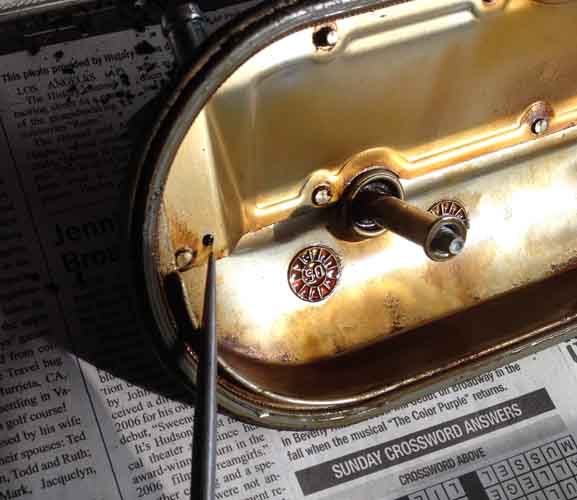
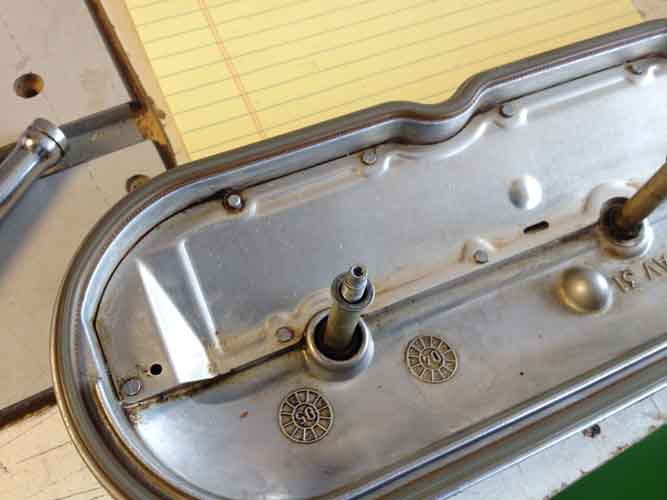
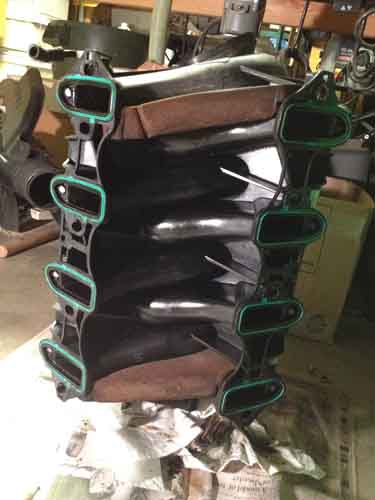
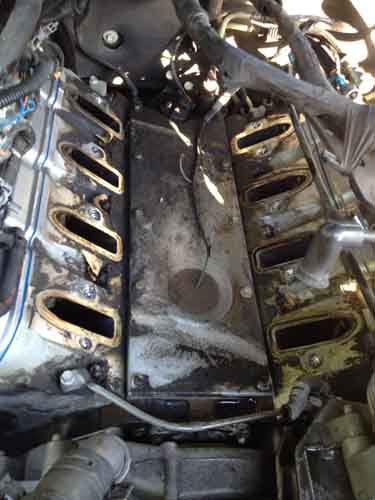
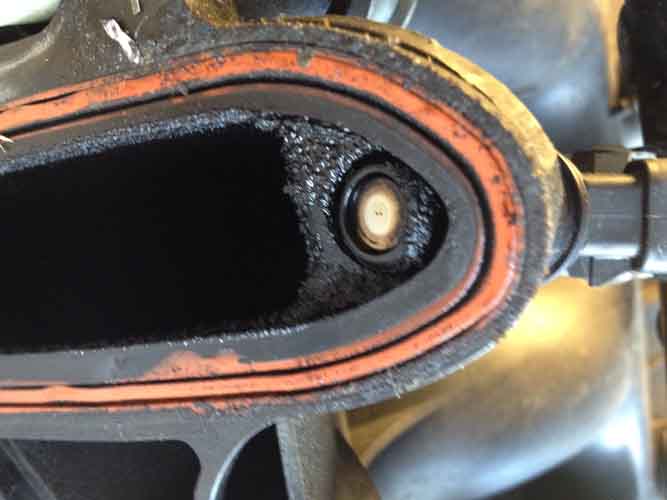
The brownish blocks at both ends of the manifold are a later model factory revision, directly related to the corrosion failures of the knock sensors. The foam blocks seal both ends of the galley / void under the intake. Mostly. More about that in a bit.
So I pulled everything apart. It's a pretty straight forward and relatively easy job. The finicky injector solenoid connectors are the toughest part. Second toughest, more on that in a bit, too.
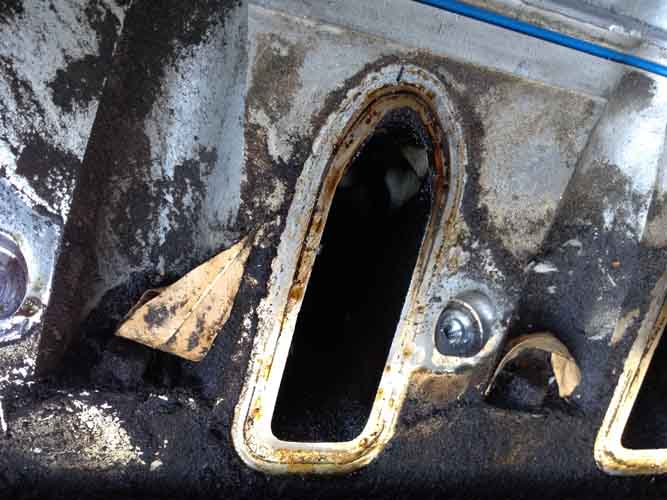
These dirty ports are the INTAKES. A before and after I cleaned things up a bit.
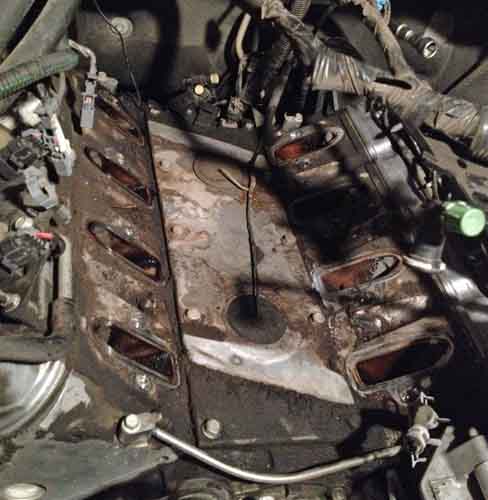
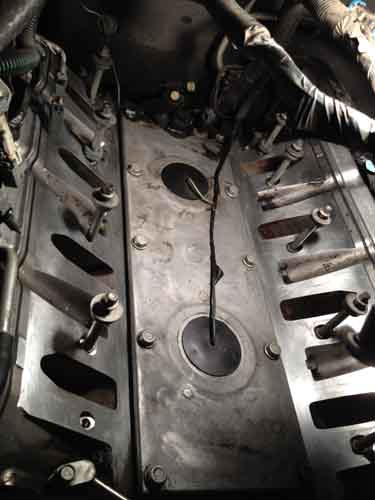
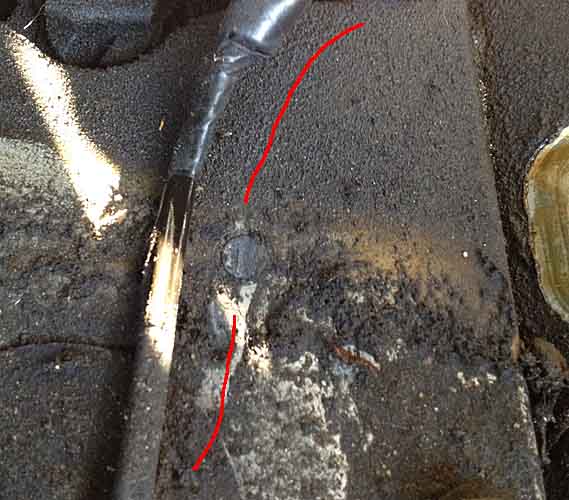
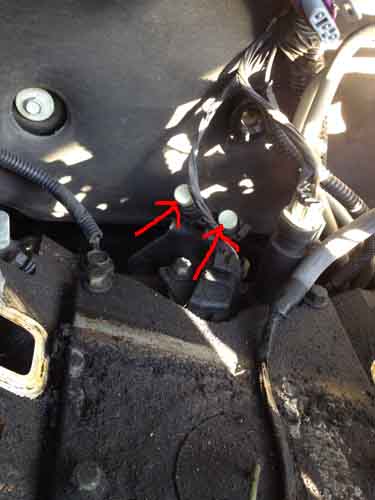
And that's a clear shot of the two knock sensors in an '05 5.3L vortec. Under those rubber disks. And their wire leads.
Anyway I cleaned it all up and got it back together, nice new intake gasket plates. Did a series of longer and longer test drives and called it good.
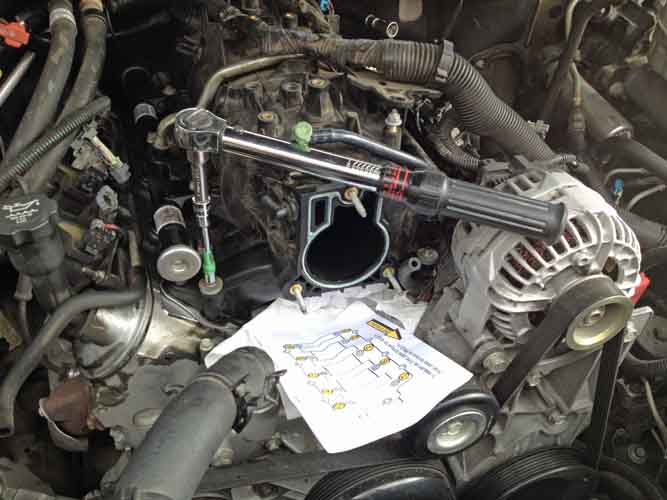
She's put about 1000mi on it since, still great and a recent swab test came out very clean. Problem fixed.
About a week later after learnign how easy it was to execute, I changed my own valve cover gaskets, all the stud bushings too. Mine had begun leaking noticeably after I mistakenly switched to synthetic blend oil at 120k mi. Wasn't dripping a drop until I did. Went very well.
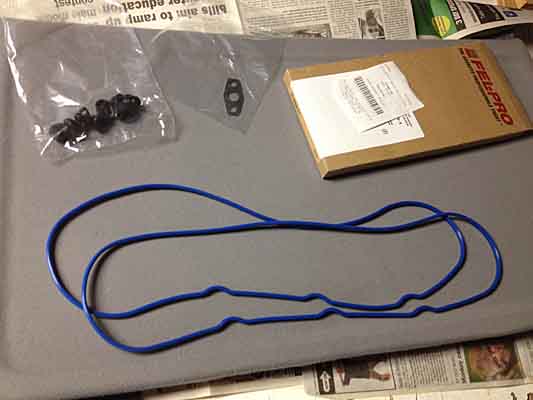
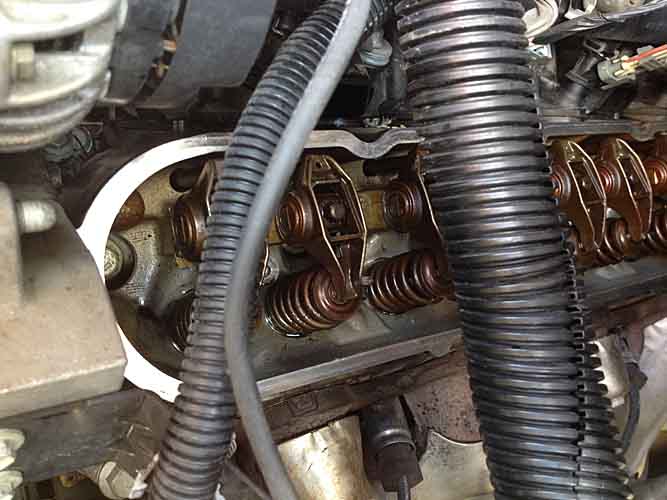
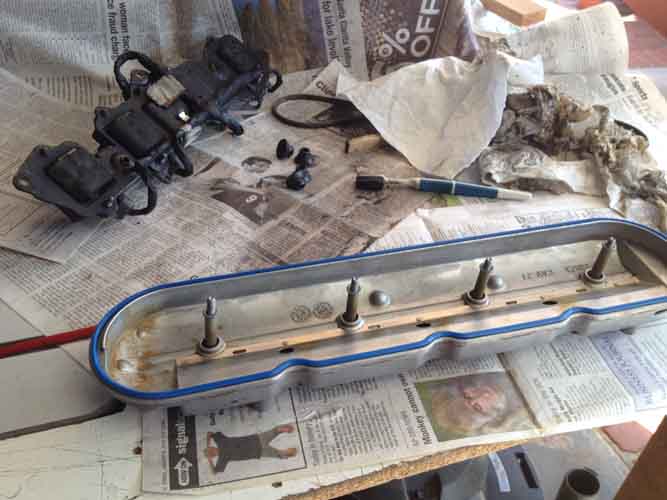
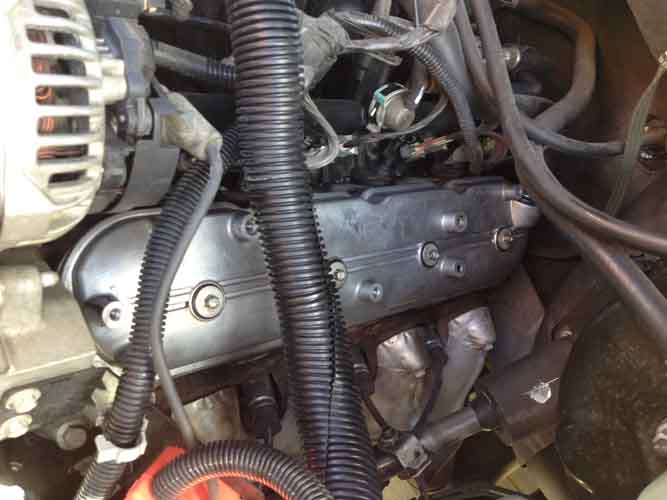
Or so I thought. I'd sprayed degreaser and took some care (I thought) when hosing it clean, before pulling the valve covers. But here I am, scarcely a week later, and I am now throwing a 'Knock Sensor #2 / Bank #2' code. Apparently I got some crud in there and fouled up the ground path of the sensor. Despite also having the foam blocks on my '02 5.3.
So now I'm going to have to pull my own intake off and decide if I can just clean up and seal my sensors and put new intake gaskets, or spend $100 on sensors too and swap them while I'm in there.
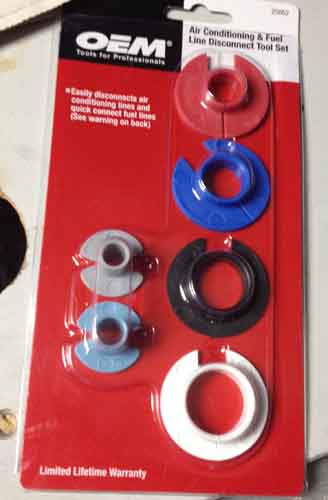
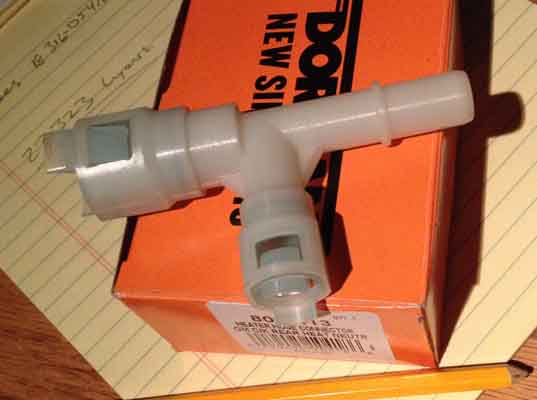
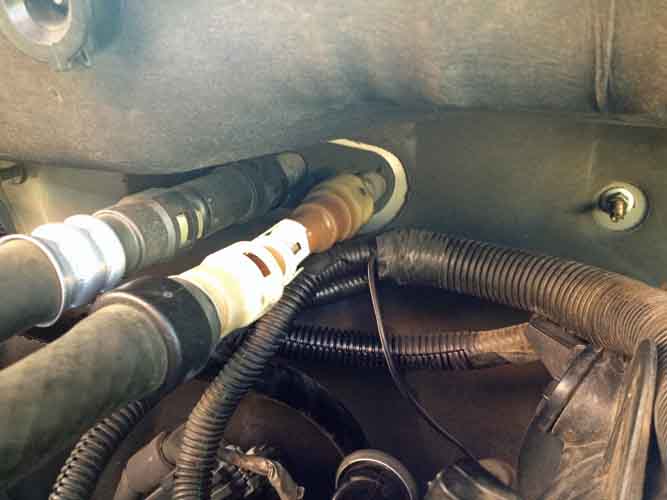
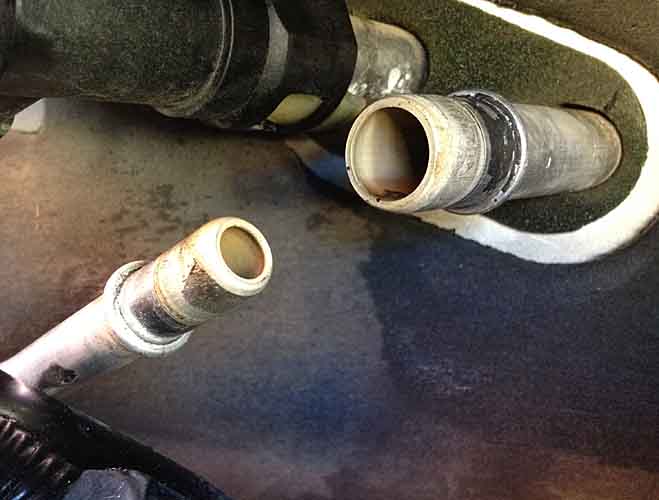
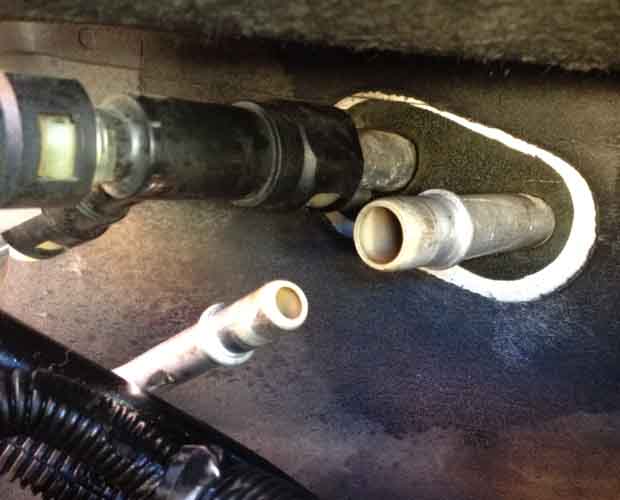
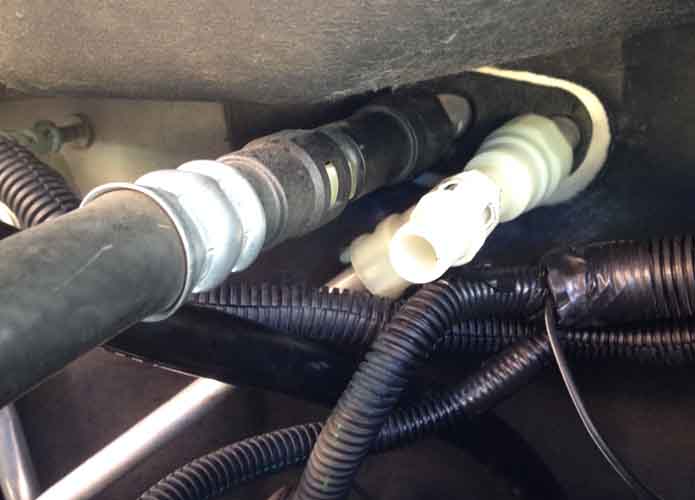
oh the other complication was while I put the wife's intake manifold back in, I nudged the plastic compression T connector on the heater hoses high on the firewall. THAT turns out to have been the source of the whiff. When I bumped it I destroyed what was left of its internal o-ring. When I fired the engine up after the intake repairs, it started streaming fluid from that connector after the thermostat opened. %$%@&#! So I had to go get that T connector ($20) and man was that a PITA to change. Do it when your manifold is out, unless you have tiny hands. If you are nearing or past 100k mi, you really ought to change them anyway, they too are apparently a known source of trouble with these vehicles.
Apologies for bumping this all in here, but seemed relevant. I'd been intending to make a 'hey Vortec guys' topic about it anyway. Things that should be planned for. Intake gaskets, the oil breathing thing, the heater hose connectors. The internet and youtube are flush with people having troubles with these things on our motors. Fix them instead at a time and place of your own choosing, as preventative maintenance.
Roster of GMT800 folks in ExPo - https://www.expeditionportal.com/fo...pickup-suburban-yukon-etc.155266/post-2302987
EGR Oil Ingestion, Remediation - page1
Heater Core connection Ts - page1
KNock Sensors - page1+
Idle Air Control (IAC) & rough idle - pg2, 23
Brake Fluid Flush/Change - pg2
Instrument Cluster Bulb replacement - pg2, 19
Oil Pump Pickup Tube O-ring replacement, Tahoe - pg2+
Vent Blend Door Actuator Repair / Replace - pg3
Torsion Key Leveling Kit Install - pg3-6
Discussion of H2 Springs - pg6-7
Mystery Coolant Loss / CasTech 706 heads cracking & repair - pg8, 17, 30 follow-up
Spark PLugs, platinum, iridium - pg9, 23, 49
Oil Pump Pickup Tube O-ring replacement, Sub - pg9
Toyota Tundra V-6 DOHC Timing Belt change - p10
Vortec Knock Sensors and Limp Mode - p10
Sub Rear Coil Spring replacement - p11+
Ignition Coil diagnostics - p11-12
Inner Tie Rod Sleeves - p12, 14
Rear brake Pad Replacement - p13
Driver window regulator and motor repair - p13
Rear Suspension Bump Stops - p15, 29, 48
Discussion of Scan and Temp gauges - p16
Steering Wheel 'clunk' / intermediate shaft - p17
Steering components and sway bar bushings - p18
PowerStop GMT900 Front Brake swap - pg18, 35 follow-up
Instrument Cluster Stepper Motors - p18-19
Rear Hatch and window releases - p20
Alternator Issues and mid-series design change - p21, 50-51
POtential Transfer Case wear-thru issues - p22, 31
Refueling early cutoff / purge valve / vapor cannister - p22-27
Throttle cable slack adjustment - p25
Fuel Pump Replacements discussion - p28, 32, 33 how to cut floor
Oil Pressure Switch / Sender - p29, 34 re-work
Radiator Crack, Patch, Replace, cooling system refresh - p29-31
Transfer case actuator / solenoid replacement - p34
front wheel bearings / hubs - p34-35
Torsion Key crossmember mount bushings - p35-36-37 temp shimming, 38 homemade bushings, 39 dorman, 40 replacement
Control arm wear and discussion - p35
CV joint dismemberment / reassembly - p36
Upper Control Arm and CV replacement - p42
Trans Cooler install discussion - p42
And my own build topic has a lot of installs and changes to my '02 Sub.
The 'Suburban Mafia' Roster - FIXED THE LINK
https://www.expeditionportal.com/fo...pickup-suburban-yukon-etc.155266/post-2302987
*******************************************
This is a repost of some stuff I just put up in the 'project vanilla' topic, I've been meaning to get around to a dedicated posting about it, akin to the 'show us your adult rigs' topic and the idea of known problems and preventative maintenance.
I have some more pics and descriptions I'll add after
the repost, the context was in relation to knock sensor failure, and GM's placement of them under the intake manifold:
Recently had the wife's '05 Tahoe 5.3 apart for another reason*, had the whole intake etc off. Was staring at those knock sensors thinking long and hard about them, but at $50 apiece and no trouble and no visual issues, I let them be. Probably should have replaced them while I had the opportunity.
The issue - and I think it's 2003-2007 engines - GM in their inifiinite wisdom replaced a simple $5 PCV valve with a metal baffle integral to the driver side valve cover. And when the internal weep holes in this baffle plate crud up - her engine is crossing 160k mi - the engine starts breathing in oil. She told me about a puff of smoke, I dreaded a head gasket problem as she's had a small bit of heating and whiff of coolant in the last several months, but nothing I could ever track down. Couple days later, it's laying its own smoke screen on startup. She kills it, takes my Sub to work and leaves me a note. I fire up and it's plainly oil smoke. Some googling and some poking around confirmed this PCV trouble. The chambers in the intake manifold had puddles of oil in them.
This was the test, a swatch of paper towel on a spring / claw probe, shoved in past the throttle plate.

After much repeated swabbing, still no end of oil. Along the way I discovered the chamber is pinch-waisted with a quarter-sized hole into the back half. I swabbed back there and got even more sopping towels for my efforts. Then a towel slipped loose, lost in the intake. I pulled the throttle mechanism off, to get a better view trying to fish out the towel, you can see there was still oil puddling in the intake manifold.


Decided I had to pull the manifold to get the towel and all that oil out. This was after pulling the valve cover and cleaning out the clogged weep holes


The brownish blocks at both ends of the manifold are a later model factory revision, directly related to the corrosion failures of the knock sensors. The foam blocks seal both ends of the galley / void under the intake. Mostly. More about that in a bit.
So I pulled everything apart. It's a pretty straight forward and relatively easy job. The finicky injector solenoid connectors are the toughest part. Second toughest, more on that in a bit, too.
These dirty ports are the INTAKES. A before and after I cleaned things up a bit.


And that's a clear shot of the two knock sensors in an '05 5.3L vortec. Under those rubber disks. And their wire leads.
Anyway I cleaned it all up and got it back together, nice new intake gasket plates. Did a series of longer and longer test drives and called it good.

She's put about 1000mi on it since, still great and a recent swab test came out very clean. Problem fixed.
About a week later after learnign how easy it was to execute, I changed my own valve cover gaskets, all the stud bushings too. Mine had begun leaking noticeably after I mistakenly switched to synthetic blend oil at 120k mi. Wasn't dripping a drop until I did. Went very well.


Or so I thought. I'd sprayed degreaser and took some care (I thought) when hosing it clean, before pulling the valve covers. But here I am, scarcely a week later, and I am now throwing a 'Knock Sensor #2 / Bank #2' code. Apparently I got some crud in there and fouled up the ground path of the sensor. Despite also having the foam blocks on my '02 5.3.
So now I'm going to have to pull my own intake off and decide if I can just clean up and seal my sensors and put new intake gaskets, or spend $100 on sensors too and swap them while I'm in there.
oh the other complication was while I put the wife's intake manifold back in, I nudged the plastic compression T connector on the heater hoses high on the firewall. THAT turns out to have been the source of the whiff. When I bumped it I destroyed what was left of its internal o-ring. When I fired the engine up after the intake repairs, it started streaming fluid from that connector after the thermostat opened. %$%@&#! So I had to go get that T connector ($20) and man was that a PITA to change. Do it when your manifold is out, unless you have tiny hands. If you are nearing or past 100k mi, you really ought to change them anyway, they too are apparently a known source of trouble with these vehicles.
Apologies for bumping this all in here, but seemed relevant. I'd been intending to make a 'hey Vortec guys' topic about it anyway. Things that should be planned for. Intake gaskets, the oil breathing thing, the heater hose connectors. The internet and youtube are flush with people having troubles with these things on our motors. Fix them instead at a time and place of your own choosing, as preventative maintenance.
Last edited:

