How would you outfit this custom LJ?

jscherb

Expedition Leader
Now that I've put the half doors on for the summer, I'd like to have uppers for them with me at all times in case of weather. In most Jeeps that would be a storage problem, but the Safari Cab roof is tall enough so that they fit above the roll bars. You can't see them too well in this photo but they're resting on top of the roll bars and speakers. I'll probably to make something to support them across the back as well. The door stakes hang down a little bit, but the rest of both uppers is above the roll bars. Plenty of headroom still for back seat passengers:

UppersStowed1_zpsp4cdzcs1.jpg


With the uppers stowed "in the attic", and the roll up side curtains ready to roll down at a moment's notice, I can drive around all summer with the Jeep open and be ready for weather.
 

NOMADIC_LJ

Explorer
Very nice JSherb! Love the attic storage.

I made out pretty good fathers day, got the Exogate for my LJ. Thanks for coming up with such a great product.
 

jscherb

Expedition Leader
Here's a look at the work in progress on the Safari Cab v2 soft sides. I got both sides about 80% done, all that's left is trimming the bottom and sewing in the plastic strip to engage the factory soft top retainer rail, putting the velcro and roll-up straps on the top edge of the panel, and installing the window. I won't have a chance to work on it again until Friday, and I'll probably get everything but the window done then. Maybe I'll drive it around as a soft-side panel truck for a week just for fun :).

As it looks right now:

PanelTruck1_zps9y6bpami.jpg


Dotted lines showing the trimming of the bottom and the window:

PanelTruck2_zpsc7l0vste.jpg


All of the zippers are in place and it installs very quickly and rolls up easily, although since the straps aren't installed there's no way to hold it in the rolled-up position yet.

I'm really glad I picked up the JK soft top to serve as the material for this project - it's really nice material to work with and it gives a real factory quality feel to the panels.
 

jscherb

Expedition Leader
I got a comment from someone who thinks the new vinyl soft sides are too gray and need to be darker. It'll be a lot darker when I'm done. The fabric is from a well used factory soft top, I haven't washed it or put any vinyl conditioner on it yet. Once it's washed and conditioned, and also when most of it is replaced by a window, it won't look so big and gray anymore. I'm not worried about it, it'll be fine when I'm finished with it. For now I've been focused on getting the tailoring perfect, which would actually be harder if the vinyl was conditioned, which will make it a bit slippery and harder to tailor.
 

jscherb

Expedition Leader
I got the v2 sides basically done today - everything but putting the windows in, so for the moment it's a panel truck with roll up sides :).

SidesRolled1_zpsol14w4gl.jpg


SidesRolled2_zps9eoi4jgp.jpg


Windows to come soon.
 

jscherb

Expedition Leader
I finished up the soft sides v2 project today.

I put a bunch of different doors on to get the height of the windows right before I cut the holes in the sides. On the driver's side I've got a fiberglass upper with slider:

SoftSidesV2Done1_zpsxxbrjxjs.jpg


On the passenger side is the full door:

SoftSidesV2Done2_zpswcztluxc.jpg


For a finishing touch, I had a local shop embroider two SAFARI logos in silver thread on pieces of the soft top fabric. They're sewed on in the photos above.

The factory door will come off today and the half door will go back on, I'll run the half doors and these sides until after my next Colorado off road trip, which I'm planning for early September.

I spent a lot of time on the tailoring to make sure they're perfectly flat when rolled down. The reflection test:

SoftSidesV2Done3_zps6kekyojn.jpg


An inside view:

SoftSidesV2Done4_zpsygxcfxpc.jpg


Outside photos will have to wait until it's not raining... I'm confident these sides are waterproof, but the photographer isn't, nor would it be fun to roll up the sides in the rain for photos. So more photos to come soon.
 

jscherb

Expedition Leader
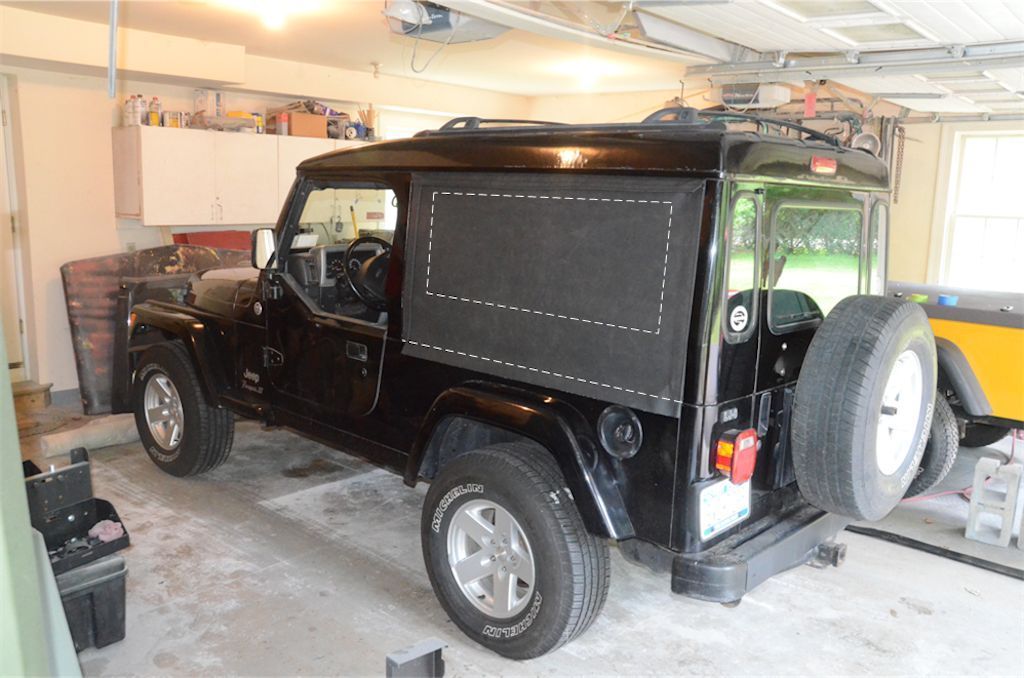
A couple of people have said they're interested in sewing their own roll-up sides (or finding someone to do the sewing for them), so here are a few details to help those possible projects along.

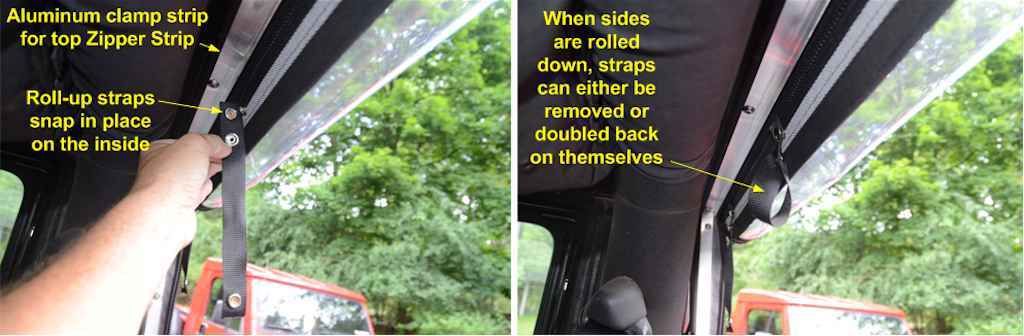
The side panels zip to "zipper strips" that attach to the hardtop. The zipper strips are attached with aluminum clamp strips that bolt to the same holes as the hard side panels do. The zipper strips get sandwiched between the hardtop flange and the aluminum strip.

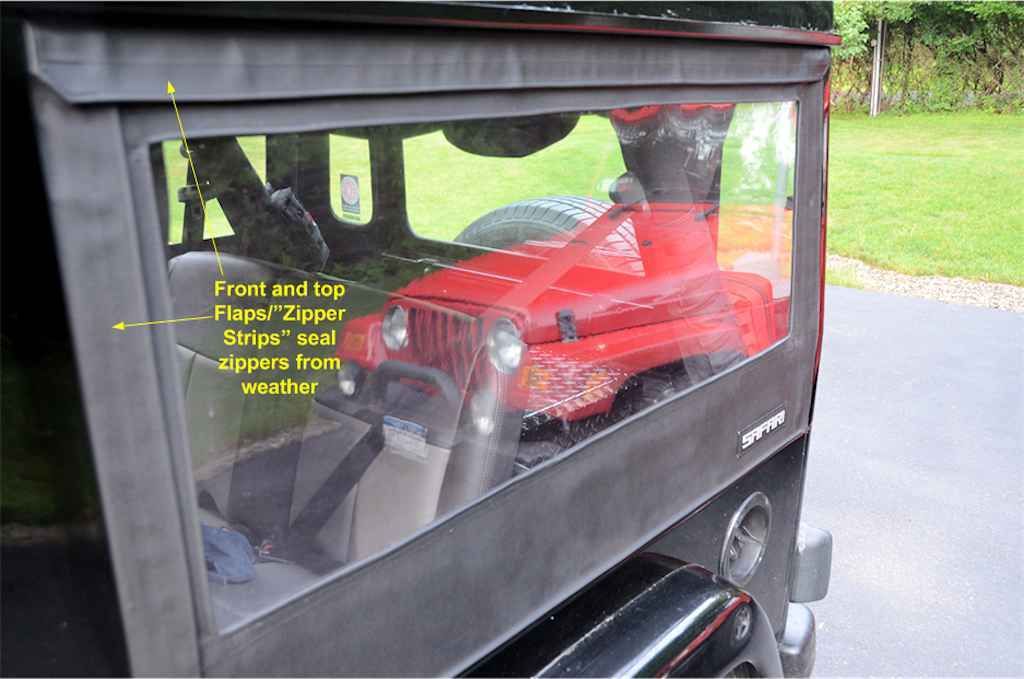
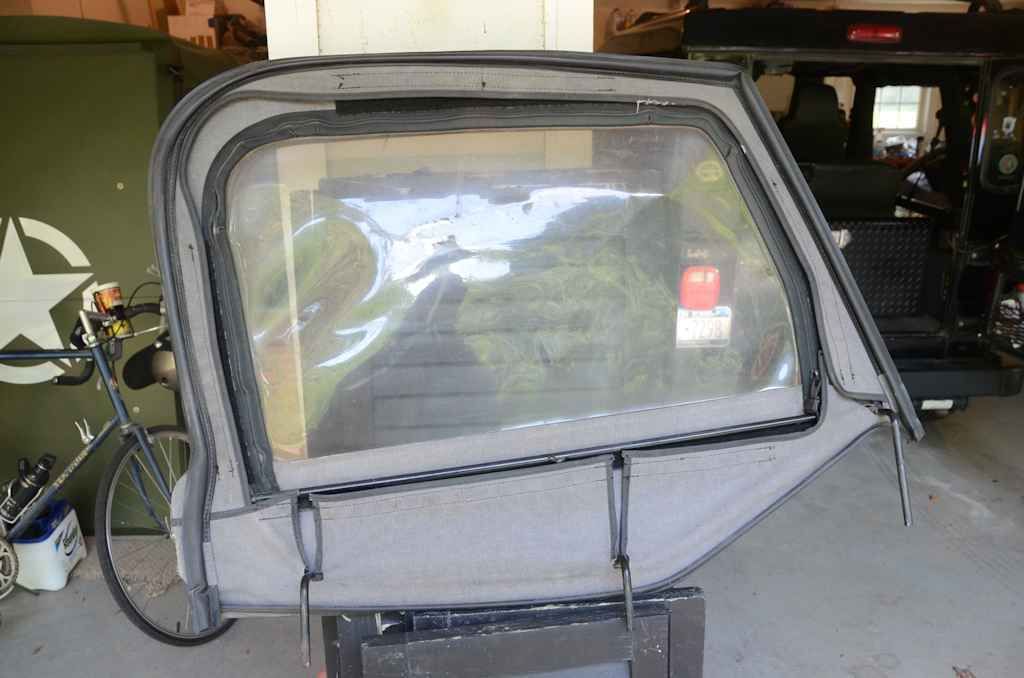
The zipper strips at the front and top overlap outside the roll-up panel, so when driving at speed water won't get forced into the front zipper, and excess water coming down off the roof won't go into the top zipper.

DetailRolledDownA_zpsxybkav9i.jpg


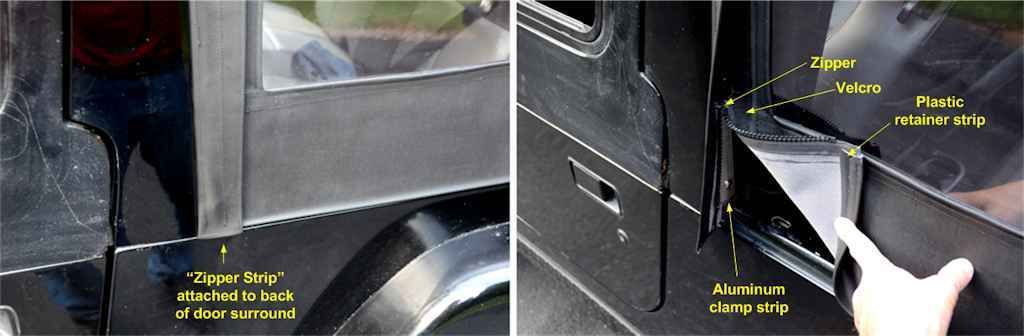
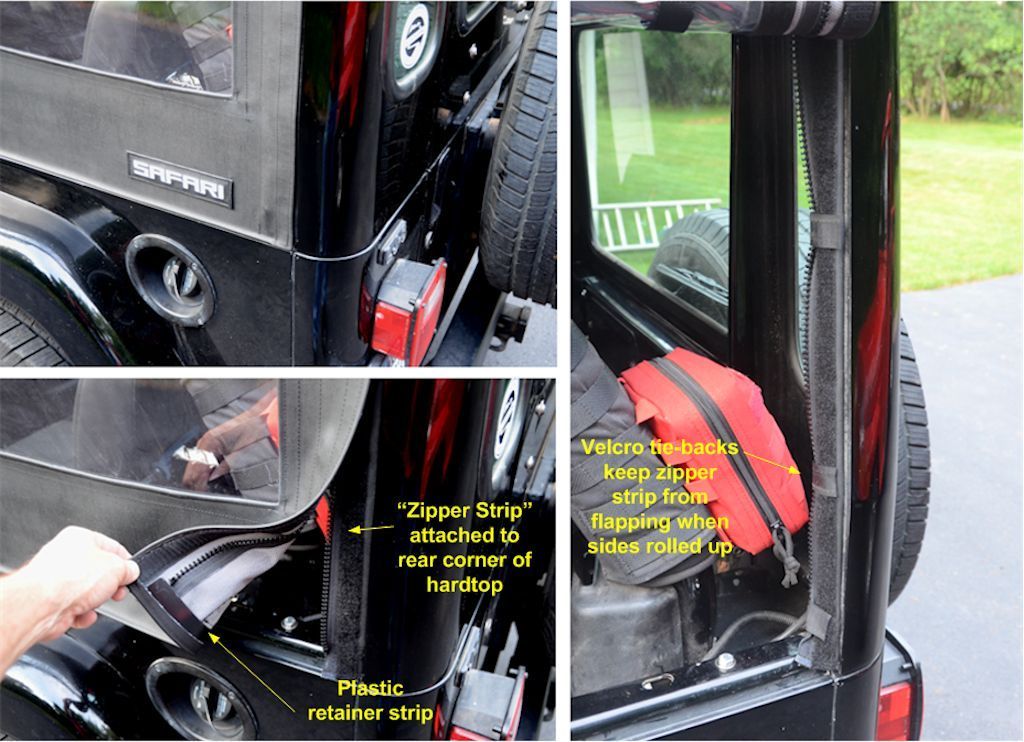
These next photos are detail views of the front zipper strip. There's velcro outside of the zipper to seal the zipper from weather getting in. In the right photo you can see the aluminum clamp strip that holds the zipper strip to the rear of the door surround. Also in this photo you can see the plastic retainer strip sewn into the bottom of the roll-up panel - the plastic slips under the retainer on the tub just like the factory soft top sides do.

DetailFrontZipperA_zpso4rcr4wb.jpg


The top zipper strip is basically the same as the front one.

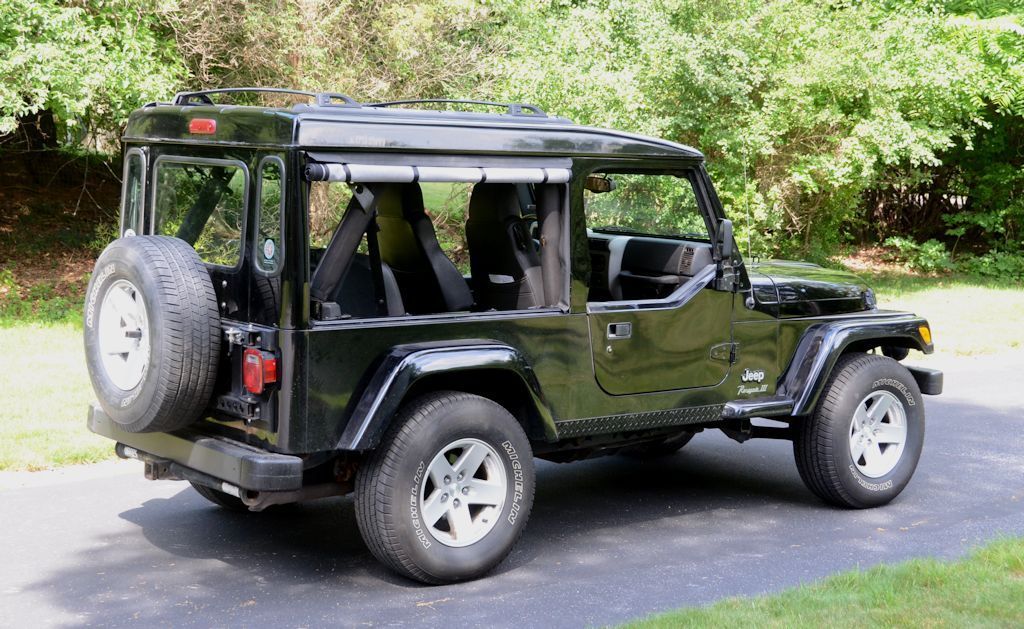
In the back, the zipper strip is on the inside, because if it was on the outside like the front one, it would be facing forward to scoop up rain while on the road. So in the back, the roll-up panel butts up against the rear corner of the hardtop, and there's velcro followed by the zipper.

DetailRearZipperA_zpsszultw6z.jpg


To keep the zipper strip from flapping in the breeze when the sides are rolled up, there are several velcro tabs to tie it back, these can be seen in the tall photo above.

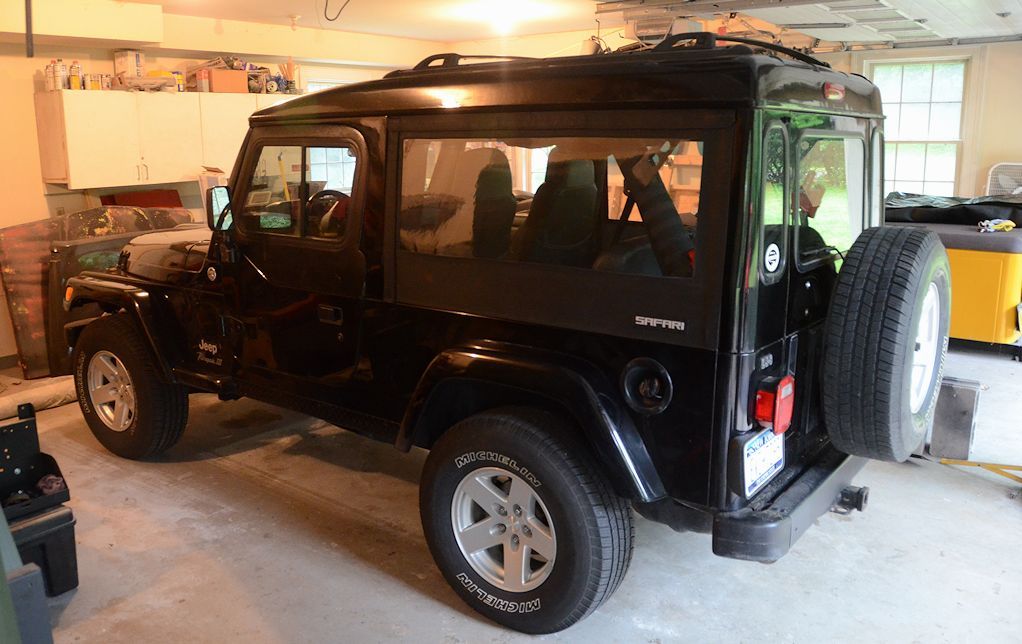
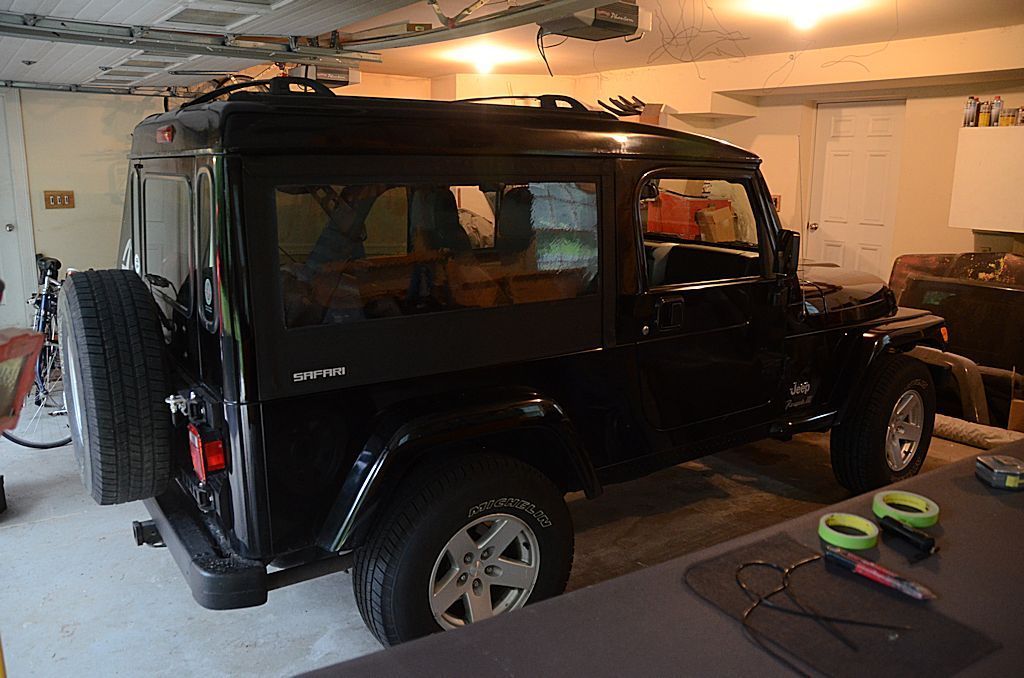
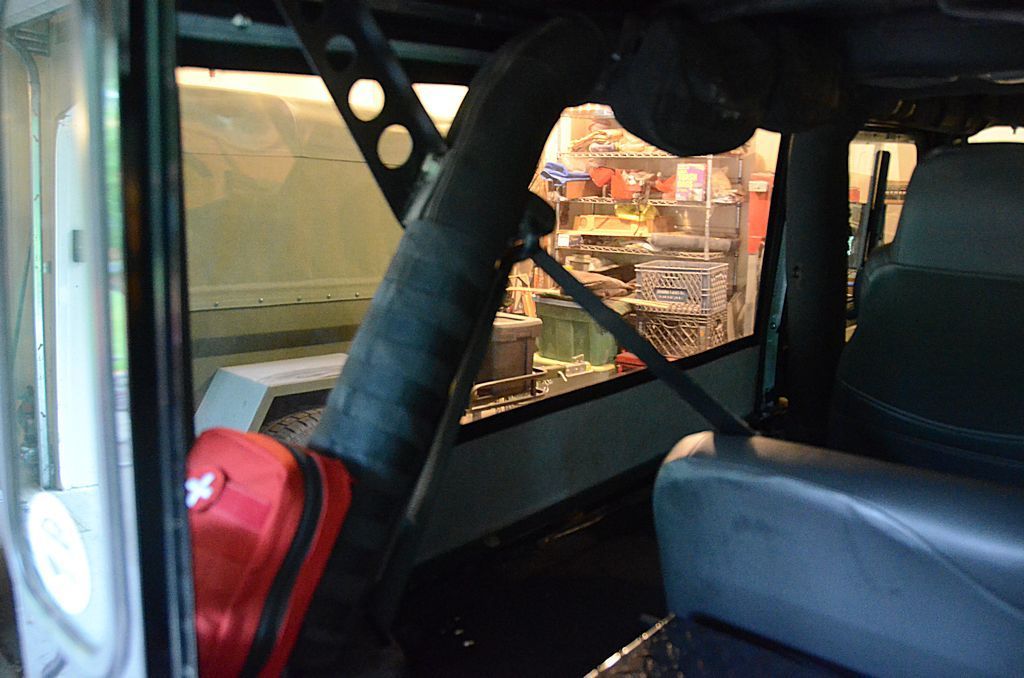
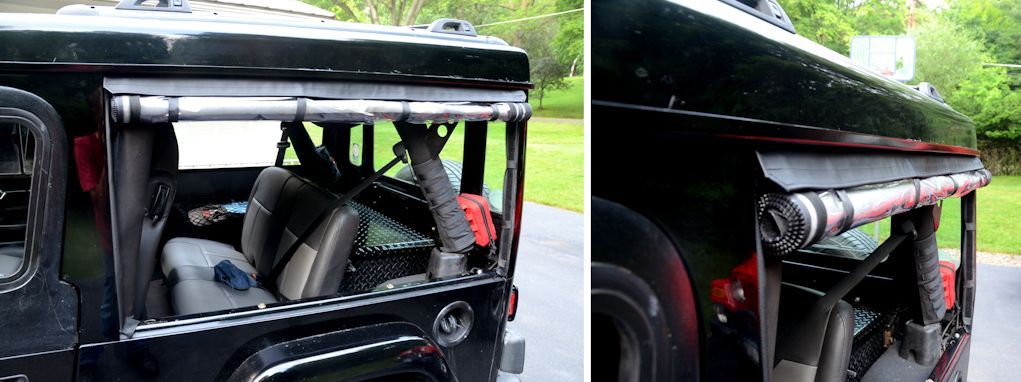
There are 4 straps on each side to hold the side panel in the rolled-up position. The snaps are removable, they snap to the inside of the side panel. That way they can be removed when the side is rolled down, or they can be doubled back on themselves and snapped as shown at right. The aluminum clamp strip holding the top and back zipper strips in place can also be seen in these photos.

DetailStrapsA_zpstcv0ookb.jpg


When rolled up, the 4 straps go around the outside of the rolled side panel and snap to hold it in place. Also, when rolled up the top zipper strip forms a bit of a rain guard over the rolled-up side, helping prevent water from dripping into the roll.

DetailRolledUp_zpsvrs2x9an.jpg


I posted a link a week or so ago to the window sewing method I used, so that plus this post is most of the detail one would need to sew their own set of roll-up side panels, but if anyone would like more info or see a photo of a specific detail let me know.

I hope this helps someone.
 
Last edited:

jscherb

Expedition Leader
As part of the v2 soft sides design, I'm getting ready to build a soft upper barn door for the Safari Cab. I've done a soft barn door for the factory soft top, but this one will be for use with the hardtop. I plan to borrow some of the design elements from the factory soft uppers, but I've got a few changes and improvements in mind.

The factory uppers consist of a frame of 3/8" steel rod which includes "stakes" on the bottom which insert into the top of the half doors. The skin is secured to the frame by flaps with velcro on the inside.

FactoryUpper_zpsjhdsre2f.jpg


I'll follow the factory design and make the barn door frame from 3/8" rod, but I won't attach stakes to the frame. The Safari Cab hard barn door attaches to the tailgate with stakes of a different design which can be seen in the photo below. Ordinarily when I remove the hard barn door upper, I unbolt the stakes from the tailgate and remove them with the upper, but for the soft barn door I'll leave the stakes bolted to the tailgate when I remove the hard upper so the same stakes can be used to mount the soft upper. Not having stakes as part of the soft upper makes the soft upper a bit smaller, so it'll be easier to store "in the attic" (inside the Safari Cab, above the roll bars).

Final13.jpg


My soft upper frame will be made from 3/8" steel rod, and will have provisions for attaching it to the Safari Cab stakes.

One thing I don't really like about the factory design is that it's fairly loose fitting. I'd like to have the soft barn door skin be much tighter than the factory upper skins. On the factory skin I think the loose fit is at least partly due to the limited amount of velcro that fits between the window opening and the frame - it's just not adequate to pull the skin tight and secure it. I'm planning to use zippers to secure the skin around the window area because with those I can get a very tight and consistent pull on the skin. On the bottom, where there's more room for velcro because there's no window, I'll secure the skin with 2"-wide velcro.

This design drawing shows the inside view of the soft upper I'll be building. The metal frame is red, the zippers are dotted lines, and the skin is shown not wrapped around the frame or zipped. There's velcro around the bottom of the skin, but the sides and top of the window are secured with zippers. The velcro at the bottom is 2" wide - the factory uppers have 1" velcro so 2" will provide a lot more grip to ensure the skin is tight.

SoftBarnDoorDesign1_zpsvyev79au.jpg
 

jscherb

Expedition Leader
I've been driving around the last few days with the soft sides rolled up and the half door uppers off, but this morning I've been doing errands in the rain so everything's closed up. Today I really appreciate the v2 soft sides because I still have the barn door for access to the cargo area. With the v1 soft sides I'd have to unzip at least one rear corner for more access to the back than just opening the tailgate, but with the v2 sides I can just open the tailgate/barn door.

SoftSidesRain1_zps2g56b2qn.jpg


SoftSidesRain2_zpsbmuys7i9.jpg


After driving a lot with the soft sides this week, I am looking forward to getting the soft barn door upper built. That'll add to the openness, and it'll store up above the roll bars along with the half door uppers - out of the way but ready for quick use. I will miss the rear wiper though, I use that often.
 

jscherb

Expedition Leader
I really enjoy following your work. Thank you for being so detailed when you share!
Thank you. I know most people won't take on projects like building a custom hardtop, but I post a lot of detail in the hopes that people will find a technique or trick they need to accomplish their projects.
 

jscherb

Expedition Leader
I've got several sets of TJ half door uppers laying around here - a factory style soft set with a zipper window, a Steel Horse soft set with glass sliders, and an unknown fiberglass set with sliders. I've used the fiberglass set on trips from NY to Colorado for offroading and they work great - they seal well and they're quiet. My factory-style uppers are long overdue for a new set of skins, and while I've been using them the last few days in the rain, I'd really rather have a slider. The problem with the fiberglass sliders though is that they're heavy and hard to store, and they bolt in place rather than just sliding into the holes in the doors, making them a bit slower to install/uninstall. And while I can store them "in the attic" above the roll bars in the Safari Cab, they take up all the room so with them up there I won't be able to store the soft barn door upper there as well.

So that leaves me to try the Steel Horse soft uppers with sliders. They're actually pretty nice, except for one thing - they didn't fit well at all. The front corner of both was about 3/8" too low, so bad in fact that sitting in the Jeep you could see light through the upper corner when the door was closed. Not only will it leak, it'll probably be a waterfall.

I spent some time today solving the problem, and now they fit fine. I removed the slider and then the soft skin to reveal the frame, which is made from 3/8" steel rod. I cut the front vertical part of the rod, and welded in a 3/8"-long piece of 3/8 rod, which made the upper 3/8" taller in the front. The skin was a little tighter but still went back on without too much trouble. I think they'll be weathertight now. These photos are after the surgery, the fit is much improved:

SteelHorseUppers2a_zpsrc4yp8pi.jpg


SteelHorseUppers1_zpskaks33xf.jpg
 

Forum statistics

Threads
186,674
Messages
2,888,754
Members
226,864
Latest member
Nowhereman
Top