You are using an out of date browser. It may not display this or other websites correctly.
You should upgrade or use an alternative browser.
You should upgrade or use an alternative browser.
Introducing the Van-That-Can- 2000 E350 V10 EB Passenger Van
- Thread starter desertspeed
- Start date
desertspeed
Adventurer
Any progess to share? Been pretty dead around here lately...
Not much on the van- I have been working on my prerunner lately. I just pulled the entire drivetrain and sold it, and I am working on thinning out the stock wiring harness. I have already removed a large trash can full of wires and I am only getting started......
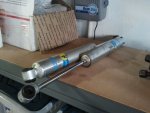
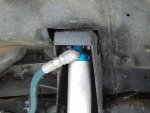
I did just buy some 2.5" King shocks for the front of the van today though- I am going to drop it off at a local shop next friday and have them build new shock hoops, so I will have some pics soon. I also have the slides for my tool drawers that I am building for my rear storage area, I just haven't had time to work on it.
Santa brought me a Scan Gauge and a Trasharoo
CodyY
Explorer
Bump- I still have the rear panel available. Looking to trade for a stock plastic one that in good shape.
$hit.
Total brain fart on my end.
McCredie a
New member
Looking good Andrew! I have been waiting for that email to help you with the truck. Let me know!! The Van is looking to be a fun toy as well.
blupaddler
Conspirator
Great job w your van!:drool::drool:
I am constantly toying with the idea of gutting my SMB and going with a more utilitarian set-up like yours.
BTW... I am in Cardiff and would love to check out your van sometime and compare/contrast. Mine's a quigley. And the one trip it has to Baja with only 20 ish washboard, I am not very happy...
Interested in your rear shocks if you decide to sell after the King upgrade.
:ylsmoke:
desertspeed
Adventurer
Great job w your van!:drool::drool:
I am constantly toying with the idea of gutting my SMB and going with a more utilitarian set-up like yours.
BTW... I am in Cardiff and would love to check out your van sometime and compare/contrast. Mine's a quigley. And the one trip it has to Baja with only 20 ish washboard, I am not very happy...
Interested in your rear shocks if you decide to sell after the King upgrade.
:ylsmoke:
I'm not sure if/when I am going to swap out the rear shocks- the rear seems to have a lot more travel than the front (or it may be the lighter weight) and the Bilsteins seem to do OK.
Anytime you want to come see the van let me know- just PM me.
desertspeed
Adventurer
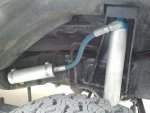
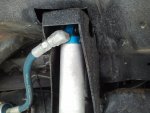
As with everything else I seem to do lately  , this was kind of a rush job so I need to go back and clean it up, especially where I trimmed the inner fender around the shock tower. However, it made a huge difference on the trip I made over the weekend. The compression valving is a little stiff, but once I get that correct I think it will ride great.
Its hard to tell from the pics, but those are King 2.5" 8" stroke smoothies.
Its hard to tell from the pics, but those are King 2.5" 8" stroke smoothies.
Attachments
BajaSportsmobile
Baja Ironman
Are you going to the San Felipe race in a few weeks? I'm taking my SMB down on Thursday and then headed to San Ignacio through Coco's on Sunday to see the whales.
desertspeed
Adventurer
Looks pretty beefy!
Thanks!
Are you going to the San Felipe race in a few weeks? I'm taking my SMB down on Thursday and then headed to San Ignacio through Coco's on Sunday to see the whales.
Unfortunately I am going to miss this year. I am still hoping to head down for the NORRA race, but not even sure on that. Work is really busy right now and screwing with my play time :-(
Jealous though- I have been promising my kids to go see the whales the last 2 years and something keeps coming up
desertspeed
Adventurer
I have been wanting to reduce the interior noise in the van to make long drives easier. I had debated whether to go with a spray on insulation like Lizard Skin, or Quiet Ride http://www.quietride.com/catalogpdfs/econoline_09_12_catalog.pdf
After talking to the guys at Quiet Ride, I decided to go that route- each kit is supposedly designed and cut for each vehicle and I didn't want to deal with the masking/clean up of a spray on product.
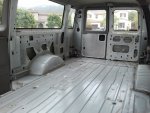
The boxes showed up last week, with each section of the kit packaged separately and well labeled, with clear instructions. After pulling out all of the interior trim pieces and the old, trashed vinyl floor, I started cleaning. I had already cleaned up most of the trim pieces and the sides of the van after I bought it, but I had never pulled up the floor so that was still pretty nasty from the PO.
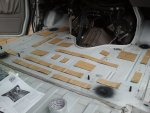
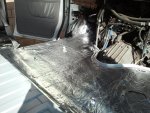
I started with the front floor section, since that was the smallest/easiest and I wanted to get used to the installation process. After cleaning, I laid out the Dynomat strips acording to the directions and then attached them. Then, using the included spray adhesive I glued down the insulation mat, and then sealed up all of the seams using seam tape (a very thin, flexible aluminum tape). The front section took about 2 hours. I only had Sunday to work on it, and I was able to finish the front floor section, the engine cover, and the entire roof. The roof was by far the most difficult, as it has 6 separate sections and each seam has to be sealed with the tape.
So far my impressions are pretty good- for the most part everything fit fairly well except for a couple of the roof sections which needed to be trimmed. My other issue is that the holes for the seat mounting brackets are marked on the pads but are not cut out. After laying them down the holes don't line up very well, and they are a pain to cut out once the pads are glued down- the mat material on the bottom of the insulation is very fibrous and difficult to cut through cleanly. I am not looking forward to doing the sides, which have tons of holes for the interior panel mounting screws.
I am hoping to finish it up this weekend, and I will try to be better at taking progress pics.
Attachments
desertspeed
Adventurer
Overall does it look like it's worth the money? I know you won't be able to tell 100% until it's done, but just curious.
Hard to tell yet. I am hoping to finish the majority of it up this weekend and I will drive it around and get a feel for the difference and let you know. It did end up costing more than I was hoping since I have the extended body, about $975 with tax/shipping.
Similar threads
- Replies
- 12
- Views
- 2K
- Replies
- 3
- Views
- 897
- Replies
- 18
- Views
- 2K
- Replies
- 11
- Views
- 4K

