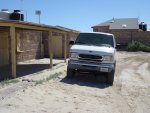
Introducing the Van-That-Can- 2000 E350 V10 EB Passenger Van

desertspeed

Adventurer
Not sure exactly what that means- I have a 3' long 3/4" drive breaker bar, so I can go pretty tight.......

The specs for a F350 are:

Description Nm lb-ft
Front spring-to-spring hanger nut 275 203
Front spring-to-shackle nut 250 185
Spring shackle-to-frame nut 250 185

Guess I will just go with these
 

bobDog

Expedition Leader
Going along w/ ujoints naming process this van should be nick named 'VanCan':D

Sent from my LS670 using Tapatalk 2
 

desertspeed

Adventurer
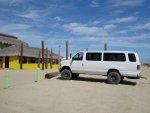
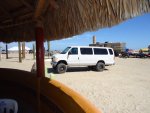
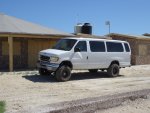
Just got back from 8 days in San Felipe with my family. Had an awesome trip. The van was perfect, way more room than the Silverado, much easier to load up, get several people/dogs in and out of, etc. I am SO happy with it.

As far as the UJoint kit, aside from the spring issues (I'll get to those in a bit) everything worked great with no problems. Steering was great, no bump steer, the van tracked straight and felt very steady, even at relatively high speeds on Mexican roads.

Unfortunately, I (with Chris' help) am still dealing with Atlas to get the correct springs. I had to skip some side trips we had planned in Baja because it was pretty much undrivable in the dirt over 10mph. I'm not going to go into all the details, but I just installed the 3rd set of rear springs yesterday and I finally think they sent me the right ones, but I need to put a few miles on them to make sure. The front springs are still too stiff, but Chris wants to make sure the rears are right before I head up to Atlas and have them try again on the front. I am leaving for the Baja 1000 in 4 weeks and will be doing a LOT of dirt, so I need to get it figured out before then.
 

Attachments

  • DSC00527 (800x600).jpg
    DSC00527 (800x600).jpg
    250.9 KB · Views: 53
  • DSC00535 (800x600).jpg
    DSC00535 (800x600).jpg
    286.4 KB · Views: 52
  • DSC00545 (800x600).jpg
    DSC00545 (800x600).jpg
    310.9 KB · Views: 53
  • DSC00546 (800x600).jpg
    DSC00546 (800x600).jpg
    308.5 KB · Views: 54
  • DSC00547 (800x600).jpg
    DSC00547 (800x600).jpg
    308.3 KB · Views: 51
  • DSC00548 (800x600).jpg
    DSC00548 (800x600).jpg
    300.8 KB · Views: 47
The van looks great! I'm also jealous that you got to go to SF for a while. I'm missing Mexico right now, I can't wait for the 1000.

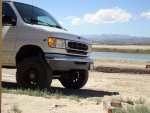
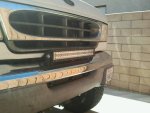
I have the same lower valance on my front bumper, did you need to trim it to clear the tires? I wasn't sure if I was going to run it, but I think I like it on there.

Sucks about the spring issues. Maybe you should run it down Old Peurtocitas (sp?) road to break them in!
 

desertspeed

Adventurer
The van looks great! I'm also jealous that you got to go to SF for a while. I'm missing Mexico right now, I can't wait for the 1000.

I have the same lower valance on my front bumper, did you need to trim it to clear the tires? I wasn't sure if I was going to run it, but I think I like it on there.

Sucks about the spring issues. Maybe you should run it down Old Peurtocitas (sp?) road to break them in!

Yes, I did need to trim the valence quite a bit (and the bumper behind it). I ended up cutting off the clip that holds the end of the valence to the bumper as well, so I added a bolt to hold it on with an aluminum fender washer.

I actually did take it on the Old Puertocitos road for a little while :sombrero: It was my dad's first time down there and I wanted to show him part of the race course so we went out there to see it- it was slow going. The vados on the highway were a little hairy as well, especially since I am used to being able to hit them at full speed in my prerunner. I had to slow way down for the Oh **** Dip.

We will get the springs figured out- after driving it around today with the new rear springs I am prety sure they are going to be good. I am going to start building my sleeping/storage platform in the rear this weekend to see how much weight that will add (I am hoping it drops the rear about 1").
 
Thanks for the info, I thought I could see an extra bolt on there. I kind of like the fact that it covers the spring hangers, keeps it a little more "factory" looking I guess. I have the Chateau package with the silver rockers and the gray on the front and rear bumpers anyway, so it will keep it kind of uniform. I wasn't sure if too much would have to get hacked away in the front to make leaving it on worth it.

I'll be curious to see what you do for a sleeping platform. I am planning on doing one with some storage built into it, kind of like an old school carpet kit that guys used to put in the camper shells of pickups with removable cross bars for the platform. I plan on leaving all the interior plastic in place.
 

desertspeed

Adventurer
You definitely need some sort of bumper up there, or it just looks too "open". I think the stock bumper works well if you don't want a winch.

I will def. take some pictures of the platform- I have some very specific requirements becuase I have several different "types" of trips that I will be taking in the van, from family trips down to San Felipe to chasing the Baja 1000 to camping up in the mountains. I think I have come up with a layout that is flexible enough to allow me to easily switch between the different setups.
 

desertspeed

Adventurer
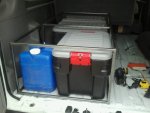
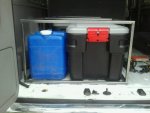
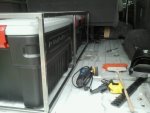
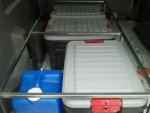
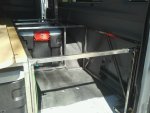
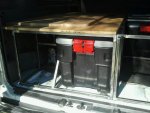
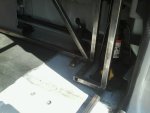
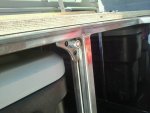
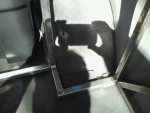
Started working on the storage area/sleeping platform today. I'm using 3/4" x .065 tubing to keep the weight down, but it will be plenty strong after I am done.

It took me a while to design, because I will use the van for several different types of trips, and I want to be able to easily switch between the different set ups.

It will be in 2 main parts that will bolt together, and I got the main part of the left side done today.

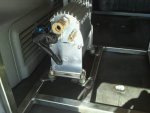
The area behind the water container will hold my compressor
 

Attachments

  • uploadfromtaptalk1350780720744.jpg
    uploadfromtaptalk1350780720744.jpg
    64.4 KB · Views: 45
  • uploadfromtaptalk1350780741549.jpg
    uploadfromtaptalk1350780741549.jpg
    59.3 KB · Views: 39
  • uploadfromtaptalk1350780778006.jpg
    uploadfromtaptalk1350780778006.jpg
    66.9 KB · Views: 40
  • uploadfromtaptalk1350780791795.jpg
    uploadfromtaptalk1350780791795.jpg
    58.8 KB · Views: 40
Last edited:

72blazerock

New member
Very nice conversion and interior start. But before you get too far you should get a roll cage in there, IMO. I happen to know someone who has one (see parts for sell).
 

bknudtsen

Expedition Leader
Very nice conversion and interior start. But before you get too far you should get a roll cage in there, IMO. I happen to know someone who has one (see parts for sell).

If you have seen Andrew's Pre-runner build thread, then you would know, if this guy needs a rollcage, he will fab one...
 

desertspeed

Adventurer
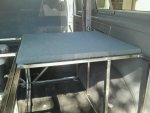
Finishing up my storage/sleeping platform. As I stated before, this took me a long time to design since I need it to be able to work for several types of trips. The biggest hurdle was that I needed it to fit 2 spare 37" tires, which is what I run on my prerunner and on the race truck that I chase for. Also, I really wanted everything to have its own spot and to be able to secure everything really well.

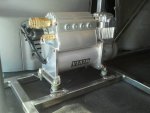
Here is how it ended up- it has 2 main sections that can be mounted independently but they bolt together. The left (driver's) side fits 2 Action Packers towards the front, and then 1 Action Packer and a 7 gallon water container towards the rear. My air compressor is mounted just in front of the water container. I am planning on making an aluminum panel that will mount on the back, hinged along the bottom- when it is folded up it will secure the Action Packer and water container, and when folded down it can function as a table for a stove while camping.

The right (pass) side fits an Action Packer or a cooler towards the front, and then has a larger section towards the rear. In "chase" mode, I can remove the top and fit 2 37" tires standing up side by side. They fit so tightly that I don't even need to tie them down. The bar across the rear has a pin release in the middle so it can be raised up to load the tires. When I am not carrying any tires, I can throw other stuff in that spot. I am still working on how to mount the wood top over that section, which obviously won't fit in place with the tires but I need for sleeping- I am hoping to figure out a way to have it fold over towards the driver's side on a hinge, but it may need to just be pulled off.

I am still working on covering the wood (3/4" MDO) with carpet. I used 3/4" because of the large area without any supports where the tires go- the 3/4 can easily support the weight of a person with no flex even in that area. The wood is bolted to tabs on the frame using 1/4" "tee" nuts going through the wood. The frame is bolted to some of the seat bracket and seat belt holes, and when everything is all bolted together it is very strong. I think I used about 80lbs of metal, and about 60lbs of wood, so it is not super light but I can easily pick up each side by myself.

After I use it for a while to make sure it is funtional I will clean it up and paint it. I also plan on adding some sort of utilitrack or tie downs along both sides for securing things on top of the platform.
 

Attachments

  • uploadfromtaptalk1352258036212.jpg
    uploadfromtaptalk1352258036212.jpg
    70.7 KB · Views: 38
  • uploadfromtaptalk1352258066307.jpg
    uploadfromtaptalk1352258066307.jpg
    72.3 KB · Views: 38
  • uploadfromtaptalk1352258087036.jpg
    uploadfromtaptalk1352258087036.jpg
    79.2 KB · Views: 41
  • uploadfromtaptalk1352258108057.jpg
    uploadfromtaptalk1352258108057.jpg
    61.9 KB · Views: 40
  • uploadfromtaptalk1352258133583.jpg
    uploadfromtaptalk1352258133583.jpg
    70.1 KB · Views: 40
  • uploadfromtaptalk1352258152592.jpg
    uploadfromtaptalk1352258152592.jpg
    88.8 KB · Views: 41
  • uploadfromtaptalk1352258178642.jpg
    uploadfromtaptalk1352258178642.jpg
    80.8 KB · Views: 40
  • uploadfromtaptalk1352258195033.jpg
    uploadfromtaptalk1352258195033.jpg
    71 KB · Views: 44
Last edited:

desertspeed

Adventurer
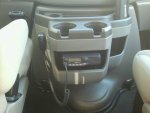
I also mounted up my race radio and Rigid 20" light bar, as well as my air compressor. The compressor is a new unit from Viair that can be used for both tires as well as lockers/airbags as it has a small integrated tank with 8 fittings. I might want/need to install some airbags in the rear for towing, so I wanted to be prepared.
 

Attachments

  • uploadfromtaptalk1352258227894.jpg
    uploadfromtaptalk1352258227894.jpg
    56.7 KB · Views: 41
  • uploadfromtaptalk1352258264787.jpg
    uploadfromtaptalk1352258264787.jpg
    74.4 KB · Views: 39
  • uploadfromtaptalk1352258281243.jpg
    uploadfromtaptalk1352258281243.jpg
    74.4 KB · Views: 43
  • uploadfromtaptalk1352258296972.jpg
    uploadfromtaptalk1352258296972.jpg
    74.6 KB · Views: 41
Last edited:

Forum statistics

Threads
188,398
Messages
2,904,180
Members
230,274
Latest member
mbauerus1
Top