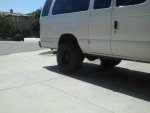
Introducing the Van-That-Can- 2000 E350 V10 EB Passenger Van

desertspeed

Adventurer
I didn't take any pics, but yesterday I welded up the upper shock mounts, installed the sway bar links, installed the centerlink/tie rod, swapped out the front u-bolts (Chris noticed from my earlier pics that I had installed the rear u-bolts in the front- thanks!), and painted up a few things. I also pulled the rear calipers and rotors off, since I am going to replace the rotors and brake pads while it is apart.

I did find out that my front shocks were 1" too short, so Chris is going to send out a longer set. I will need to install slightly longer bump stops up front as the fully compressed length of the longer shocks is cutting it a little close at full compression, and I don't want to risk bending the shafts.

Hopefully my new rear springs will show up today so I can get the rear finished and back on the ground. I still need to get my pitman arm off, install the drag link, install the brakelines, splice the ABS wires, and mount the steering stabilizer, but it is getting close......
 

CodyY

Explorer
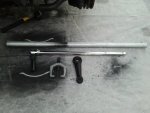
You may have to hit it pretty hard. I used the 3 lb mini sledge on mine before it popped.

Also, the big red wrench helps on em.
US_Navy_070517-N-9928E-009_Hull_Technician_Fireman_Zach_Carver_brazes_a_pipe_fitting_with_an_oxy-acetylene_torch_in_engineering_department's_welding_shop_aboard_Nimitz-class_aircraft_carrier_USS_John_C._Stennis_(CVN_74).jpg
 

desertspeed

Adventurer
Who's my b@*&ch? :sombrero:

uploadfromtaptalk1348085174298.jpg

Oh, wait a minute.........:mad:

uploadfromtaptalk1348085213869.jpg

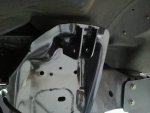
After finally getting my pitman arm off last night with the help of a very long breaker bar, I realized that the clocking was wrong for the new pitman arm. Chris said the best option is to put the stock one back on.

uploadfromtaptalk1348085197491.jpg

Upper shock mounts welded on.
 
Last edited:

CodyY

Explorer
really? is there a production split on the splines or can't you 180 the steering shaft at some point in the linkage?
 

desertspeed

Adventurer
really? is there a production split on the splines or can't you 180 the steering shaft at some point in the linkage?

I'm not sure. Maybe Chris can explain better than I can what the deal is with the different splines. There are actually 4 of the larger splines- the new arm has them at 12, 3, 6, and 9:00, but my stock arm has them at 2, 4, 8, and 10. So it is not a matter of just turning the shaft- they are at different intervals.
 

notmiller

Observer
I had the same spline clocking issue. My splines were the same as yours. The problem I found with just using the stock pitman arm and the crossover steering setup is that I couldn't get the steering stops to actually contact because the stock pitman arm doesn't provide a long enough throw. Consequently I wasn't getting the full turning radius possible out of the D60. There is another pitman arm out of the 1999-2004 Super Dutys that will mate up with your spline clocking (Moog K80796). It's a longer arm and maximizes the turning radius. You may need to check the compatibility with the ball joint you're using though. I had an additional issue where the ball joint was hitting the driver's leaf pack in compression because I'm running the thicker pack Deavers. I ended up drilling the pitman arm from the top for a Moog ES2026R and running the ball joint on top. Now it clears the springs and the frame. I have yet to test drive it though because I'm working on other issues.

But this is just my experience, Chris is the expert!
 

desertspeed

Adventurer
I had the same spline clocking issue. My splines were the same as yours. The problem I found with just using the stock pitman arm and the crossover steering setup is that I couldn't get the steering stops to actually contact because the stock pitman arm doesn't provide a long enough throw. Consequently I wasn't getting the full turning radius possible out of the D60. There is another pitman arm out of the 1999-2004 Super Dutys that will mate up with your spline clocking (Moog K80796). It's a longer arm and maximizes the turning radius. You may need to check the compatibility with the ball joint you're using though. I had an additional issue where the ball joint was hitting the driver's leaf pack in compression because I'm running the thicker pack Deavers. I ended up drilling the pitman arm from the top for a Moog ES2026R and running the ball joint on top. Now it clears the springs and the frame. I have yet to test drive it though because I'm working on other issues.

But this is just my experience, Chris is the expert!

Thanks for the info- Chris did mention the other pitman arm and the issue with hitting the leafs. In your opinion, how much of the turning radius do you lose with the stock pitman arm? I am just trying to decide whether it is worth trying to find a way to use the longer arm.

Is there a reason that I couldn't use the ball joint that came with the steering kit (not sure of the Moog part #), and just mount it to the top of the longer arm (Moog K80796)? Also, why did you need to drill out the pitman arm for the Moog ES2026R? Does it have a larger shaft than the one that came with the kit? Or is it a taper issue (I haven't really looked at the pitman arm closely enough to know if the hole is tapered.)

Chris, any thoughts?
 

notmiller

Observer
If I remember correctly, there was about ~3/8" of gap at the steering stops. The drag link that came with Chris' kit required the ES2026R threads but the tapered shaft on the joint is too big for the K80796, so you have to drill it out with a standard 7deg tapered drill. Luckily, there's enough meat to drill it out the opposite direction to flip the ball joint to the top, if you like. The downfall I see is that the drag link and tie rod are no longer parallel, which if I remember correctly is the ideal setup. But you'd have that same issue with going with the stock, short pitman arm.

Honestly, it might not be an issue to run the ball joint in the standard underside configuration with the K80796 if you're using Chris' Atlas springs. I'm running Deavers which are a much thicker pack and therefore less arch to achieve the same lift height, but Chris would know about its compatibility with the Atlas springs. I only had less than a 1/4" of clearance at full left turn at ride height.

ball joint clearance.jpg

By flipping the ball joint, I think I'm going to be able to keep my full upper travel or at least as much as I can. I still need to cycle it.
 

ujoint

Supporting Sponsor
I've tried to decipher which van gets which arm, and it never seems to work :) There's a GVW break @ 4200lb but I've had it go both ways. If you have the common 12,3,6 & 9 o'clock big teeth, the K80796 arm works with 6" kits and up. This arm is straight and 1.5" longer than stock. The 2,4,8 & 10 replacement arm is from Ford, and has a slight drop to it.

The problem with flipping the drag link is that the large opening is too big for the small end of the now flipped drag link end. To do this, the arm needs to be drilled out & have an insert welded in.

With either of these arms & the 4" lift, the drag link end will hit the spring pack at full lock. So the only decent fix is to keep the stock arm and loose a bit of turning radius. (more reason to go with a 6" lift!) :D

I've recently switched my drag link ends so no reaming of the pitman arm is needed. Costs me more but it's better in the long run. Hope this makes sense.
 

notmiller

Observer
The problem with flipping the drag link is that the large opening is too big for the small end of the now flipped drag link end. To do this, the arm needs to be drilled out & have an insert welded in.

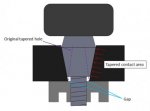
Chris, I'm not sure if I ever updated you after I did this. I found that with the K80796 pitman arm and ES2026R ball joint, no insert was needed. The worry for an insert comes from the fact that the major diameter of the stock hole in that pitman arm is bigger than the threaded shank on the ball joint. But the major diameter is still smaller than any portion of the tapered contact area on the ball joint, which I think is where the concern should be. I bought everything assuming I would need to machine and weld in an insert, but after I took a few measurements I found out it was going to be okay without one. I even drew everything up to reassure myself that I wasn’t crazy. Here’s a drawing that might clarify my thinking:

ball joint drawing.jpg

This is a standard ball joint interface. The red arrows point to the tapered contact area that you want to maximize. In most cases, if not all, there is always a gap between the minor diameter of the hole and the threaded portion of the joint because these joints are designed to take the load in the tapered area and not the much weaker threaded area. The dashed purple line shows the original tapered hole that we’re drilling out from the opposite end. Hopefully this makes sense. After I drilled it out, this was exactly what I got. The only reason this works in this case is that the stock tapered hole is for a smaller ball joint shank. If it were the same size, you’d definitely need to weld in an insert. So my disclaimer is that this only works for the K80796 and ES2026R pairing! :D
 

desertspeed

Adventurer
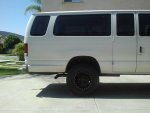
Since finishing up the front is still up for "discussion" :) I thought I would work on the rear. I still need to do some painting and a final torque, but pretty much done.
 

Attachments

  • uploadfromtaptalk1348176329626.jpg
    uploadfromtaptalk1348176329626.jpg
    28.3 KB · Views: 39
  • uploadfromtaptalk1348176348653.jpg
    uploadfromtaptalk1348176348653.jpg
    24.9 KB · Views: 37

ujoint

Supporting Sponsor
Chris, I'm not sure if I ever updated you after I did this. I found that with the K80796 pitman arm and ES2026R ball joint, no insert was needed. The worry for an insert comes from the fact that the major diameter of the stock hole in that pitman arm is bigger than the threaded shank on the ball joint. But the major diameter is still smaller than any portion of the tapered contact area on the ball joint, which I think is where the concern should be. I bought everything assuming I would need to machine and weld in an insert, but after I took a few measurements I found out it was going to be okay without one. I even drew everything up to reassure myself that I wasn't crazy. Here's a drawing that might clarify my thinking:

View attachment 122035


This is a standard ball joint interface. The red arrows point to the tapered contact area that you want to maximize. In most cases, if not all, there is always a gap between the minor diameter of the hole and the threaded portion of the joint because these joints are designed to take the load in the tapered area and not the much weaker threaded area. The dashed purple line shows the original tapered hole that we're drilling out from the opposite end. Hopefully this makes sense. After I drilled it out, this was exactly what I got. The only reason this works in this case is that the stock tapered hole is for a smaller ball joint shank. If it were the same size, you'd definitely need to weld in an insert. So my disclaimer is that this only works for the K80796 and ES2026R pairing! :D

Good info and nice drawing! What you have will work with the 2027/2026 ends, which I've stopped using in order to stop reaming pitman arms. The drag link end that I use now is the ES3427T which is the stock upper replacement for the SD trucks and fits in the stock pitman arm with no mods.
 

notmiller

Observer
Good info and nice drawing! What you have will work with the 2027/2026 ends, which I've stopped using in order to stop reaming pitman arms. The drag link end that I use now is the ES3427T which is the stock upper replacement for the SD trucks and fits in the stock pitman arm with no mods.
Oh, didn't realize you stopped using the 2026. My solution isn't cheap for those who don't have the reamer since those things are $$. Luckily I had this reamer around from a SAS I did about 10 years ago. I guess I got my money's worth cuz I used it.....twice.
 

Forum statistics

Threads
188,462
Messages
2,905,330
Members
230,428
Latest member
jacob_lashell
Top