Kitchen Kit/Chuck Box

arlon

Adventurer
Only issue with metal boxes is they are so noisy. I can't imagine the rattling from an aluminum box on a nice washboard road.. Maybe if you painted the inside with bed liner that would help keep the noise down. Might also add structural strength to the seams of a riveted box..
 

cruiseroutfit

Supporting Sponsor: Cruiser Outfitters
I keep thinking about that myself. Either welded or even just riveted and caulked at the seams, but I'm strongly leaning towards having a sheetmetal shop shear and bend me up the outer box at least. Worst case I might have my local metal supply do everything flat and just rivet everything together with angle stock at the corners.

Precisely how my Kamp Kitchn is built, aluminum that as bent and riveted. Makes for easy modifications and repairs. I'm working on some new models and they will likely utilize similar construction.

Only issue with metal boxes is they are so noisy. I can't imagine the rattling from an aluminum box on a nice washboard road.. Maybe if you painted the inside with bed liner that would help keep the noise down. Might also add structural strength to the seams of a riveted box..

I keep mine in a soft-sides storage case, adds some storage room (my skillet sits at the bottom) and keeps it clean, out of the elements and rattle free. Been working really well for a few years and hundreds of meals now :D

More pics of the unit and the bags I had made here:
http://www.expeditionportal.com/forum/threads/14117-Kamp-Kitchn?p=986875#post986875
 

Every Miles A Memory

Expedition Leader
I was thinking the same thing. If you're worried about the noise, just order some padded inserts that go inside the Pelican Boxes and it would keep everything protected and quiet

You could always wrap a few things in various sized Crown Royal bags or various other types of felt bags. Best part is emptying the bottles so you can use the bags :beer:
 

lupinsea

Observer
Design Is Finished
Last night I finished the chuck box design. The layout is largely the same but with some tweaking for packaging and size constraints along with the some adjustable shelves that were designed in. Then I laid out the panels in preparation for cutting.

chuckboxlayout.jpg

Tomorrow I'll be having it cut on my neighbor's CNC machine he has at his cabinet shop.

We'll be cutting three copies of the chuck box: one for me, one for my friend and neighbor with the CNC machine, and a third for another friend who's also a fellow Jeeper. We'll be cutting his cargo deck project at the same time, too. Though I figure he'll post up here with his own write-up on his own cargo deck project project.

It should take maybe 15 min or so to cut out each one. The machine will handle all the dados for the adjustable shelves and the internal partitions.

Can't wait.

Look for a proper write-up once I finish the project which might be in a few weeks due to other things I need to take care of at home first.


Metal Wash Bin
I thought about having one of the many local sheet metal fabricators whip up something for me but it would probably cost ~$100-150 or so. They do excellent work but it costs for the machines and man hours.

So, I'll wait on the wash bin and fab it up later myself out of mild sheet metal or something. I like the idea of coating it with a truck bed liner material.
 

ethernectar

Adventurer
Thanks everyone for sharing! Got some good ideas so here's mine.

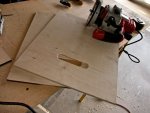
My chuckbox build, baltic ply.
Chuckbox1.jpg

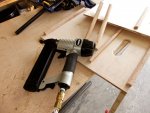
Planned on learning dovetail joining for this, but I don't have a table saw so ended up buying a brad nailer. That's a handy tool!
Chuckbox2.jpg

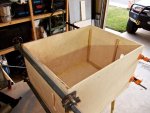
All boxed in.
Chuckbox3.jpg

Lip on top to keep stuff from rolling off.
Chuckbox4.jpg

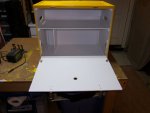
Painted the inside white.
Chuckbox5.jpg

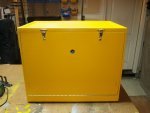
Bright gold on the outside with brass fittings.
Chuckbox6.jpg

Open up and say aaaaah.
Chuckbox7.jpg

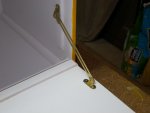
Brass doohicky...
Chuckbox8.jpg

Loaded up. 3 propane cans behind the off and, bottom boxes hold utensils, coffee, spices, misc and all the other stuff goes in the wash tub.
Chuckbox9.jpg
 

jammyauto

Adventurer
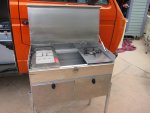
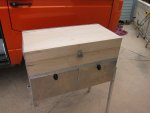
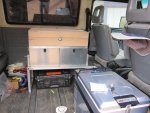
Here's one I just built. I was inspired by the kantz kitchen but wanted to use snow peak stuff. This kitchen is built for my syncro which I use only for solo trips or trips with just my wife. I wanted to fit the smaller stove, bbq and basically my entire kitchen in one unit that I could use inside the van (not the BBQ of coarse) or outside.
unsorted 001.jpgunsorted 003.jpgunsorted 005.jpgunsorted 009.jpgunsorted 002.jpg
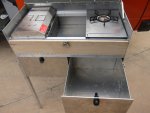
After building this I can totally understand why the kantz goes for what it does. I spent close to 400.00 on Maple, stainless steel, aluminium and stainless steel hardware to build this. Thebox is tig welded aliminium as are the drawers. The lid is maple with stainless steel on the inside. If I was to build another one I would leave out the maple as it added some weight to the kitchen. I'm guessing it's about 70 lbs with the stove and BBQ. I can move it in and out of the van but it's not exactly light.
My next addition is to build a stainless "sink" that is the standard snow peak size. The kitchen is designed to hold 3 snow peak items.I'll post up some more pictures here one I put the kitchen to use. It's still a work in progress.
 

jammyauto

Adventurer
Thanks for the compliments. The burner is a snow peak stove. This is kind of like "kantz meets snow peak" system. The kitchen is sized to hold 3 snow peak appliances.
 

Forum statistics

Threads
188,028
Messages
2,901,388
Members
229,352
Latest member
Baartmanusa
Top