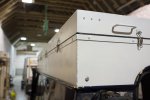
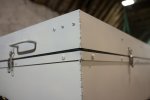
Making a ifting roof on a 110

wuntenn

Adventurer
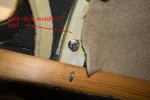
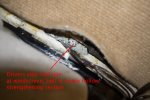
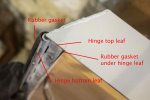
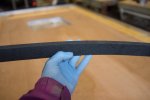
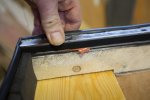
Have made a decision about the seals. I found the following rubber profile which ironically is a part for a LandRover door but available off-the-roll from seal suppliers. Its a simple flap with a pre-formed curl. Wall thickness is around 2mm.

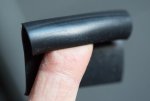
seal-1-3.jpg


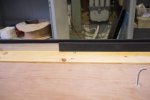
seal-2-2.jpg

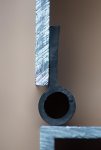
The idea is that I can use this above the top leaf of the hinge. This will both seal the hinge/roof join and the 'curl' is perfect to go around the hinge ball, effectively sealing it from blowing water coming in.

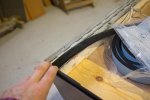
seal-3-2.jpg

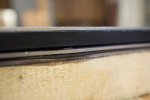
It is supple enough that when the lid is opened it will bend with the hinge and maintain the seal.
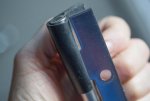
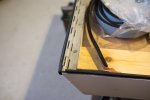
seal-4-2.jpg

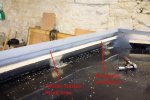
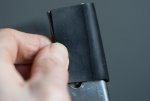
On the lower hinge/body interface I can put a simple flap of 25mm x 1.5mm rubber that will extend out to touch the curled over section to provide a reasonable join. Neoprene strip inserted in between the hinge (ie over the top of the screws) will seal it when closed, as it will be 'pinched' and under pressure from the closed hinge.
seal-5-2.jpg

And of course this has raised the lid by the thickness of the curl section - 2mm, plus the flap on the lower hinge another 1.5mm, so that's a total of 3.5mm to 4mm. This has meant that I need a slightly thicker seal on the other three edges around the roof and I found an 8mm 'tadpole' section that is perfect. It's actually got a manufacturing defect and this has resulted in the flange being off-centre so that the gap on one side is 2.5mm and on the other is 3.5mm instead of being central. This has meant I can use it for my 3mm section and it wont protrude beyond the face of the top section when not under pressure, and will therefore be clear of the clips when it comes down. I've kept the clips slightly above the surface of the lower lip of the roof to use as stops/guides for the raising/lowering section as you can see here in a previous post.

I estimate when its under pressure the tadpole will deform to 'lose' its hollow in the middle part of the roof (but only half deform at each end of the roof given the 'banana' shape I'm working to alleviate/seal) and so will end up raising the lifting lid by twice the seal wall thickness of approx 2mm = so around 4mm total. Which is pretty much what the hinge rubbers at the front raise the lid by given their thicknesses. Of course the only way to find out for sure if all this works in practice is to do it! Does all that make sense? Basically I'm having to take into account the deformation of the main seals around the three sides, and what thickness they end up when under pressure, and then that precise amount will be the gap at the hinge that needs sealing, split into two separate seals, one above and one below the hinge. Clear?
seal-6.jpgbut

Van is now temporarily in a friend's dry barn/workshop with 18 feet of overhead space - I need 16 feet to raise my roof to vertical to fasten the hinge so its a perfect space. Hopefully will have the roof fastened down, sealed, lid and hinges fixed and seals on, gas struts fitted in the next few weeks if it all goes to plan. (fingers crossed!))
 
Last edited:

wuntenn

Adventurer
Well its slowwwwwllllly ongoing. I'm at the stage where a lot of effort results in (apparently) little progress.

lid-2.jpg

I've cleaned the old mastic out of the gutters of the old roof on both sides in preparation for sticking the new top on (and can now see where leaks originate) and have drilled the holes for the bolts through the lower section brackets/old roof, and stuck the lower section down with PU sealant.

I'm not fully bolting it up tight until I fit the lifting top as I may have to tweak the alignment of the sides to suit the top alignment - there's a few mm play because I've drilled the roof holes slightly oversize to allow the roof to flex (the whole van flexes quite a bit when on rough ground).


I've managed to get the brackets aligned with the rigid strengthening channel above the windscreen - pics below show the area above above the rear view mirror, through the two main ribs in the roof on either side near the middle of the van, and above the drivers side windscreen, which means the new roof has got a good 'grip' of the old roof.

lid-10.jpglid-9.jpglid-8.jpg

I'm fitting a pressure-treated timber batten under the lower hinge fixing point which will a) strengthen the hinge fastening area, b) provide a firmer attachment point for the self-tapping stainless screws, c) help seal the lower hinge area from water ingress. The angle alloy I've used for the sides and which has dictated the size of the front area will take a 25mm thick insulation sheet under it and give a flush finish - you can see the insulation in the shot below. It'll be tacked on with mastic then builders foam will be skooshed all around it to fully grip it and the new sides and fasten the whole plot to the old roof - basically I''ll fill the recess down the curve into the old gutter with foam and it will insulate, seal and glue the new roof to the old.

lid-1.jpg

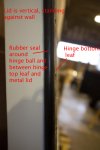
The rubber seal on the hinge is fitted - the roof is standing on edge against the wall so the pics are 'vertical'. Basically the pre-curved rubber is fitted so the flange is trapped between the lid and the top hinge leaf. The curve then wraps around the ball and presents a nice curved barrier to weather and allows any drips running down when the lid is lifted to run right off.

lid-7.jpg

lid-6.jpg

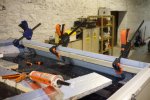
I know there's been some wondering about whether I remove the old roof or whats going on - so here's a rough idea for you - I'm keeping the front area of the roof intact above the front seats, and cutting it across the width just behind the big strengthening rib that is immediately behind the lap joint where the roof goes from flat to slope.

lid-3.jpg

And at the back I'm cutting it a few inches in from the back door (to allow for some bracing of some kind to be fitted) and along the sides it will be cut just where the flat of the roof starts to curve down into the gutter. It is in effect a giant sunroof - keeping the front area makes it strong above the front seats and means the front part of the bed which is bolted through into the remaining roof becomes a structural component, and leaves a void that can hold stuff - radios, flip down tv, an inverter, whatever. The sides will be braced with some angle alloy and will provide a storage area for the flapping fabric that will eventually fall inside when the roof is closed and the fabric sides need somewhere to go. Keeping the sides wont impede the interior in any way because there will be a cooker unit on one side and sink on the other, both of which are about 300mm deep so will stick out into the van. The void I've created can hold wiring, lights, ducting for a cooker smells extractor or whatever else I fancy.

lid-4.jpg

Tomorrow I hope to get the rubber Tadpole/P-section seals glued onto the lid perimeter. I'm still working alone so some tasks take ages as they're so fiddly and an extra hand would be useful - these bolts through the roof are a good example - pita to both hold them below and stick nuts on above - 9 foot arms would be handy (three of them)!
 

wuntenn

Adventurer
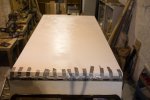
Today I got the seals fitted. Some sort of special two-part contact adhesive was suggested by the seal supplier, but I'm not impressed by its 'workability' - seemed to go off very fast, although to be fair I may have used too much catalyst as there was no instructions so I assumed equal measures of the two components. Anyway the seals went on but I had to give two coats of glue and work fast. Seems to have stuck ok though.

seals-1.jpg

seals-3.jpg seals-2.jpg

I then added some closed-cell foam above the seals simply to prevent condensation on the bare alloy (which will obviously form behind the seal and be trapped otherwise). This part is all hidden when the roof is up/down so I'm not too fussed about how pretty it looks.

seals-4.jpg

seals-5.jpg
I'm intending putting a length of self-adhesive closed-cell foam draught strip between the hinge leaves, stuck to the lower hinge face which will also help seal the c/sunk screw heads. You can see it here below - I had this laying about so thought it might do, although it looks a bit on the fat side I think it will compress when under pressure of the
closed roof.

seals-7.jpg seals-6.jpg seals-8.jpg seals-10.jpg

Last pic above is a 'layer cake' of timber batten beneath the alloy frame of the lid, then rubber seal (black), then hinge leaf, foam strip, hinge leaf. Obviously as this is the lid, its being shown upside down so in the real world it will be flipped over.

Up front above the windscreen I've installed another wooden batten which will strengthen the hinge area on the frame for the bottom hinge leaf, help seal it, and give more grip to the self tappers which are 25mm long and will come pretty far through the 3mm alloy and get a good bite into the timber. It's just stuck on with silicone mastic at the moment and will be properly held by the hinge screws when they go in.

seals-9.jpg
 
Last edited:
Arjan

Fossil Overlander
Great progress !

It takes the time it takes - but I'm really looking forward to see it late this year in the metal !!!

Keep going - it is going very well !!
 

wuntenn

Adventurer
Well today (Saturday) was a surprise. I wanted to try to fit the lifting lid, but it was dependent on the availability of a couple of other lads to help me lift it, and if it didn't work and we'd to come back to it later it'd be the next Saturday before I'd get another chance. But it all came together and we kicked off at about 3.30 and by 6.30 we'd got it on and to my surprise and delight it fitted (more or less)!

fit-1.jpg

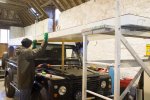
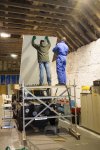
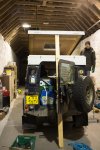
We'd to put a small scaffold in front of the LR and balance the (awkward & heavy) lid on it. That was a big and difficult lift. Then pull the lid forwards onto a wooden T piece that supported it over the bonnet, with its other end resting on the scaffold. Then we realized that that rubber seal that curls around the hinge was preventing the hinge leaf from going onto the lower lid. So we'd to duct tape it up out of the way - which was a fiddly wrestling match but worked fine.

fit-2.jpg

I managed to get two screws into the guide holes I'd drilled when I did a dry run during a test last year when it was still a bare frame and manageable to lift on my own, and then slipped a length of thin rubber tape under the hinge leaf to pack it up and seal it when screwed down. Those two screws were all it needed to hold it firmly so we could then lift up to vertical and tip it over to try it down onto the lower frame and see if it fitted.

fit-4.jpg

fit-3.jpg

Getting it up and over was a horribly precarious and slightly unnerving experience - a couple of straps over the roof joist made it a bit easier, but it was still pretty fraught - one careless slip and someone would at the least lose some fingers, at worst be killed, and either way the whole thing would be trashed, falling from that height. But we took it slowly, always two of us holding it, and up it went, and down it came and although it was rather tight on the passenger side - about 1mm out and hitting the edge of a clip - it fitted. I shoved a piece of wood across inside the lower frame to push the sides out (widen it) and the lid popped down. I'm going to have to either slightly bend a clip or two out by 1mm or file a bit off the edge of the lid at the clip area (or both) to 'sweeten' it a bit.

fit-5.jpg

Front with duct tape holding rubber seal up out of the way.

fit-7.jpg

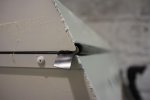
Tape removed and seal rolled over and curled around the hinge ball nicely.

fit-6.jpg


It looks like all my calculations and guesses about the seals thickness and accompanying rubber packers under and above the hinge were reasonably accurate - I'll test it with a hose soon. My one fear was that the clip adjustment (the clasp part is on a screw) would not be sufficient to reach the now further away J hook on the lifting section, but I'd left enough play and the clips caught just fine.


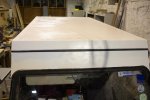
So here's what it looks like - front, rear quarters, back. Unfortunately the duct tape was damp and the silver stuff came off when I removed it from the hinge area but left the glue behind so a bit of cleaning to do there. Can anyone suggest a cleaner for the glue that wont remove the paint as well? What hasn't helped is that the paint on the roof is not entirely smooth but has a slightly rough texture (probably not enough of it on there) - and when it was outside and it snowed onto it the snow really gripped it and was hard to wipe off - so any suggestions for a decent brush/roller applied gloss enamel that I can put on the roof to both seal it further but make it more durable and 'slippy'?

Ignore the paint runs in the lower picture - these will be covered over with some vinyl transfers I'm putting on to break up the white slabby sides. And that's the tail of the thin rubber seal under the lower hinge leaf that's hanging out - seals need some trimming and mastic to finish here and there.

fit-12.jpg

fit-11.jpg

fit-10.jpg

Despite what it looks like - rather tall - its ended up only about 5 inches higher than the original roof. The line at the bottom of the clip in the pic above is the height of the original roof inside so overall it's ended up less than the height of a roof rack on top, never mind adding a roof tent on top of the rack. Will need to measure it from the ground and see what it is overall.

This was a significant step forwards - the van can (hopefully) be driven now and not turn into a swimming pool. I'm so grateful to my friends for the use of their barn - could we have done this outside? Maybe - by going under a tree or by rigging up some wooden or metal support structure, or with a forklift - none of which I have handy! But with any of those one gust of wind would likely end in disaster. Anyone having a go at this make sure you have a good think about process, make sure your companions fully understand what might be clear to you but may not be so obvious to them, and take more precautions than you need, backups for your backups are always worth putting in place. Big thank you to Steve and Richard for the muscle, ingenuity and encouragement!

Next step is the gas struts so it will stay up and I can then get accurate dimensions for the fabric sides.
 
Last edited:
Arjan

Fossil Overlander
Oh YES !!!!!!!!

What a great progress you've made.

And yes - we have lifted a few Brownchurch roofrack with rooftents / box on & off Land rovers and that is never an easy job - unless a hoist it there to use.

Looking very good - looking forward to see it open up !!
 

86tuning

Adventurer
Very impressive work, I've been following your progress from here in Canada, across the big pond. It's a big commitment to cut a hole in the roof!

To reduce the dangers of the roof piece when flipping it over, you could have tied a rope to the lid, and to a beam or other solid anchor in front of the truck to allow you to lower it slowly, or catch it as needed.

A mate with rope and rock-climbing or rappelling gear would have come in handy for this.

Looking forwards to seeing the interior, when you get to that point.
 

wuntenn

Adventurer
Aye we had a safety line! You can see it in the last couple of images, and its shadow on the white roof in a few of the others - a green heavy duty lashing strap round the roof beams which was tied onto the handles on the end of the lid, with a loose second one as a lowering one. When they were actually tied on I wasn't taking pictures! I was holding on tight, fiddling with rubber, or jumping about like a mad thing!
 

ersatzknarf

lost, but making time
Congratulations on the big step forward. Think it all looks great. Have been checking this thread every chance. Wish I had a recommendation for something to remove the duct tape residue. There are some commercial removers here, but I have only tried one and did not have good luck with it. I suspect your "google-****" is very strong and that a bit of a search will turn up something as good as you've done with your successes with the rubber seals, etc.

Will be a bit sad, when it is all done, but am hoping you will treat us to the interior build, also :D
 

MDM54

Observer
Duct Tape Residue

Quickly dab/stick a piece of fresh duct tape to the residue and it will lift off. Will require multiple dabs.
 

Forum statistics

Threads
188,213
Messages
2,903,867
Members
229,665
Latest member
SANelson
Top