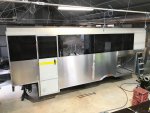
Mercedes 1222A.. The beginning!

Sitec

Adventurer
Hi Ian. Thanks for the reply. I'm only using this in some of the voids under the floor. I've bought Kingspan rigid insulation for the sides and roof. The roof had previously been insulated with the itchy stuff and was still good, and dry, so hopefully the little bit I've used under the floor sould be fine too.
 

Sitec

Adventurer
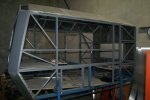
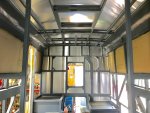
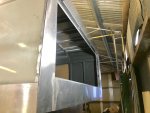
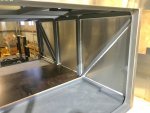
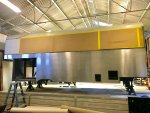
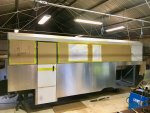
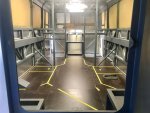
The joys of a long weekend means stuff happens!! Over the course of the last few days I have managed to put the lid on the job! The roof is on! Here are a few shots of my easter antics... The view inside what now feels like an empty railway carrage!

Body mods 96.jpg

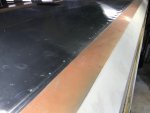
Here's the LH side bonded and riveted in place.

Body mods 95.jpg

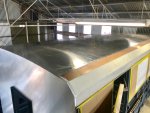
And the completed job.

Body mods 94.jpg
 

Sitec

Adventurer
A little more activity here at the weekend. I completed the time consuming job of sheeting around the rear viewing door. I'm glad I've taken the time to add this door, even though theres a bit of work involved!

Body mods 97.jpg

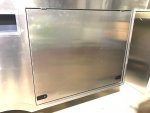
We also managed to bond the lower panel in place. The rear lockers are starting to feel like lockers now!

Body mods 98.jpg

I've also ordered a Truma Aqua Go hot water system, as I need to decide where I'm putting it, as I'm thinking it'll need a frame to support it. It'll either end up at the rear of the truck behind the spare wheels (top half of the center panel pictured above), or just above the diesel tank under the hab box seats on the right side of the truck. I'm still undecided! :)
 

joeblack5

Active member
That is a lot of progress, impressive. That frame should easily hold up in a side flip. I really wonder how the glued boxes hold up with a side flip?
I can imagine the glue can handle the weight when you gently lay it on its side but how would it hold up and how repairable is it when in falls over with a shock? One of the reasons why i go with a bus body.

I see the insulation laid below the floor. One of them shows a hole for drainage/ ventilation? Are all like that ?

Johan
 

Sitec

Adventurer
Hi Johan.

It's getting there. I'm currently waiting on the rest of the Aluminium side panels that are being folded locally. I'd hoped to have them for this weekend, but there's lots of other stuff to do if they don't get done. Hopefully I never flip the truck, but yes, it's a solid frame. I had to remove a short section of 50mm timber batton that I'd glued in place, so we can fit the Truma Aqua Go where we want it. I'd only glued the batton in place a few weeks ago, but it still took a hammer and two chisels to remove it! The Bond and Seal is very good! I've never seen the aftermath of a composite box that's rolled heavily, but so long as there are a few internal bulkheads, I'd think they'd still hold up well... Cloud 9 was involved in a gentle roll when the road gave way under the truck, and landed on it's right side. The hab box (composite) didn't have a mark on it, so they're pretty resiliant.

Re the hole in the rear locker floor, I have a plan to have the ability to pressurise our Hab Box when on dirt roads, and the hole in each rear locker will have a 2" flex tubewhich connects to the rear lower lockers. These lockers have a small fluted outlet vent at the rear. The idea being that if I feed more air into the top front of the hab box than can escape, it'll pressurise and not allow the dust in... Yet to build that bit though... :)
 

Iain_U1250

Explorer
I agree Simon, strength wise as long as the composite box has reasonable front and rear walls, or internal bulkhead wall, they should be very strong in a slow roll over, but I have seen the photos of the fridge truck boxes fold flat because of the big doors at the rear letting go, so it the front or rear has large windows or door, it won't have much strength at all. Probably why you seldom see a window in the rear of the major expedition body manufacturer's vehicles.

My main concern and why I didn't end up going the composite way was the out skin getting damaged by tree branches. I know of two composite box trucks, both by major manufacturers that have water leaks due to cracks in the outer skin. I've been in both an they have that musty old caravan smell to them. On mine, each seam in roof was covered with another piece of aluminium, all glued down to the water has a long way to get through to the inside. We had had one branch hit the truck so far, causing a dent in the aluminium high up on the top. We hit it at about 30kph, roof bars helped a bit, but it was quite a hit, the tree snapped off at the base (about 5" across) as we twisted the whole branch around.

I'm pretty sure a composite box would have survived OK as well, but would the outer skin have been cracked, especially those with the thin fibreglass skins? I think it would have.

The otehr reason was I wanted it certified for rear passengers, my Engineer said he would want an internal steel cage if passengers were to be in the back in a composite box unless I could do the calculations to proved how strong it was. I designed my steel frame using the ADR bus code, same member sizes but at closer centres, and then a fully trussed cage front and rear section. He was happy that it passed the "Substantial" rule.

Mine is pretty lightweight compared to your Simon, I think yours would hold up falling down a mine shaft :)

PICT2231.JPG
 
Last edited:

Sitec

Adventurer
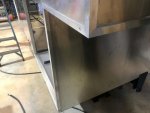
Long weekends equal progress... Our Truma Aqua Go turned up, and discussions were had as to where it is to go. With that decision made, I cut and added a frame to support it on the right side of the truck, and then got on with gluing the aluminium sheets on having collected them from the folders. The smaller hole will have a hinged flap on it which will be used to access the diesel tank. 'Fun' was had lifting a 3m sheet onto a glued surface whilst stood atop a step ladder. I had to be careful not to bend it as there is a 10mm upstand fold that runs along under the windows.

Body mods 100.jpg

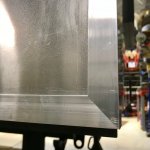
Next up was the left side. This had a few more things to work around. Each sheet has a 90 deg bend on one end which folds into the door frames. I'm happy with how the sheets have worked out, and pleased with the gaps around the access door.

Body mods 99.jpg

The next job is to cut the skylight holes out and get some light inside the now dark box! Ince this is done, I'll fold and bond lthe last few missing trim bits around the door and in front of the windows, and then I can cut and bond the 1' x 1' alli angle around each corner as a finishing trim. Now to start prodding the painter!
 

Sitec

Adventurer
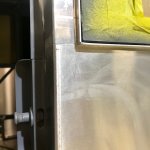
This week I finished off the aluminium skinning. Here's one of the pieces surrounding the Hab box door. This will be sanded and sealed before painting.

Body mods 101.jpg

With all the 2mm sheeting completed, I can now look to the final corner capping using aluminium angle. Here are the first few pieces loosly taped into place.

Body mods 105.jpg

I plan to drill and countersink these, ready to then bond and rivet in place using blind countersunk rivets.
 

Sitec

Adventurer
Capping continues! Here's the rear left corner.

Body mods 107.jpg

Now the body is enclosed, I needed to reposition the workshop lights. Roof hatch holes cut and the lights are now in the hab box!

Body mods 108.jpg

Hopefully I'll have the body exterior finished, and then I'll focus on a few things that need painting and fitting on the truck before the body goes back on. I need to get the grey water tank fitted and work out where the outlet is going to come from out of the hab box. I also plan to set up a decent 24v supply from the truck batteries to the hab box, via an Anderson Plug. Loads to do, just planning the order it needs to be done in!
 

Sitec

Adventurer
This weekend was spent finishing the capping, and then pondering how to finish the rear body wheel arches... I decided that because I'd replicated the front wheel arch shape on the rear, I should continue with that theme, so the capping trim is replicated from the top section of the front arch...

Body mods 109.jpg

Now to decide if the arch goes grey the same as the whole body, or if it goes satin black to match the side skirts and front arches...

Body mods 110.jpg
 

Sitec

Adventurer
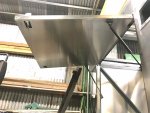
A little more progress here. I've primed and clad the side and rear doors, and the crawl thru doors, and have now hung the rear locker doors. Heres the left door in the closed position...

Body mods 114.jpg

And the right door in the open position...

Body mods 112.jpg

Next up is to get the rear door hung at the weekend, when I have Wifetec to help. I'm now drilling holes for the rear marker lights, reverse camera, and side indicator repeaters. I need to get these cables in and glued down before insulation goes in. The last few evenings we went through the Narva catalogue and picked out all the lights we want. It's easier to have them to hand when running cables as things like the awning lights willneed cables in before the insulation goes in. With the outside almost complete, I can turn my attentions to the inside!
 

VerMonsterRV

Gotta Be Nuts
I am sure you have thought of this but the wiring you say glue before the insulation goes in, are you planning on being able to replace it if there is ever an electrical issue (I know, probably a dumb question)? Our sailboat had PVC conduit thru out for wiring runs, which made things way easier when things failed. In our truck I ran the wiring inside cabinets to make it accessible(well that and the walls we composite panels).
 

Sitec

Adventurer
Hi Jon.

Yeah, I have managed to get most of the internal wiring so it will be accessable once the vehicle is complete. These wires I'm fitting now are for the top marker lights on the hab box, and the side repeaters above each rear wheels. With the steel framework of our box, it'd be very hard to run a conduit for these wires, so I've decided to run them in such a way that they are secured internally, and (in theory) should never give issue except at each end where the cable is connected to the light or supply. If ever there was a problem in the future, I will just have to run a surface wire somehow.
 

Forum statistics

Threads
188,201
Messages
2,903,720
Members
229,665
Latest member
SANelson

Members online

Top