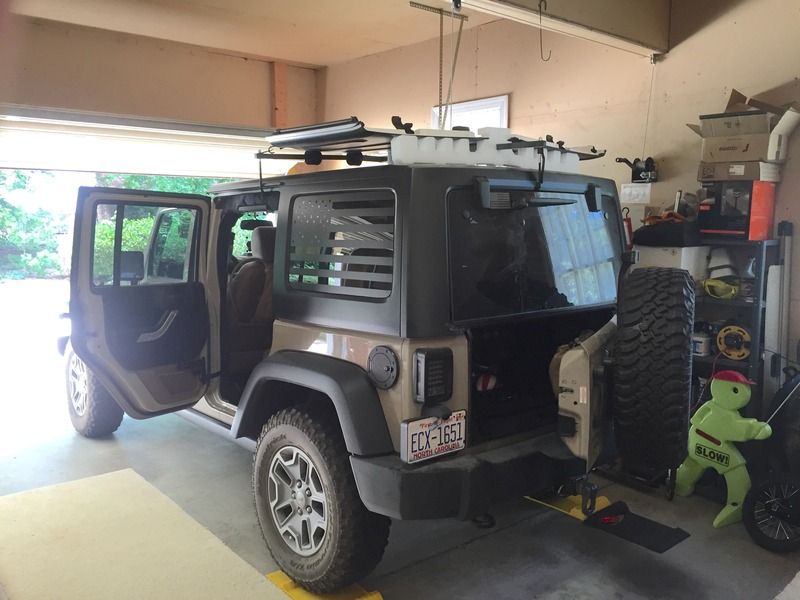
My 2016 Mojave Sand JKUR

Comanche Scott

Expedition Leader
yeah, if the fuel tank didn't hang so low on the Jeep, a couple of tube sliders would be an excellent option.
On the stock fuel tank skid, just that front section seems to get dented in to the point where extra protection is required.
I thought about having a piece of 3/16" plate bent in a brake, then welding it to the stock skid plate. Basically running from where it bolts in the front, to the first cross structure support.
I've got a few heavy scrapes and small dents behind that area from sliding over big arsed rocks, but nothing that would damage the tank itself.

Summit Racing has a really good deal on the TJM aluminum skid plate for the fuel tank ($135 delivered). It's 5mm aluminum, and fits very tightly over the stock fuel tank skid plate. 33 lbs total weight, which is nice too. It is 1 piece though, and it's a pita to install with a bent up skid plate.
 

ReconH3

Heavy Duty Adventurer
49B76BEF-8471-4FA4-A666-7C00EEC1BFAC.jpg


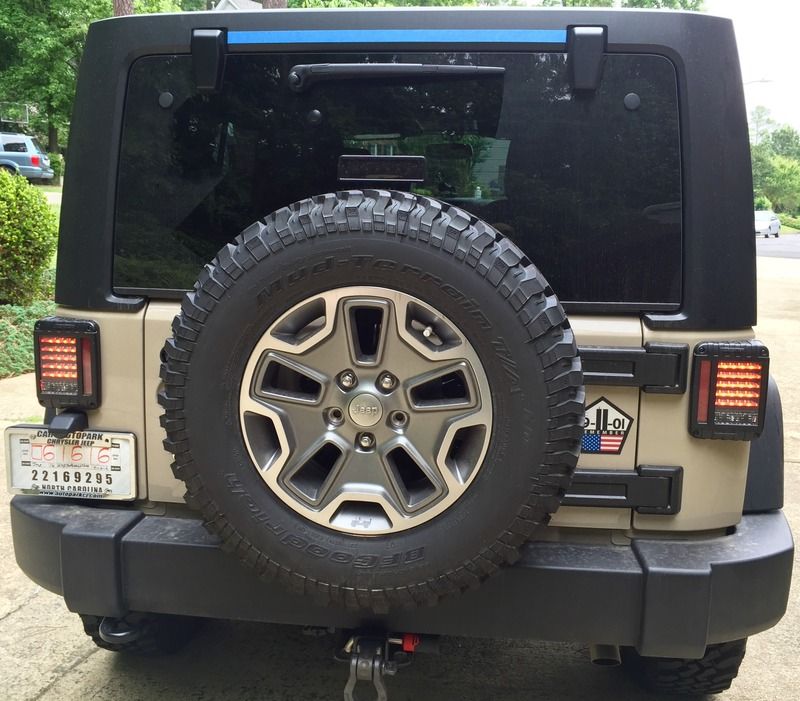
Finally installed the JWS LED taillights. Had them sitting around but only just got to them.

ED8C3F1A-3D2B-43F7-ABAB-8F10E1BA44F9.jpg


13BD6E57-9A1B-48CE-AFF6-9339D14A943E.jpg


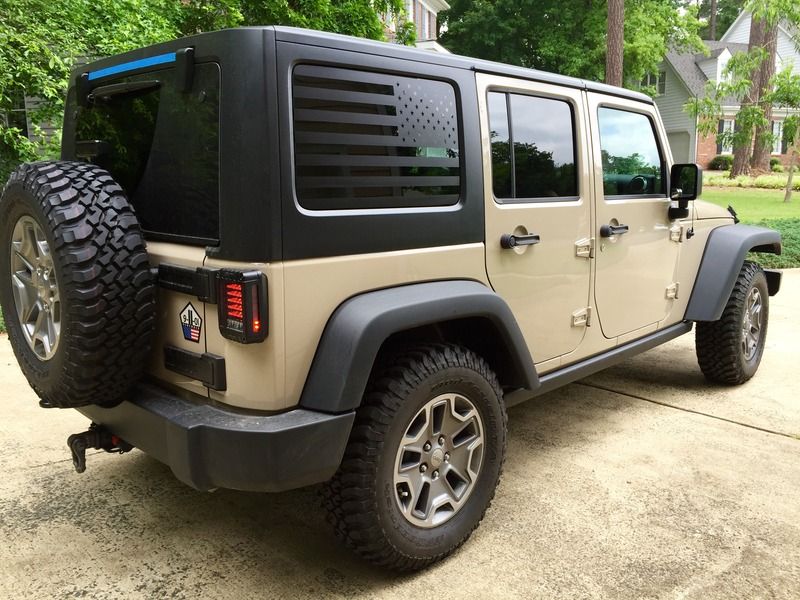
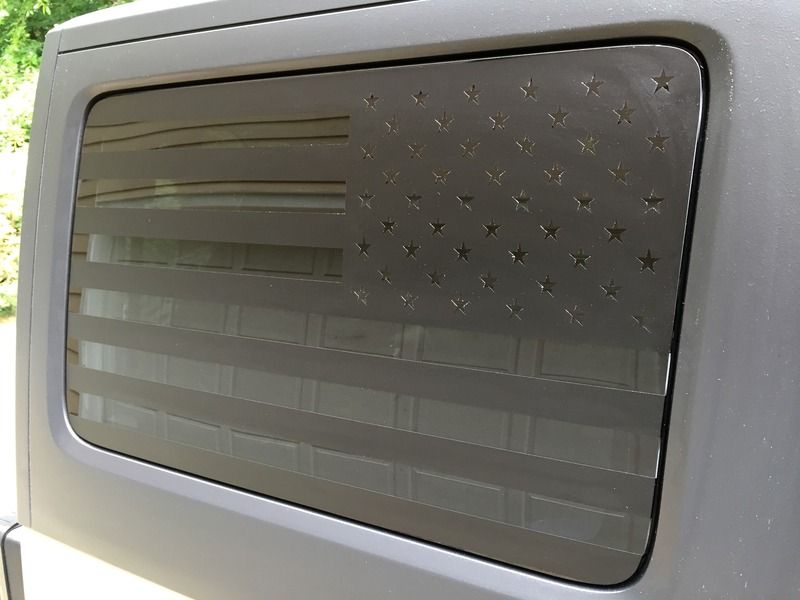
Was feeling patriotic so I had these subdued Flags made. Came out better than I had envisioned. :D
 

ReconH3

Heavy Duty Adventurer
Thanks! It was a spur of the moment idea. I was going to cover the windows in black vinyl from the inside so people couldn't look into the cargo area. Then I remembered that I knew someone that had perfed vinyl that he could print stuff on. I was going to have him print a subdued flag, but that's when it occurred to me that cut vinyl was even easier and cheaper.
 

ReconH3

Heavy Duty Adventurer
D38924DB-9D30-4E29-AE73-63656B78697E.jpg


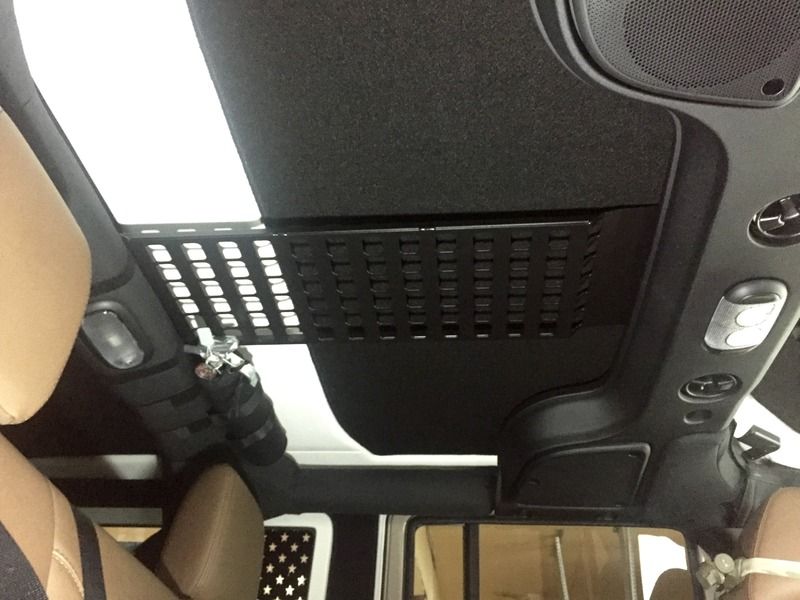
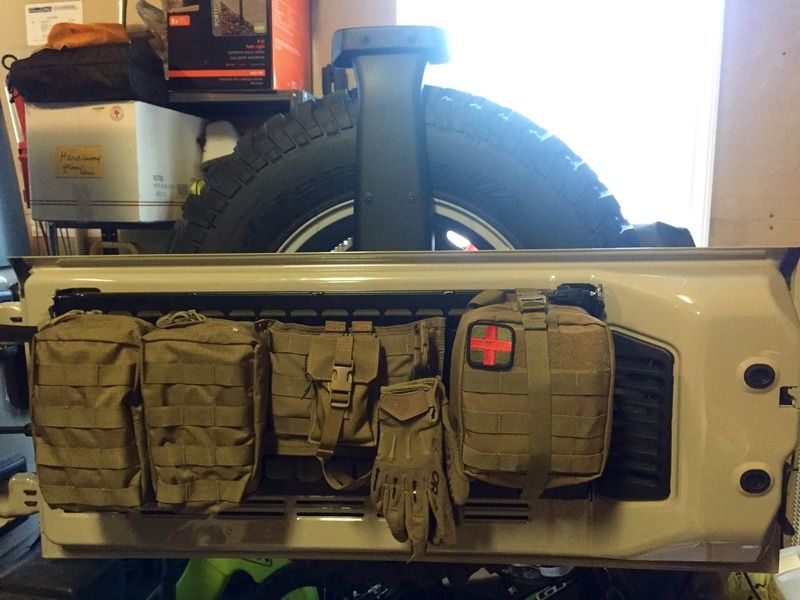
Installed the rear molle panel from Molle Platform Solutions.

ED3498D4-0358-4C4C-B0BB-79D06FA29B0E.jpg


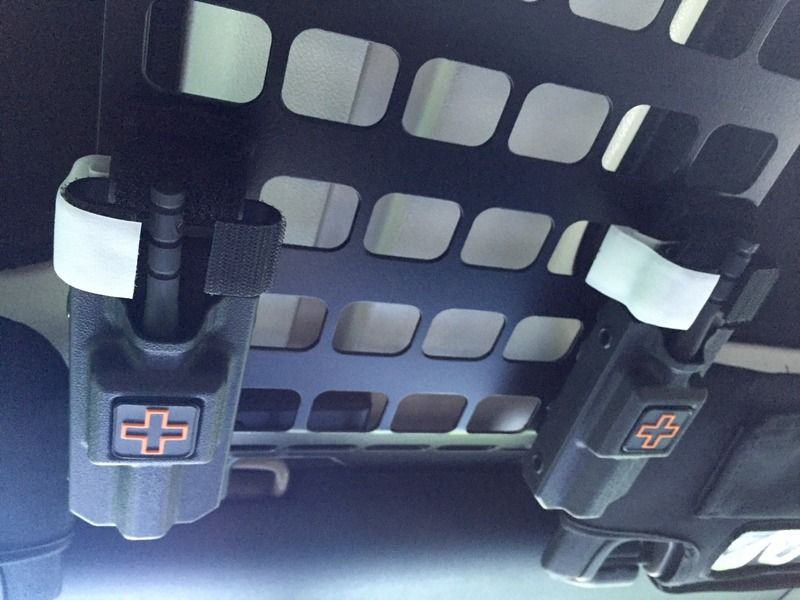
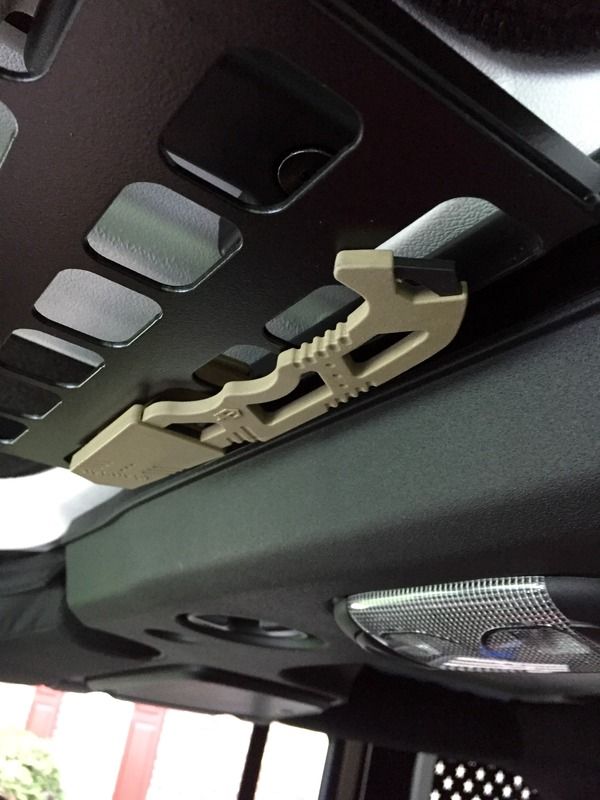
Added some tourniquets in the overhead molle panels as well as a belt cutter/window breaker.

D92182BF-4235-4B07-A01B-5F5F75A2C8B9.jpg
 

ReconH3

Heavy Duty Adventurer
A992D466-EEEB-48DE-A022-B2923F1985E9.jpg


Finally assembled a decent trauma kit. I spend a lot of time at the range and it's only a matter of time before a negligent discharge occurs. Also in the wilderness, anything can happen and usually Murphy is nearby to throw a monkey wrench to make things worse. After several training classes, I've built up a list of gear I know how to use and not some generic bought first aid kit. First pouch on the left is for splints and bandages for sprains and broken bones. Second from the left is for extra dressings and other duplicates in case a multiple casualty situation pops up. Far right is the main kit that is removable from the panel so you can take it with you. It contains all the more serious gear like tourniquets, NPAs, chest seals, coagulant dressings, sterile dressing, shears, gloves, finger light, etc. Second from the right is a folding litter that can be used by one or more people to carry the patient. On top of that is a strobe for signaling location if needed. There's some work gloves in case some work needs to be performed to access or retrieve the patient, that sterile rubber gloves can't handle. I think that's everything. :D
 
You know. I have a question never have used anything Molle before, But how does one keep track of where one puts something I've noticed several bags which seem the same without markings.. yet the medical bag is clearly marked.. I wonder if anyone has ever thought of creating small scout type patch for the bags just to organize things.

carabiner_boy_scout_patrol_patch_2_inch_500px__56059.1422250247.500.659.jpg


B4500__19424.1447169244.500.659.png


B4515__38220.1450282109.500.659.png
 

rubicon91

Explorer
You know. I have a question never have used anything Molle before, But how does one keep track of where one puts something I've noticed several bags which seem the same without markings.. yet the medical bag is clearly marked.. I wonder if anyone has ever thought of creating small scout type patch for the bags just to organize things.

carabiner_boy_scout_patrol_patch_2_inch_500px__56059.1422250247.500.659.jpg


B4500__19424.1447169244.500.659.png


B4515__38220.1450282109.500.659.png

Blueridge Overland has a bunch of different ones you can put on I am sure there are more out there as well.
 

ReconH3

Heavy Duty Adventurer
You know. I have a question never have used anything Molle before, But how does one keep track of where one puts something I've noticed several bags which seem the same without markings.. yet the medical bag is clearly marked.. I wonder if anyone has ever thought of creating small scout type patch for the bags just to organize things.

That was my next step. Just haven't had the time. They do make Velcro strips that weave between the Molle to add patches if you want. It's a great idea but I'm not going to do that. All the pouches in the tailgate are for emergency. I'm just going to make a list of the contents on a 1 inch white strip that will attach to the Molle. The reason that the right one is the only with the Red Cross is because that's the pouch with the critical gear. The stuff that will stop you from bleeding to death or keep you breathing. It's a breakaway pouch that you can take with you to the site. The other pouches have the rest of the gear for the non immediately life threatening injuries. I am not an EMT or similar. I only have gear for injuries I have been trained for. That's why I don't have one of those large EMT bags.
 

ReconH3

Heavy Duty Adventurer
6FAA0F2A-015B-4E68-B103-DE6D3720F321.jpg


Got a ton done today. Installed a Lange hard top hoist. Got the hand crank version. Couldn't justify the extra cost of the electric hoist version for twice a year that I would use it. I also prefer the hand crank version because you can feel tension on the cable if something is hung up. Works very well but is one pulley short. Added the extra pulley because the angle of the cable was getting in the way.

E6F7202F-A615-4079-9E75-95FB1C192143.jpg


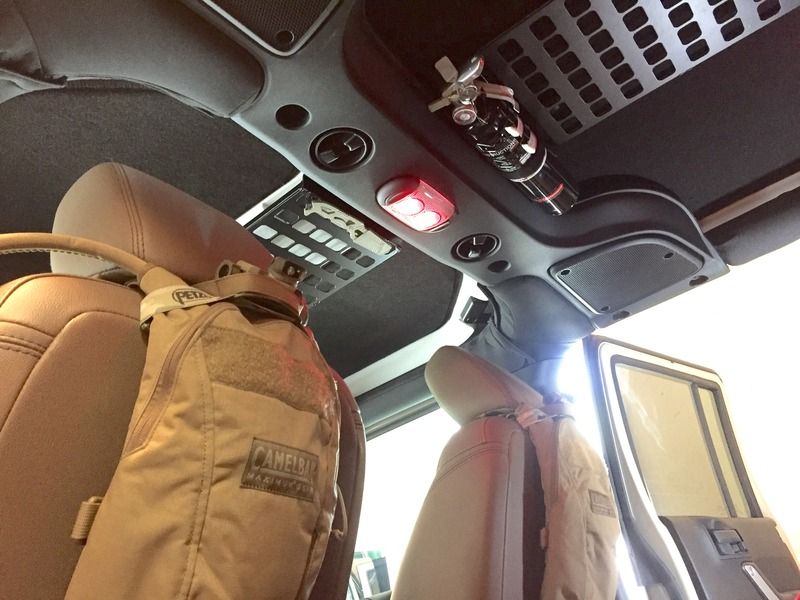
Since I had my hardtop off with the hoist, I took advantage to do some mods to the rear Molle roof panel. I drilled and secured a fire extinguisher so that it could be accessed by all the occupants. I have a few more in the rear but I wanted one located so that everyone could access it, in case of an accident where the occupants may be pinned down.

I also added some Camelbaks and headlamps that double up as map reading lights for the rear occupants. The new Camlebaks have d-rings that coincide with the headrest posts. It's so easy to pop on and off for either wearing or refilling. The Petzl headlamps can cycle through many intensities and colors depending on need.
 

Comanche Scott

Expedition Leader
Very nice!
I like your camel backs setup on the seat back as well. Wonder how they'd work filled with Margarita Slushies... ;)

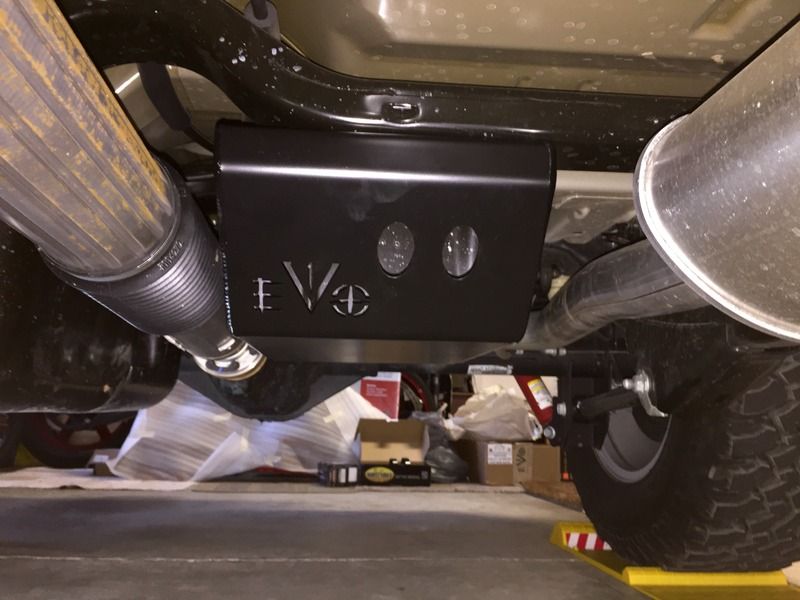
On the evap skid; When you get the lift check your driveshaft clearance as you reach full droop. You may have to slide it a bit to the driver's side to keep from tearing the boot.

Really dig the upgrades you are doing. Very well thought out. :beer:
 

ReconH3

Heavy Duty Adventurer
Very nice!
I like your camel backs setup on the seat back as well. Wonder how they'd work filled with Margarita Slushies... ;)

On the evap skid; When you get the lift check your driveshaft clearance as you reach full droop. You may have to slide it a bit to the driver's side to keep from tearing the boot.

Really dig the upgrades you are doing. Very well thought out. :beer:

Thanks for the heads up. Will definitely check it out when I get a chance to ramp it.
 

Alphonse

Observer
That is good advice about the Evap skid. I had to oval out some of the mounting holes on mine to shift it to the drivers side enough to clear the DS.
 

Forum statistics

Threads
188,214
Messages
2,903,872
Members
229,665
Latest member
SANelson
Top