NAS LR3 build with an overseas twist

Ray_G

Explorer
Unofficial lug nut roundup

Amidst jet lag, laundry for the next trip, and work antics I found some time today to actually take a look at the recently arrived gorilla lugs and then take some pics amidst putting them on the truck.

Bottom line: if you see yourself taking your wheels off a fair amount due to flats, repairs, etc-these appear to have merit. If you are going with black wheels, particularly if the previous statement applies, these have merit. If you have perfect stock lugs or only need to replace a few, or if you are going with gunmetal and are only worried about aesthetics...these may not be worth the $100, but read on...

This shot shows one of the silicone caps, a black gorilla lug, and a brand new LR lug side by side. Essentially the gorilla lug and the LR capped lug are nearly identical in proportions, particularly where it matters in terms of the washer and depth of the lug itself.
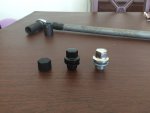
2016-03-04 13.11.15.jpg
From the side, the LR lug is slightly taller/longer because of the curvature of the cap, whereas the solid gorilla lug is flatter across the top.
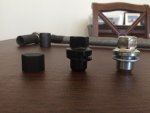
2016-03-04 13.11.28.jpg
Flipped over, the washer you can see is nearly identical which to me is an important aspect given how LR lugs work.
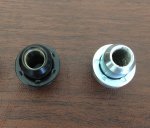
2016-03-04 13.11.45.jpg
A series of shots to illustrate the lugs on the truck as I switched out one set on the wheels, apologies for the poor lighting-time was at a premium this afternoon. This is where my comments regarding using the silicone caps may be more aesthetically pleasing if you were going with gunmetal vice black. I'm not all that concerned with it but did find the silicone caps to be a very good fit and look, esp for $8.00...and that leaves plenty of $$$ left over to buy the 23mm impact socket you're going to want to get your swollen lug nuts off.
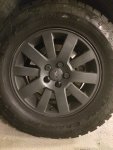
2016-03-04 13.27.26 HDR.jpg
Regardless of silicone cap or black gorilla, for dark wheels I think either are superior to leaving them silver.
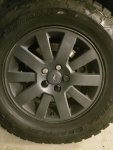
2016-03-04 13.28.05 HDR.jpg
All black lugs, blend fine with the truck with the gray all told and now I don't worry as much about shop monkeys and their impact guns going to town if they are putting my wheels back on for some reason. That said I do believe at some point they'll scratch and such, but much like my solid RRC lugs on Coyote I would rather spray paint them once a year or so then deal with the different sizes of socket needed to get the swollen capped nuts off-other's preference and opinion may vary of course.
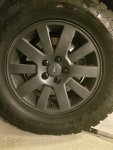
2016-03-04 13.32.46 HDR.jpg
 

Ray_G

Explorer
Cargo area lighting revisit

I have found the rear cargo area to be rather dark, perhaps a facet of usually unloading in a parking garage and having a black interior but coupled with the rather anemic single bulb I'd long figured it might be worth revisiting the lighting back there. Ultimately I decided that the 'cat eye/eagle eye' style LEDs (Eagle Eyes) that I'd used to put light on the rear hatch would be the best bet and looping those in with the four on the hatch would setup a comprehensive rear area lighting solution that would run off a single switch and not draw too much power.

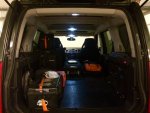
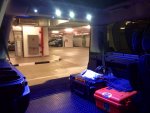
Here's what I mean about dim; of course that could be my photography skills too.
2016-03-12 09.41.05.jpg
The anemic cargo area light-works well for just getting in and out of the truck particularly since I switched to LEDs and didn't want them to be as harsh as the dome conversion in my D1.
2016-03-12 09.42.17.jpg
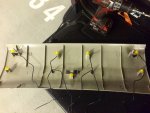
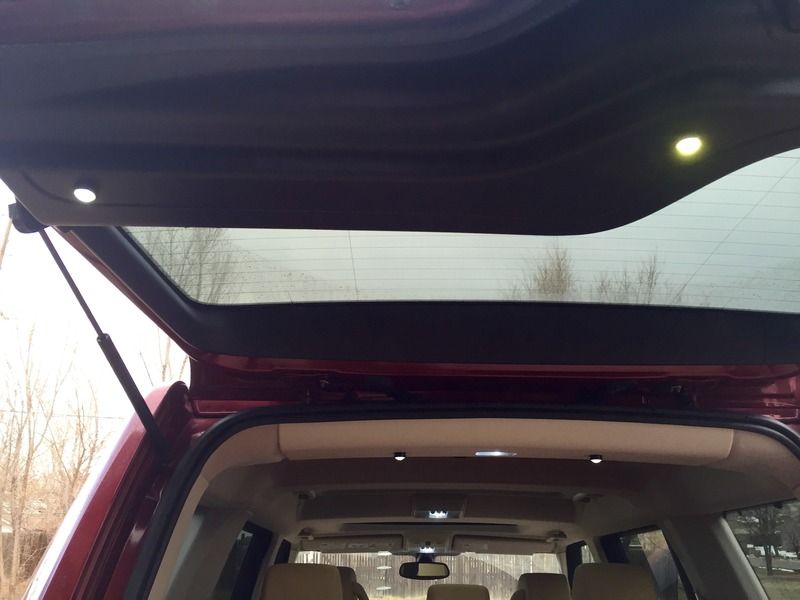
When I set out to do it I just popped the panel off and worked with the existing wiring that was going to the rear hatch LED add-ons. I knew that I wanted LEDs that faced both into the cargo area as well as straight down. As you can see the straight down LEDs just straddle the existing dome light, the ones on the sloped interior face of the panel I opted to tuck inside the trim fastner pylons as I was concerned that otherwise the lights would run into clearance issues. Thankfully the LEDs went in rather easily and then after sorting the positive tapping into the wire already running through that space, the negative ended up going out to one of the grounds on the upper inside of the hatch (there are two up there).
2016-03-12 08.35.09.jpg
Flipped over to illustrate lighting configuration from the outside.
2016-03-12 08.35.18.jpg
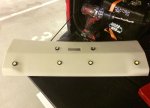
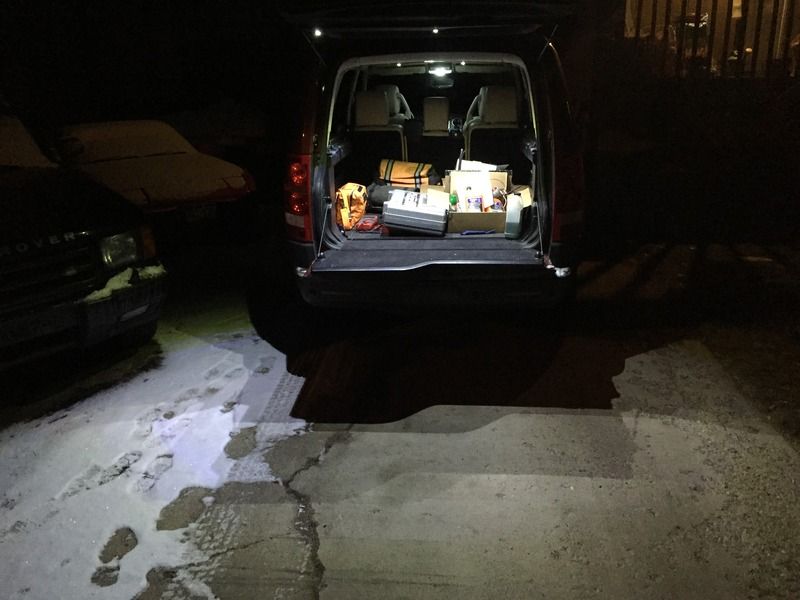
The end result as seen from the outside of the truck.
2016-03-12 09.41.34.jpg
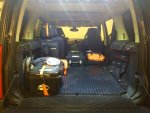
Looking back from inside.
2016-03-12 09.41.44.jpg
For about $9.00 investment in lights off Amazon prime and perhaps an hour and a half of dawdling (I was doing a few other things with the rear cargo electrics at the same time that necessitated popping the trim off to get to the aux power panel and such) its a project that was def worthwhile.

Truck heads to Icon later this week for some more upgrades, and in theory I'll have a new rack one day when prospeed gets their batch in and ships.
r-
Ray
 

harbinger808

Adventurer
Wow Ray... your Disco is looking good. I still need to buy and install my Engel Fridge center seat style. Your interior looks like mine except mine is in BROG Coyote color scheme.
You ar going to love the Prospeed roof rack also. It took about 2 months for mine to arrive to PHX but I was extremely happy with the quality and versatility. I'm looking into ordering a few more pieces from them by summer to complete my Disco4.
I really enjoy reading this thread and your adventures. It definitely helps my wife and I with ideas for our family. Thanks!

I have found the rear cargo area to be rather dark, perhaps a facet of usually unloading in a parking garage and having a black interior but coupled with the rather anemic single bulb I'd long figured it might be worth revisiting the lighting back there. Ultimately I decided that the 'cat eye/eagle eye' style LEDs (Eagle Eyes) that I'd used to put light on the rear hatch would be the best bet and looping those in with the four on the hatch would setup a comprehensive rear area lighting solution that would run off a single switch and not draw too much power.

Here's what I mean about dim; of course that could be my photography skills too.
View attachment 334536
The anemic cargo area light-works well for just getting in and out of the truck particularly since I switched to LEDs and didn't want them to be as harsh as the dome conversion in my D1.
View attachment 334537
When I set out to do it I just popped the panel off and worked with the existing wiring that was going to the rear hatch LED add-ons. I knew that I wanted LEDs that faced both into the cargo area as well as straight down. As you can see the straight down LEDs just straddle the existing dome light, the ones on the sloped interior face of the panel I opted to tuck inside the trim fastner pylons as I was concerned that otherwise the lights would run into clearance issues. Thankfully the LEDs went in rather easily and then after sorting the positive tapping into the wire already running through that space, the negative ended up going out to one of the grounds on the upper inside of the hatch (there are two up there).
View attachment 334538
Flipped over to illustrate lighting configuration from the outside.
View attachment 334539
The end result as seen from the outside of the truck.
View attachment 334540
Looking back from inside.
View attachment 334541
For about $9.00 investment in lights off Amazon prime and perhaps an hour and a half of dawdling (I was doing a few other things with the rear cargo electrics at the same time that necessitated popping the trim off to get to the aux power panel and such) its a project that was def worthwhile.

Truck heads to Icon later this week for some more upgrades, and in theory I'll have a new rack one day when prospeed gets their batch in and ships.
r-
Ray
 

Ray_G

Explorer
Wow Ray... your Disco is looking good. I still need to buy and install my Engel Fridge center seat style. Your interior looks like mine except mine is in BROG Coyote color scheme.
You ar going to love the Prospeed roof rack also. It took about 2 months for mine to arrive to PHX but I was extremely happy with the quality and versatility. I'm looking into ordering a few more pieces from them by summer to complete my Disco4.
I really enjoy reading this thread and your adventures. It definitely helps my wife and I with ideas for our family. Thanks!

Very glad it is in any way helpful; good to know on the Prospeed stuff too-I am psyched about the rack & think it probably is the best looking one for the 3/4 by far, admittedly I was a little dismayed at the absence of follow through by the company. The Rep was extremely helpful and communicative as I placed the order, but once the $ was downrange there was no follow up to point out that they didn't have the rack on hand, that the next batch was expected to be a few weeks, etc. In the end it will probably be worth the wait of course, but the expectation management would have been easy enough to accomplish. Still, from the pics I've drooled over I had no qualms about the $$$.
r-
Ray
 

ColoDisco

Explorer
Great minds, I put 2 surrounding the dome light as well as 2 in the upper hatch. I did the led dome, kick and puddle lights as well thanks to your inspiration Ray.
17FF55D7-9880-42BD-8EA5-6BC44746F590.jpg

CC766E20-CF6D-430E-AF49-5DF386071F72_1.jpg
 

Ray_G

Explorer
Great minds, I put 2 surrounding the dome light as well as 2 in the upper hatch. I did the led dome, kick and puddle lights as well thanks to your inspiration Ray.

Hmmm...I like what you did there in the hatch, when I pull the trim eventually for backup camera wiring I may follow your lead!
You black out your wheels yet? I think that will look sweet on your color truck.
r-
R
 

Ray_G

Explorer
Frontrunner Aux fuel tank: can a Rover really ever have too much gas?

So the truck is at Icon now for some love, so I'll just leave this here as what will probably serve both as a teaser and really the only functional shot of anything other than the underside:
FR tank.jpg

80L of fuel (~21 US gal) should nearly double the range of the truck; admittedly is that important for its application...not really-and the wife took me to task for it since it will also mean a rear swing away, but it wasn't that expensive all things considered and I have all manner of other rationalizations for it that make sense in my head.

More to follow in a few weeks when I get the truck back (I'll be out of town so I gave it to my fabricators with some instructions on tweaking a few things amidst the fuel tank install + rear swing away build).
 

Ray_G

Explorer
I like the idea. Has anyone figured out how to get the evap system to work with it?

We'll see if that's an issue given the way the system is integrated with the stock tank; thankfully labor is cheap and I have some time to sort it out!
 

harbinger808

Adventurer
If that system works out for you, I would love to have the instructions since thats what I've been dreaming of so I can take some long trips to Baja!
By the way, that truck of yours keeps getting better and better :)


So the truck is at Icon now for some love, so I'll just leave this here as what will probably serve both as a teaser and really the only functional shot of anything other than the underside:
View attachment 335149

80L of fuel (~21 US gal) should nearly double the range of the truck; admittedly is that important for its application...not really-and the wife took me to task for it since it will also mean a rear swing away, but it wasn't that expensive all things considered and I have all manner of other rationalizations for it that make sense in my head.

More to follow in a few weeks when I get the truck back (I'll be out of town so I gave it to my fabricators with some instructions on tweaking a few things amidst the fuel tank install + rear swing away build).
 

Forum statistics

Threads
186,671
Messages
2,888,689
Members
226,767
Latest member
Alexk
Top