Over-family-landing composite F-550 build

ben_j_c

Active member
I hope you have a woodstove. I would love to have a few tons of oak.

Yes, lots of firewood to burn and we do have a wood stove. Oregon has pretty mild winters, so we dont use it super fast, so we have years of firewood on the ground currently. We are salvaging some of the bigger logs to turn into oak timbers to build an outdoor kitchen and dining space down at our pond. One of my neighbors is donating a 34 inch diameter by 14 foot and another has a 24 inch by 16 foot white oak trunk to the effort as well, figuring out how to move them is still being determined... We have a few of similar sizes as well.
 

RAM5500 CAMPERTHING

OG Portal Member #183
This is awesome and i look forward to following along.

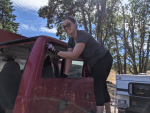
The pics of "daughter for scale" are adorable and hilarious!

One note... Get rid of those rear leaf block ASAP and go with the style that capture the ubolts as well and keep everything together.

I've seen a fair amount of vehicles spit the blocks right out off the spring and wreak havoc. ESPECIALLY with the amount of torque and power we are throwing down with these massive trucks.

liftblock_FORUM.jpg
 

ben_j_c

Active member
Get rid of those rear leaf block ASAP and go with the style that capture the ubolts as well and keep everything together.
It was on my list to remove and replace these, they are about 1.75 inches too tall. I like your suggestion for the replacement, thanks!

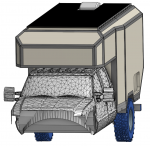
Making some progress on cleaning up the CAD work. It is currently looking like this:
1616452639958.png
1616452722622.png

1616452830908.png

Getting pretty close to having the metal cut out and starting to bend it up. If you see anything that looks wonky let me know now! If you want to look at the CAD check out the box here: https://cad.onshape.com/documents/4...519ed930cff403121d/e/cb3361c9a238900cc096c91c

I got my ring gear on the ARB locker from @mk216v while cooking some spaghetti and meat sauce!

1616453176112.png


Also been doing some work on making a rear view mirror replacement with a Raspberry Pi 4 and a 7 inch touch screen. Here it is on the 3D printer

1616453361615.png
 

mk216v

Der Chef der Fahrzeuge
Yeahhhh buddy! Digging your contours, especially the nose cone and sides near the door entry.
We're brothas from another motha! My upcoming camper; https://atoverland.com/pages/aterra-xl-flatbed-camper
AT_Overland_Aterra_XL_Flatbed_Camper_Three_Quarter_View_Truck_-_Grey.png
 

ExpoMike

Well-known member
That AT rig looks nice but looking at a few of the details from the link, I have some questions about their design idea. I am seriously thinking the amount of room over the bed is going to be to tight for the person sleeping at the front of the camper. The angled roof looks great but takes away a lot of space. The cabinet and bed design is weird. It doesn't seem to have any easy way to get up into the bed, unless you are an active and nimble person. I know in our old FWC, even using the couch, it still took a good leap up to get to the point of pulling yourself in. Then the concept of a "pull out bed". It doesn't seem the bed is getting any larger (unlike the FWC which allows a narrow or wide bed based on sliding out or not). Just seems like with the bed pulled out, now you cannot access your fridge. That isn't a big deal when both people get up at the same time but often my wife would be up hours before I would and not being able to get a bottle of water or something would suck.

Might be wrong but based on the drawings they are listing.
 

mk216v

Der Chef der Fahrzeuge
That AT rig looks nice but looking at a few of the details from the link, I have some questions about their design idea. I am seriously thinking the amount of room over the bed is going to be to tight for the person sleeping at the front of the camper. The angled roof looks great but takes away a lot of space. The cabinet and bed design is weird. It doesn't seem to have any easy way to get up into the bed, unless you are an active and nimble person. I know in our old FWC, even using the couch, it still took a good leap up to get to the point of pulling yourself in. Then the concept of a "pull out bed". It doesn't seem the bed is getting any larger (unlike the FWC which allows a narrow or wide bed based on sliding out or not). Just seems like with the bed pulled out, now you cannot access your fridge. That isn't a big deal when both people get up at the same time but often my wife would be up hours before I would and not being able to get a bottle of water or something would suck.

Might be wrong but based on the drawings they are listing.

No trying to take away any focus from Ben's build, but since the cabins are similar, maybe this will help Ben's build?
Cabover bed slides rearward to give the frontmost sleeper more head room due to the front pitch of the exterior wall (looks better IMHO than vertical face, also better for aero) = wider bed (sleep with your head east or west; head-tail is 80"), so it's the same as the FWC.
Cabinet to the right of the entry door has a hidden step to get up into the cabover bed.
True on the fridge access when bed is deployed. However, I see about 10x more usable storage in the Aterra (same length as Hawk) than even a Grandby FWC. I always disliked how poorly designed the FWC kitchen galley cabinets were laid out, very haphazard; poor engineering of available space IMHO.
 

ben_j_c

Active member
Well it has been a while since I posted, and I owe you all an update on the progress!

Things have been moving along at a pretty solid clip here! First let's talk about the truck.

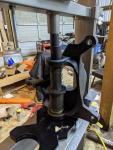
We painted all the associated running gear parts installed the axles and added an air locker to the front.

1632867133378.png

1632867095884.png

We put in all new u-joint, seals, etc, going with Spicer parts where possible.

1632867701194.png

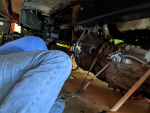
We took out the transmission and fully inspected the clutch (expecting to replace it) but it was already pretty new and in great shape, so we put it all back together. Do not believe the shop manual when it says this is a 4 hour job, it is longer...

1632867240691.png


1632867282569.png

We stripped down the entire dash and associated plastic parts with steel wooled it and painted it with Color Bond LVP Refinisher. I think they turned out great! I was pretty terrified to paint it, but there were too many places that just didn't look great. The pain makes nice even coats and dries pretty quickly. I didn't get many in progress photos of this for some reason.

1632867783318.png


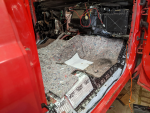
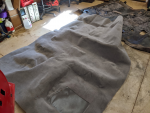
We cut the new carpet to fit and installed it
1632867868280.png
1632867835117.png

Then we steam cleaned the seats and bought a new middle seat from the junkyard (still not installed yet)

1632867935143.png


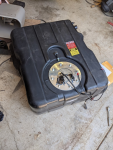
And intstalled a new fuel tank from Titan as the old tank was showing some delamination issues:
1632867980794.png
 

RAM5500 CAMPERTHING

OG Portal Member #183
Well it has been a while since I posted, and I owe you all an update on the progress!

Things have been moving along at a pretty solid clip here! First let's talk about the truck.

We painted all the associated running gear parts installed the axles and added an air locker to the front.

View attachment 684464

View attachment 684463

We put in all new u-joint, seals, etc, going with Spicer parts where possible.

View attachment 684469

We took out the transmission and fully inspected the clutch (expecting to replace it) but it was already pretty new and in great shape, so we put it all back together. Do not believe the shop manual when it says this is a 4 hour job, it is longer...

View attachment 684466


View attachment 684467

We stripped down the entire dash and associated plastic parts with steel wooled it and painted it with Color Bond LVP Refinisher. I think they turned out great! I was pretty terrified to paint it, but there were too many places that just didn't look great. The pain makes nice even coats and dries pretty quickly. I didn't get many in progress photos of this for some reason.

View attachment 684470


We cut the new carpet to fit and installed it
View attachment 684472
View attachment 684471

Then we steam cleaned the seats and bought a new middle seat from the junkyard (still not installed yet)

View attachment 684473


And intstalled a new fuel tank from Titan as the old tank was showing some delamination issues:
View attachment 684474

Looking awesome! Great work
 

ben_j_c

Active member
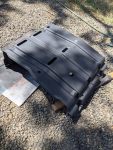
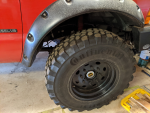
We also put in a new skid plate that we found on craigslist and refinished

1632868076296.png

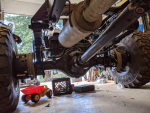
Then pulled it back outside to work on the muffler

1632868171594.png

And got the muffler and stuff reattached. We then took it for a spin around the driveway!

We removed the back window

1632868496296.png

And installed a pass through made of 1/8" 6061-T6 with a hole to crawl through and coated it in matte black vinyl.

1632868690847.png

1632868751225.png

Then back into the garage for more work!


I think the underside is looking great, a huge improvement from before!
1632868813493.png

1632868836508.png
1632869163246.png

We also got the rub rails cut out of HDPE with the router and installed on the frame, the bumper mounts laser cut and the air brake 3 point system mocked up and getting ready for welding. Still figuring out exactly where the fuel filler will live, but probably on the spare tire holder (which is mounting with the plates shown on the bumper)

1632868988010.png

Lot's of work still to go on it, but it is moving and looking pretty good now.
 

Attachments

  • 1632868814365.png
    1632868814365.png
    3.9 MB · Views: 35

ben_j_c

Active member
The camper has also been making some big strides. I settled on an exoskeleton design that I was happy with.
1632869396626.png.

So I made nearly 100 flat drawings to get the parts laser cut and bent. The results looked like this.

1632869493978.png

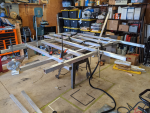
I also started working on the frame, cutting it out of 3/16" wall 2" box tube using my miter saw with and aluminum blade and mocking it up on the truck.

1632869604765.png


Then when I was happy with it I started welding it all together.

1632869663279.png

Using the Miller Dynasty 280 Tigrunner that I rented for a month!
1632869746913.png

Pretty soon it was looking like this!
1632869796598.png

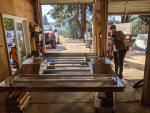
Then it was time to move it back into the shop (the one with the bigger door and start going vertical.

1632869860068.png

Lots of measuring, clamping, strapping, and laser leveling later it started to go up
1632869926376.png


1632869962187.png

1632869992007.png
 

ben_j_c

Active member
I then built the nose on the ground

1632870228318.png


Then hoisted it up and welded it to the main chassis. You may notice that one of the pieces over where the door will be is installed backwards, it was bent backwards and I just tacked it in place till I got a new one, it is fixed now.

1632870268719.png

I then had some 1/4 bar stock cut for the roof rails with the mountain and tree designs and welded into the top
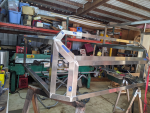
1632870482339.png


For the mount points I used the lathe and cut down some round stock and put a hole in the middle. Then 'pressed' (with an 8 lbs sledge) it into the frame tubing and plug welded it in place to make sure I cannot crush the tubing.

1632870619729.png

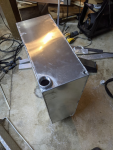
I also started working on a kitchen box that mounts behind the passenger rear tire and pulls out with a hot plate, sink and work station.
1632870739124.png
and associated lid
1632870779817.png

1632870804939.png

As well as a tank for grey water that mounts under the entry step and also holds the retractable stairs
1632870887905.png

1632870914326.png
 

Attachments

  • 1632870587475.png
    1632870587475.png
    1.7 MB · Views: 39

Forum statistics

Threads
188,041
Messages
2,901,523
Members
229,411
Latest member
IvaBru
Top