Overland Journal Classic Build: 1995 Range Rover

Series1Rangie

Adventurer
Nothing like cold weather to bring home the small things that you haven't got to yet. Like glow plugs. :Wow1:
cheers

Its the little things that you don't notice 'till you go to use it, that will get you every time. :D

So cold start aside, what are the first impressions?

Ta

Mike and Myles
 

gjackson

FRGS
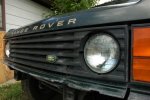
So a bit of delay in reporting, but wanted to give my first (and second) impressions of the RRC on the road.

Firstly, though, the initial article in Overland Journal on this build will be in the upcoming Gear issue, so watch out for that.

I've done nothing on the tuck this month but drive it. It has temp plates and passed emissions inspection and diesel conversion inspection so in the next few weeks I'll be getting plates and a correct CO title for it. Just want to let the paper tags run out a bit.

So far I've done 1200 miles on the road and highway with no off-road yet, though quite a bit of snow driving requiring center diff lock. Of all the 300tdi vehicles I've ever driven this one is the most civilized. She's quiet, hardly vibrates, and drives sufficiently well to put a grin on my face every time I get in her. After re-doing the timing belt and making sure it was spot on, the motor went from being able to push the '89 Roverzilla at 55, floored on the highway (with a slight downhill) to being able to cruise very happily at 70 with boost left to spare for passing. Have not done a speed test on the flat yet, but the small change on the timing made a world of difference. Gearing seems perfect as well, and I have no vibrations from the drive line.

She's running at 24.5 mpg right now and I got an easy 500 miles out of the first tank.

Only had a couple of issues so far: as stated above, not wiring up the glow plug circuit proved to make starting on very cold mornings a little hard on the starter motor. But she always started. Also, with low temps, the heater just doesn't get very hot even with the radiator completely baffled.

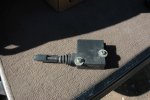
The fuel flap actuator is toast, but John Gadd is sending me a replacement, along with a new rear light lens to replace the cracked one. I have not hooked the AC up yet, though all components are installed. The windshield washers only work on the passenger side, so I have to investigate that, and I still have a small oil leak from the speedo drive on the t-case, so I'll have to get that sorted.

All in all, very very happy with how it came out. The 300tdi is a great engine for that machine and I'm almost loathe to put any more weight on her.

But now, on to stage two of the build which will include all sorts of things that I don't have yet.

cheers
 

Attachments

  • DSC_0005.jpg
    DSC_0005.jpg
    149 KB · Views: 59

jrose609

Explorer
I have two 300tdi's: one in the D1 and one in the RRC.

My D1 has been built up. Lockers, sliders, armor, bumpers, winch, roof rack, etc. I get 20 on the highway if I'm lucky.

My wife's LWB gets about 26 on freeway. It runs better than my 300. The same guy did both installs. He is a diesel expert and couldn't figure out why the LWB runs so much better. It seems to hold speeds on the freeway and uphills sooooo much better. My d1 had few mods when I first installed the tdi, but never ran as well as the LWB.

Couple of weeks ago spoke with Rovertrader. He said he's noticed that some 300's seem to run better than others for some unknown reason.

Graham, sounds like you picked a good one!
 

gjackson

FRGS
Couple of weeks ago spoke with Rovertrader. He said he's noticed that some 300's seem to run better than others for some unknown reason.

Graham, sounds like you picked a good one!

Well, it wasn't a good one when I got it. In fact it couldn't even get out of its own way. I think the trick with the 300 is all in the timing belt. I moved the injection pump 1/8th of an inch to go from a pig to a rocket ship. I think the tolerances on the timing are a little tighter than the LR manuals would have you believe, and tighter than the tooth count on the belt really allow with ease.

In fact after fixing the RRC I'm now going to redo the timing on the 110. With the big turbo I should get a lot more out of than I am, so I think the super fast timing job Keith and I did on it before the Expo last year wasn't as spot on as I would have liked.

There is quite an art to getting the timing right. I've got to practice more while I have the feel for it! :chef:

cheers
 

Series1Rangie

Adventurer
She's running at 24.5 mpg right now and I got an easy 500 miles out of the first tank.

I'm pretty sure that means its not a RRC. :)

Good on ya for getting the timing dialed in. Its amazing how much feel is involved in really getting a Rover right.

Mike and Myles
 

jrose609

Explorer
Guess I need to check the timing. I turned the fuel pump up in the D1 just a tad, and it did help quite a bit.
 

gjackson

FRGS
Got the glow plug circuit wired in today, but not without some frustration. Turns out that the RAVE is incorrect on wire positions for the timer relay.

So if you are going to wire up the glow plug timer relay PRC6913, be aware:

From the RAVE (incorrect):
50 - Starter relay
86 - Ground
87 - Glow plugs
30 - 12v from battery through 12ga fusible link (or 50a fuse)
85 - From ignition switch position 2
L - To dash light

If you wire it this way, the glow plugs will come on at accessory position 2 as required, but they will never turn off; the timer does not function and the glow plugs will happily heat forever, engine running or with ignition on.

Took me a bit to figure it out, but the correct connections points are:

Correct:
50 - Starter relay (NR)
86 - From ignition switch position 2 (WG)
87 - Glow plugs (YB)
30 - 12v from battery through 12ga fusible link (or 50a fuse) (NO)
85 - Ground (B)
L - To dash light (BY)

Once wired correctly the timer works and shuts off the glow plugs. Nice to have it working correctly.

cheers
 

gjackson

FRGS
Stage one of the build little has been done, but now I'm gearing up for stage two. I did change the fuel door solenoid since John Gadd was kind enough to send one along. Easy fix.

Since then he has sent a heater core (the old one was leaking) and a set of door latches (reason for those later). Thanks RoverDude!

Latest mileage was 26.6mpg. That's empty and cruising on CO highways using summer diesel. I'll be running a tank of bio through it shortly to lube up the moving bits. But, wow, 550 miles on one tank is really putting a smile on my face.

Unfortunately (isn't this always the case with Land Rovers?) after getting the timing perfect, I put synthetic oil in and immediately the front main crank seal started leaking. I went back to dino which improved things, but one more lesson learned: when doing the timing belt, always do the crank seal. I have one ordered from George at RDS and will put it in as soon as the 110 is back on the road. So another game with the timing belt.

For stage 2 I'm thinking about underbody mechanicals, paint, bumpers and tires. Initial estimates on a paint job were a bit high at $9500 especially given that the truck is worth $2000. I have a few leads on places that might be a bit more reasonable. Some guy from Longmont (;-)), Columbia Overland and ARB are getting me the parts required for underbody and bumpers. Tires . . . well, who knows?

Attached is a pic of the fuel door solenoid from RoverDude, because build threads are useless without pics!

cheers
 

Attachments

  • FuelDoorSolenoid.jpg
    FuelDoorSolenoid.jpg
    96 KB · Views: 28
I have had a bunch of 300's and agree some seem to be rockets and others dogs. The engine in my 130 let go in February. I installed an engine a friend had lying around and it was a dog both from performance and economy standpoints. I did the timing belt and pulley update but didn't play with pump timing.
I upped the fuelling both off boost and on, and performance dramatically improved and I'm now over 400 miles on an 18 gal tank full again.
I want to toy with pump timing after reading your comments... slippery slope. To quote a wise friend "the enemy of good is better" ie leave well enough alone-I just can't.
 
Last edited:

gjackson

FRGS
When I say 'play with the injection pump timing', that may be a bit of an overstatement. I've found that the timing on the injection pump is much more critical than the cam. The cam can move an eighth or so and still be good, but the pump has to be dead nuts on each time.

What I do now when installing the belt is to tension it, then pull the pins and turn the engine over 8 times. Then put the crank pin back in and lock it. Then, usually, the pump pin won't go in easily showing that it is a bit off. Loosen the bolts on the pump pulley and put a 7/8 wrench on the shaft. Rotate it clockwise until the pin will slip in really easily. Then, while holding the shaft at that position, tighten up the bolts and then set them to 25Nm. The pin should slide in very easily.

cheers
 

gjackson

FRGS
So I've never been a fan of chrome on vehicles and recently I've discovered that that extends to silver of any kind. Grays are fine, but silver actively annoys me. Call it my overland vanity, but one goal on this Range Rover build was to get rid of all chrome. The rear bumper was easy as were the wheels and that was the majority of it, but every time I opened the doors, the silver door handles rankled me. I considered pulling them and powder coating, but that seemed to be too much effort for vanity on a budget build.

Luckily John Gadd came to the rescue with a full set of Discovery door handles in, you guessed it, black. I have to say they did everything I wanted (except for the keyhole surround which is still silver) and let me get away with my little bit of vanity. After all, it's not about how you feel, it's about how you look.

Old: Old.JPG


New: New.JPG

cheers
 

Forum statistics

Threads
186,813
Messages
2,889,575
Members
227,160
Latest member
roamingraven
Top