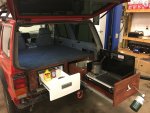
Overland XJ Build. Not my first Rodeo.....(video included)

JDaPP

Adventurer
I believe he said it was for travels when weather is bad or the area is sketchy. I think the end goal is a pan-am trip.
 

Overland History

Wanderluster
Finishing the write-up on the Sleep Platform build got away from me with the Holidays! ;)


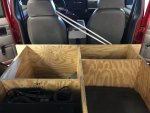
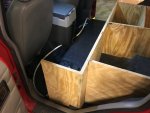
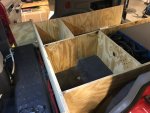
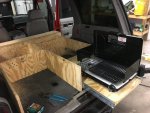
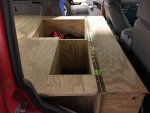
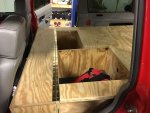
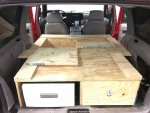
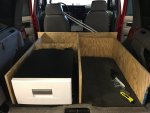
Back on track, I cut panels to create two cubbies just beyond the Refrigerator on the left, and where the pull-out drawer for the Sink and Grill-Stove will go.

IMG_5217.jpg


The storage cubby on the left will be for tools and recovery gear, and on the right will be for my Auxillary Deep-Cycle Battery(to power my Fridge and Freezer Console), and also my Blue Sea Fuse Panel and Charging Relays, which will allow me to toggle between my Cranking and Auxillary Batteries.

IMG_5218.jpg


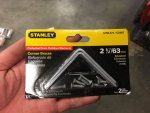
Two things that I used during this build that I thought were crucial.

Almost every corner where wood joins together at a 90* angle, got 2-3 of these corner braces to add strength to the platform, should it find 2 people sleeping on it. (The main thing that joins the wood together are 1 7/8in outdoor decking screws through each "T" in the front crossbrace.

IMG_5219.jpg


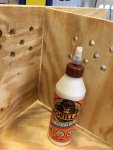
The other thing I used is Gorilla Wood Glue at the joint of each piece of wood to prevent squeaking. To this day, the platform is whisper quiet, even off-road or on washboard roads. :)

IMG_5220.jpg


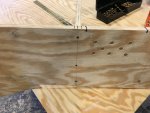
The small holes that you see in the picture above, as well as this one are to vent the Refrigerator Compressor so it doesn't overheat when running. (I later went back and drilled more and bigger holes, as I figure warmer climates will necessitate this.)

Also, you can see the decking screws here and how I attached the boards together at each "T".

IMG_5221.jpg


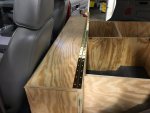
Since I wanted accessible storage above my Water Tank for the On-board Hot Water Shower System, I built upright supports so I could put a long hinged access panel across the tank. (I also installed a 1/4in piece of angle in the center to help support the span of the hinged board.)

IMG_5225.jpg


I used "piano hinges" on all of my storage cubbies for easy opening and access. (One important thing to remember is that I used pressure treated plywood, which will rust any screws that aren't stainless or made for exterior use.)

IMG_5229.jpg


Anyways, I'm beat after a long day. I'll finish the write-up tomorrow and also answer ya'lls questions then! ;)
 

Attachments

  • IMG_5220.jpg
    IMG_5220.jpg
    545.9 KB · Views: 47

Overland History

Wanderluster
Here's a better shot of the storage cubbies. They run all the way down to the floorboard, which is probably close to 2.5ft deep at the front, but I haven't measured.

IMG_5226.jpg


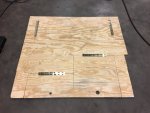
I measured what seemed like 200x and finally cut the platform top to contour to the interior panels of the XJ.

One important thing that I did to minimize cuts, is I cut and laid my 4x8 piece of plywood crossways to the interior. The reason for this, is because the platform, aft of the hinged tank opening, is exactly 48in. The XJ interior width is also wider than 48in. This allowed me to simply measure the widest point of the interior cargo area, then use cardboard to contour the minor cuts and bends. (If any of that didn't make sense to you guys, just say so and I'm happy to clarify!)

IMG_5234.jpg


I snapped a quick pic of the disaster that I turned the shop into with all of the cutting... :D

IMG_5235.jpg


I ordered 36in Drawer Slides on Amazon, that just so happen to be 500lb Capacity. (Way overkill for my application, but apparently that's just how they come, since they extend such a long way.)

I left 37in of space on the Grill/Sink Drawer Slide side of the platform, after I came to the conclusion that between the length of the Grill Stove and Sink, I would need at least 35in to clear the platform when they're fully extended on the slides. The extra 2in was added in for a margin of error in my measurements. ;)

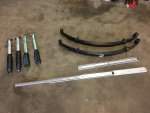
This is a pic of the drawer slides pre-installation. (I also ordered new 3.5in Rubicon Express Leaf Packs to compensate for the weight of the platform, and Bilstein 5100's in all 4 corners for ride quality.)

IMG_5561.jpg
 

Overland History

Wanderluster
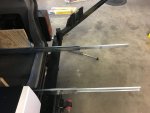
This was a visual mockup of the drawer slides....

IMG_5569.jpg

IMG_5570.jpg


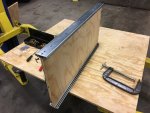
I cut the Drawer Slide platform first and attached the slides, as it's the easiest and only way to attach the slides.

IMG_5573.jpg


Attaching the slides to the platform ribs is a complete pain in the southland, as you have to mark and drill pilot holes as the slides extend outward through sequenced holes in the slides.

IMG_5574.jpg


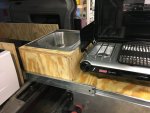
Testing it out and taking some measurements to be able to build the Sink Mount....

IMG_5575.jpg


This is what happens when you work long and late hours in the shop. This picture was taken at 2:36am, according to my phone. I was exhausted.

I took a second glance at this, and said to myself, "Brandon Libby wouldn't approve of this whatsoever." (Brandon is a friend, writer for Expedition Portal, a skilled woodworker and XJ lover.)

IMG_5576.jpg


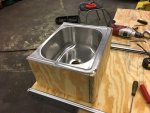
These pics show the sink housing redone, using a router on the edges for a smooth and clean look.

They were also taken after a good night's sleep. ;)

IMG_5583.jpg

IMG_5584.jpg
 

Overland History

Wanderluster
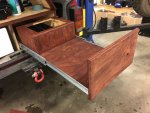
I built the drawer face for the slide, attaching it with the exterior decking screws that ive used on the rest of the platform. I also used 2 of the 90* angle corner brackets opposite of the drawer face, since the drawer face would see some torque from opening and closing.

The hole that you see in the drawer face toward the right is for my propane hookup to the grill. ;)

IMG_5585.jpg


I cut a face cover for the right side of the pull-out drawer....

IMG_5587.jpg


And also one piece that would cover the Fridge gap and everything to the left of it....

IMG_5588.jpg


Next up was to cut all of the cubbies out of the top of the platform and add the low profile piano hinges.

IMG_5820.jpg

IMG_5821.jpg


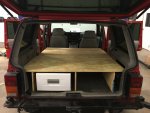
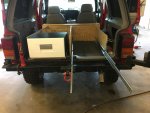
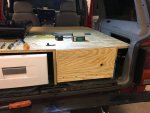
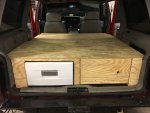
This is the naked platform with everything tucked into place.....

IMG_5824.jpg


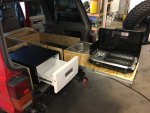
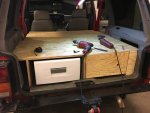
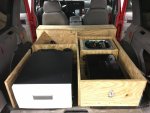
This is a view of the XJ platform as if you're turned around sitting in the Driver's seat. All cubbies are hinged, including the hidden ones on the left side of the Fridge and right side of the Grill-Stove and Sink.

IMG_5822.jpg


Platform top mounted with all storage exposed.(I'm not sure why the front of the platform looks warped in this pic, but it sits completely level and flat up front.

IMG_5825.jpg
 

Overland History

Wanderluster
I kicked a lot of different ideas back and forth on how to make the platform look classy and clean.

I bought this stain and slapped it on the platform.

IMG_6181.jpg

IMG_6183.jpg


As it was drying, I was really regretting the decision to go with such a darker red stain.

Once it dried though, I couldn't stop staring at how well it turned out!

IMG_6189.jpg


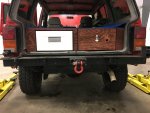
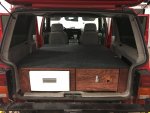
To finish off the top of the platform, I found this very thin "SUV rear cargo area" carpet at Walmart for $20ish/piece.(large enough to cover most SUV cargo areas.) I bought 2 of them to cover the platform. They're allegedly waterproof and stainproof. It's got a thin rubber on the bottom and seemed like it would be perfect, which it has been thus far. I used an electric staple gun with galvanized exterior staples to attach the carpet, after I cut out all of the storage cubbies.

Overall, I hope I made this look really easy, because it wasn't!! When building a prototype, where Step-3 effects Step-9, and Step-9 effects Step-4, it requires more thinking than doing.

With that said, this isn't the last crazy project that I've got in store for this XJ. But for now, I'm gonna enjoy the hell out of what I've built thus far and hope you do too. :)

I update my Instagram daily, which in my opinion is a far superior App than Facebook. Follow me by searching: @Overland_History

IMG_6206.jpg

IMG_6209.jpg
 
Last edited:

FJOE

Regular Dude
Epic build, man. I was living in NoVA when I had my '96, wish I didn't give up on it so easily. I'm sure we would have crossed paths. I stepped up to a 2015 WJ Limited, wouldn't think of drilling holes in it or anything, though it may get a fridge due to my frequent long trips (12+ hrs) sometime soon. Normally I throw the Yeti in the back but you've got me thinking about being more refined and classy!

Good Job!
 

Danronian

New member
The drawers and platform look great. I can tell you took your time with how well it all turned out. I feel more inspired to add one to the cargo area of my 4Runner...


Sent from my iPhone using Tapatalk
 

JandDGreens

Adventurer
You Know after seeing what you have done I might have to ditch my back seats out of my XJ And do the same, besides how often do I you them anyway??? Are you planning on keeping your RTT?
 

Overland History

Wanderluster
If you're making a sleep platform in the jeep what is the RTT for!?
I was thinking the same thing. Might be for a guest room?

I believe he said it was for travels when weather is bad or the area is sketchy. I think the end goal is a pan-am trip.


Yes, the platform was built for use during bad weather or if an area that I'm passing through doesn't feel safe. If I have additional friends camping that need a place to sleep in either the RTT or the platform, the choice is theirs. Afterall, what good is having nice things if you can't share them with others? ;)
 

Overland History

Wanderluster
Epic build, man. I was living in NoVA when I had my '96, wish I didn't give up on it so easily. I'm sure we would have crossed paths. I stepped up to a 2015 WJ Limited, wouldn't think of drilling holes in it or anything, though it may get a fridge due to my frequent long trips (12+ hrs) sometime soon. Normally I throw the Yeti in the back but you've got me thinking about being more refined and classy!

Good Job!

Thank you! I highly recommend Domectic products. I purchased my Refrigerator and Freezer before I knew Dometic was breaking into the Overland scene. They had a booth setup at Overland Expo East this past October and I showed them my Fridge and Freezer setup, to which they were very impressed. They weren't actually carrying my Drawer Fridge in stock at the show, as they mostly carried the ones that are more similar to the ARB. They were happy to see their products put to good use. :)
 

Overland History

Wanderluster
The drawers and platform look great. I can tell you took your time with how well it all turned out. I feel more inspired to add one to the cargo area of my 4Runner...


Sent from my iPhone using Tapatalk

Thanks! I think my setup with the Fridge and Sink/Grillstove can still likely be done even with the back seats still installed, with some careful planning. The nice thing about my Hot Water Shower System being on the same side as the Sink(which was planned on purpose), I have the ability to wash dishes with Hot Water in my sink, since the hose itself is 60" and reaches the sink perfectly from the passenger fender. :)
 

Forum statistics

Threads
187,130
Messages
2,891,228
Members
227,790
Latest member
coast runner
Top