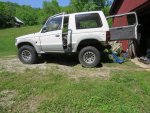
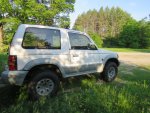
Pajero Mk2 SWB MIVEC Build

CharlieNorth

Well-known member
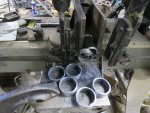
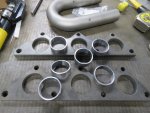
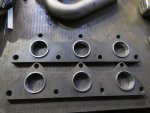
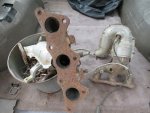
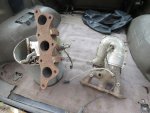
Next step up front with this will be to build the headers. These will be long tube stepped 3-1. I bought a pair of flanges from RRE last fall who claim their flanges are same as port and CNC machined, these are flame cut, not machined. Unfortunately their port size is for 1 7/8 tube where these engines are best with 1 5/8 OD tubing which offers the proper ID for the ports. At least they are simple round ports such that I have material coming that I will machine stubs to step down to the proper size. Unnecessary time waste but I am not in the mood to machine a set of flanges for this project. I make plenty of them for complex port shapes that I was hoping to buy simple ones.
When I was first planning these headers I felt there was plenty of room, but once I have the lower steering column, starter with wires and the front propshaft in place, it gets tight in there. In some ways buying a set of Nissan headers might not have been wrong, but I was not finding any that looked to have mandrel bent tube.

This Pajero has a custom single 2 1/2 exhaust under it, quite well made at that, they used a Flowmaster muffler. I am giving thought to finding a path on the left side to snake a dual exhaust around the T-case and back under this. I have an unused Flowmaster sitting here and plenty of stainless tube and bends. We will see what happens.
 
Last edited:

CharlieNorth

Well-known member
A bit more done to make the header flanges usable. I bought some steel pipe and turned it to the ID and OD needed, seems I did not take any shots of the lathe work Oh well.
After turning and facing I cut the parts in the bandsaw and faced the backsides. This followed by some presswork, again no camera. I pressed these with the flange over a sheet of cardboard such that the flanges will be proud about .010" to help with sealing as years go by. I was even a good boy and placed a flange on the engine to make sure I have the flanges facing the right way since the bolt pattern is not symmetrical.
IMG_7554.JPGIMG_7557.JPGIMG_7560.JPG
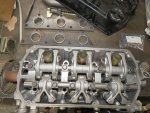
Next for these, I will pull a 6G75 head off the shelf so I can make a few dowels to guide these over the studs such that the ports will be properly aligned.
 

CharlieNorth

Well-known member
I do not get to see many nearly new engine bits around here, this is a head that came off the 3.8 Galant engine I built my 3.8 DOHC engine from 15 years ago. I intend to build another one of these soon to go into my Diamante wagon. It will be really nice to have more low end power than the existing 3.0 DOHC has and would be nice to be able to stay in 5th gear more when cruising in the hills.
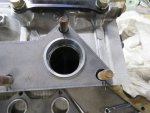
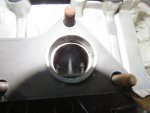
But for the task at hand, the stud holes are not aligned well to the ports, at best the flange sits low and will not allow SAP tubes to properly line up. The worst part with the flanges sitting low is the critical roof of port is what is compromised here. The images do not do justice to the issue since the flash did not reach into tho port. I will need to mill a few of the stud holes to line up properly then insert the bushings. Would have taken less time to just make my own flanges as I routinely do.
IMG_7562.JPG IMG_7566.JPG
 

CharlieNorth

Well-known member
I am giving thought to regrouping on the flanges. I have a set of essentially new, although not kept dry for the past 16 years, factory Galant manifolds. I will decide as the day goes on if I finish what I started or change to these flanges. I might be best keeping these for my next swap and spend a few more hours on the flanges I bought. This is kind of just a problem I get into with always making something as good as it can be.
IMG_7569.JPG IMG_7570.JPG
 

CharlieNorth

Well-known member
One question I felt the need to answer was mounting a power steering pump. The later Eclipse/Galants run two accessory belts with a 4 groove for the pump. The cars though with their more modern rack system are not like the older rack pumps that can be re-valved to work with a steering box. The new pumps, nope cant get a linear flow down at the lower levels our steering boxes want.
My choice is to pick the pump off one of my '95 Monteros. Fine but the front of this engine is nothing like the early V6s as to where the belt tensioner and filter mounting are. As such I bet to figure out my own mounting where the belt run is tucked in tight to the front cover.
It is looking like the pump mount from the V6 Mighty Max provides the raw bracket and with some welded up tabs and such it should do a good job.
 

CharlieNorth

Well-known member
With a drizzly 40ish Deg day here I am playing indoors, back to the Ex flanges.Decision is to stay with the flanges I recently bought. I have mounted the flanges on the mill and moved the bolt holes to where they need to be. This will be followed with the two upper end holes getting a tubular sleeve pressed in place to locate the flange. Is this accuracy necessary, well I am now over 50 years of building and racing all sorts of motorized things and optimizing every aspect of a vehicle or device is usually worth it. In this case it more than likely will be that one more MPG that otherwise would not be there.
IMG_7578.JPG IMG_7579.JPG
 
Last edited:

CharlieNorth

Well-known member
Well after an absolutely miserable time away from productive life, The evening after my last post I got myself a strong case of food poisoning. Not a nice way to take a dozen days off from life. I can not say I have ever gone 7-8 days without eating or even drinking water.
So what do I do to start getting my strength back, pull my 21' SuperBoat out of long term hibernation so I can start work on it and get back to repositioning the hitch on the Pajero.
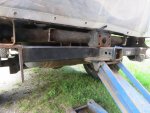
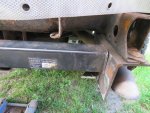
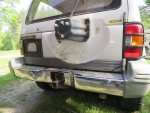
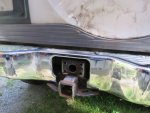
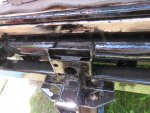
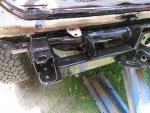
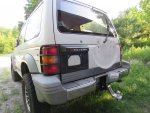
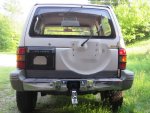
This Pajero had a custom receiver built onto the back of it. Done well enough but it hung down and was further back than I like. So since the rear bumper has been off while I am restoring the frame brackets it was a good time to get a few 9" x .062 cutoff wheels into a mid size angle grinder and go at removing the hitch. Should have had my camera with me yesterday but here it is trial fitted where it will end up. With this tucked up and in it will not affect off road use and I prefer to tow with the ball as tucked in as much as possible with SWB vehicles.
IMG_7634.JPG IMG_7635.JPG IMG_7636.JPG IMG_7637.JPG
 

CharlieNorth

Well-known member
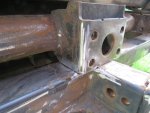
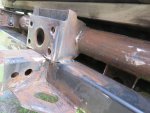
One more step roughed in. First part was to restore the four bumper mounts to the frame.
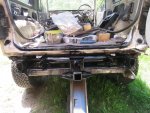
Next I got the final fitting done and have partially welded the hitch on. I like it, it is tucked up and in as tight as logical.
I then set the bumper in place, I did not cut the center out, that was done previously. The bumper in this shot is just sitting there, no fasteners yet. I am happy with this.

IMG_7649.JPG IMG_7652.JPG IMG_7656.JPG IMG_7657.JPG IMG_7658.JPG

A new aluminum ball mount will arrive tomorrow, I will be gone most of the day conducting Young Eagles flights so it will be later in the day till I get to see it.
 

CharlieNorth

Well-known member
Finally a little more done, between the May rain & snow and hosting an aviation event I finally got to coating the work area with POR 15.
I had started prepping the frame in the rear wheel area but I really want to do a more proper job, I truly would like to lift the body off the frame and do the best I can but I do not see that happening. One issue that bothers me is there is allot of sand inside the frame. I think there is a chance we will see pictures of this Pajero hanging from a chain sometime in the future and then I will paint what I can then oil the inside with a good Bar & Chain oil.
IMG_7768.JPG IMG_7771.JPG IMG_7774.JPG IMG_7775.JPG
 
  • Like
Reactions: plh

CharlieNorth

Well-known member
One more step for the Pajero, nothing at all for mankind.
I have a new Fuel pump and level sender installed now. I had bought new assemblies overseas and had no rush to install them. Being this had been a Diesel it did not originally have a pump in the tank. These had been pulled when out west and unfortunately two adjacent 5mm studs were sheared off the tank where the pump mounts. To remedy this I used an air cutoff wheel to clean the stubs down flush, then with some spacers under an old pump assy I was able to use it as a guide to spot where the fasteners needed to be. I was intending to install new studs but then chose to simply drill and tap and use two stainless bolts along with 4 new nuts.
Once this was completed and the area scrapped down and finish cleaned I brushed the top of the tank down with POR 15.

As this sat for a spell I started questioning if I truly wanted to install some unknown sourced fuel pump. Kind of an easy decision, just buy a proper Denso pump. I even decided to install the later 0008 rather than the 0007 pump called for our Monteros. The 08 is called for the Gen 3 as well as the Galant this engine is sourced from.
So no photos but it now looks spotlessly clean when looking through the access hatch in the floor. I guess I could take a picture with the AN flair adapter since I will be running new Cu-ni lines under this rig.
 
Last edited:
CharlieNorth

Well-known member
Current task, Replacing factory hardlines from the pump to the engine as well as the rear brake piping that will get re-routed down the trailing arm.
As I was working on removing the retainers for these lines I was finding it a PIA to get into the regions above the frame, the body was just making things tough. Well what the hill, I have not installed the body mounting hardware, knew there was a reason to not rush into that. So I grabbed a pair of the spacers, slid the jack under a rocker, first one side then the other and placed the two spacers that go in front of the rear wheels. Much easier now with the body lifted up from the frame. Even got a chance to shoot a picture of the new pump plates on top of the tank.
wMovsWW.jpg


l3dlax8.jpg


hKi3ZeO.jpg
 
Last edited:
Looks like its coming together great charlie. I What size tires are you planning on running?

I just finished up my work season almost. got a week off before I need to head out again for a quick job in cali. I had to cut the engine mount off mine, and am in the process of making a new one.

I cant wait to see this thing back together.
 

CharlieNorth

Well-known member
I do not intend to go over 33s, for now the 31s that were on it, most of it's duty will be on the street which will be some 265 Hakkapeliitta snow tires on 16s and taller 265s also on 16X8s, both of these have been in use on my SR.
Once I come up with some 16" rim offroad tires I can get the larger sport brakes up front but for now it will get the 2 piston calipers.

Yesterday was frustrating, I had other stuff to do in the morning preparing for a customer's antique aircraft fuselage I will be building this winter followed by an hour sitting in a room in the new spine care facility at our local hospital, the doctor never showed up so I walked out rather disgusted. I think it is a far distant dream to have two fully usable legs with minimal pain.

I was able by the end of day to get all the locating hardware removed for the fuel and brake lines along the frame. No fasteners broke so that is nice.
I have ordered a different filter/regulator for the fuel line as well as a fresh flex line for the rear brakes so I will wait for them to arrive before going further under this.
I think I will need to spend some time riding the lawn mower and get a few acres trimmed while waiting for parts while we have a few days before the rains return.
 

CharlieNorth

Well-known member
Yesterday I formed the rear portion of the new fuel lines, damn do I wish I had lifted the body off this thing if not just for this task. I will never say these lines are "pretty". Pictures later. I am glad I spaced the body up the few inches for this task though.
The lines however are tucked in where branches and tree limbs will have a real hard time getting to, not that I have had an issue but every few years or so I drive over fallen trees after a storm when I have not gotten around to clearing my drive yet. Not to mention getting out on a trail to play or rough my way into a canoeing spot.
I am now waiting on a new filter/ regulator that I will feed the returnless fuel rail from. If it arrives today I get to play otherwise we have many days of rain coming next week. Well I could always work indoors then. I do not want to, summer is too short here.
I am also waiting for a new brake hose which will be used when I reroute the rear brake piping.
 

Forum statistics

Threads
188,225
Messages
2,904,088
Members
229,805
Latest member
Chonker LMTV
Top