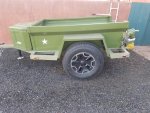
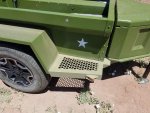
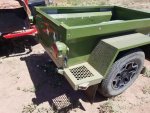
PBRE M-series dinoot

84-4runner

Active member
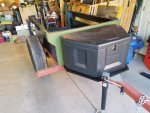
I built a J-series dinoot so thought I didn't have enough trailers ( 5 ) so tried my hand at
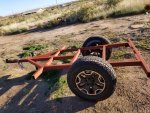
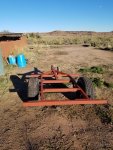
building a M416 replica. Started with a 2x3 1/8 inch wall frame. Still had 3 rubicon wheels
and tires so ordered a straight axle from dinoot . Added some extension to the frame so
I could build some steps/bumpers on the sides. Made them long since I didn't have any
idea what size or shape I wanted them
 

Attachments

  • thumbnail (1).jpg
    thumbnail (1).jpg
    295.4 KB · Views: 12
  • thumbnail (2).jpg
    thumbnail (2).jpg
    265.3 KB · Views: 12
  • thumbnail (3).jpg
    thumbnail (3).jpg
    398.3 KB · Views: 12
Last edited:

84-4runner

Active member
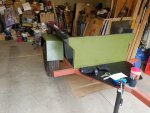
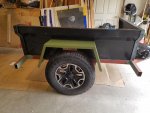
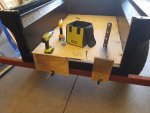
The M-series or 416 is much easier to build than the J-series. I then mocked up the sides and
fenders on the frame so I could drill the holes to put things together. Also so I could decide
where to mount the fenders. I did move the axle up a little and will be adding a box on front.
From my experience on the 1st trailer I put the axle over the springs
 

Attachments

  • thumbnail (4).jpg
    thumbnail (4).jpg
    196.4 KB · Views: 10
  • thumbnail (5).jpg
    thumbnail (5).jpg
    129.7 KB · Views: 9
  • thumbnail (6).jpg
    thumbnail (6).jpg
    107.7 KB · Views: 9

84-4runner

Active member
some more mock up with the from box.
 

Attachments

  • thumbnail (9).jpg
    thumbnail (9).jpg
    127.8 KB · Views: 6
  • thumbnail (7).jpg
    thumbnail (7).jpg
    189.4 KB · Views: 8
  • thumbnail (8).jpg
    thumbnail (8).jpg
    146.4 KB · Views: 7

84-4runner

Active member
Mocking up the fenders. ended up putting them all the way up to the bend in
the box. A brick was the perfect spacer
 

Attachments

  • thumbnail (10).jpg
    thumbnail (10).jpg
    111.1 KB · Views: 8
  • thumbnail (11).jpg
    thumbnail (11).jpg
    108.6 KB · Views: 8
  • thumbnail (12).jpg
    thumbnail (12).jpg
    263.8 KB · Views: 7

84-4runner

Active member
next was a floor the plans recommend a piece of 5/8 marine grade plywood
but I splurged and used a 3/4 inch piece. then mocked up and attached the
tailgate
 

Attachments

  • thumbnail (13).jpg
    thumbnail (13).jpg
    96.5 KB · Views: 7
  • thumbnail (14).jpg
    thumbnail (14).jpg
    234.1 KB · Views: 7

84-4runner

Active member
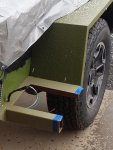
then to the step/bumpers . Once the fenders were attached I could have used a piece of angle
iron but I wanted to match the fender angle so use flat stock and then welded the corner for
custom angle iron. Still deciding on the length so the are long
 

Attachments

  • thumbnail (15).jpg
    thumbnail (15).jpg
    392.5 KB · Views: 6
  • thumbnail (16).jpg
    thumbnail (16).jpg
    207.1 KB · Views: 6

84-4runner

Active member
at this time in case I added a rack or a swing out tire carrier in the back I welded on pads
 

Attachments

  • thumbnail (15).jpg
    thumbnail (15).jpg
    392.5 KB · Views: 6
  • thumbnail (16).jpg
    thumbnail (16).jpg
    207.1 KB · Views: 6
  • thumbnail (17).jpg
    thumbnail (17).jpg
    218.1 KB · Views: 5
  • thumbnail (18).jpg
    thumbnail (18).jpg
    262.3 KB · Views: 4

84-4runner

Active member
Of course it started snowing but figured out I wanted an angle and cut and put the side
pieces on. For some unknow reason rather than bedlining the entire panels I only did
the parts that were attached to each other. This would cost me
 

Attachments

  • thumbnail (19).jpg
    thumbnail (19).jpg
    230 KB · Views: 7
  • thumbnail (20).jpg
    thumbnail (20).jpg
    202 KB · Views: 7
  • thumbnail (21).jpg
    thumbnail (21).jpg
    204.7 KB · Views: 7
  • thumbnail (22).jpg
    thumbnail (22).jpg
    200 KB · Views: 7
  • thumbnail (23).jpg
    thumbnail (23).jpg
    249.1 KB · Views: 7
  • thumbnail (24).jpg
    thumbnail (24).jpg
    206.1 KB · Views: 7

84-4runner

Active member
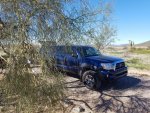
well it decided to turn into winter and was too cold to bedline in the garage so I down
the trailer down to the valley (phoenix) and did my bedlining there. The trailer is behind
the palo verde tree
 

Attachments

  • thumbnail (25).jpg
    thumbnail (25).jpg
    146.7 KB · Views: 7
  • thumbnail (26).jpg
    thumbnail (26).jpg
    294.1 KB · Views: 7
  • thumbnail (33).jpg
    thumbnail (33).jpg
    156.1 KB · Views: 9
  • thumbnail (27).jpg
    thumbnail (27).jpg
    205.2 KB · Views: 9
  • thumbnail (28).jpg
    thumbnail (28).jpg
    232.6 KB · Views: 9
  • thumbnail (29).jpg
    thumbnail (29).jpg
    140.3 KB · Views: 8

84-4runner

Active member
finally found some perforated steel to use on the steps
 

Attachments

  • thumbnail (30).jpg
    thumbnail (30).jpg
    153.7 KB · Views: 6
  • thumbnail (31).jpg
    thumbnail (31).jpg
    179.5 KB · Views: 6

84-4runner

Active member
of course the company name
Next I plan on using some dinoot no-weld rack parts to build a rack.
On the last trailer I welded the rack which is a pain. But will post the
rack build as I go along
 

Attachments

  • thumbnail (32).jpg
    thumbnail (32).jpg
    119.4 KB · Views: 4

84-4runner

Active member
adding a No-Weld rack system from dinoot trailers.
Mark the bases with the orentation that I am using so I put them back where and how
they go. I learned the hard way when I drilled the holes with the base turned the wrong
way and had to weld them up and redrill.
 

Attachments

  • thumbnail (1).jpg
    thumbnail (1).jpg
    395.3 KB · Views: 2
  • thumbnail (2).jpg
    thumbnail (2).jpg
    476.5 KB · Views: 2
  • thumbnail (3).jpg
    thumbnail (3).jpg
    146.2 KB · Views: 2

84-4runner

Active member
once you do an upright you get the idea and it goes fast
use edge lube and a good drill bit
 

Attachments

  • thumbnail (4).jpg
    thumbnail (4).jpg
    510.8 KB · Views: 2
  • thumbnail (5).jpg
    thumbnail (5).jpg
    298.9 KB · Views: 3
  • thumbnail (9).jpg
    thumbnail (9).jpg
    361.9 KB · Views: 1

84-4runner

Active member
take your time and think thru what you are doing and it is straight forward
If you are making a telescoping rack to just remember that due to the bolts
you lose or gain, depends how you look at it some height. About 8 inches worth
I did the length as if I were welding and ended up too high but it is easy to
take apart and fix.
 

Attachments

  • thumbnail (6).jpg
    thumbnail (6).jpg
    409.1 KB · Views: 2
  • thumbnail (7).jpg
    thumbnail (7).jpg
    409.1 KB · Views: 2

84-4runner

Active member
done except for the cross pieces. I haven't figured out where I want them
 

Attachments

  • thumbnail (8).jpg
    thumbnail (8).jpg
    459.1 KB · Views: 6
  • thumbnail (10).jpg
    thumbnail (10).jpg
    362.1 KB · Views: 6

Forum statistics

Threads
188,214
Messages
2,903,877
Members
229,665
Latest member
SANelson
Top