Photo Critiqing Thread

ARBJK-042-nw.jpg

I like your treatment of the background and I know the subject of the photo is the bumper, but using the black background at ground level muddles up some of the detail under the vehicle. I know the focus should be on the bumper, but my eye is drawn to the area beneath the vehicle trying to find some detail. I believe if there were a gradient to a lighter background in the lower third, the viewer would look there and then focus more on the bumper. I like your choice of color for the upper left background as it is repeated in the highlight just to the right of the driver's side headlight.
 

nwoods

Expedition Leader
I like your choice of color for the upper left background as it is repeated in the highlight just to the right of the driver's side headlight.

That was my sample point! I totally agree about the dark bg down low, but I did this as a 5 minute quicky before I headed out the door to work. Didn't take time to fuss with it.

FlyingWil, how about something like an action shot, like this one from Goodyear:
RedJeep_Krawl1024x768.jpg
 

Photog

Explorer
The Bus: I like the overall idea of this image. To improve on it, I would start by including the front of the bus, and a little space ahead of the front also. It looks like there is some other junk that might show up in that area, so plan on doing som Photoshop work, to remove it from the image. I see a large Joshua Tree behind the bus. Include it as part of the image, or remove it completely. The peek-a-boo Joshua Tree does not help the image. You will probably have to place the camera in a different location to make all this work.

Exposure and focus are right on. You could try a different time of the day, for a different type of light. Before sunrise or after sunset (depending on the orientation of the bus) would give a softer light, and reduce the hard shadows. This may not be an improvement; but it is may be worth the effort.
498538432_MeJQL-XL.jpg
 

Photog

Explorer
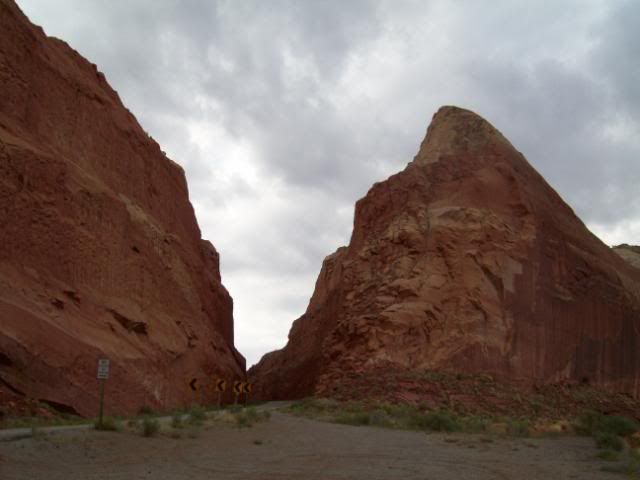
The Canyon: This is a tough nut to crack. I can see the lines where you have brought together the various levels of exposed images. I think those are good cut-off points. If you are shooting with the idea of using some type of HDR software, take your time with the exposure settings.

It really looks like you would only need 3 or 4 RAW shots to make this image work. Before shooting, set the camera on manual control, adjust your aperture for deep depth-of-field, and find the proper shutter speed for each of the regions of the photo. Write those numbers down, as you go.

Now compose the shot, and the model (daughter), set your shutter for the area where the mofel is, and fire. Now the model can relax.

Look at youe notes, adjust the shutter for the next shot and fire.

Continue until all exposures are captured.

Now you have the necessare data to allow an HDR program to bring it all together. And the whole image should not be "mid-tone".

These kinds of projects really help us improve our technical skills.

Great project shots.:26_7_2:

498540905_9V8GL-X2.jpg
 

Photog

Explorer

I also like the color choice and quality of the background removal. The black at the bottom is definitely a hole the eye goes into, looking for info.

This is alos the best of the bunch, for displaying the bumper. The camera is a bumper level, and the corner of the bumper is the closest object to the camera. These two things help draw attention to the bumber. Notice how the Goodyear add has the tire at camera level, and it is the closest object in the image, in in a great location (background).

Now you have to consider lighting. Harsh sunlight is not usually the best choice. Having the bumper in partial shade, while the near side of the Jeep is in full sun, does not help the image. For big subjects, like buses and Jeeps, the softer light of a cloudy day, or before sunrise & after sunset, can usually improve the final result. Although, with the harsh light, you can create an extreme style of image.

Once you get the angles and light figured out, take the Jeep to a location that has a great background. Fire away, while telling the Jeep to "Work it".:):)
 

nwoods

Expedition Leader
The Bus: I like the overall idea of this image. To improve on it, I would start by including the front of the bus, and a little space ahead of the front also. It looks like there is some other junk that might show up in that area, so plan on doing som Photoshop work, to remove it from the image. I see a large Joshua Tree behind the bus. Include it as part of the image, or remove it completely. The peek-a-boo Joshua Tree does not help the image. You will probably have to place the camera in a different location to make all this work

Wow, I did not even see the tree in the image until you pointed it out. There were a few people circling the bus shooting at different vantage points, so my comp was trying to pull the distortion a bit, while hiding the people wearing white shirts all around the place. There is a red car UNDER the bus's front right wheel, and it's very distracting. I did toy with the Joshua Tree in other images, but those images stunk.

bus-1-800.jpg


bus-2-800.jpg


The canyon image's line you see is not really an artifact, but I agree it looks like one. I think it's there because its over sharpened. It's actually a second shadow line on the edge of the canyon wall. Here is a sort of a baseline shot at 1/125, F6.3, ISO 100, exposure -0.33

canyon-800.jpg
 

Photog

Explorer
NWOODS,
The red car could really pose a problem, trying to include the front of the bus. I would still try it (if you can return to the location). You may also try cutting the buss off at both ends, with no space at either end, keeping that same dramatic angle. Just remember that what ever part of the bus that is closest to the camera, will dominate the image and become the subject. Use that to your advantage.

This bus could be a cool learning tool.:wings:

Over-sharpening can definitely add unwanted artifacts and lines to photographs.
 

flyingwil

Supporting Sponsor - Sierra Expeditions
I read your post from top to bottom. As I saw the second photo, I said "too high!" to myself. Then noticed your third photo where you lowered the angle. Much better! I think this image would work better in landscape format though.

Also, I think the bright background is rather distracting. It's nice there is not a junkyard back there, but the exposure is too glaring. I don't know how not to do that, other than to choose a more specific background, or photoshop it :)

Great choice of rig though. Nice color, great tires with fresh lugs.

ARBJK-042-nw.jpg

Thanks... How did you crop out just the Jeep so well? It seems to take me hours with Photoshop to try and cut everything out that I want, and there always seems to be some mistakes when i am all set and done.

I like your treatment of the background and I know the subject of the photo is the bumper, but using the black background at ground level muddles up some of the detail under the vehicle. I know the focus should be on the bumper, but my eye is drawn to the area beneath the vehicle trying to find some detail. I believe if there were a gradient to a lighter background in the lower third, the viewer would look there and then focus more on the bumper. I like your choice of color for the upper left background as it is repeated in the highlight just to the right of the driver's side headlight.

I agree the color choice was great!

That was my sample point! I totally agree about the dark bg down low, but I did this as a 5 minute quicky before I headed out the door to work. Didn't take time to fuss with it.

FlyingWil, how about something like an action shot, like this one from Goodyear:
RedJeep_Krawl1024x768.jpg

I wish I could but I only had two hours with that JK!

I also like the color choice and quality of the background removal. The black at the bottom is definitely a hole the eye goes into, looking for info.

This is alos the best of the bunch, for displaying the bumper. The camera is a bumper level, and the corner of the bumper is the closest object to the camera. These two things help draw attention to the bumber. Notice how the Goodyear add has the tire at camera level, and it is the closest object in the image, in in a great location (background).

Now you have to consider lighting. Harsh sunlight is not usually the best choice. Having the bumper in partial shade, while the near side of the Jeep is in full sun, does not help the image. For big subjects, like buses and Jeeps, the softer light of a cloudy day, or before sunrise & after sunset, can usually improve the final result. Although, with the harsh light, you can create an extreme style of image.

Once you get the angles and light figured out, take the Jeep to a location that has a great background. Fire away, while telling the Jeep to "Work it".:):)

Yeah the lighting was Harsh... 3 in the afternoon, and in Phoenix, AZ... so no clouds. How does the rule of thirds apply in photo like this?
 

nwoods

Expedition Leader
Thanks... How did you crop out just the Jeep so well? It seems to take me hours with Photoshop to try and cut everything out that I want, and there always seems to be some mistakes when i am all set and done.

No magical secret. I have not had much luck with the "smart tools". I just zoom in and use the Polygon lasso, and make a selection using lots and lots of points, especially around compound curves. PM me your address and I'll email you the PS file with the selection layer in it. I cut around the lugs on the tires and so forth, it's pretty accurate.

To navigate while zoomed in, just push the space bar to get the hand icon to pan around, then let go and resume your picking your selection points.
 

computeruser

Explorer
I'll throw a couple out there. All were shot with the Fuji S5000 that I bought from Scott a couple years back for like $100, and have not seen any work except Windows XP Picture Resizer to get them to 800x600 for posting here.

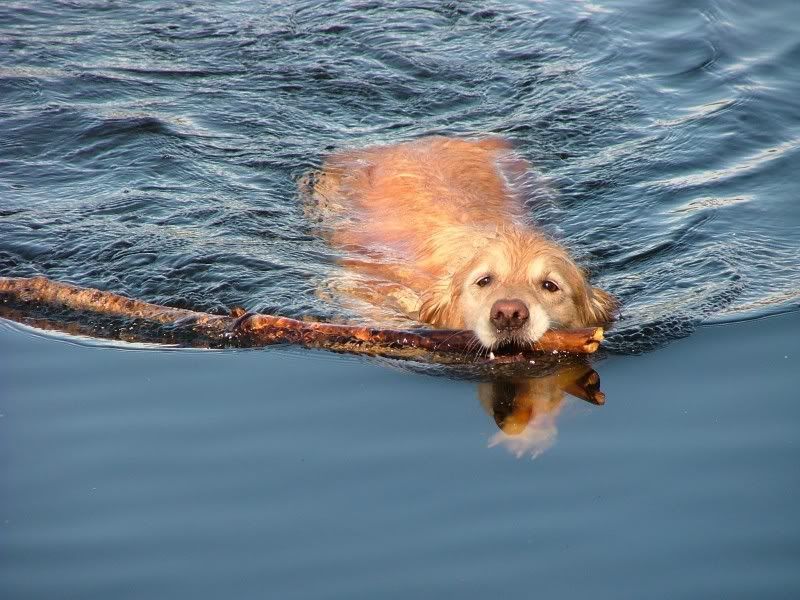
I think that positioning the dog lower in the frame, with less still water and more ripples, would have helped the final product. Thoughts?
DSCF1235Medium.jpg


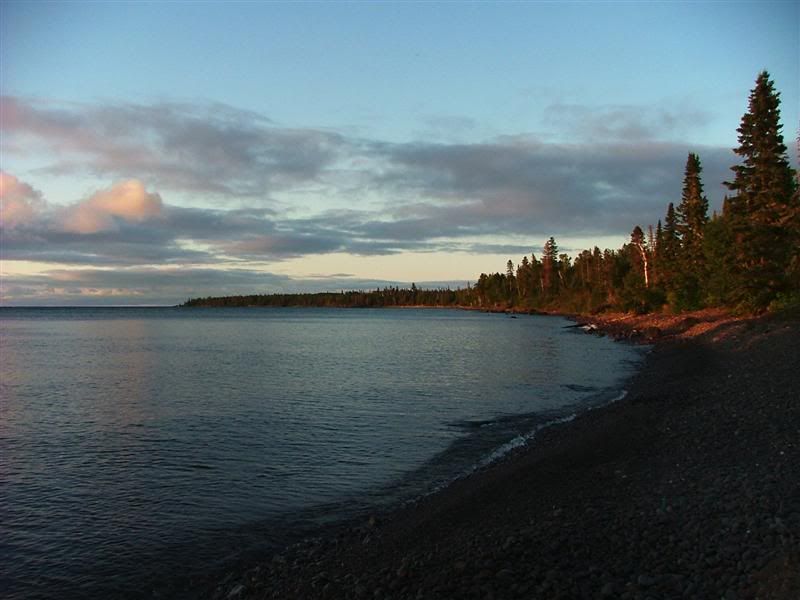
In both images, the horizon is at roughly the half-way point. Should it have been higher or lower? What else should have been done differently in composing the shot?
DSCF1616Medium.jpg

DSCF1611Medium.jpg
 

Tucson T4R

Expedition Leader
Trying my hand at night star shots

OK, these were my first attempt at capturing some night shots with light painted trees in the foreground. Let me know how you think I can improve these in the future. I did learn that a 25-30 sec does start to pick up the star movement. I also found that you can easily light the foreground subject too much. I switched from my flashlight to only using an LED head lamp with a couple short passes. That seemed to be a better balance.

GardnerCanyon090060.jpg


GardnerCanyon090061.jpg


GardnerCanyon090062.jpg


GardnerCanyon090063.jpg


GardnerCanyon090079.jpg
 

Photog

Explorer
Yeah the lighting was Harsh... 3 in the afternoon, and in Phoenix, AZ... so no clouds. How does the rule of thirds apply in photo like this?

Most advertising type images don't use the "Rule of Thirds" unless it is to make space on the page for text, titles, articles, etc. If it isn't for advertising, you could place the subject to one side of the image, and have the other side of the image be a background of the landscape of choice (Moab, etc.)
 

Forum statistics

Threads
188,297
Messages
2,905,112
Members
229,959
Latest member
bdpkauai
Top