Pop-Up Camper - Custom Build (scratch built) Oasis-Si

Ducstrom

Well-known member
Great build! Looks like we started our truck camper builds right around the same time and with very similar trucks. Don't worry, my camper is not done yet either...
It's tough to keep motivated with all the little bits and details that need figuring, solving, and building with a custom box.
You're in the home stretch now for sure!
 

VanIsle_Greg

I think I need a bigger truck!
Great build! Looks like we started our truck camper builds right around the same time and with very similar trucks. Don't worry, my camper is not done yet either...
It's tough to keep motivated with all the little bits and details that need figuring, solving, and building with a custom box.
You're in the home stretch now for sure!

Thanks for the encouragement sir. Yeah, it has been hard to get back on track. Lots of little things to do, but its coming along.

I can't wait to get the roof completed and to get all of the mechanical systems done. I am really looking forward to actually using it. Heh

Need to get warranty sorted out on my battery...its a sealed AGM unit, and doesn't appear to be holding / taking a charge properly now. Sigh. Also still waiting for the delivery of my Laguna table leg setup. FedEx appears to have lost it.
 

Rando

Explorer
Very nicely done!

One quick point - you may want to flip the gas struts around, they should be mounted with the rod down to keep the internal seals lubricated, and to stop water running into the body of the strut.
 

VanIsle_Greg

I think I need a bigger truck!
Very nicely done!

One quick point - you may want to flip the gas struts around, they should be mounted with the rod down to keep the internal seals lubricated, and to stop water running into the body of the strut.

Funny thing...I noticed that yesterday, that I mounted them upside down. My son actually pointed that out to me as well.

I don't know what I was thinking? Thanks for the heads up and good catch.
 

ITTOG

Well-known member
Very nicely done!

One quick point - you may want to flip the gas struts around, they should be mounted with the rod down to keep the internal seals lubricated, and to stop water running into the body of the strut.
Glad to see this post. It will keep me from making the same mistake soon.

@VanIsle_Greg it is looking great. I love how you designed the conduit supports.

Sent from my Pixel 3a XL using Tapatalk
 

VanIsle_Greg

I think I need a bigger truck!
Glad to see this post. It will keep me from making the same mistake soon.

@VanIsle_Greg it is looking great. I love how you designed the conduit supports.

Thanks man. I can't take much credit for it, Tim Morrissey is who I sort of modeled this from... his videos are pretty good, especially the ones on redoing the fabric himself (him and his wife)! My fabric is shorter at 21" only so the tubes are significantly smaller on mine.

Tim Morrissey on YouTube.

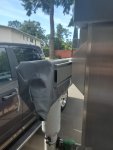
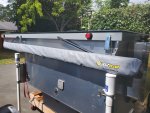
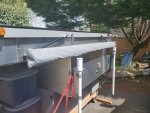
Managed to get a bit more work done too. I installed the awning brackets, and then the awning the next day... as it was DARK when I finished the brackets. Oh and I swapped around the gas struts as well. :cool:

Awning mount looks pretty much in the overall theme of the whole exterior! heh

20200708_114255.jpg

Sticks out a few inches bast the end of the camper for now, but I will play with the positioning once I test it on the truck and deployed.

20200708_114246.jpg

And you can see the struts are flipped over... heh Nice big awning too.

20200708_114234.jpg
 
Last edited:

VanIsle_Greg

I think I need a bigger truck!
I spent some time this past weekend and this week re-building the fridge slide and drawer system. I was not happy with the way it was coming together, and it had some challenges the way that it was setup. So, of course, I pulled it apart and re-did it all with the exception of the drawer base.

It went from a closed box, to an open front slide... and it works great. I was fortunate to have some left over off-cuts of poplar that match the trim and frames etc. What I didn't have, apparently was time to take any pictures. lol Just imagine it... so tight. heh Pics to follow here. :unsure:

Next up, I need to finalize the lift system uprights and finish glue and screw them all in. It has been up and down a handful of times, and it works ok, not perfect but a pretty solid ok. It will be a lot better with the fabric installed and the front support (safety support) over the bed. Also need to grab a 4 x 8 sheet of 1/2" birch ply and some 1/2" x 1" fir (or poplar if I can find it) to complete the bed slide portion. Need to add an additional 6" to the current bed platform. Also got some good news, picking up my Laguna adjustable table leg tomorrow... yay.

All in all this weekend should be good. Pics to follow. No really.
:cool:
 

VanIsle_Greg

I think I need a bigger truck!
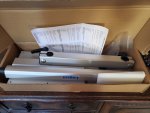
Ok... its been a tough week to get back on the camper, lots of work and family stuff getting int he way of my fun. I did receive something pretty awesome however FINALLY. The first order was lost in shipping, but the second one showed up in only 2 days from the UK. Why the UK, cheapest one I could find... and that was in stock. Funny thing I thought it was shipping from the USA?

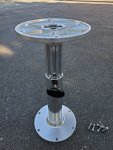
New arrival. Full Lagun table leg / support kit. Pretty stoked on this... I love the leg I have in there now, but without the option to swing it out of the way, space is pretty tight in there.

20200717_164253.jpg

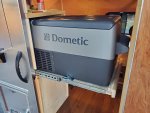
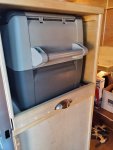
Finally remembered to grab some pics of the fridge slide tray as built now after modifications. I removed the front and sides and went with a simple drawer slide and added the front poplar bullnose trim that matches the seat fronts. I still need to remove the stock Dometic handle... and replace it with a tie down of some description.

20200718_201107.jpg

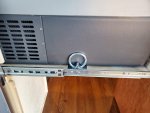
Decided to modify up some simple cheap tie down loops to use to secure the fridge in place. Going to make up some straps to hold it in there. Simple and cheap option, looks pretty OK too.

20200718_201114.jpg

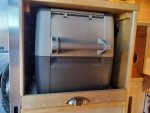
Closed up. Nice fit and a little drawer pull that matches the o

20200718_201133.jpg

Good ventilation too. This is a Dometic CF-35 and it is a fantastic unit. I have nothing but good things to say about Dometic fridges. Really low power consumption, excellent longevity and pretty useful. Mine is the older style, the newer ones have a much nicer colour, and a nicer lid design too... plus all that WiFi technology stuff.

20200718_201155.jpg

Up next, pulling out the table and existing leg setup and putting in the Lagun. Also need to finish off the kitchen upper cabinet doors soon too, that will basically complete the kitchen. Yay!
 

VanIsle_Greg

I think I need a bigger truck!
Another few hours of progress. Well first I had to do some regression, take a few steps backwards... then move forward. I ripped out the stationary up-down table leg to prep for installing the Lagun leg.

I basically started with this. I love this table leg, VERY sturdy and looks amazing, but it is just not working for me in this build. So out it had to come.

20190309_181810.jpg

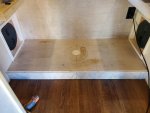
And out it came. There is a 3" hole under it so the leg can co all the way to the bottom / lowest setting... and that means a big ****** hole in the floor plus 6 bolt holes. Hmmm... oh and this thing required me to basically gut the flooring and deck to get to the nuts on the bottom of the bolts. That sucked.

20200719_155430.jpg

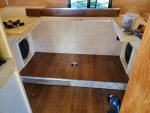
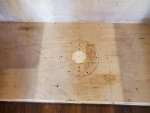
I lifted out the vinyl flooring, cut a 1/2" x 3" plug to fill the hole, added some backing to it, and glued and screwed it all in place.

20200719_163041.jpg

Worked out pretty good and completely flush. I then needed to fix the 7 holes in the flooring.

20200719_163046.jpg

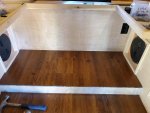
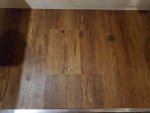
I thought this was going to be simple, and that I would just pull out the 2 planks and replace them. Sadly I had only scraps and not enough to replace full planks. Sigh... and I am too cheap to buy a WHOLE box for 1 plank. Ugh. So I needed to very carefully scribe in a patch. That took some detail work. While it is not perfect, it is 95% and that is good enough for now.

20200719_170127.jpg

You can see it if you look for it... I still need to roll the edges a little to get it smoother. When you cut the vinyl it raises a little on either side of the cut, and that is what you are seeing.

20200719_170132.jpg

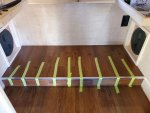
All back together. I forgot to take the pic after I put the 1/4 round back in too. Oh well, adhesive should be dry by tomorrow, and the tape can come back out. All in all this was challenging, but I am happy that it turned out as well as it did all things considered. Next up, planning for the Lagun install! I hope I can re-use my existing table top... we will see.

20200719_171029.jpg
 

VanIsle_Greg

I think I need a bigger truck!
Ok...last update for today, I promise. It's just now turning dark, and I just finished cleaning up... so that was about 8 hours of picking away at this thing today...need to get it done finally. Anyhow, final updates on Lagun install, which is done (and it is amazing).

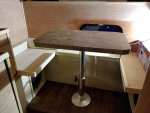
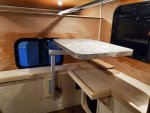
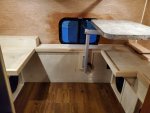
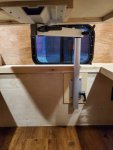
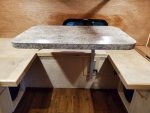
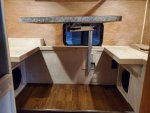
Installed and swung out of the way, so I have some more moving around space and access to the bunk etc. I figured this will help a lot when getting ready for bed. I might ditch the table top and make a new one as this one is well made, but crazy heavy.

20200719_212055.jpg

HEAVY top swung out of the way for maximum floor space.

20200719_211809.jpg

Much better.

20200719_211805.jpg

I am very impressed with these table legs. Pricey, but worth it. I found this one online at http://rv-table-mount.com for $133 USD plus $30 ish shipping! Great deal, but after I ordered I did find a few local suppliers as well. The company shipping these is in the UK, and their service was superb! If you are looking in Canada, Expedition Upfitter carries them.

20200719_211755.jpg


20200719_211746.jpg


20200719_211741.jpg

This is what came out. Beautiful thing... and for sale soon too!

20200719_183028.jpg

Oh and I rolled in the seams in the floor patch, not bad at all.

20200719_212049.jpg

Next up, finish the electrical and solar, and then get the fabric installed.
 

VanIsle_Greg

I think I need a bigger truck!
Sold the table leg... that was quick.

Apparently these are hard to come by right now? Who knew. Add that to my canvas savings fund!
 

VanIsle_Greg

I think I need a bigger truck!
So funny story. The place I ordered my Lagun from shipped it super fast... and then FedEx lost it in shipping. Booo So I contacted the shipper, the folks I bought it from (after dealing with FedEx and them looking for it everywhere). He was very helpful, he got on with his FedEx contact... and his comment was, "yeah, its lost".

The replacement that they sent me arrived in 2 days! Nice! That is the one I installed.

Well, the 2nd one just arrived yesterday a month and a bit after it was ordered. lol Awaiting instructions on what to do with it. heh Might have one for sale soon.
:unsure:
 

VanIsle_Greg

I think I need a bigger truck!
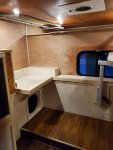
Finally got back out there and put in a few hours on the camper. It's all (mostly) small stuff I am dealing with now, so it's lots of picking and fiddling and 4 hours later it doesn't look like you got very far. But, it still feels good to be making progress. Today was all about finishing the kitchen (or trying) and then working on some stuff I was hacking away at last week.

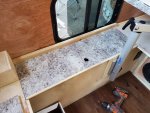
One thing I did last weekend but did not really document at all was to remove the raised edge around both of the seat fronts. This was put in there to retain the cushions, but it will dig into your side / elbows when in 'bed' mode and not 'table' mode, so I decided to scrap it. I dug out my Fein Saw and went to town. LOTS of sanding and routing and more sanding later it looks great and is way more functional. I did this along the side as well on the cover over the water / battery box. Today I decided to fix it all up... and laminate it with some Formica to match the counter tops. I then took the front piece of Poplar that I cut off, ripped it on the table saw and then added it to the back of the cover to act as a strengthener. Looks stellar.

Lots of router trimming and fun today... best tool I have picked up in a long time...
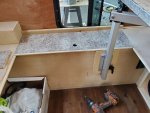
20200803_200826.jpg

Done.

20200803_200820.jpg

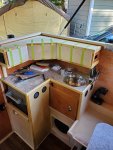
Then it was on to the kitchen cupboards. Long overdue. I started with laminated Luan to match the walls and the other drawers / cabinets, but it was chipping and it is hard to keep the edges in good shape. So... I scrapped it and went with 1/2 inch Birch ply. Same thing, the veneer is soooooo thin on both that any little knick and you are looking at glue. Scrapped that Idea... laminated them as well with Formica. heh I am also going to do the backsplash in either the Formica or maybe some imitation tile? TBD.

Measuring and testing, PITA doing this. Lots of testing, cutting, testing....

20200803_145800.jpg


20200803_151009.jpg

I laminated them with some spray adhesive... man I love that stuff.
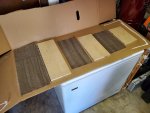
20200803_164841.jpg

Busted out the new Makita again and trimmed off the edges. I think this is my new favorite thing to do. heh Ready for installation.
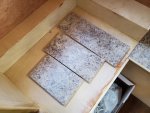
20200803_200839.jpg

I will be using these hinges from Richelieu, they are interesting, and I have never used them before. They are called 'Self Closing Hinges' and they look...complicated to mount. Ran out of time, but will dig into it tomorrow maybe if I have time.

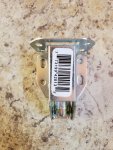
Richileau.jpg


20200803_165928.jpg

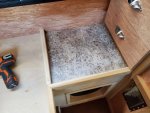
I also wanted to laminate the little spot beside the seat and under the drawers. This is a good spot to put a drink or your stuff if you are in the bed there, stuff like your keys and or phone. This turned out great too... didn't include int he pic the 1/4 round I re-installed, but you can see that I also added that trim from the wall to the corner to clean up that edge and to hold in the cushions one day... when I actually have cushions and stuff.
20200803_200807.jpg

More work coming soon. I am going to be doing some more laminating, trim and then finishing off the bed and getting it ready to install the mattress. YAY that will be an epic day for sure. Need to start varnishing final coats too, and in some cases first coats. heh Might be able to get it ready for fabric install in a few weeks!
 
Last edited:

Forum statistics

Threads
190,214
Messages
2,925,093
Members
233,522
Latest member
Petersmithinak
Top