Rango.....1942 Willys MB

Metcalf

Expedition Leader
Why thank you!

I think its going to be pretty dang neat when its 'done'. If I was going to start from scratch and choose parts I didn't already have I would probably do a few things different, but overall it's still going to be cool I think. I wanted to do something different than I had seen on a vehicle that has been being built on for the last 70 years. Who knew there was so many ways to build a flat fender!

Even after the initial build, I still have more stuff to do.....real lockers, alloy front shafts, 5.38 gears, etc....they are never 'done' :sombrero:
 

jeepdreamer

Expedition Leader
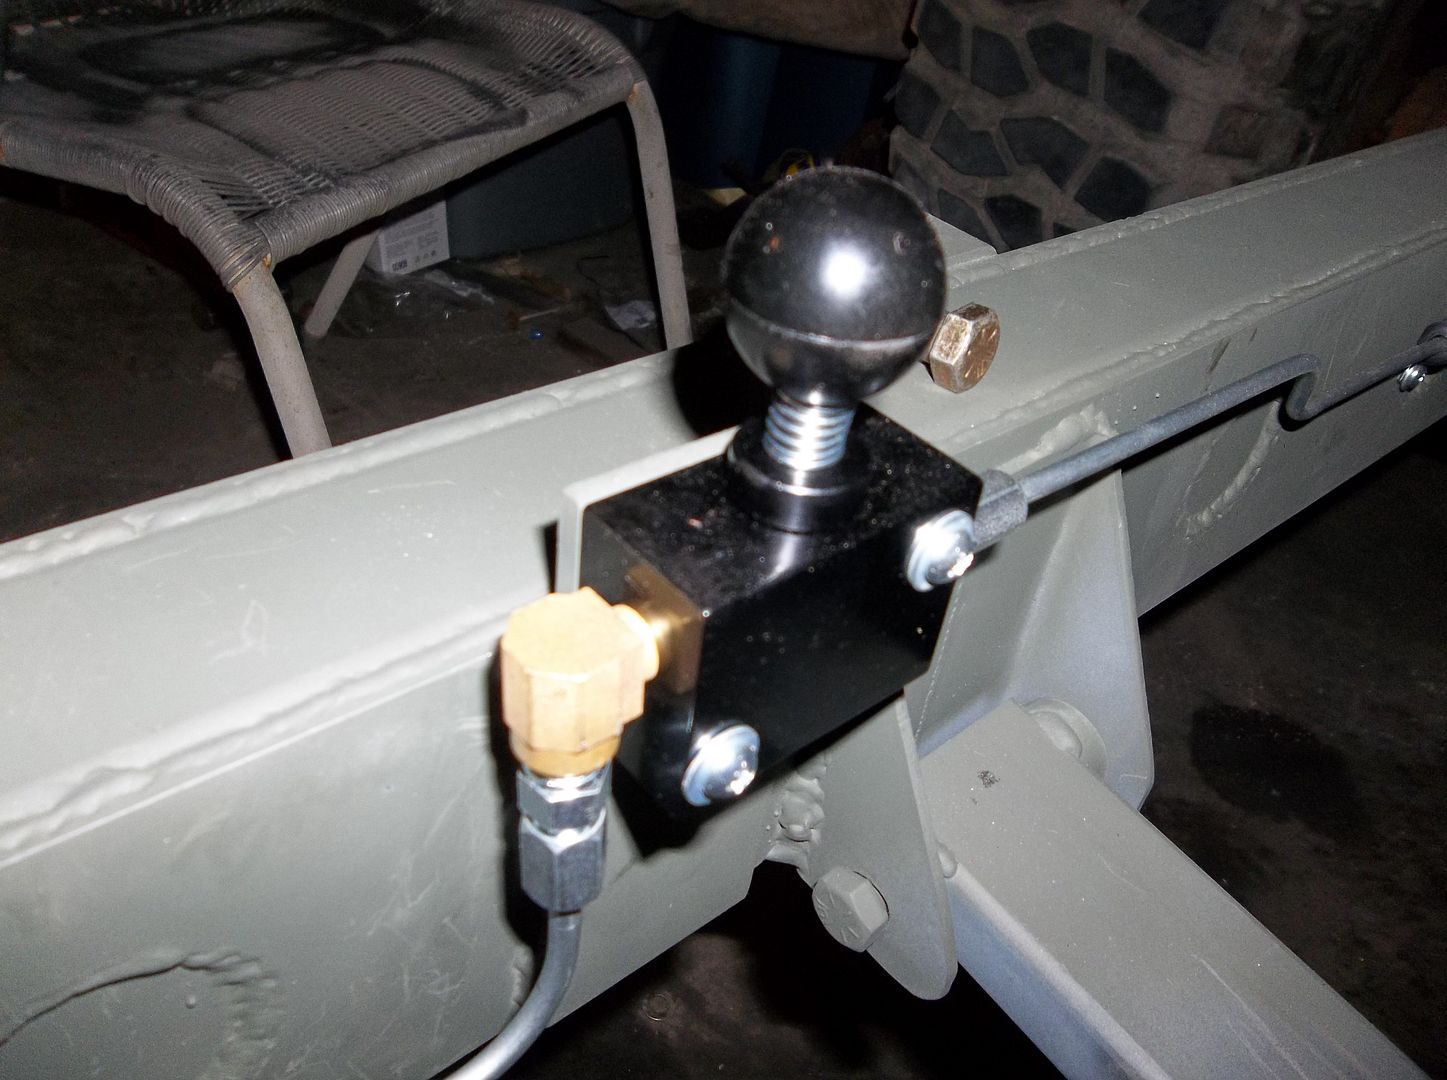
Ok... So whats the little black knobby thingy on the drivers side frame rail attached to the metal line? Some kind of line loc?
 

Metcalf

Expedition Leader
Yup, hydraulic park-lock. The knob will come up just under the edge of the seat. Push the pedal, hit the knob, and the rear circuit is locked. Its basically a simple temporary parking brake. I may change my mind, but I think it should work for now. I don't have a lot of other options for a parking brake with my brake setup and super high transfer case position in the chassis.

Too bad I don't have a transfer case that will allow front digs......it would be fun for that too.....
 
D

Deleted member 9101

Guest
Thank you. I don't think its the perfect solution, but its close. Ideally I think having the tank under the rear rear floor behind the rear axle would be best, but the complexity of the tank to retain good ground clearance and have decent capacity would have taken things to a whole new level. Plus, if the tank is under and behind the rear axle it would have needed a skidplate. With the vehicle sitting so low I decided to just keep the tank inside....

Now, I looked at just about EVERY fuel cell available on the market, and nothing I saw would give me the fit I wanted. They are all basically just a rectangle. All of the stock sizes would have left a lot of wasted space.....

After looking at a few things I decided to design a tank from scratch and have it quoted at Boyd Welding out of Ocala, Florida.

The tank was designed to take up the minimal amount of space for the maximum amount of capacity. The area behind the front seats is probably the oddest most unusable space so I decided to use that area in the design. Boyd Welding was then able to take my design and turn it into metal in a HURRY. From order to delivery was 10 business days if I remember it all right.

Hopefully the tank will last a long time.

I will try and get some more pictures during the install of the tank, but for now the features of the tank are....

-Conforms to the shape of the wheel tub and floor to use all the available space behind the seats.
-approx 19 gallon capacity. In flat fender jeep I feel that is MORE than enough, but also give the vehicle some real range.
-Fuel sump under the body. The sump is a 2" dia, 4" deep sump that should help with fuel starvation at angles a lot.
-The fuel sump is under the body and next to the inside of the frame for ease of fuel line routing. One thing I really didn't like about off the shelf fuel cells was that most of the lines are routed from the top of the cell.
-There are two ports on the front of the tank that will allow me to construct a sight tube for fuel level. The sight tube is between the front seats where it should be fairly protected and easy to see.
-A roll over vent/safety valve was installed in the passenger corner of the tank. This will be extended up to the top of the roll cage.
-The fill port is non-vented and located on the top rear of the tank behind the drivers seat.
-A baffle was built into the middle of the tank to help with fuel slosh.

Enough for now....I need to get out into the shop.

HaHa, I really do like the way you think...lol. the way I see is:you have made a very reasoniable comprimise and came up with a real world solution. Funny that they are in Ocala, I am not too far away.. almost makes me want to have an extra tank for my bike built...lol.
 

jeepdreamer

Expedition Leader
Could you pass on some info on the line loc thingy? The E-brake in my jeep is a death trap and this would be a good band-aid until I can gather the parts for a disc brake set up.
 

Metcalf

Expedition Leader
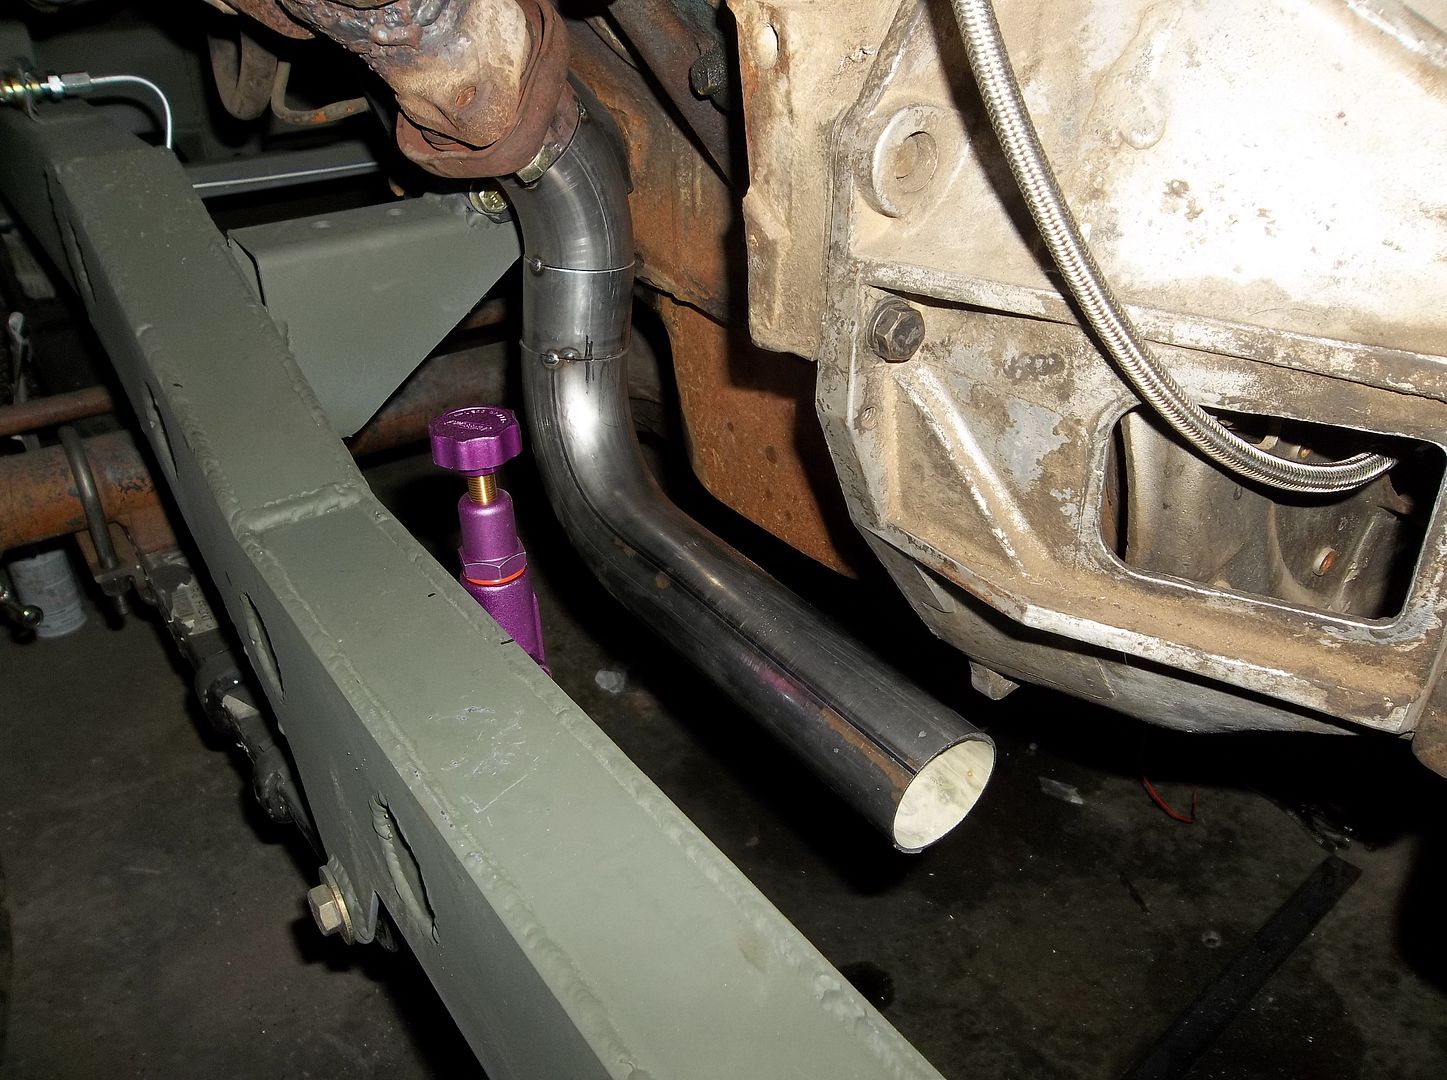
Tonight I started on the exhaust......

100_0879.jpg


This is the easy side, but it still turned out ok I think. Its 2" mandrel bent tube sectioned and welded. Nothing fancy.....

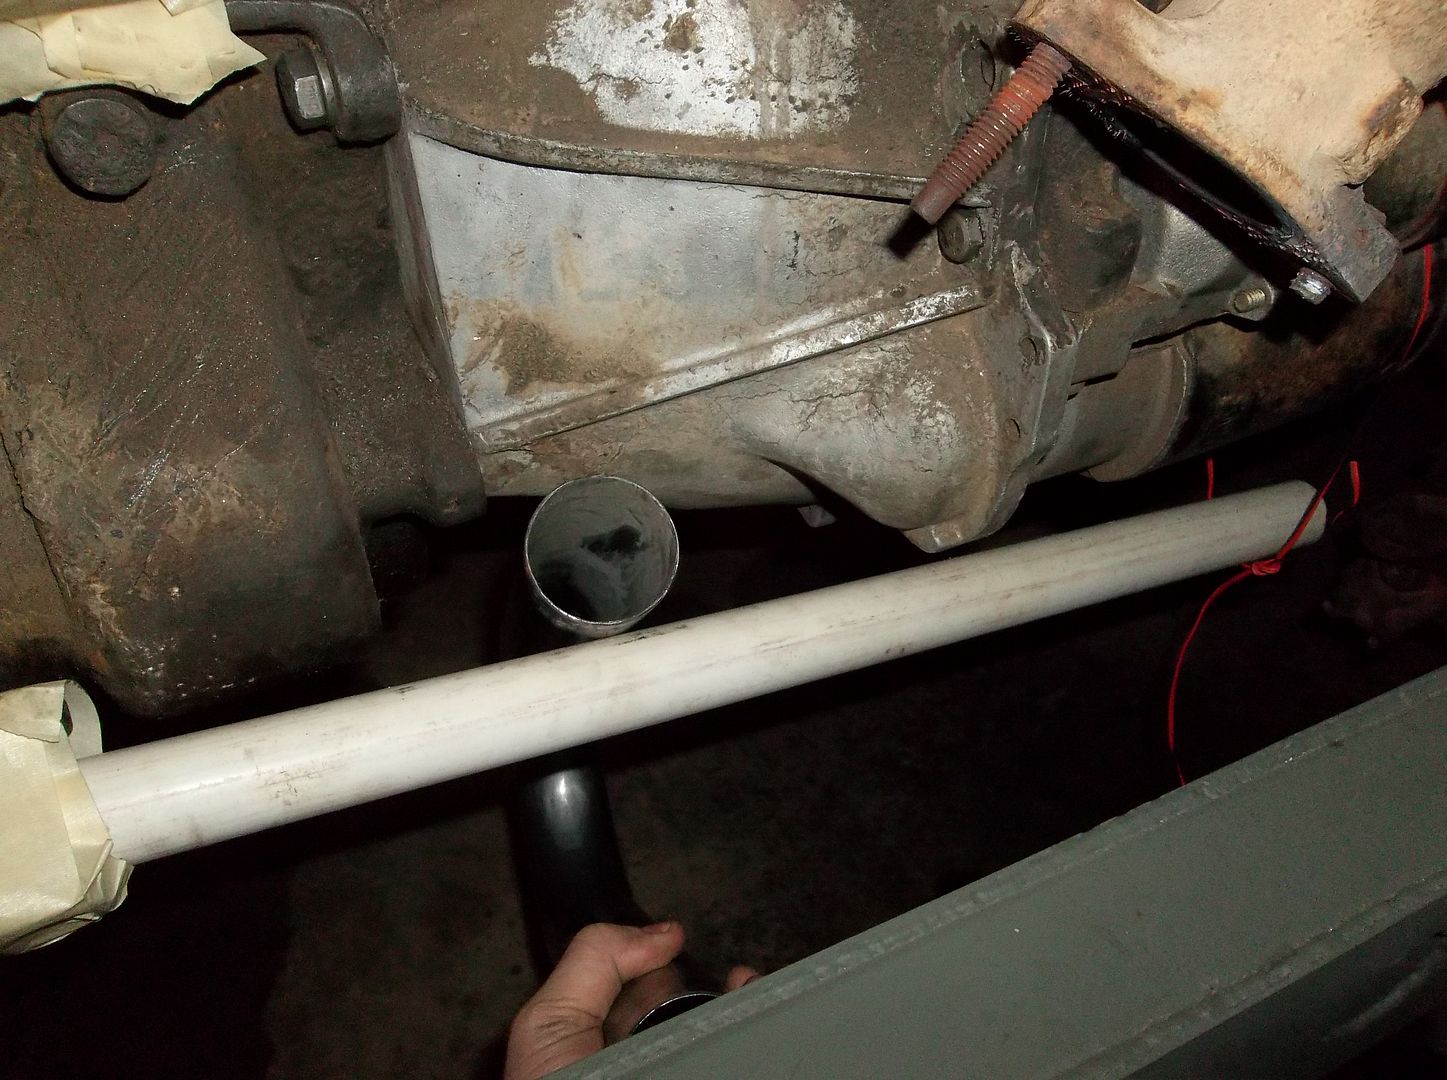
100_0875.jpg


This side is going to be more difficult! I need to go over the driveshaft and under the transmission. I don't think the driveshaft is going to get as high in the chassis as my high tech mockup spacial model is indicating, but its still not going to have a lot of extra room......

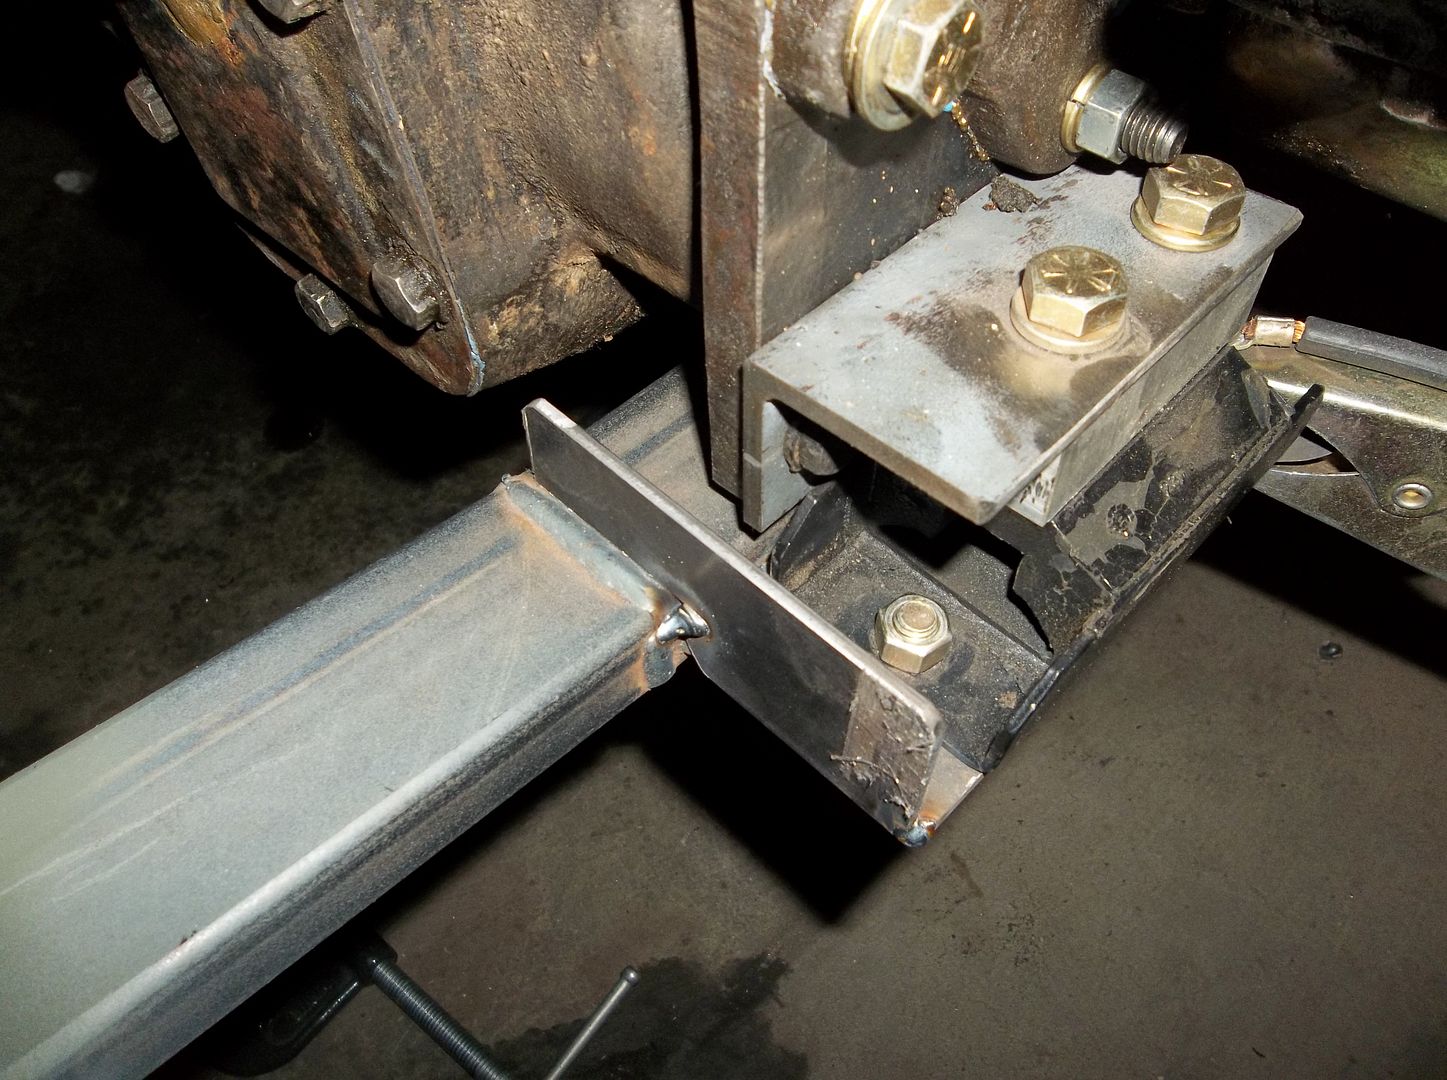
100_0878.jpg


I also make a little gusset for the transmission mounting tab.....

100_0880.jpg


I picked up the fitting I needed for the back end of the Park-lok. The entire chassis is now plumbed. When I get the tub on I will make the hard lines from each end to the master cylinder....

100_0877.jpg


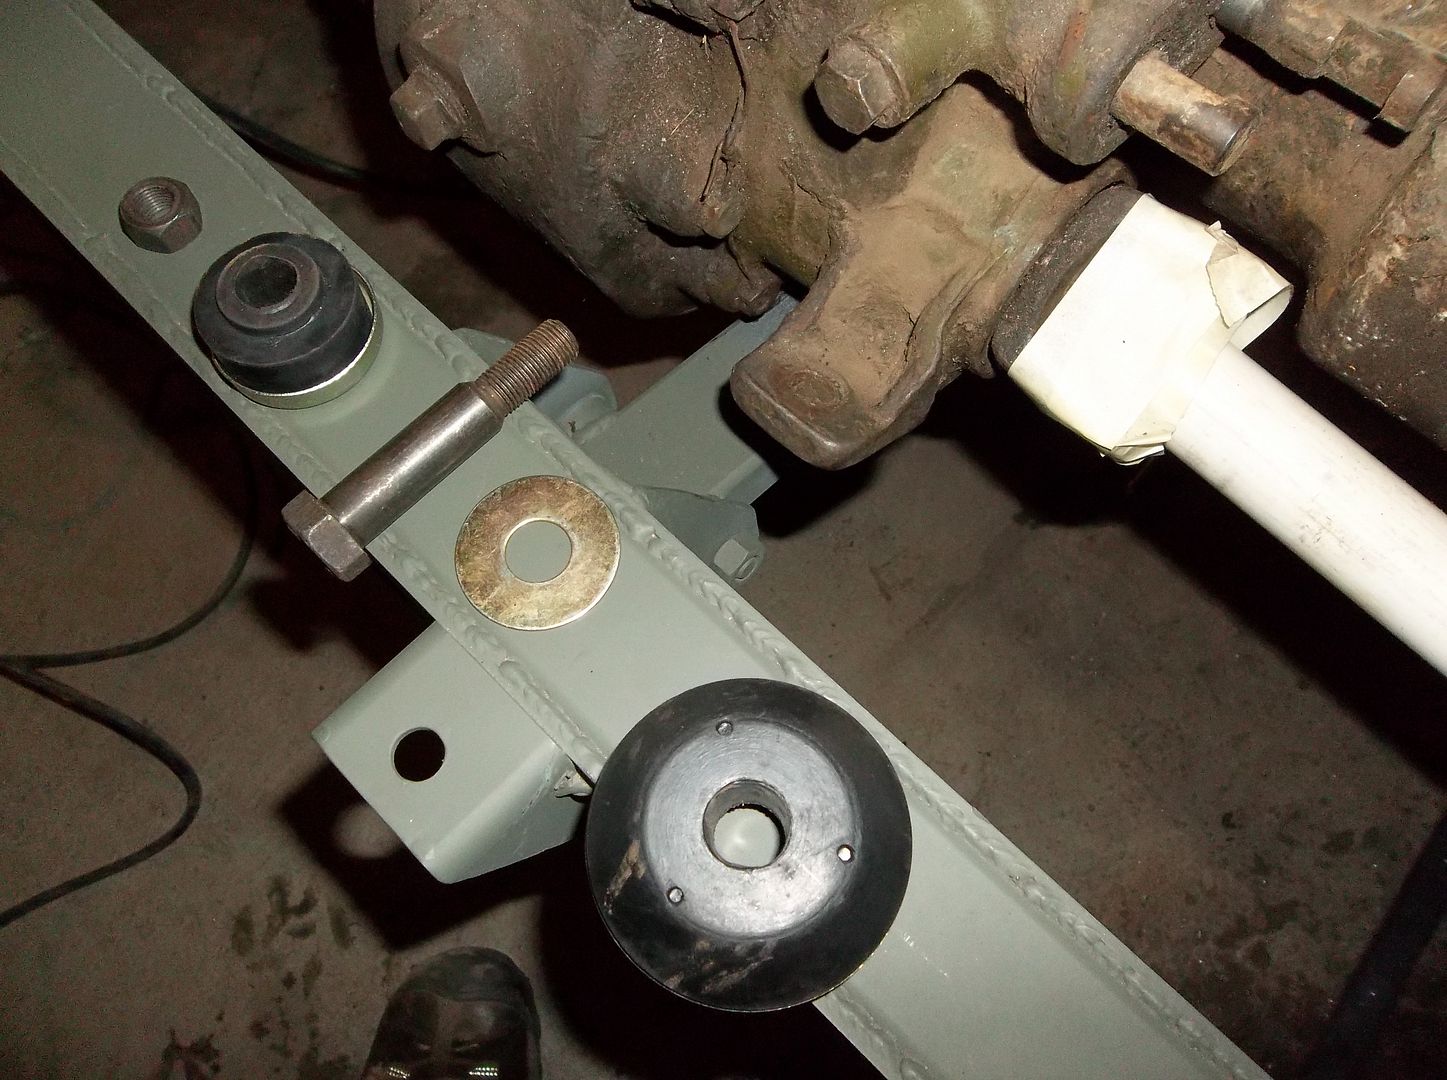
I also tried to make a torque mount for the transfer case....yeah....a stock-ish mounting bushing is not going to work. I am going to try something different with a normal bushing assembly.....
 

Metcalf

Expedition Leader
Could you pass on some info on the line loc thingy? The E-brake in my jeep is a death trap and this would be a good band-aid until I can gather the parts for a disc brake set up.

This is what I used...

http://www.speedwaymotors.com/Park-Lok-Hydraulic-Brake,1970.html

I can't really say good or bad yet. I will try and remember to post some more info after I get rolling around. It's not an emergency brake really.....just a parking brake. I wouldn't use it for hours and hours, but it should work for getting out for a few minutes. I will have to see how I like it....
 

Metcalf

Expedition Leader
Just a bit more.....

100_0889.jpg


I'm not sure if I like doing exhaust systems.

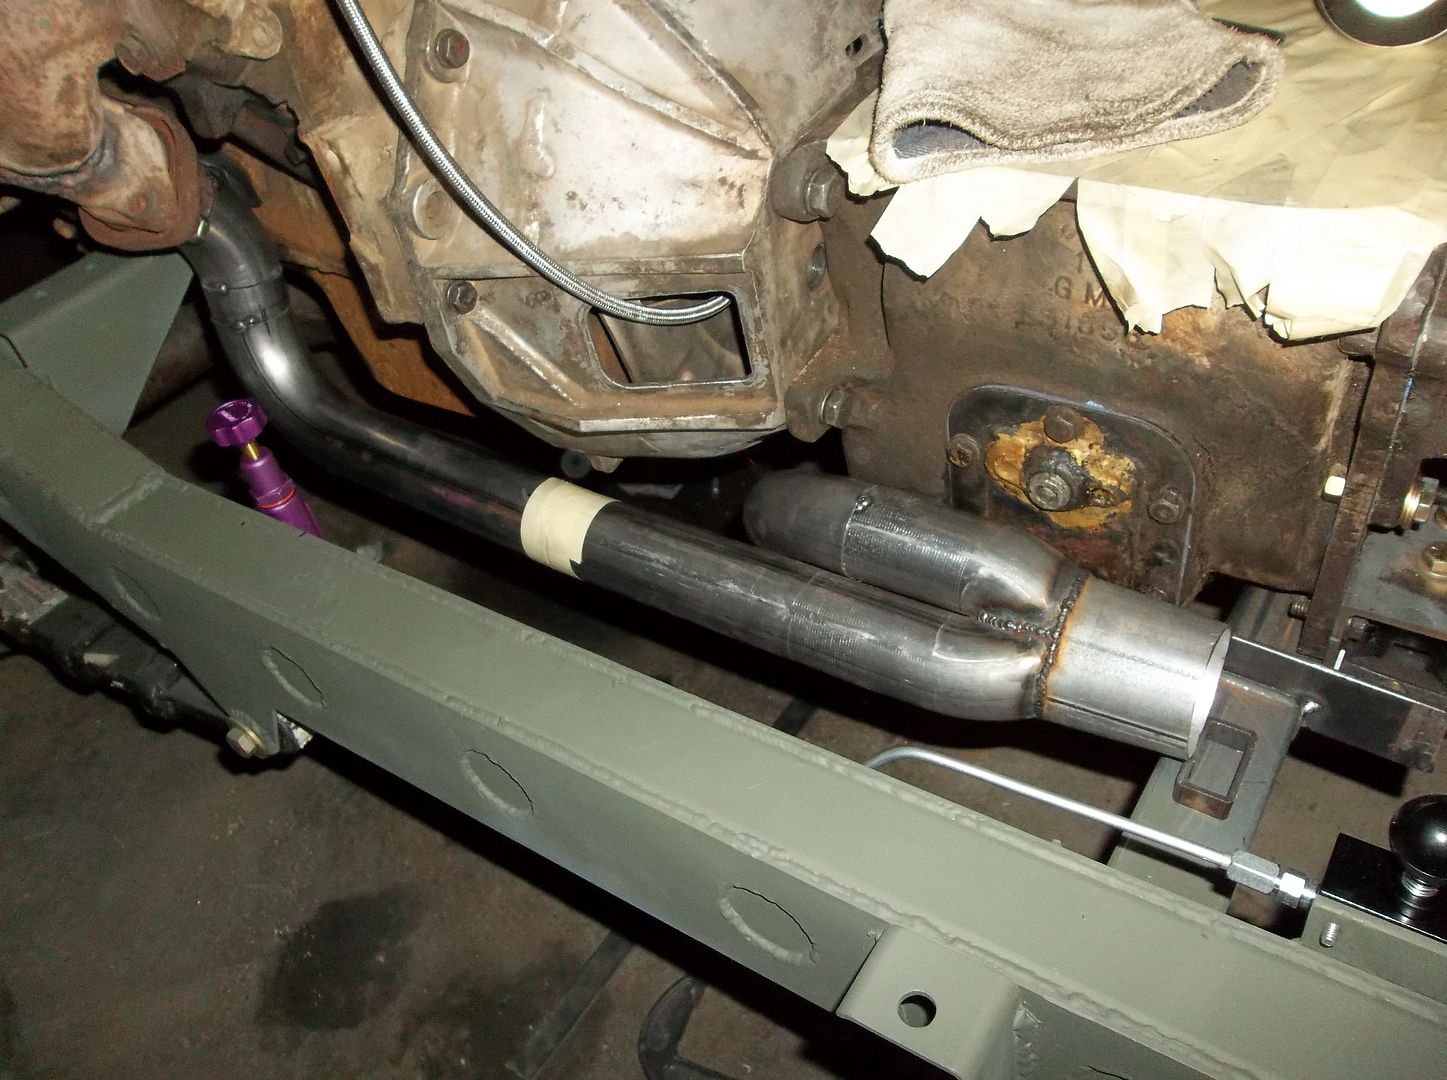
I built a Y-pipe merge collector thing for my transition from 2" dual to 2.5" single on the rear section with the muffler. Figuring out how to make the merge was a little interesting. It's basically just two 45 degree bends that where sawed off on the inside face of the tube and welded together. Then I squished a short piece of 2.5" tube to make one end slightly oval to match up with the oval merge shape. Then I just marked it with a Sharpe and cut it off in the saw. Before you weld on the larger section you can weld the inside of the merge to get a good seal where the two tubes come together at the root. Finally, you just weld on the ovaled larger tube.....

The merge collector is rotated at a 45 degree angle to the vertical (?) so that what is a 4" 'tall' collector can fit under the floor with the short frame. There is just so much to work around on these little things.

I started the crossover pipe under the transmission with a rotated 90 to not only go backwards from the face of the front of the transmission but also up to get the exhaust tucked into the frame as much as possible. Going up and over the front driveshaft on the passenger side is going to be a pain in the rear. I think I will have to use about another four 45 degree bends to pull it off. I will find out tomorrow.
 

Free Beer

Brocephus
I really dig the build! Hydraulic T/O bearings are awesome, you might want a limiter or a 2x4 behind the clutch pedal while you are bleeding it. I blew the seal out of mine when I bled it the first time :mad:
 

shortbus4x4

Expedition Leader
Nice work on the exhaust. I would put a bolt together junction right about where your system ends in the current picture so you can pull it off in case you need too. I have done trans/clutches on vehicles with custom exhaust that was welded from the headers all the way to the tailpipes. Oh yeah it sucks, I use a sawzall and then it goes to the muffler shop.
 

Metcalf

Expedition Leader
Good tip, thanks! I will de-stroke my pedal linkage when I bleed it.....bleeding it is going to be fun anyways.....
 

Metcalf

Expedition Leader
Oh, and yes, there will be a junction just after the crossmember, one of those V-band clamp sets. That will be followed by one of those stainless steel flex couplings. I am most likely going to add a hard mount from the exhaust the the transmission near the merge pipe. I think this will help the exhaust move with the powertrain. The flex coupling should help things flex....and then the muffler and rear exhaust section will be mounted on rubber mounts.

I hope I can get the exhaust done in the next day or two so I can get the tub back on soon!
 

Forum statistics

Threads
188,347
Messages
2,905,928
Members
229,959
Latest member
bdpkauai
Top