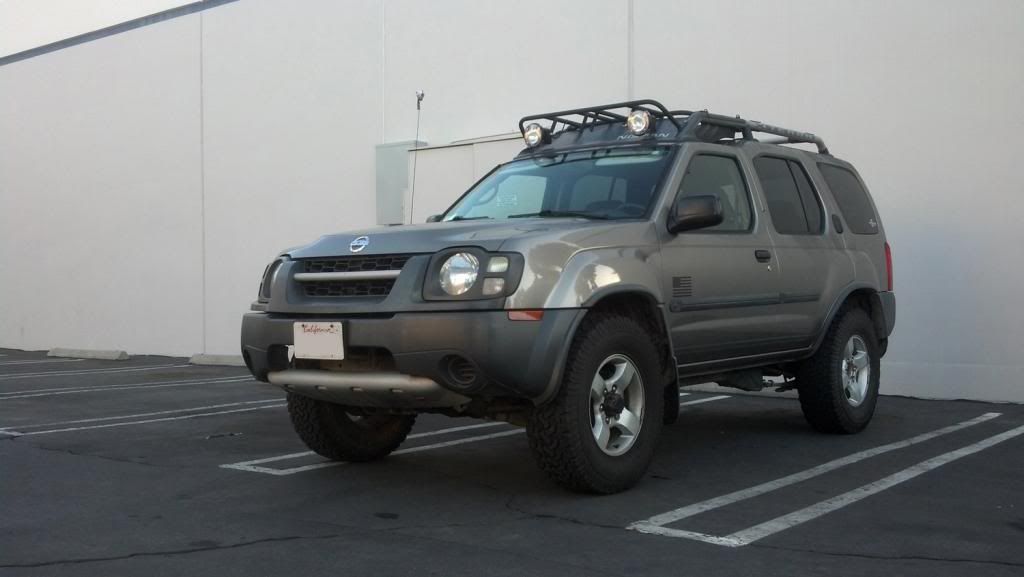
richard310's 04 Xterra

mortonm

Expedition Leader
You're going to want a fuse, a relay and a switch. You could splice it into the headlight or highbeam wiring but I wouldn't bother, you're just asking for trouble. I like to leave factory wiring alone.

I would run it right to the battery. I'm considering wiring my rigids to the fog lights but my fogs are long since rusted out. This also will limit my use of the rigid LED lights to when my highbeams are not on.
 
Last edited:

richard310

pew pew
Okay just as I thought. i'll be wiring it straight to the battery then. I've had enough dealing with OEM wiring messes and I want to be able to switch it on manually anyways.

When you buy the lights that come with the preassembled wiring (wires, relays, fuses, and switch), are those relays good enough or should I upgrade them? I just dont want the hassle of replacing it down the road...
 

mortonm

Expedition Leader
Okay just as I thought. i'll be wiring it straight to the battery then. I've had enough dealing with OEM wiring messes and I want to be able to switch it on manually anyways.

When you buy the lights that come with the preassembled wiring (wires, relays, fuses, and switch), are those relays good enough or should I upgrade them? I just dont want the hassle of replacing it down the road...

From a reputable company I wouldn't worry about it. Everything they come with should be designed to handle the necessary loads
 

richard310

pew pew
From a reputable company I wouldn't worry about it. Everything they come with should be designed to handle the necessary loads

Great. Can't wait to get some aux lighting up top in the next week or two followed by some extra gas cans and a dephep rack up top too.

That reminds me... I gotta get new shocks instead hah. Bilsteins here we come. It'll definitely perform better than these craptacular shocks thst came with it.
 

mortonm

Expedition Leader
I've wanted a dephep for awhile, but since I put my spare up top when offroad the rack would actually increase the height of my tire. It would be perfect for luggage and jerry cans etc though
 

richard310

pew pew
I've wanted a dephep for awhile, but since I put my spare up top when offroad the rack would actually increase the height of my tire. It would be perfect for luggage and jerry cans etc though

Time for a rear tire carrier. :D It's on the to-do list for me considering the ease of on/off, and out-of-the-way placement of the spare. I hate how it's $$$$ though.
 

wreckdiver1321

Overlander
They should have come with a tire carrier from the factory. Those things look so awesome with them. I actually think one of those would be pretty straightforward to build/have built.
 

richard310

pew pew
They should have come with a tire carrier from the factory. Those things look so awesome with them. I actually think one of those would be pretty straightforward to build/have built.

+2

well if you have a welder and the materials, it shouldn't be too hard to do. I should CAD one up and see if the guys at my work down in the shop could weld one for me during off-hours. Maybe improve some current/older designs in the process too. Any ideas for improvement?
 

wreckdiver1321

Overlander
+2

well if you have a welder and the materials, it shouldn't be too hard to do. I should CAD one up and see if the guys at my work down in the shop could weld one for me during off-hours. Maybe improve some current/older designs in the process too. Any ideas for improvement?

A straight copy of the Shrock style bumper/carrier would be a pretty robust design. Really easy too. A piece of large rectangular tubing, some 2" round tubing and 2" square tubing, some relatively thick plate (for frame mounts), a Comp 4x4 face mount double shear hinge, a latch, some scrap steel (for the Hi-Lift mount), a couple shackle mounts, and some hardware. As long as a guy could measure and draw straight lines, as well as have a friend who can bend tubing and weld pretty well, I don't think it'd be hard at all. Also helps having a friend who can powder coat :D

That is basically the route I'm going with my rear bumper. One for an Xterra would be even simpler because all you'd really have to do is replace that center section under the door. Don't have to do the corners or anything.
 

richard310

pew pew
A straight copy of the Shrock style bumper/carrier would be a pretty robust design. Really easy too. A piece of large rectangular tubing, some 2" round tubing and 2" square tubing, some relatively thick plate (for frame mounts), a Comp 4x4 face mount double shear hinge, a latch, some scrap steel (for the Hi-Lift mount), a couple shackle mounts, and some hardware. As long as a guy could measure and draw straight lines, as well as have a friend who can bend tubing and weld pretty well, I don't think it'd be hard at all. Also helps having a friend who can powder coat :D

That is basically the route I'm going with my rear bumper. One for an Xterra would be even simpler because all you'd really have to do is replace that center section under the door. Don't have to do the corners or anything.

Thanks for the tidbit of info. Yeah it looks quite simple actually in construction. It's just a matter of time, cost, and materials. I can CAD some stuff up pretty quickly considering the simplicity of the tire carrier and the lack of bumper wrap-around. I'll have to ask around for a powdercoater. I'm pretty darn sure my work has hookups through someone somewhere.
 

richard310

pew pew
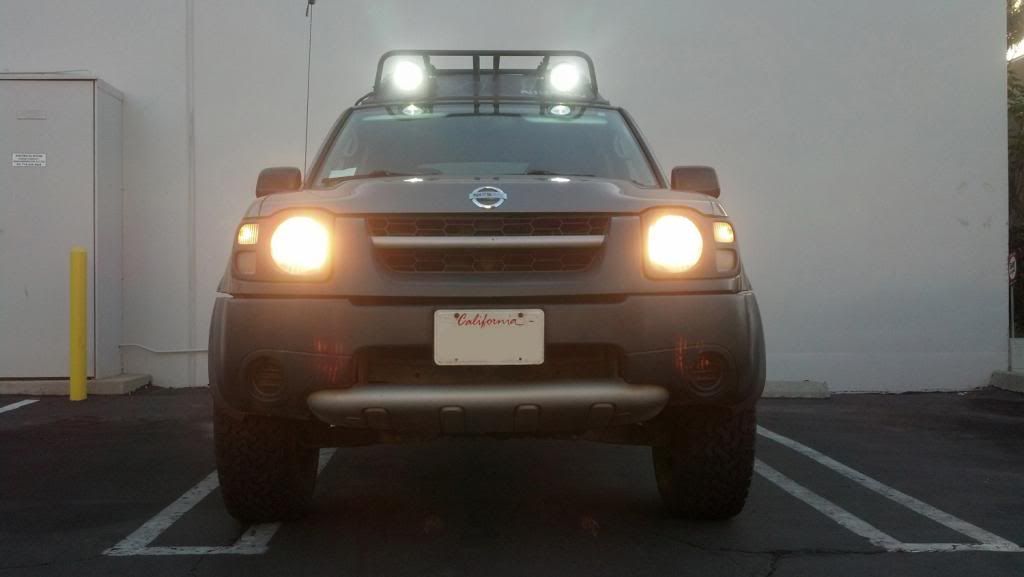
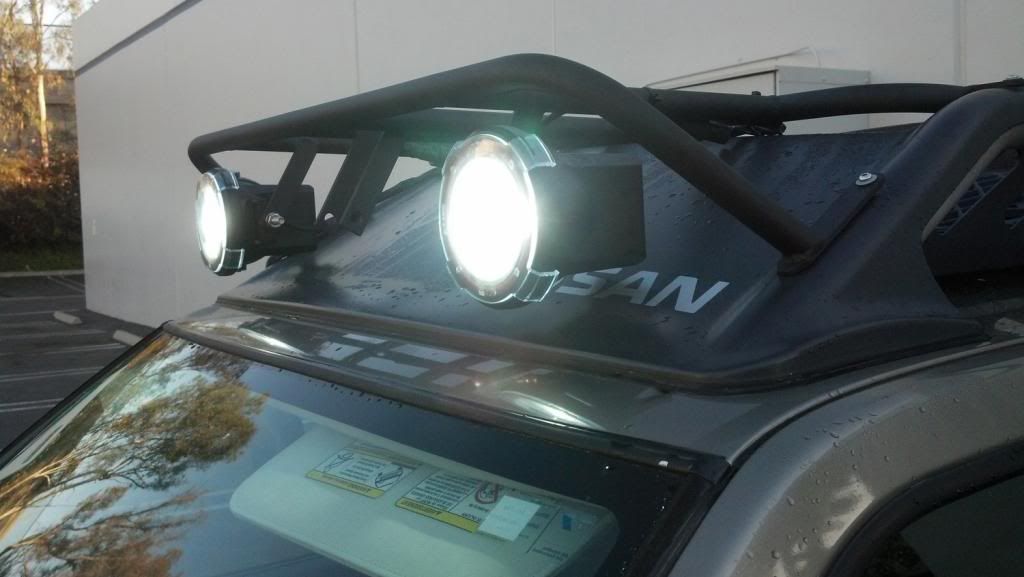
After watching a disappointing Eagles wildcard loss Saturday night against the Saints, I slapped on some lights for the lightcage. I needed a picker-upper. A pair of Tuff Stuff 55W 4" HID lights from TruckAndWinch that came in Friday last week. One day shipping from Santa Ana with regular ground fee. I love buying somewhat locally. They didn't have the 4.5" round LED I wanted so they sold me these for the same price as the LEDs. A pretty good spot pattern from these little lights. Wired them right up to the battery and with the pre-wired kit, it was a total breeze. Not the cleanest install I wanted to do, but with little concealed areas to lay down, I did the best I could. I may go at it again when the other lights come in. It was getting quite damp and cold last night so I just finished up and called it a night.

Lots of bleed into the cabin off the reflection of the glass, and not too much hood glare. Quite minimal if you ask me but lots coming straight in from the top. Lights up the dash pretty well as I have to flip up the sun visors. I can live with it for now, but might fab up some glare shields in the near future.

I've got another pair of 6" lights coming in with flood pattern. We'll see how the lighting is on those.

Excuse the crappy phone pics. Didn't bring my camera to work today.


stioc

Expedition Leader
Nice, I like them and that light cage looks pretty good on your truck. I too played with HID lights this weekend. Where are you planning to mount the 6" floods?
 

mortonm

Expedition Leader
Looks great to me, I imagine they toss a lot of light

I actually kind of like the monochrome American flag on the side, tastefully done.
 

richard310

pew pew
Nice, I like them and that light cage looks pretty good on your truck. I too played with HID lights this weekend. Where are you planning to mount the 6" floods?

Thanks, HIDs are quite fun. :) I was hoping they sent me a 35W kit as I don't see the need for a 55W (and the extra power consumption) but the throw is pretty good for such a small housing. The 6" floods would go right in the middle two tabs on the cage. I might swap it with the spots to figure out a good light pattern with everything turned on, but everything's going up top.

I might throw in some 3000k HIDs in the 6" floods or just a yellow halogen. We'll see how things go.
 

Forum statistics

Threads
188,424
Messages
2,904,675
Members
230,359
Latest member
TNielson-18
Top