Scott B.'s 2015 AC Build - Expo Style

Scott B.

SE Expedition Society
I'm only a little behind in posting...

On the way back from Parashant, this happened....

speedo.jpg
 

Scott B.

SE Expedition Society
Rear Shocks

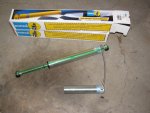
To match the front Bilstein 6112s, I decided to run 5165 reservoir shocks on the back. After lots of measuring, I found what I think are the longest I can run while retaining adequate compression travel.

sh1.jpg

The 5160 that fits the Tacoma is not very long - it is designed for stock suspension lift and travel. Since I am running more lift, and will get more travel from my springs, I needed a longer shock. However, none of the longer shocks have a post-style top mount.

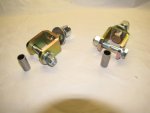
I have to change the upper shock mount. I found one option - BAMF. They make an extended mount, allowing for a longer than stock length shock, with the correct upper mount. However, their setup moves the top of the shock outboard (to clear the bed inner fender) almost requiring the use of wheel spacers. I ordered one, but they were backordered. I ended up canceling my order since I needed a solution before my Parashant trip.

I devised a solution, but was unable to complete it in time for my trip. So, as a temporary solution, I picked up a set of adapters. (The only problem with these is the reduction of 2" of compression travel.)

sh7.jpg

But, they worked for the trip.

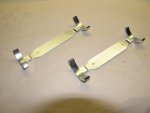
I found these really cool and functional reservoir mounting brackets - and they were not that expensive!

sh6.jpg

The shocks are on, and work great.

The new custom-made extended upper mounts are in process - pictures when they are complete.
 
Last edited:

Scott B.

SE Expedition Society
Lift Blocks

My expedition-rated rear springs were not carrying the weight as good as I wanted them to. The rear end of the truck sagged a little bit.

I could have lowered the front to even things out, but I really didn't want the truck to sit any lower. Besides, the lower height was eating into my up travel space.

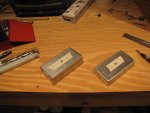
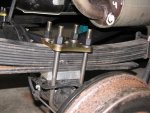
I decided to build a set of lift blocks. While not the perfect solution, these would take care of most of problem. Yes, I won't get any addition up travel.

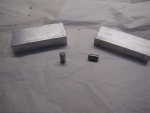
I used aluminum - 1" on the passenger side, 1 1/4" on the driver side.

sh2.jpg

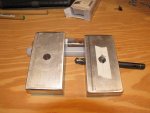
After cutting to length, I drilled holes in the center.

sh3.jpg

Holes bored to proper size. If you look close at the right side one, you can see a stepped hole. The larger diameter allows the spring bolt head to slide in, and the smaller diameter allows the steel pin to be pressed in place.

sh4.jpg

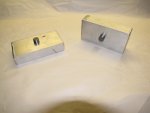
Pins pressed in.

sh8.jpg

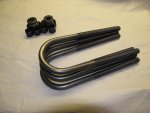
New 5/8" u-bolts.

sh5.jpg

Installed.

sh10.jpg

I also installed a set of Wheeler's bumpstops.
 
Last edited:

brianjwilson

Some sort of lost...
Those aluminum skid plates sure look nice!

What made you go with Deavers rather than allpro expedition leafs?

Good reminder on the CV boots too. I've had an assortment of hose clamps to do the same thing, for quite a while. Actually I have a handful of small misc items that I haven't been able to get to for months....
 

Scott B.

SE Expedition Society
Those aluminum skid plates sure look nice!

What made you go with Deavers rather than allpro expedition leafs?

Good reminder on the CV boots too. I've had an assortment of hose clamps to do the same thing, for quite a while. Actually I have a handful of small misc items that I haven't been able to get to for months....

I ran Deavers on my Ranger, and really liked them. They handle weight well, ride nice and flex when needed. My truck is also heavier than standard (though not as heavy as yours) and wanted a spring tuned to my specific weight, not a generic "guess".
 

brianjwilson

Some sort of lost...
Gotcha, was just curious. I didn't think your truck was all that heavy, but obviously I understand wanting to get it just right!
 

Scott B.

SE Expedition Society
The rear of my truck weights 2580, the entire truck weights 5300.

Much heavier than I thought.
 

brianjwilson

Some sort of lost...
Your not even at gross weight yet! ;)

Thinking back to my ranger, I'm pretty sure it ran around right at gross weight most of the time too. Weight adds up quick!
 

Scott B.

SE Expedition Society
Door Sill Protectors

I added a set of DSPs from G-TEK Fab.

I really like the way they look, and they are great to cover scratches other people have put in the door sills....

dsp5.jpg
 

socalktk

New member
Refrigerator Mount

Having a fridge while off road for a day or a week is really nice. I admit, I used to shun these things, thinking how ridiculous they were. I am a convert. No soggy food, no leaking ice chests, warm drinks turned cold (great in the desert!)

I built the sleeping platform and drawers to accommodate a fridge, and here is my "quick release" mount.

First, I built 2 feet/slider assemblies, one for the front and one for the rear of the fridge. The length of the sliders is just less than the inside width of a drawer.

View attachment 305205

I attached the sliders to the fridge using longer feet mounting bolts.

View attachment 305204

I cut 4 hold-down clamps

View attachment 305203

and mounted them to the inside of the drawer.

View attachment 305207

The fridge drops in the drawer, and is slid towards the rear of the truck, with the sliders engaging under the clamps.

When the drawer is closed, the forward side of the fridge hits the sleeping platform, keeping everything locked in place.

View attachment 305206

For power, I mounted a 12V power port to the leftmost vertical divider, just beyond the fridge.

This setup worked really well at Parashant.

I love this set up and how you built it. Looking to do something similar down the line.
 

MJCake1

Member
I really like the aluminum gas tank skid plate I got from Pelfrybilt, so I ordered a full set of aluminum skid plates for the rest of the truck. It didn't hurt that they were on sale!

View attachment 322008

Here is the front of the truck without the factory skid pan - so nice and clean. (Probably the last picture of the truck this clean!)

View attachment 322007

With the front and mid plates installed:

View attachment 322006

View attachment 322009

I have to reroute the exhaust for the rearmost plate to fit.
That's one of the first things I did. Reroute the exhaust that is. Toyota engineers ******?

Sent from my SM-N900V using Tapatalk
 

Scott B.

SE Expedition Society
Antennas, Communication

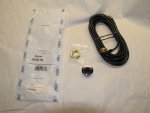
I installed 2 communication antennas, one for CB radio and one for ham radio. For CB, I selected a K40 antenna, and for ham, a Laird NMO mount. Both antennas were mounted through the roof.

I like the roof mount for several reasons. On the roof, the antennas are high off the ground, and not obstructed by any of the metal body. The higher the antenna, the farther the transmitted signal will travel. Also, roof mounted antennas are in the center of the vehicle, yielding the most uniform/even transmission pattern. Using the radio off-road, an omni-directional pattern is preferred. (Over the road trucks, with their dual antennas, prefer a more uni-directional pattern.)

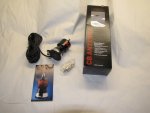
Here's what I installed:

K40

ant2.jpg

Laird NMO:

ant3.jpg

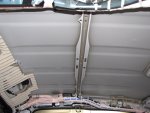
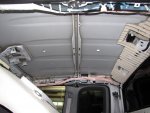
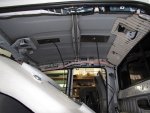
On to the installation. First remove the headliner. On these trucks, you start removing the headliner by removing the door sills....

ant1.jpg

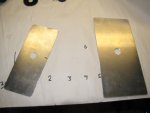
I like to add a backing plate under the thin roof sheet metal. Extra material to carry the load when the antenna hits tree limbs and such.

Backing plates:

ant5.jpg

I used 1/8" aluminum for the K40 backing plate, and thinner aluminum for the NMO mount. I had to modify the K40 to use the thick plate. Unfortunately, the NMO did not allow for a thicker plate. But, something is better than nothing.

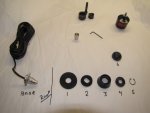
Here's an expanded view of the K40:

ant4.jpg

I also added Part # 1 - a 1/8" thick rubber washer. Part # 3 needed to be shortened to allow for the plate and washer.

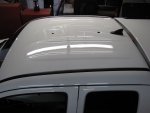
Using a chassis punch, I punched 2 holes in the perfectly good roof:

ant6.jpg

ant7.jpg

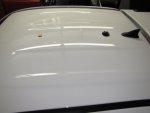
Assembled:

ant8.jpg

ant9.jpg

Now to put the interior back together!
 

Forum statistics

Threads
188,350
Messages
2,906,019
Members
229,958
Latest member
bdpkauai
Top