THE BUNDU GEAR BUILD - LEXUS GX470

bunduguy

Supporting Sponsor
What happened to this thread? I have been wanting to know what has been / what's going to be done to this GX, as the rear suspension on my Sand Dollar Pearl GX is finally giving up the ghost, and i don't want to replace those components with stock pieces. I'd really like to convert my GX to an "every man" ride also, so I'm anxious to know where things stand on yours............any updates?

Rival, I will be working with Icon Vehicle Dynamics shortly to see what we can do about the factory airbags. There are 2 options, and basically just a variation on the theme. We can put Eibach springs in there, that play very nicely with the Icon aluminum shocks. If I were to take it a step further, I may put in airbags that fit inside the springs. This way, I have the comfort and travel of springs, but the adjustable ride height for when I'm towing. Stay tuned.
 

bunduguy

Supporting Sponsor
Okay, time for the good stuff:sombrero:
I have always wanted a snorkel on my vehicle. I did not have one on my 1980 Range Rover 2-door, nor my Defender 110Tdi. I don't care if I need it or not, and I'm not going to espouse why I need one. I just want one.
So, I placed a call to Eli at Camel4x4, importers of IronMan products from Australia. IronMan have a snorkel for the Prado, and as you know by now, the GX is basically a sexier, fancier Prado, with a V8 in it.
So Eli sent me the snorkel, and of course Sierra Expeditions did the installation for me. Since I did not want to take a hole-saw to my fender, I wanted someone I could blame if it went wrong.:sombrero:
So when the box arrived, was when I really started getting excited:
snorkel kit.jpg
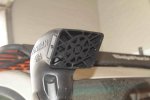
The IronMan snorkel is not some cheap Asian-made snorkel. IronMan goes to great pains to explain the makeup of their snorkel including the plastic, UV protection, strength etc. So I was confident I was not putting on some junk.

first task is removing the airbox
Removing airbox.jpg
Kyle from Sierra Expeditions got down to the task, and he's done so many snorkels I was confident in him doing all the work.
Template.jpg
In a rare break from his orders, Wil checks on Kyle's work. The template for the Prado is great for the GX, since it is mostly the same bodywork.
After marking the holes with the included template, it's time to drill. Where possible, get someone else to do it:sombrero:
drilling.jpg
The benefit of air tools is no end to the torque. Mounting holes being drilled into the fender.
Next is cutting the hole for the main intake.
Measure 6 times and cut once.
measure 6 times and cut once.jpg
drilled fender.jpg
Kyle decided he could do this installation without removing the fender or flare, so he simply worked through the inside fender flap.
lower fender.jpg

Next is installing the mounting bolts into the nutserts.
installing bolts.jpg

now measuring the holes for the A-pillar bracket
marking the A-pillar.jpg
 

Attachments

  • face plate.jpg
    face plate.jpg
    202.8 KB · Views: 136

bunduguy

Supporting Sponsor
After a test fit, we assemble innards, trim the airbox for the gasket etc.
drilling a-pillar.jpg
test fit.jpg
trimming airbox.jpg

And most importantly, we need to add the Sierra Expeditions head plate for the front of the intake
View attachment 121353

And, taa daa: finishes product.
finished product 1.jpgfinished product 2.jpg

Apart from some very minor tweaking on the A-pillar bracket, it was a straight forward installation and everything went on perfectly. I have notices a very slight whistle from the snorkel while driving, but not distractingly so, and I'm pretty sure any snorkel will do the same.
 

bobDog

Expedition Leader
Hows adout a shot or four of the car w Snorkel from a bit further away.:D

Sent from my LS670 using Tapatalk 2
 

bunduguy

Supporting Sponsor
Bobdog, not sure if ur being sarcastic or not, but there will be more pics regardless. More work has been done and I'll be taking more and better pictures in coming weeks and days.
And, bobdog, if you don't like the car, I'll take some from really far away so that you can enjoy the sunset or canyon or something or whatever is in the background;)
 

bobDog

Expedition Leader
After a test fit, we assemble innards, trim the airbox for the gasket etc.
View attachment 121354
View attachment 121355
View attachment 121356

And most importantly, we need to add the Sierra Expeditions head plate for the front of the intake
View attachment 121353

And, taa daa: finishes product.
View attachment 121357View attachment 121358

Apart from some very minor tweaking on the A-pillar bracket, it was a straight forward installation and everything went on perfectly. I have notices a very slight whistle from the snorkel while driving, but not distractingly so, and I'm pretty sure any snorkel will do the same.

No. Really wanted to see the whole thing. Looks better with the snorkel on.


Sent from my LS670 using Tapatalk 2
 

bunduguy

Supporting Sponsor
and..here's the next phase!

So, if I posted this as a before picture, what would you think was next?
Before:
before.jpg
Did you guess? So, how about this, then?
bumper wrapped 1.jpg
And this:
bumper wrapped 2.jpg
Yes, indeed, we have ourselves an IronMan commercial deluxe bullbar from Australia! this is one of the few bullbars available stateside, thanks to Eli from Camel4x4. It is made for the Prado, and mostly fits right on the GX. IronMan does make a bar with no hoops, and that is the one I would have preferred, but it would not have been in-country for a few months, and I really wanted to get this build done. What I really like about the IronMan bar is the good angles, the LED lights and that it is lighter than the ARB or other equivalents.
So, to the build: First job is to get the old bumper off. As usual, Kyle from Sierra Expeditions gets to do the dirty work, so that I can "hold the camera".
old bumper off.jpg

Then comes the new bumper mount. I had sent the whole bumper to paint beforehand, and they actually painted the mount as well. Luckily it was not too spendy to color match a completely hidden part!
new mount on.jpg
The mount is straight bolt-on part and has what seems like a hundred bolts holding it in place.The only obstacle here with the GX is needing to do some redirecting of the factory lines which get in the way. A little strng-arm tactics from Kyle, and they are persuaded to take an alternative route.
hoses redirected.jpg

new bumper waiting.jpg
New bumper waiting its turn.

Once the main mount is on, it is time for the next toy! I opted once again to go for an IronMan product; the 9,500lb winch. Mostly because I had one on my LC100 and really liked it, and also because it is great value
winch 1.jpg
Straight out the box....
winch mounted.jpg
And onto the bumper mount bracket.

synthetic line.jpg
I also got synthetic line with this one, so replaced that right off the bat. I think the synthetic line saves something silly like 30lbs up front.
Due to the access from the bumper, the winch does need to be clocked. But access is excellent, and the best part of the IronMan winch is the wireless remote.

Once the mounting bracket was on and the winch all wired up, time for a test fit, to come next
 

bunduguy

Supporting Sponsor
So we need to test fit to see if anything is in the way, and check the height etc.
test fit.jpg
This is when we see the difference between the Prado and the GX. We'll need to trim the fender!
So out comes Kyle with his toys. God Bless airtools!
cutting fender.jpg
fender cut finished.jpg
This is the finished line cut in the fender which will nicely follow the bumpers lines.

After this, the bumper actually goes on, and fits nicely. The hood on the GX is different to the Prado, so the hoops get in the way when you open or close the hood. For this reason, not only does the bumper need to protrude 3 inches further forward, but it is also necessary to trim a small curve on the inside top edge of the bumper to allow the hood space at the bottom. Kyle covered the hood and got to work cutting my newly painted bumper!
cutting bumper.jpg
And before you know it, voila! We have a nice new bumper on the GX.
after 1.jpg
There are still a few finishing touches, like connecting the lights (used old harnesses and they plugged right in), as well as attaching the bumper "wings". There is a skid plate for the bumper wings which is very clever, as well as a skid plate from the front bottom of the bumper to under the radiator. This connects perfectly to the Asfir skid plates and makes a great seamless full length skid plate for the front.
Overall, I'm extremely pleased with the results.
finishing touches.jpg
Then it is a matter f putting the fender flares back on, which have to be trimmed like the fender was. This was not something I was prepared to do, so I had my local bodyshop guys do it, since they do it all day long. Even so, he told me he was nervous as hell and measured 6 times before cutting. Here is the finished product.
after.jpg
all finished.jpg

I will soon take some better pictures which do not distort the wide angle of the shoe. The bumper looks very respectable on the front and definitely compliments the lines of the vehicle. Build quality is good, and has significantly added front end protection.
The bumper sticks out about 3 inches over stock. But this is more than offset by the impressive clearance I gain in the front and under the wings. My approach angle has significantly improved, and I have actually gained useful recovery points, as well as found a place to park a winch. I coupled the winch with a Hawse fairlead from Sierra Expeditions, and also with a Factor 55 safety super duper thimble! After a couple of weeks, the front end has settled, and I will be adjusting the front coilovers to make up for the sag.

There are more projects to come, but I'll just enjoy this one for a little while.
 

reece146

Automotive Artist
Can you clarify something regarding the fitment requiring 3" of spacing?

Are you saying you had to move the bumper 3" further forward compared to a Prado fitment or that the bumper ends up sticking forward 3" compared to stock?

Was the bumper bolt on to the GX chassis or did you have to custom space it forward to allow bonnet clearance?

The sides of the bar seem to line up with the wings fine (other than the GX cutting)?

Looks good.
 

DanKunz

Adventurer
It sticks out 3" further than a Prado to clear the hood.

I did some extra work and it allowed a bit more fitment as well:

gx001-1.jpg
 

Forum statistics

Threads
186,674
Messages
2,888,744
Members
226,864
Latest member
Nowhereman
Top