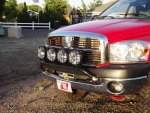
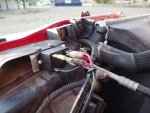
The Cactus Red mod thread.

crawler#976

Expedition Leader
The platform is great for camping and storage but makes hauling anything that would ordinarily fit in a truck difficult. It takes a few hours to remove and re-install it, so in a pinch, it can be done. I had it to remove it for the body shop to fix the damage. The platform and all the equipment must weigh 6 or 7 hundred pounds! The rear suspension came up over an inch with it out. I had considered removing it once we got the camper, but it still make solo trips easy, and make a great place for the dogs to ride when we take them along camping. So, for now anyway, it stays put.

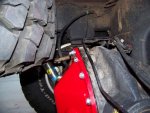
The only new part I didn't post are pics of the finished DT ProFab diff cover! After a few months of use I can report that while it does touch, it makes very minimal contact - just enough to take the dust off.

Capacity is an even gallon vs 84 oz for the stock cover.

Mark
 

Attachments

  • dt profab cover 2.JPG
    dt profab cover 2.JPG
    236.5 KB · Views: 62
  • dt profab cover 1.JPG
    dt profab cover 1.JPG
    244.8 KB · Views: 59
  • contact patch.jpg
    contact patch.jpg
    36.5 KB · Views: 50
Whoa! Beefy. And color matched to boot! The additional capacity will be helpful. I'm thinking of running a Mag-Hytec trans pan for the additional fluid and the sensor port. Perhaps DT will begin fabbing those pans also. Keep up the good work! :sombrero:
 

crawler#976

Expedition Leader
Time for the next mod...

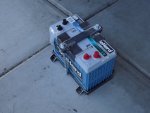
Decided to add a Sears DieHard Marine Platinum P1 (Group 31 - 1150 CCA, 205 Reserve) to augment the Sears DieHard Platinum P2 (Groupe 65 - 950 CCA, 135 Reserve) starting battery. We are now spending more time with the ARB fridge running while we're camped, so having a battery dedicated to it seemed like a good idea. It will be mounted in the bed in parallel with the starting battery, no isolator, just a good old fashioned knife switch and 2/0 cable.

Started on the project today by fabbing up a mount. I'm glad I don't do this for a living - nobody would pay for the cost of my home built projects. Took about 5 hours to cut, grind, weld, and apply a coat of tan rattle can bed liner to it. $16.00 in matl, $19.00 in hardware, $5.00 for paint, and $150.00 in labor for a grand total of $190.0 for a battery tray :sombrero:

Still need to mount it in the bed, run the cable and knife switch. Looks like about 16' of cable is needed for each lead.

A photo prior to paint:
 

Attachments

  • battery mount.jpg
    battery mount.jpg
    311.1 KB · Views: 78

crawler#976

Expedition Leader
Called my local welding supply company - Vern Lewis. They have the best price on cable - the good stuff too boot. 1/0 fine strand welding cable is $3.30 a foot. I'd planned on buying complete cables, but at that price I'll be getting the cable crimper out and buying ends and heat shrink tubing. I'd planned on using 2/0, but the cost is just too high. Also decided against the knife switch and went with a Blue Sea Systems fully enclosed 300A On/Off switch. http://bluesea.com/category/1/products/6006
 

crawler#976

Expedition Leader
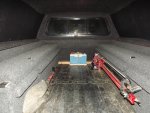
Finished up the project with the exception of the On/Off switch. It arrive until Friday, and I'll be at the BITD Parker Challenge for the weekend, so I'll get that in next week.

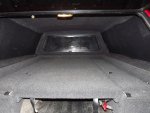
I used 33' of 1/0 cable, 1/0 positive and negative battery terminals, 1/0 3/8" ring terminals, red and black terminal covers, 1/0 red and black shrink tube, grommets, and a pile of zip ties. Pulling the cable was a chore. The underside of the truck is, as usual, filthy. Also had to completely remove the platform and the 400 lbs of gear stored in it. Literally 400+ lbs of stuff...

Checked voltage with the truck running, no loss at all from the main battery to the spare. Both read 14.35V
 

Attachments

  • platform in place.jpg
    platform in place.jpg
    586.4 KB · Views: 80
  • mounted and wired up.jpg
    mounted and wired up.jpg
    608.8 KB · Views: 109
Last edited:

crawler#976

Expedition Leader
Christmas present for Cactus Red

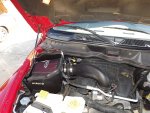
Initial testing reveals a seat of the pants improvement in power above 3000 RPM - it really hits hard when it comes on, and continues to pull thru 5700 RPM.

It's an AirAid non-oiled SynthaMax filter w/ pre-filter. The dyno sheet sez 18 HP, 20 Ft/Lbs, and I tend to believe it from how it feels. It runs as good here at 5000' as it does in Phoenix at 1400'. I'm also hoping for an improvement in MPG, and on the short trip we did yesterday for a Christmas Eve family gathering, the overhead displayed 14.2 MPG instead of its normal 11.8 or so. I don't buy that yet, but we'll see if it continues.
 

Attachments

  • AIRAID.jpg
    AIRAID.jpg
    622.3 KB · Views: 44

crawler#976

Expedition Leader
Yes and no...

The stock intake horn is replicated, but I suspect 90% of the air is pulled from the left side that is not sealed at the hood/body seam.
 

crawler#976

Expedition Leader
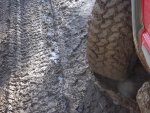
Had an opportunity to get 5 Nitto Trail Grapplers 35/12.5-17's for 6 bills, 4 with 4000 miles, one new. I've never been real happy with the BFG's, so they're off the truck.

They are wide for a 12.5 series tire. I measured the top of the tread at 11" wide. The guys at Discount said they are actually a 13.5 series, even wider than the 315/70-17's.

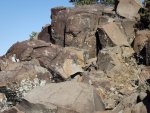
Initial impressions are great! Did a 80 mile run today on dusty dirt, sloppy mud, crusty snow, and am very pleased with the results. Took a walk to find some 1200 AD ruins near Walnut Creek, AZ. Located the site, and some neat Petroglyph's.

I found no "pull to the left" as reported, but they are basically new. Perhaps that will manifest as they wear, I don't know... The gentleman I got them from ran a set on a SportsMobile for 36K with no problems.

They are heavy compared to the BFG's - I can feel it. But, as an E rated tire, I expect that, and the road manors were good. Very quiet compared to the BFG's.

Dirt traction was excellent. Mud traction was excellent - they cleaned well. Crusty, re-frozen snow traction was good, better than I expected. All in all, I'd rate them very close to the outstanding traction I got from the GoodYear Kevlar MT/R's.
 

Attachments

  • nitto trail grappler 1.jpg
    nitto trail grappler 1.jpg
    732.5 KB · Views: 42
  • nitto trail grappler 2.jpg
    nitto trail grappler 2.jpg
    712.8 KB · Views: 38
  • nitto trail grappler 3.jpg
    nitto trail grappler 3.jpg
    543.7 KB · Views: 40
  • nitto trail grappler 4.jpg
    nitto trail grappler 4.jpg
    729.2 KB · Views: 51

1leglance

2007 Expedition Trophy Champion, Overland Certifie
Those look good on your rig...
and glad to hear you are liking them :)
 

crawler#976

Expedition Leader
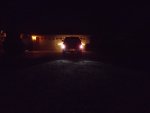
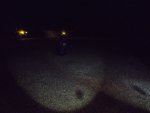
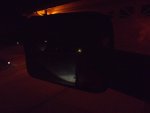
The reverse bulbs have always been dim for the big truck. I ordered a set of T15 5W LED (same as a 921) bulbs from Retro-Solutions.

http://retro-solutions.net/product-list.php?high_power_LED_reverse_backup_bulbs-pg1-cid121.html

Also put a set of 3156 LED's in the Jeep.

Photos - standing at the tail light, from behind the truck, a 90 gallon trash can about 50' away, and looking in the mirror,. The 3156 LED's in the Jeep are much brighter, but they are also a lot bigger. I'm pleased with the results!

Mark
 

Attachments

  • behind the truck.jpg
    behind the truck.jpg
    67.5 KB · Views: 22
  • rear view.jpg
    rear view.jpg
    421.9 KB · Views: 25
  • 90 gallon trash can.jpg
    90 gallon trash can.jpg
    471.2 KB · Views: 24
  • mirror view.jpg
    mirror view.jpg
    302.9 KB · Views: 24

crawler#976

Expedition Leader
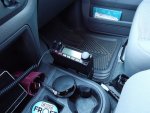
Yaesu FT-2900R TX Mod (MARS MOD)

To make a long story short, I decided to use the Yeasu FT-7900R in the Jeep. It's compact, and will work fine for what we do with Miss Rubi.

So, I needed a radio for Cactus Red. Decided to go back to a basic 2M. I don't use 70C at all since the local IRLP node disappeared. I'd had a FT-2800 in the past, and found it to be a rugged radio. It was also easily modified for out of band transmission, a feature I require for use as a Best in the Desert volunteer. I did some reading AFTER buying the new radio , and found out it was different than the older model. The new radio requires that a solder bead be removed to open up the transmitter.

http://www.worldwidedx.com/yaesu/44185-yaesu-ft-2900r-frequency-modification-mars-mod.html

This shows the location of the bead and what is required. I was a little nervous about sticking a soldering iron in a new radio, especially when you need a magnifying glass to even see the bead! I stuck the hot iron on it, and the bead went away...

Figured I'd go ahead and reassemble the rig and test it, and all is well.

So, I'm back on the air with a new rig and a 1/2 wave Larsen 150 trimmed to the 146.46 range. SWR is 1.5, so I should be good to go.

Mark
 

Attachments

  • DSCF0695.JPG
    DSCF0695.JPG
    294.7 KB · Views: 28
  • DSCF0694.JPG
    DSCF0694.JPG
    377.7 KB · Views: 27
Last edited:

DT75FLH

Adventurer
looks good. I just purchased the ft-1900 model. I'm happy so far. They seem to be very rugged radios for the money, A few guys in my club have them in open crawlers. they handle the dust/dirt open cabs pretty good.
 

crawler#976

Expedition Leader
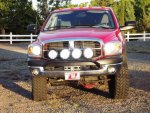
When I saw the new KC HID's advertised a couple months ago, they were not yet available. MSPP is $546.26, Amazon has'm at over 2 bucks less @ $314.53! Actually just ordered as set for the Heep!

http://www.kchilites.com/lights/hid/8-hid-driving-polymax

With the previous LightForce HID's I used a standard 5 pin relay. Occasionally when running the lights with the high beams, all the locker/sway bar lights would flicker. Never threw a code, or caused a problem, but is seemed odd. Did some research and came up with a different style relay, a Tyco Electronics or Potter & Brumfield T92S7D22-12 six pin. It's a fully sealed and potted industrial relay. http://www.te.com/catalog/pn/en/1-1393212-4 The relay uses low switching power, so I'm hoping the CanBus system won't be bothered by it. The two separate terminals, 0 (power in) and 1 (earth) are for switching power only, when the four main terminals are switched on, they take primary power in and out. Terminal 2 switches to 4, terminal 6 switches to 8.

The install went well since most of the wiring was already in place. The lights are a great fit on the Randy Ellis light bar, the hood closes with plenty of clearance.

I like the beam pattern - it's wide and bright just like a driving light should be. I'll get some photos soon. Adjusting the lights is easy - 6MM Allen wrench and a 13mm wrench do that, and a 17mm takes care of the mount.

The lights are a really nice kit with complete wiring harness, switch, wire loom, and relay! Impressive!
 

Attachments

  • clearance.jpg
    clearance.jpg
    480.4 KB · Views: 28
  • KC part number 851.jpg
    KC part number 851.jpg
    151.6 KB · Views: 30
  • lights.jpg
    lights.jpg
    504.9 KB · Views: 26
  • relay.jpg
    relay.jpg
    356.9 KB · Views: 26
Last edited:

Forum statistics

Threads
188,307
Messages
2,905,269
Members
229,959
Latest member
bdpkauai
Top
­