The Cicada/Clark/Vantonio Vanderas/The Disco Ship E350 Build

Justgosurfin

Active member
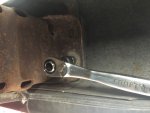
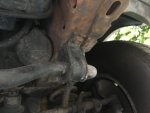
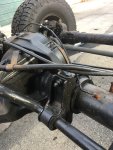
Small amount of progress last night. Cut off the old trac bar mount and ground it flush.
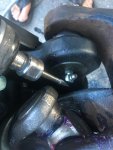
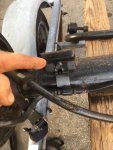
Also tried a new trick, a truck forum guy suggested grinding the upper balljoint grease nipple to allow clearance for the ujoint to spin. I used a small die grinder and it seems to be good with the knuckle in any direction now. Hopefully it works when underway.
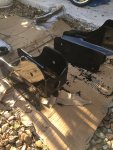
Finally laid out all the kit pieces as well. Should there be u bolts somewhere? Also, what’s the reason the front hangers aren’t predrilled on both sides? It seems like it’d be easier to just drill in from each side instead of one long bit all the way through. I haven’t gotten under the van again but I’m guessing it’s due to limited access on one side?
 

Attachments

  • 63BE9314-4876-4945-9630-5787337ED86C.jpeg
    63BE9314-4876-4945-9630-5787337ED86C.jpeg
    1.7 MB · Views: 25
  • 07B8278F-50DD-4D37-9BA8-6A552DD43C3F.jpeg
    07B8278F-50DD-4D37-9BA8-6A552DD43C3F.jpeg
    1.5 MB · Views: 25

Justgosurfin

Active member
I’ve been pretty stoked on my axle carrying trailer (for a little skiff a friend is keeping at my dock). I can’t keep all my crap at the metal shop so it’s been great to have a mobile workbench for the axle rebuild.
 

Justgosurfin

Active member
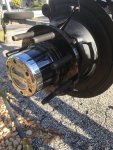
Learned a bit yesterday about mile marker hubs. DO NOT grease them. According to MM the tackiness can cause them get stuck in the locked position.

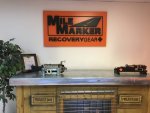
I thought I was doing a good thing by disassembling the hubs and greasing them up since the axle came from a junk yard. I reassembled and literally used the needle tip on the grease gun to load it up as much as I could. “Thankfully” I lost one of the screws that holds the cap on. I called Mike Marker to request a replacement and ask about the design of the hub in general. In doing so I mentioned the greasing. Bob the tech guy over there brought the record to a screeching halt and said bring it over and we’ll clean it and get you a parts kit (their warehouse is only about 15 min away from me here in south Florida).

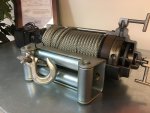
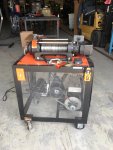
Well Bob and Mile Marker are freaking awesome. I paid for a parts kit with new screws and o rings $24.50. Mark takes my hubs to the back and comes back up with a brand new set and calls it a warranty claim! Sweet! He also took me in the shop to show off the hydraulic winch display he had made for trade shows. It’s run off the power steering pump. Only downside is that you cannot steer and winch simultaneously.
Regardless I had a great experience there and I’ll definitely be looking to them when I get to the point of wanting a winch.

Any thoughts on cable versus spectra line? We use 100’ of spectra to tow a 37’ booster whaler behind the yacht I work on and have never had an issue with its strength. I just wonder about chafing?
 

Attachments

  • E1E4EE71-D783-4CD7-8FD3-2D240A6D43AC.jpeg
    E1E4EE71-D783-4CD7-8FD3-2D240A6D43AC.jpeg
    2 MB · Views: 17
  • E9672F2A-904B-4DEE-8599-681F5507C3F9.jpeg
    E9672F2A-904B-4DEE-8599-681F5507C3F9.jpeg
    2.1 MB · Views: 18
  • 7A37CD12-4BA2-4133-A36C-3A22DB1F8E33.jpeg
    7A37CD12-4BA2-4133-A36C-3A22DB1F8E33.jpeg
    1.5 MB · Views: 22
  • 3F854260-CE44-448E-B952-66AD9CDF9F80.jpeg
    3F854260-CE44-448E-B952-66AD9CDF9F80.jpeg
    1.6 MB · Views: 21

Wyuna

Observer
I'd go Spectra over cable any day, i use to hate cable when i couldn't find gloves.

Do change the Guides/Hause if it has been used with cable.

its a nice little weight saving as a bonus over cable
 

Justgosurfin

Active member
Well yep. No holes on the inside of the hangers because you can’t get a drill in there. Duh. Got them up and the frame drilled last night. Hopefully getting some paint on them and the axles today.

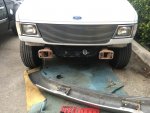
I’ve been trying to knock out steps that can still allow me to use van until the springs arrive and the big install happens. The hanger bolts were a big step. All that to you must do is remove the bumper, four x 18 mm nuts, and drop the sway bar a bit by removing the sway bar bracket mounts, four x 15 mm bolts. The sway bar can then be pulled down enough to get the hangers on the frame. Dead blow hammer is your friend.

Drilling was a ********** and took forever because I’m a cheap ass and didn’t buy new bits and the grinding wheel is down at moment. I just followed ujoints advice and use several bit sizes to step up the holes incrementally. Be careful with the big ones. They like to grab and swing the drill and your knuckle into hard stuff. The drill clearly knew that yesterday was the day I finally put boots on but not gloves this time.

Stoked to be making more progress!
 

Attachments

  • 0A25E123-D16A-411E-AA15-19899DB0CFA0.jpeg
    0A25E123-D16A-411E-AA15-19899DB0CFA0.jpeg
    1.9 MB · Views: 25
  • 52023815-7AC3-44A8-8B45-3CC509FA0DE2.jpeg
    52023815-7AC3-44A8-8B45-3CC509FA0DE2.jpeg
    2.3 MB · Views: 24
  • 2646007C-B005-4769-B387-59BBCF6855AC.jpeg
    2646007C-B005-4769-B387-59BBCF6855AC.jpeg
    1.5 MB · Views: 25
  • 02077372-CA7A-4FD7-A79E-9B549C8A3FC5.jpeg
    02077372-CA7A-4FD7-A79E-9B549C8A3FC5.jpeg
    1.4 MB · Views: 26
  • 7ABEAEDD-11DE-440A-806E-606BE8AC1AB4.jpeg
    7ABEAEDD-11DE-440A-806E-606BE8AC1AB4.jpeg
    2.1 MB · Views: 24

Justgosurfin

Active member
Steering box. I figure I’ll replace during this process. Stock or aftermarket like Redhead?

Anyone have a part number for the little rubber bushing in the steering column above the box?
 

Justgosurfin

Active member
I did the last two holes when Bobby got back to the shop and introduced me to the big ass drill with two guiding handles (not sure what the drill is normally used for concrete?). If you can find one to rent and get a friend to brace it, it made the big holes significantly less sketchy.

Got some paint on the hangers and hubs last night. Just did the hubs so I can now mount the wheels and paint the whole axle without having to hang it up or create some sort of stand.

The Chasis Saver paint came out great for the lack of effort I put in. It flows really nice and if you take your time I’m sure it could have great results. I’ll be a little more careful about runs when I do some of the frame and rest of the axle. A little seems to go a long way with a foam brush. Just be careful about doing this in high humidity as that is what it reacts with and reduces dry time. I would have waited for another day if this was a show car.

Per their instructions, dropping a few drops of Xylene on top of the remaining paint and in the can without mixing and putting a piece of Saran Wrap under the lid keeps it from kicking before the next project. That seemed to work for my little paint pot between coats too. The first brush I left exposed and ended up hard as concrete.
 

Attachments

  • 238C4754-51F3-45C5-BB7E-3515FAFF0768.jpeg
    238C4754-51F3-45C5-BB7E-3515FAFF0768.jpeg
    2.1 MB · Views: 24
  • 2D93383F-0768-4B33-912F-196B84B56FDA.jpeg
    2D93383F-0768-4B33-912F-196B84B56FDA.jpeg
    1.9 MB · Views: 23

Justgosurfin

Active member
More prep for the big weekend of install in the near future. Sorry for posts of steps that seem obvious but I’m doing this also to keep track of it all for me and for my friends and fam to check in and see so I’m not always answering the question “done anything new on the van?!”

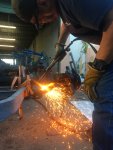
Got the old brake lines, sway bar and spring perches off the sterling. I wish I could upload the slowmo cutting torch action. The molten metal dripping off was pretty cool. Bobby did a great job getting most of the perches off without cutting through tube. This saved tons of time for me smoothing things down with the grinder.

On a side note has anyone used or made a road shower? I’m wondering if black pvc will get the water as hot as aluminum?
 

Attachments

  • 24C8BBE2-9B63-47D3-90A8-29426FCD2B73.jpeg
    24C8BBE2-9B63-47D3-90A8-29426FCD2B73.jpeg
    1.9 MB · Views: 14
  • 4774067E-EBD9-403A-BF9B-FB23914FDA21.jpeg
    4774067E-EBD9-403A-BF9B-FB23914FDA21.jpeg
    1.5 MB · Views: 14
  • D9B49553-3DB9-46E4-AE00-49CF6E27D48A.jpeg
    D9B49553-3DB9-46E4-AE00-49CF6E27D48A.jpeg
    428.5 KB · Views: 12

Justgosurfin

Active member
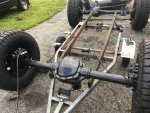
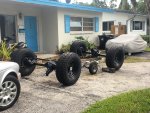
Painted axles and just decided I’m going to stick with a 4wd boat trailer instead of van.
 

Attachments

  • C0598C08-AD0F-45C9-86EB-8264417E2D5E.jpeg
    C0598C08-AD0F-45C9-86EB-8264417E2D5E.jpeg
    4.2 MB · Views: 33
  • 15B94F10-B15F-4068-A00C-343CFA01DABE.jpeg
    15B94F10-B15F-4068-A00C-343CFA01DABE.jpeg
    2.9 MB · Views: 33

WVI

Adventurer
I like the idea of the boat trailer 4X4....but I think you're putting the axles on the wrong ends.
 

Justgosurfin

Active member
Parking brake. It’d be nice to have a hand operated one since this is a manual. Maybe I won’t need it with the granny first gear but still I don’t really care for the action of the stock foot pedal style.

Does anyone have a style they liked? The Tacoma dash mounted ones are kind of cool. I just haven’t looked into mounting the linkages and all yet...
 

Justgosurfin

Active member
Had fun with big fork lifts last night. I finished the front and put it on its wheels with brake lines and all done around 430 am. Nothin like a deadline to get you showing up to work looking like a crackhead haha. Will post details later but I’m pretty excited and wanted to get this up.
 

Attachments

  • B5D5B395-242E-46CD-95DB-152417D7E7B0.jpeg
    B5D5B395-242E-46CD-95DB-152417D7E7B0.jpeg
    1.8 MB · Views: 33
  • A657D167-B107-4A97-BB8C-05FFCC8E5BCC.jpeg
    A657D167-B107-4A97-BB8C-05FFCC8E5BCC.jpeg
    1.8 MB · Views: 31

Forum statistics

Threads
188,184
Messages
2,903,525
Members
229,665
Latest member
SANelson
Top