The Plan...

dieselcruiserhead

16 Years on ExPo. Whoa!!
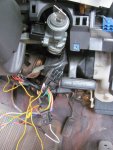
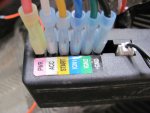
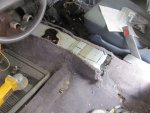
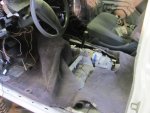
This is a remote starter that was installed into the truck by a PO and has to go. The good news is it helps me track down or create that start wire from scratch and will let me test to make sure all the circuits are in decent shape...
 

Attachments

  • EM_021.jpg
    EM_021.jpg
    123.8 KB · Views: 29
  • EM_023.jpg
    EM_023.jpg
    96.5 KB · Views: 29

dieselcruiserhead

16 Years on ExPo. Whoa!!
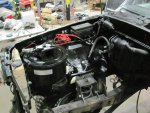
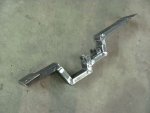
But in order to get this far I had to hook up the main electrical fuse box so this is about 6" farther back than it was before and took some fabbing of a little bracket to get it placed.. Sorry for all these little details but I figured this might help someone. Honestly all this stuff isn't too hard at all and I am not even using a wiring diagram except for a couple little printouts off the internet when I need them here and there...

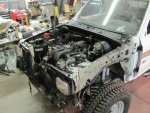
You can see the massive 4 gauge wire that is now going to the fuse panel. I am using heat shrink at the major connections and I love heat shrink.. You can see the big red wire that will now go to the main fuse panel. This is mostly because I had this stuff around and it needs to be a lot longer now to reach the battery on the other side.

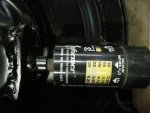
Also if you look on the air cleaner this is a neat little gizmo that measures if you need a new air filter. You can find these at major diesel supply houses and they are cheap... I am really psyched for all of the air I'll have going into and the huge exhaust so this engine will really breathe. With the boost controller and EGR eliminated from the engine it should really scream or at least get up to boost quickly...

That's it for now.. I plan to have the engine in tomorrow hopefully...
 

Attachments

  • FM_039.jpg
    FM_039.jpg
    137.9 KB · Views: 54
  • FM_044.jpg
    FM_044.jpg
    95.4 KB · Views: 54
Last edited:

Wheelingnoob

Adventurer
I am in awe of the volume of work you are getting done on this thing and the speed!! I cant believe its were it stands now and you are going to take it on an off road trip in just under 2 weeks!! Cant wait to see how it comes together and how it sounds and runs! :sombrero::elkgrin:
 

dieselcruiserhead

16 Years on ExPo. Whoa!!
I am lucky that my day job (building web sites) is a little slower right now other than one big project so I am able to put a lot of time into it... Also believe it or not its 1 week now, not two!
 

dieselcruiserhead

16 Years on ExPo. Whoa!!
Yesterday I arrived at 10AM and ended up staying until 3 in the morning.. 15 hour day... Engine/trans/t-case assembled, placed in engine bay (which also took a couple hours) and then a few grueling hours building and mounting the cross member... My goal is to have it starting by Monday and running/driving by Tues or Weds... The biggest hang up was the transmission arriving this week when it was supposed to be here Feb 25th but I can't complain, it was hand built by Marlin himself and they are a sponsor for the vehicle at some of the events it will be at later this week so cost on it was free...
 

Attachments

  • AM_017.jpg
    AM_017.jpg
    124.4 KB · Views: 83
  • AM_020.jpg
    AM_020.jpg
    124.1 KB · Views: 54
  • AM_024.jpg
    AM_024.jpg
    118.5 KB · Views: 53
Last edited:

dieselcruiserhead

16 Years on ExPo. Whoa!!
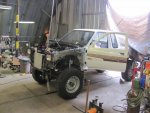
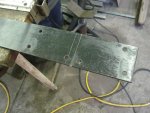
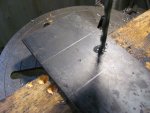
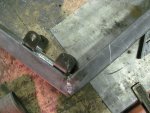
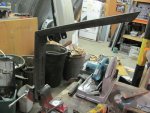
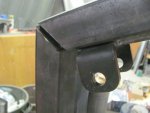
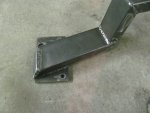
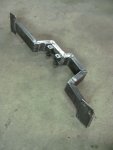
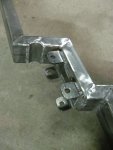
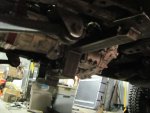
Lots of hours with the tranmission crossmember. It is about the quickest I have ever built one of this complexity... Unfortunately it hangs a little low so I will trim it out with some little changes when I pull the engine again to weld in the motor mounts and paint up the front end and install the clutch...

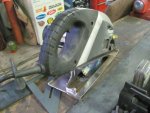
I was really grateful to my friend Brian who is a professional fabricator who loaned me a metal circular saw and some other aspects to get this done besides the welder as well. My welder repair bill just came back at about $450 plus the $150 gun and another bottle of gas.. About $700 in welding costs this last month alone.. The welder was 1/2 a year out of warranty too.. :(
 

Attachments

  • BM_034.jpg
    BM_034.jpg
    114.4 KB · Views: 40
  • BM_032.jpg
    BM_032.jpg
    118.7 KB · Views: 22
  • BM_026.jpg
    BM_026.jpg
    128.3 KB · Views: 25
  • BM_035.jpg
    BM_035.jpg
    138.4 KB · Views: 22
  • BM_037.jpg
    BM_037.jpg
    131.5 KB · Views: 16
  • BM_042.jpg
    BM_042.jpg
    80.8 KB · Views: 17
  • BM_056.jpg
    BM_056.jpg
    103.6 KB · Views: 24
  • BM_052.jpg
    BM_052.jpg
    90.6 KB · Views: 41
  • BM_050.jpg
    BM_050.jpg
    104.6 KB · Views: 26

dieselcruiserhead

16 Years on ExPo. Whoa!!
Installed.. Photos at about 2:30AM this morning... It also really made the whole truck sit a lot lower. I have about 1/2 of the pieces for the engine motor mounts cut and ready, that is the next step. Currently it is nestled between a screw driver and a piece of scrap steel but the truck is on its own weight now. It also really came down in height and looks normal. I have having some pretty serious interference issues with the steering and I'll have to add one more bend to the panhard.. So basically that will all happen pretty shortly here...
 

Attachments

  • CM_048.jpg
    CM_048.jpg
    90 KB · Views: 27
  • CM_049.jpg
    CM_049.jpg
    144.8 KB · Views: 93
  • CM_051.jpg
    CM_051.jpg
    100.7 KB · Views: 72

Willman

Active member
Dude....This is awesome!

I need to come and see ya!

Thanks guys...

Oil pan cleaned up.. I tried the JB weld method but it really did little or nothing after I ground it smooth.. I think it should be OK again looking closely at the welds..

You can alway bring your oil pan down to my house....I have a TIG welder that can smooth and fill any pin holes that the MIG left behind

Let me know

:)
 

Gifu

Observer
coming along swimingly i see. nice work. I really like the 1980's graphics. Bummer on the welder... could have bought a new one for that much.
 

dieselcruiserhead

16 Years on ExPo. Whoa!!
I know.. And I have been meaning to upgrade for some time so there is $700 down the drain for it..

Nic thanks for the offer, man would I love TIG as well.. Everything just came back from Utah Powder Coatings today.. Simply amazing, I will take and post pictures some times tomorrow perhaps. Though I'm a pretty good welder the powder coating really highlights a lot of my weaknesses 90% of which are due to just due to not taking the time to do things slowly (and getting used to this new machine)...

Anyway, more updates to come. I dropped off the driveshafts today for adapting/shortening.. .
 
N

NorCalBorn

Guest
:drool: The detail of this build and the final overall are definitely looking impressive. When all is said and done call in a few favors and do a really good photo shoot to get some pics to post. The stripe kit James did for you makes me absolutely jealous I didn't go ahead and have him do mine last year.

One thing to be sure to go back and do though, after all of this is before you paint your sliders, either have some plate inserts made up, or go back and rock-guard about 5" up from the bottom panel seams, and ~4-5" down from the beltline as you'll find out as I did, that pebbles and rocks have a bad habit of deflecting right off the sliders and into your bodywork, chipping it all to heck.
 

Wheelingnoob

Adventurer
Must be a busy man no update in 2 days........good luck with it, we all cant wait to see it done!! I almost planed a trip down to AZ just to see this truck at Overland Expo. :elkgrin:
 

Forum statistics

Threads
188,490
Messages
2,905,627
Members
230,502
Latest member
Sophia Lopez
Top