You are using an out of date browser. It may not display this or other websites correctly.
You should upgrade or use an alternative browser.
You should upgrade or use an alternative browser.
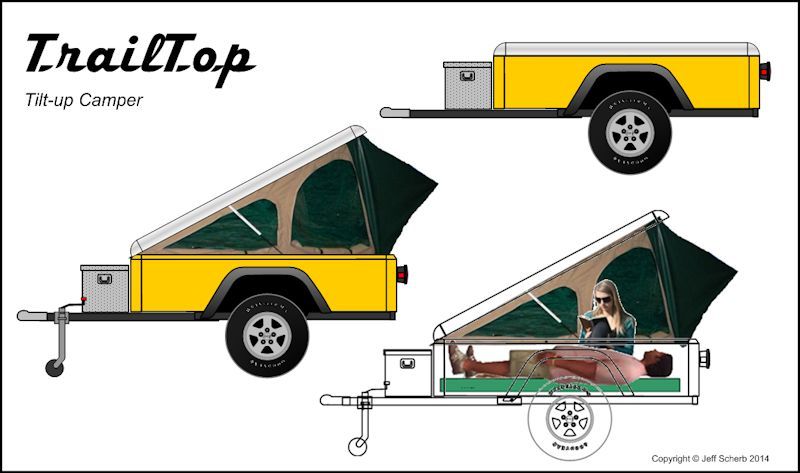
"TrailTop" modular trailer topper building components
- Thread starter jscherb
- Start date
jscherb
Expedition Leader
The fiberglass bonding the TrailTop frame cured overnight so this morning I pulled the clamps off and trimmed the excess fiberglass mat sticking out at the joints.
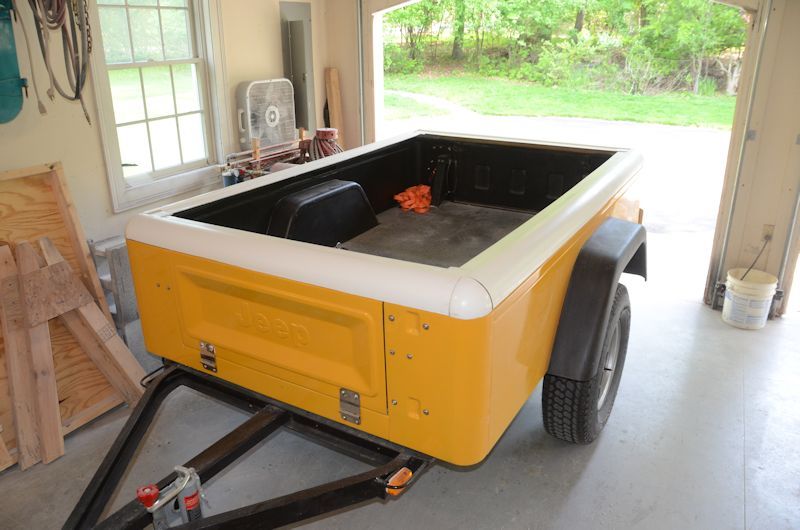
Off the tub:
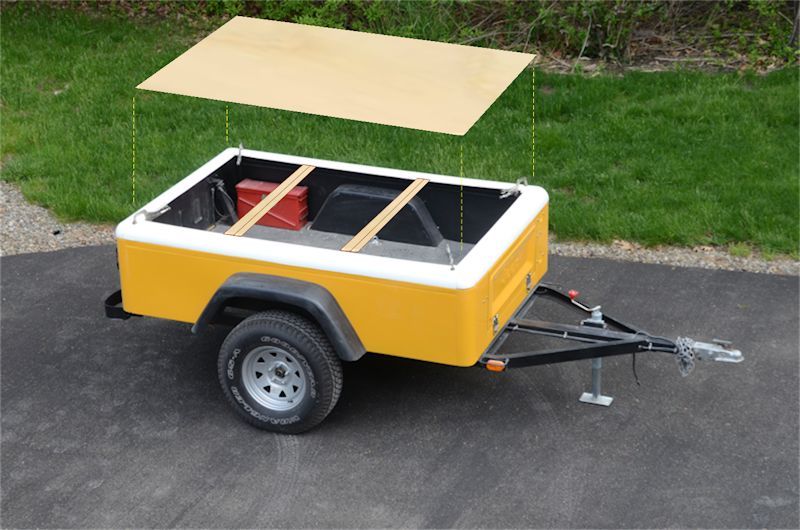
What'll happen next is some wood framing will be installed, followed by a 1/4" plywood skin:
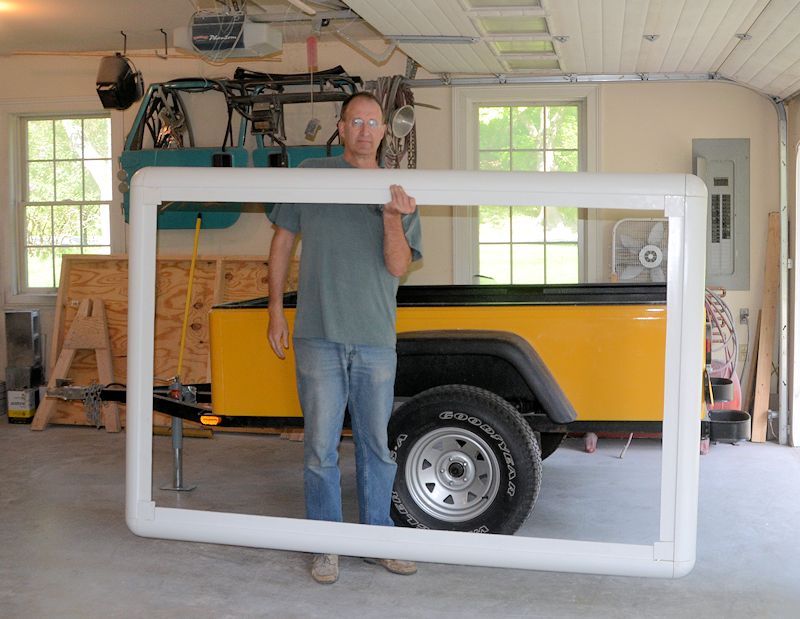
Here's the frame sitting on the Dinoot test tub in the workshop; I'll do the woodworking in the workshop because that's where the woodworking tools are.
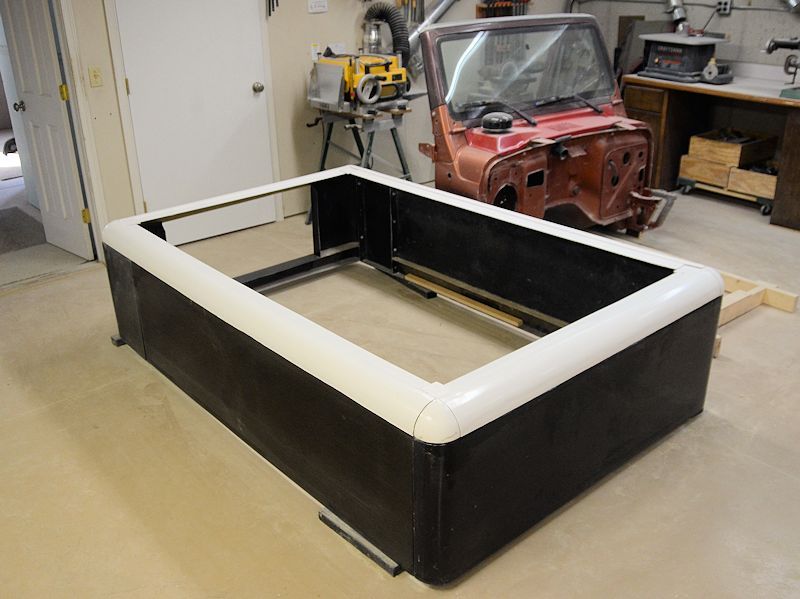

Off the tub:

What'll happen next is some wood framing will be installed, followed by a 1/4" plywood skin:


Here's the frame sitting on the Dinoot test tub in the workshop; I'll do the woodworking in the workshop because that's where the woodworking tools are.

jscherb
Expedition Leader
Youre making it seem soooooo easy, lol
Thanks
Here's my original list of 5 top goals (not in any particular order, all 5 were equally important):
- Affordability.
- Configurability - the ability to implement multiple types/designs/sizes of trailers using the same basic parts.
- Style. A TrailTop-built camper should have a professional level of style; even though it would be a home-built, I want to enable the DIY-er to achieve professional-looking styling and build quality with tools and skills an average DIY-er would have.
- Ease of construction. I believe it will be easier to build a TrailTop-based camper than it would be to make one entirely from scratch out of wood.
- Strength. A TrailTop camper should be stronger than wood-only construction; I want it to be possible to support things like a roof-top tent on top (an upstairs for the kids?)
jscherb
Expedition Leader
I'm planning the strut installation to support the tilt-up feature of the cover. The cover will be hinged on the front, and will have two struts to support it when open.
I'll need struts with about a 10" difference between the open and closed length, and about 50 lbs. force each, so I searched the U-Pull junkyard for hood support struts because they should have about the right specs. I found a pair from a Kia Sorrento that look like they'll be just fine. Here's a mockup with the struts:
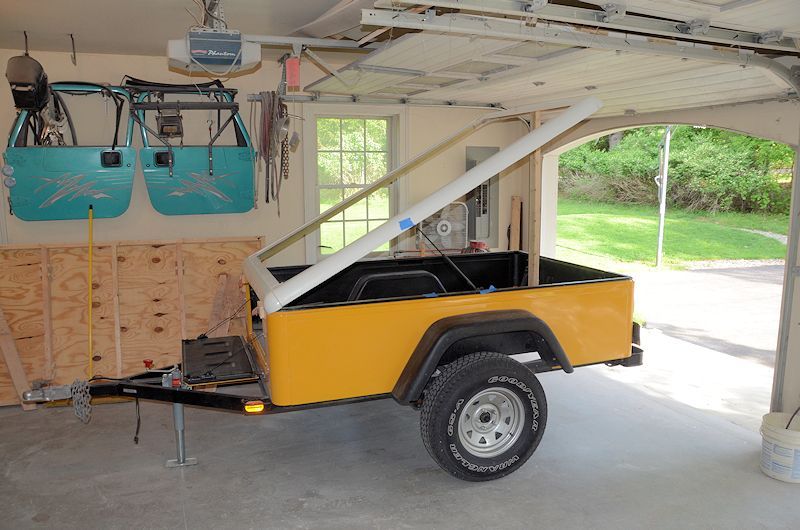
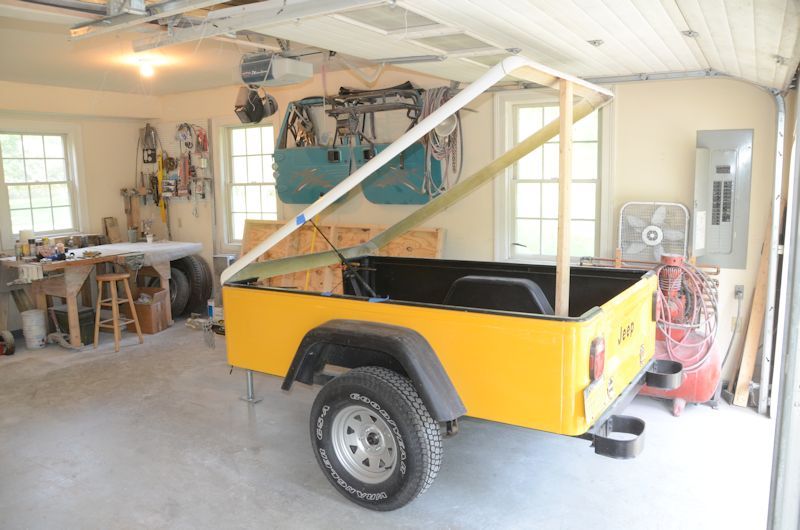
The height of the high end when open will be about 42", which gives about 5' from the tub floor to the bottom of the cover at the peak. Plenty of room to turn the hard cover into a camper...
I'll need struts with about a 10" difference between the open and closed length, and about 50 lbs. force each, so I searched the U-Pull junkyard for hood support struts because they should have about the right specs. I found a pair from a Kia Sorrento that look like they'll be just fine. Here's a mockup with the struts:


The height of the high end when open will be about 42", which gives about 5' from the tub floor to the bottom of the cover at the peak. Plenty of room to turn the hard cover into a camper...

jscherb
Expedition Leader
how are you thinking about hinging the front?
Hinges will mount on the outside of the tub and the outside of the cover.
jscherb
Expedition Leader
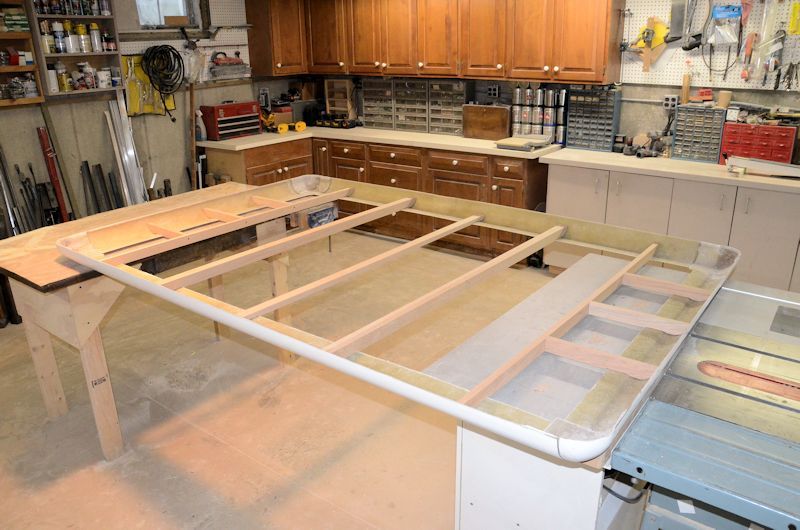
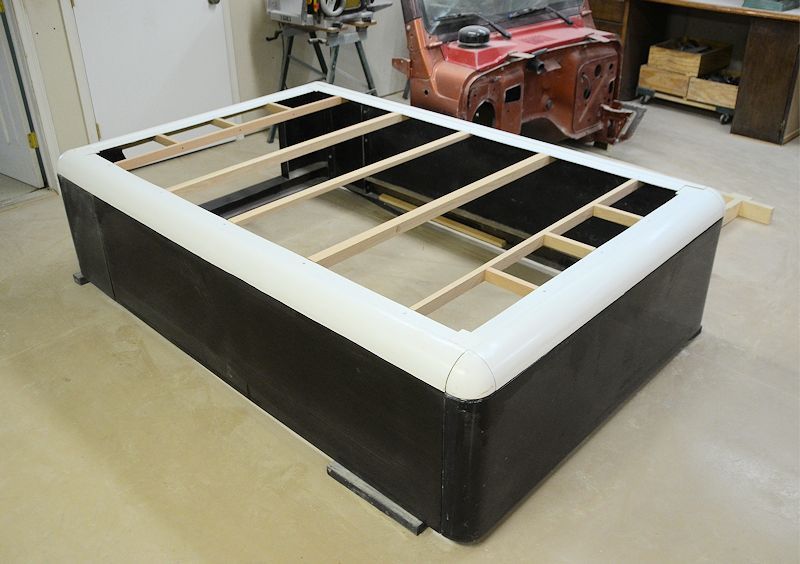
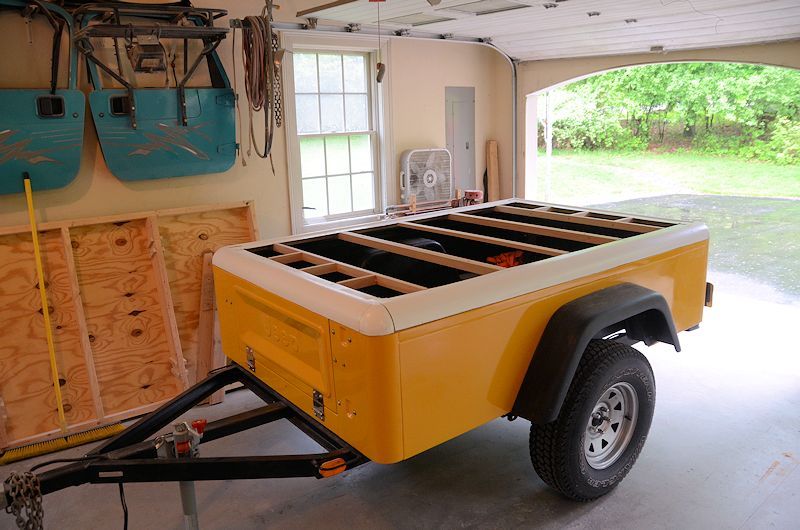
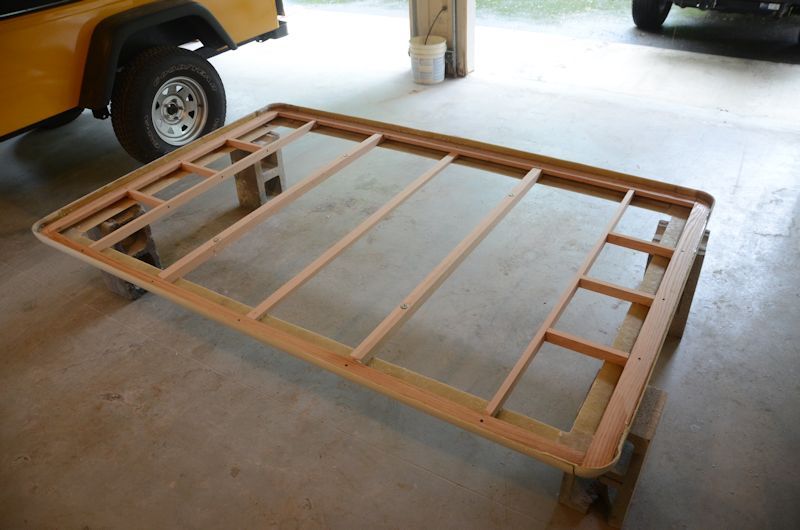
The ribs in place. There are two double thickness ribs made from two pieces of 1x2 glued together, those are spaced at 32", which is a typical spacing for roof-top tent mounting. They'll have tee nuts installed in them to make it easy to bolt the RTT in place from above. The center rib is a 1x2 with the wide side horizontal, that's there because there will be a joint in the plywood at that point - the tub is 5 x 7'5", which will take two sheets of plywood to cover.


jscherb
Expedition Leader
Sure do appreciate the time you spend on this nearly every day. Great work and great of you to share it with us.
:bowdown:
Thank you very much. I'm glad you're enjoying following along
jscherb
Expedition Leader
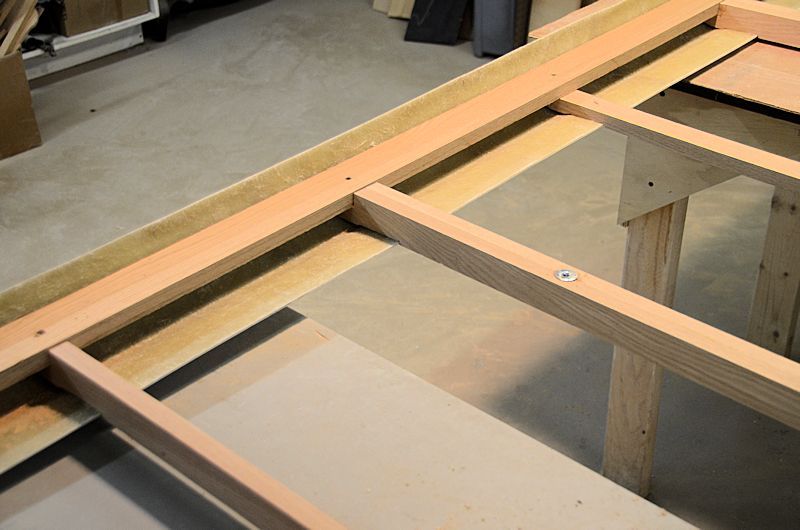
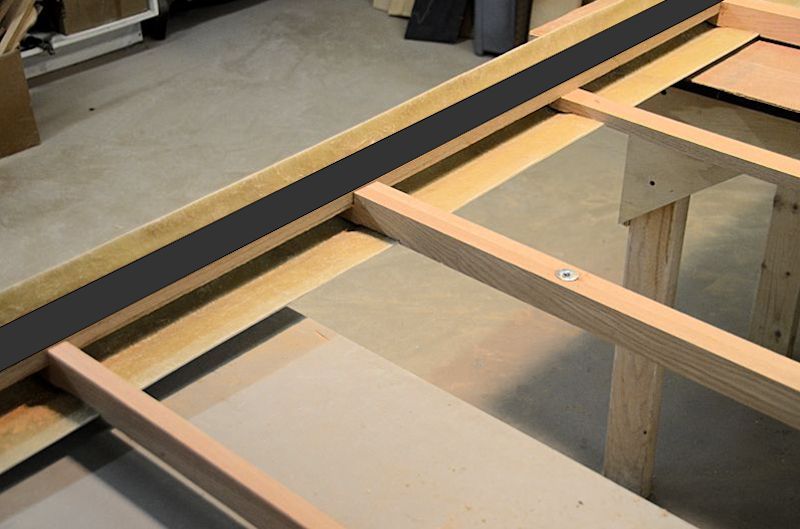
In addition to the ribs, there's a sill that goes all the way around the perimeter of the frame. The sill is where the cover rests on the top of the tub, and will be weatherstripped to seal out the elements. The sill is also where the hinges, latches and struts will mount. The sill is in place in this photo:
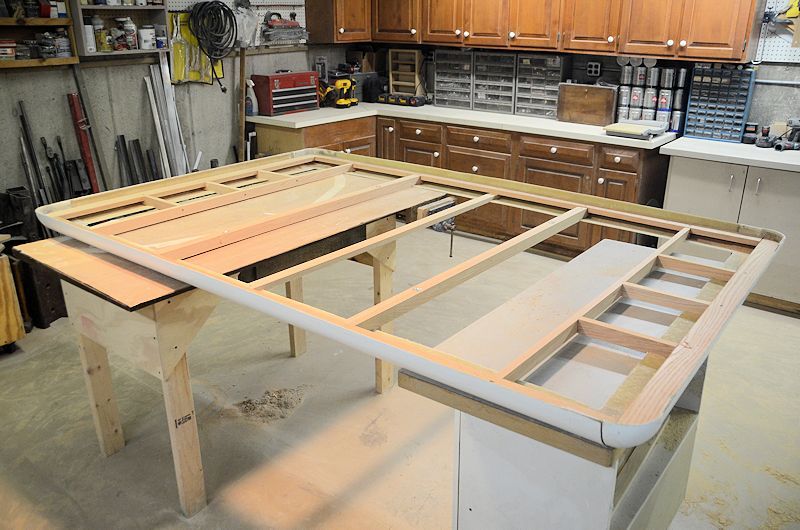
Here's a closer view of the ribs and the sill. Also you can see one of the tee nuts in the rib for bolting the roof-top tent in place.
All the wood framing parts are done now, next they'll be screwed/epoxied in place and then it will be time to put the plywood on.
One more quick test-fit on the tub before the ribs get epoxied into place. Fit is good, ready for epoxy.

Here's a closer view of the ribs and the sill. Also you can see one of the tee nuts in the rib for bolting the roof-top tent in place.

All the wood framing parts are done now, next they'll be screwed/epoxied in place and then it will be time to put the plywood on.
One more quick test-fit on the tub before the ribs get epoxied into place. Fit is good, ready for epoxy.

jscherb
Expedition Leader
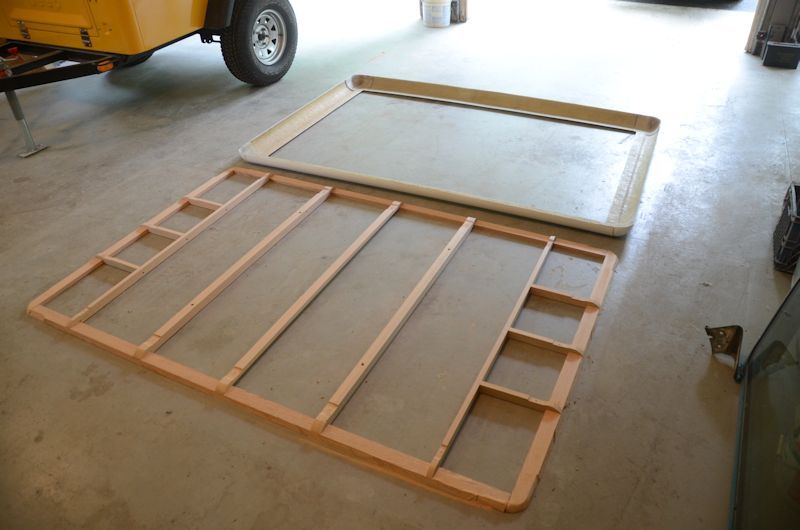
Getting ready to epoxy the ribs into the fiberglass frame, I've unscrewed the wood from the fiberglass and flipped the fiberglass over. I'll apply epoxy to the mating surfaces, flip the fiberglass part back over the wooden frame, and screw it back together:
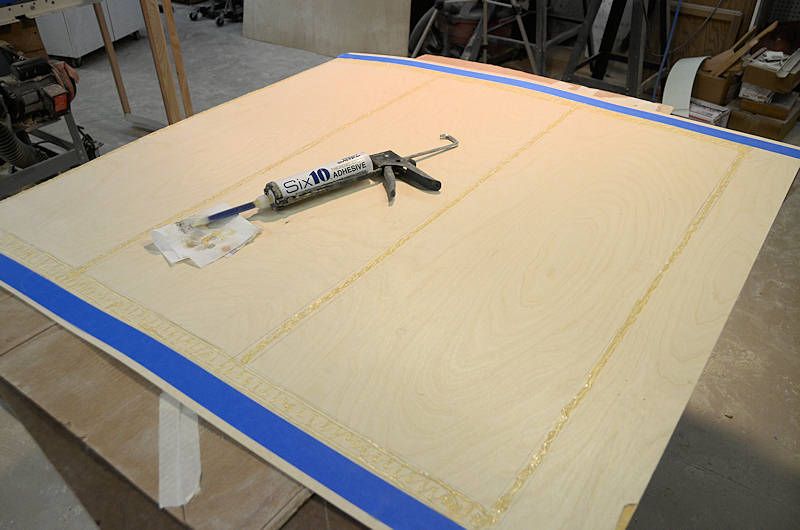
I'm using West System Six 10 epoxy because it's very easy to use - fits in an ordinary caulk gun and mixes as it's dispensed. I used it to bond the curved plywood skin to the curved fiberglass hatch ribs for the teardrop and it worked very well. This photo is from that project, I didn't take another photo of the epoxy today:
Once the parts were epoxied and screwed back together I flipped it upside down so I could clean up/smooth out any epoxy that oozed out of the seams.
The epoxy needs to cure overnight.

I'm using West System Six 10 epoxy because it's very easy to use - fits in an ordinary caulk gun and mixes as it's dispensed. I used it to bond the curved plywood skin to the curved fiberglass hatch ribs for the teardrop and it worked very well. This photo is from that project, I didn't take another photo of the epoxy today:

Once the parts were epoxied and screwed back together I flipped it upside down so I could clean up/smooth out any epoxy that oozed out of the seams.

The epoxy needs to cure overnight.
jscherb
Expedition Leader
Jeff- Are you going to plywood the underside also to create a "honey comb" effect? Also will you be doing some type of weather stripping on the underside to seal the lid to the tub?
The sill will be weatherstripped - I've drawn the weatherstrip onto the photo I posted earlier showing where it will go. It'll seal exactly the same way a factory Jeep hardtop does.
I only plan to put plywood on the outer surface. I suppose you could put it on the inside as well, but I'm not sure if that would serve any real function.
jscherb
Expedition Leader
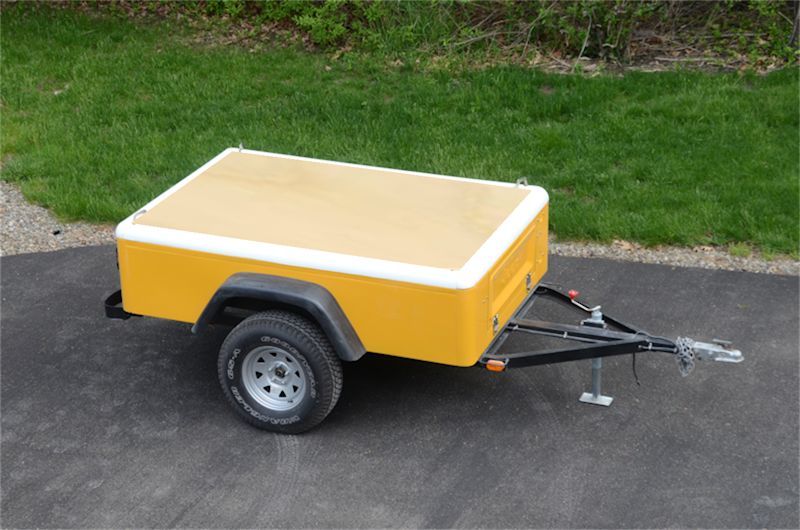
The epoxy has cured, and I'm going to do a final trim on the bottom of the fiberglass shell. I haven't done a final trim on the bottom of the fiberglass parts until now, and the reason is now that everything's epoxied together, I can mark a line a consistent distance away from the sill plate to ensure the bottom of the cover is perfectly parallel with the tub.
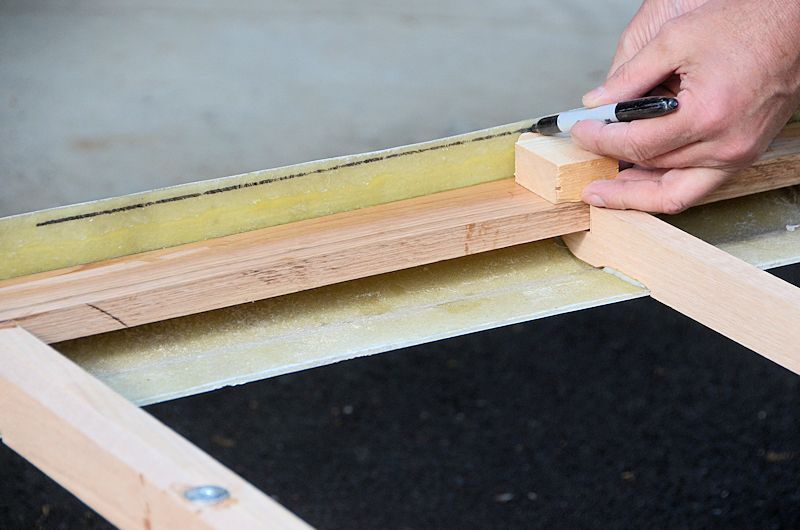
I'll use my D/A sander to rough sand up to the line, and I'll finish the job with my manual long board sander.
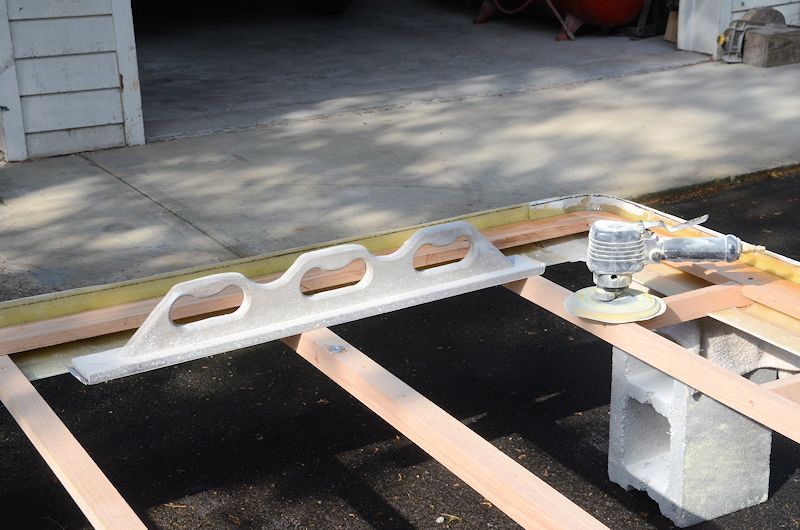
All trimmed, here it is on the tub:
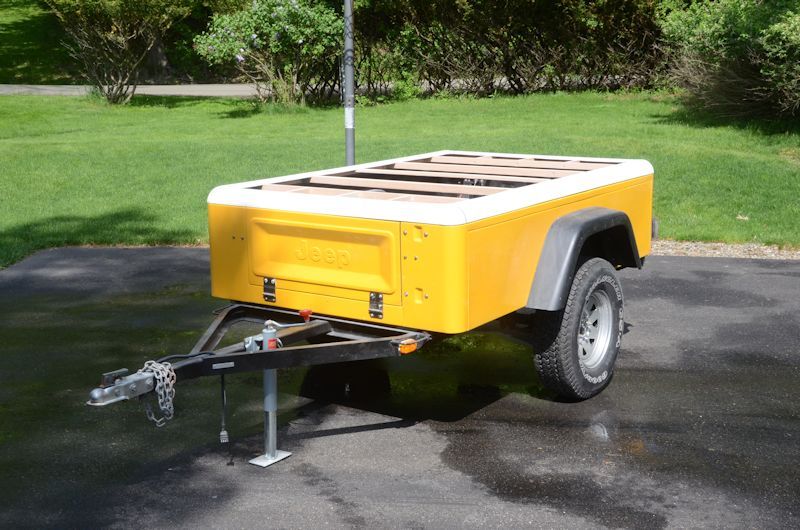
Next up: plywood for the top, and hinges. Not necessarily in that order, it's easier to do the hinges without the plywood on top. Same goes for the struts and latches, I'll probably do all of them before I install the plywood.
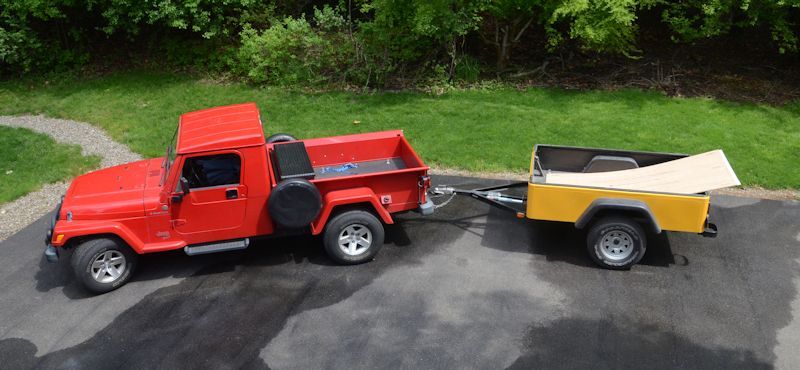
And speaking of plywood, here's the trailer earning it's keep, just back from a plywood run to Lowes...

I'll use my D/A sander to rough sand up to the line, and I'll finish the job with my manual long board sander.

All trimmed, here it is on the tub:

Next up: plywood for the top, and hinges. Not necessarily in that order, it's easier to do the hinges without the plywood on top. Same goes for the struts and latches, I'll probably do all of them before I install the plywood.
And speaking of plywood, here's the trailer earning it's keep, just back from a plywood run to Lowes...

Last edited:
Similar threads
- Replies
- 3
- Views
- 526
- Replies
- 2
- Views
- 656
- Replies
- 9
- Views
- 390
- Replies
- 9
- Views
- 2K
- Replies
- 0
- Views
- 460

