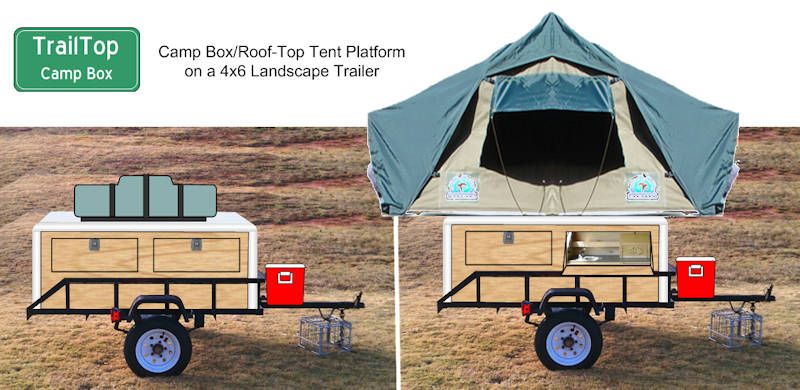
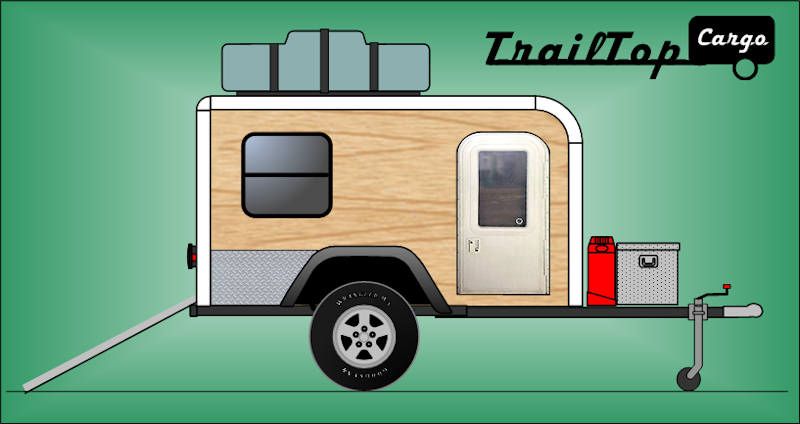
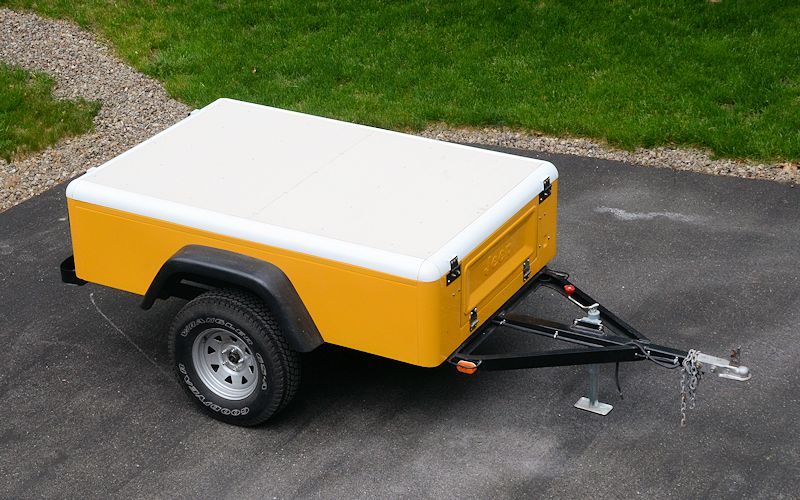
"TrailTop" modular trailer topper building components

Randy S. Hager

New member
Trail Drop parts

Jeff, have these parts been picked up by anyone yet? After I return from overseas in May I would like to check these out further. I want to make a camper and these parts would for sure speed that very slow process up significantly. If they haven't been produced by a company then I would like to discuses with you about a license to produce one set....if you are agreeable to that. I will have my CNC router together so doing these shapes would not present a problem. Might need to pick your brain about the mold making and layup methods you use.

Thank you,
Randy S. Hager
Venus, TX
 

jscherb

Expedition Leader
Jeff, have these parts been picked up by anyone yet? After I return from overseas in May I would like to check these out further. I want to make a camper and these parts would for sure speed that very slow process up significantly. If they haven't been produced by a company then I would like to discuses with you about a license to produce one set....if you are agreeable to that. I will have my CNC router together so doing these shapes would not present a problem. Might need to pick your brain about the mold making and layup methods you use.

Thank you,
Randy S. Hager
Venus, TX
Randy,

Yes, the parts speed up camper construction quite a bit, and give you nice rounded shapes that would be a little hard to reproduce if you were building a camper from scratch, but if you started from scratch intending to make your own molds to make similar parts you'd be better off just making the whole camper from scratch - by the time you made the masters for the molds, made the molds, molded the parts, etc., you could have made a camper from scratch anyway.

I haven't been trying to find a company to make/market the TrailTop parts, I've been too busy with other projects lately to think about this project. I've still got all the molds and I have a few ideas for new parts to add to the system, so I'll probably get back to it someday, maybe later this year.

jeff
 

datkins

New member
I want to build this!!! I just purchased a flat 7x20 tailer to build a shell on and was looking at the Trailtop images and was wondering how to purchase or make the edge curves.
 

jscherb

Expedition Leader
Another TrailTop long-term test result...

The TrailTop components are fiberglass, and designed so that they provide a framework and nicely curved corners for the construction of the camper/trailer topper/etc., and plywood is used to span the flat areas inside the framework. This photo shows the unfinished tilt-up camper top after the plywood was bonded to the fiberglass with epoxy and secured with flathead machine screws. I used inexpensive 1/4" underlayment plywood from Lowes, which came from the store primed white on one side.

CoveryAssyDone3_zps114e1d53.jpg


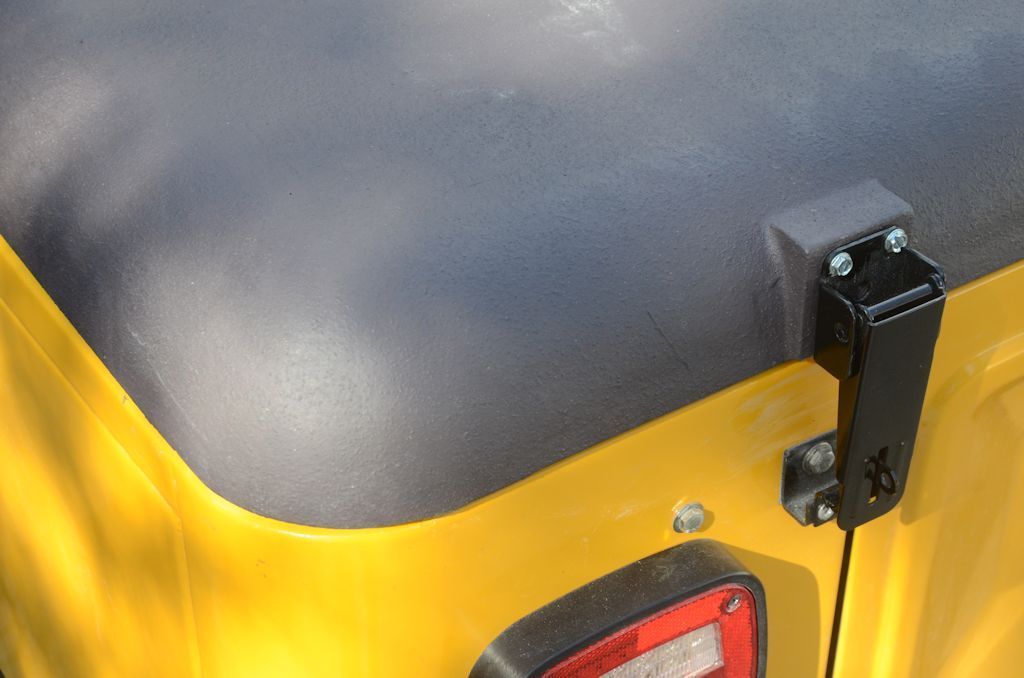
After bonding + bolting the plywood to the TrailTop framework, I used ordinary automotive body filler to smooth the joint between the plywood and the fiberglass, and then finished it off with Olympic Rescue-It deck resurfacer, I picked up a gallon of it on the "mistint" table at Lowes for less than $20. I sealed the underside of the plywood with ordinary polyurethane varnish.

RescueItCover_zpse981bc36.jpg


The trailer has spent most of this winter in the unheated garage, and some of the time outside with the tarp cover on it when I needed the garage for other projects. It's been the coldest/dryest winter in 100 years here, so if there was going to be any shrinkage of the plywood I would have expected it to happen this winter.

I'm happy to report that the cover looks as good as the day I put the finish on it (well maybe it's a little dustier). There's been no shrinkage at the joints between the plywood and the fiberglass.

RescueItAfterDryWinter_zpsyp6vlscx.jpg


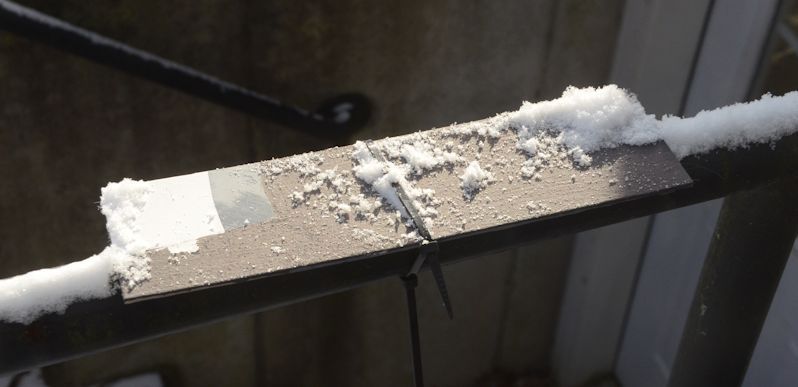
And, as I reported a while back, the fiberglass sample I primed and coated with Rescue-It last fall and left out in the snow all winter is also as nice as the day I applied the finish.

RescueItSnow2_zps3cfd6fa9.jpg
 

jscherb

Expedition Leader
Yesterday I got this email from a forum member:

I've been reading your posts for awhile and I'm very interested in trying to create something like you've done in one of your incredible renderings. Can I possibly ask you for more details on how you created the masters for you 12" corners?

I'm always happy to answer questions like that. I don't think I ever posted those details before so I'll post the answer here because others may be interested as well.

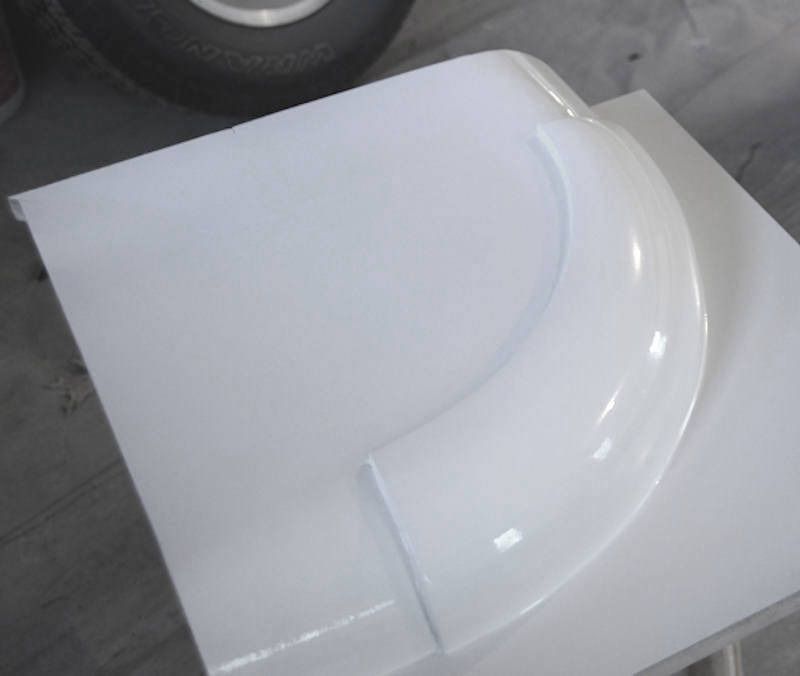
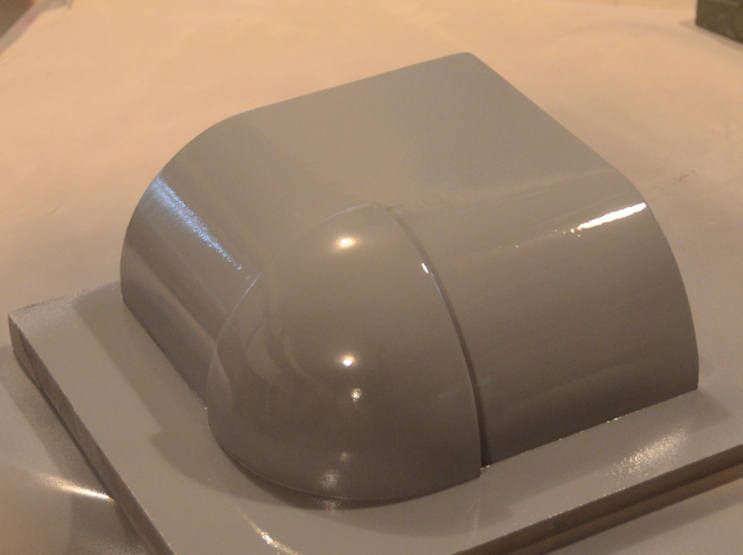
The mold master in question is the one in the photo below, it was used to make the mold for the 12" radius TrailTop corners:

12CornerEpoxy_zpstftmmmga.jpg


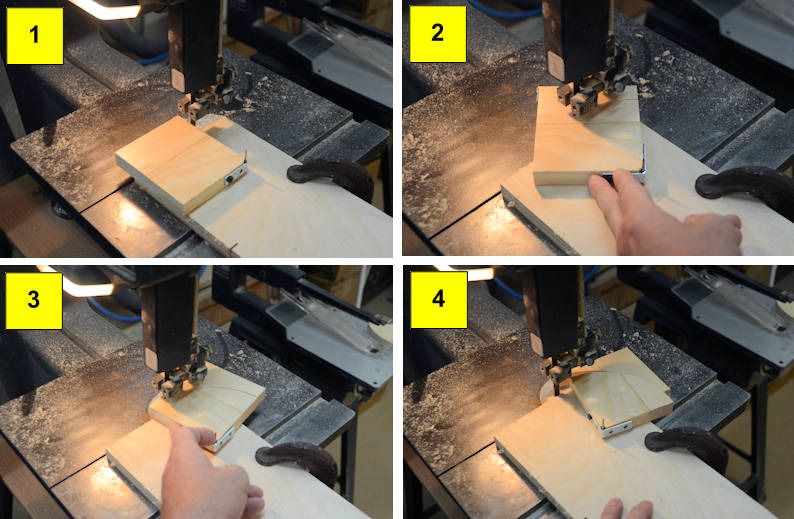
I made that mold master from solid wood. I don't have detail photos of the construction of that master, but I do have photos of the construction of the 3.5" radius corner mold master, and the techniques are the same, so I'll show that one.

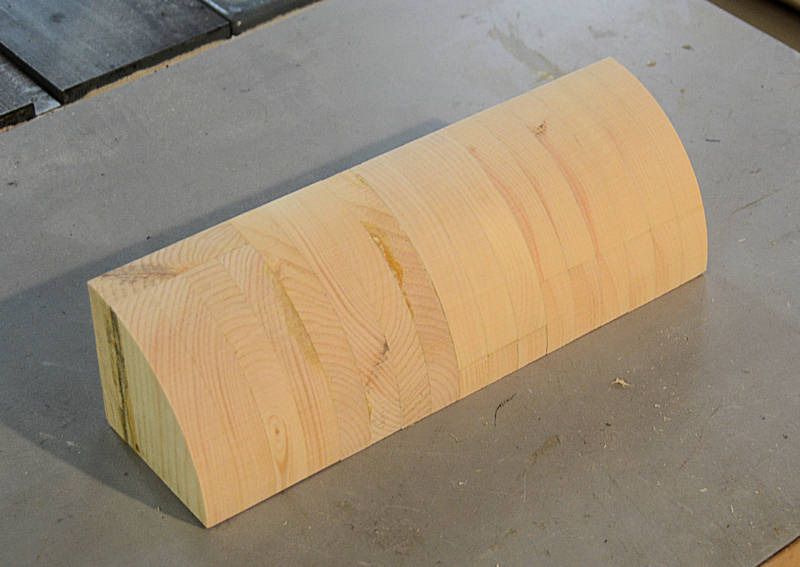
I started by setting up a jig on my bandsaw to make it easy to cut lots of identical pieces. The jig is basically a board with a nail in it which serves as a pivot for the wooden blank. A corner bracket is screwed to the blank to go over the nail, and the blank is rotated through the saw on that pivot:

TinyCornerMaster1_zpsuk5wdgmq.jpg


Once a bunch of identical parts are cut on the bandsaw, they're glued together into a "log":

TinyCornerMaster2_zps3i00qar6.jpg


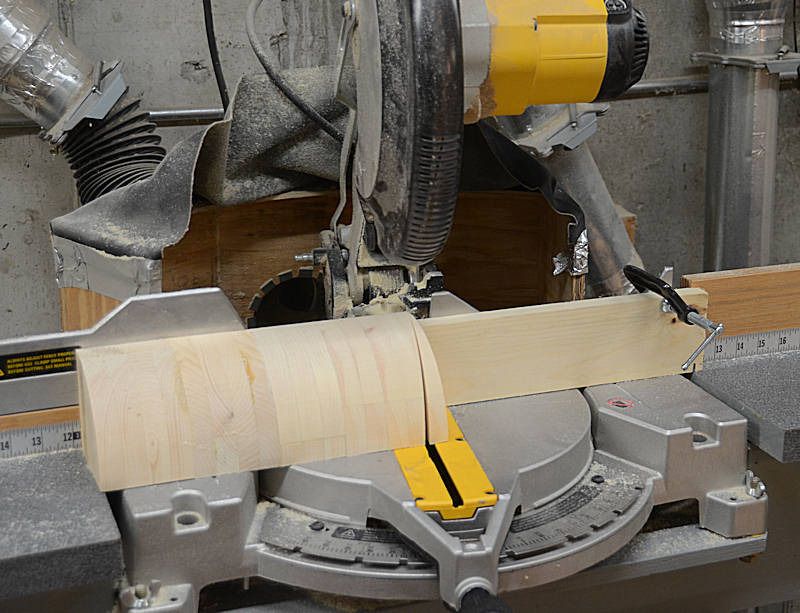
Then wedges are cut from the log on the miter saw:

TinyCornerMaster3_zpslvbw2fep.jpg


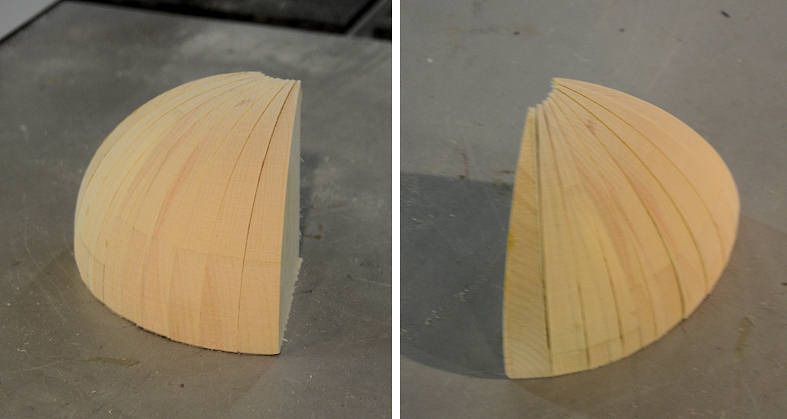
Those wedges get glued up into a slightly rough curve:

TinyCornerMaster4_zpsi4uygues.jpg


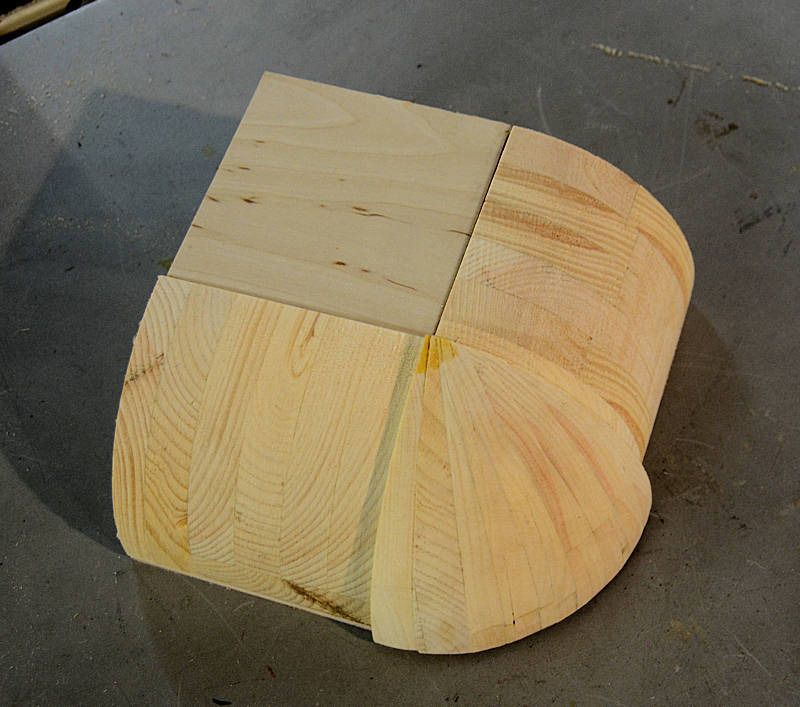
The rest of the components of the mold master, in this case the flanges on the end for joining this part to other TrailTop parts, are added:

TinyCornerMaster5_zpsymgexqmc.jpg


Then the rough master is sanded and smoothed if necessary with a little body filler. A smooth finish is put on it, and then it's ready to have a mold made from it.

TinyCornerMaster30_zpswmpwprfx.jpg


The steps I used for the 12" corner master he asked about are the same, the only difference is that the angle of the wedges was much smaller (and there were lots more of them).

This technique is best for fairly small parts; I made the mold masters for the 36" radius curved pieces using a different technique because making something that large using this technique would have required a zillion wooden wedges :).
 

cr500taco

Adventurer
I have just started reading through this thread and really like the campbox idea I am planning on using a 4x6 or 4x7 trailer as a dirt bike hauler & off road trailer (when I am not hauling the bikes) with a RTT on a rack. how easy will it be to slide the campbox on and off by a single person?
 

jscherb

Expedition Leader
I have just started reading through this thread and really like the campbox idea I am planning on using a 4x6 or 4x7 trailer as a dirt bike hauler & off road trailer (when I am not hauling the bikes) with a RTT on a rack. how easy will it be to slide the campbox on and off by a single person?
You're talking about this one from page 4 of this thread?

Landscape3_zpsc7884c94.jpg


Here's a bunch of ways...

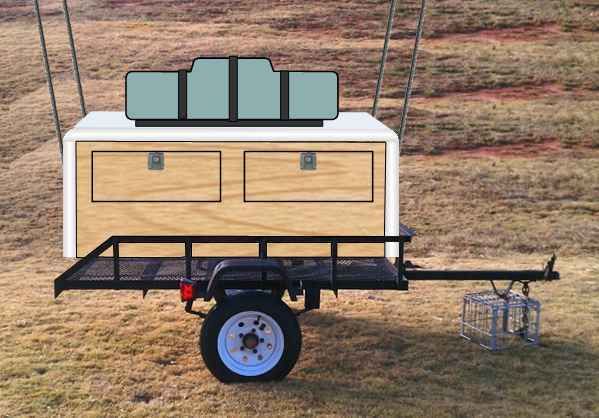
If the box ended up being light enough, you could build it with handles on the back end - lift the back the handles and slide it off the trailer (while the trailer was still hooked up to the vehicle so the trailer didn't move). Slide the box onto mover's dollys as it comes off the trailer.

Or, if it was too heavy for one person to slide, you probably could still lift the back end enough to put something underneath - you could put a mover's dolly upside down on the deck of the trailer/under the box - the dolly would stay in place on the trailer but with the wheels facing up the bottom of the box would roll very nicely. When the box was far enough off off the trailer you could set the free end on another mover's dolly and then roll the box off the trailer "wheelbarrow style" with handles on the front. Installation would be the reverse of removal.

Another way: I often use the rails of my garage door to support and lift things - you could build the box with hooks or handles at the corners, and use ropes with hooks on both ends - one end would hook over the garage door rail, the other end would hook onto the trailer box. The box probably wouldn't be too heavy that one person couldn't lift a corner of it a couple of inches to hook up the rope. When all 4 corners were hanging on the ropes, you could roll the trailer out from underneath, and then remove the ropes from one end of the box at a time and set the box on mover's dollys.

If the box ended up being too heavy to lift an end to put a dolly underneath or hook up a rope from above, it wouldn't be too hard to work out something with a lever or a jack to lift the end the necessary amount.

There are lots of other ways it could be done, these are just a few quick ideas.

Obviously this photo isn't in a garage, but it was easy to edit the original drawing to lift the box a few inches and add the ropes...

Landscape3a_zpsio4wweys.jpg
 

jscherb

Expedition Leader
Took the trailer on an errand today, the big, flat TrailTop cover makes a good place to carry fragile 1/4" drywall...

CarryingDrywall_zpsfnx62lvh.jpg
 

cr500taco

Adventurer
You're talking about this one from page 4 of this thread?

Landscape3_zpsc7884c94.jpg


Here's a bunch of ways...

If the box ended up being light enough, you could build it with handles on the back end - lift the back the handles and slide it off the trailer (while the trailer was still hooked up to the vehicle so the trailer didn't move). Slide the box onto mover's dollys as it comes off the trailer.

Or, if it was too heavy for one person to slide, you probably could still lift the back end enough to put something underneath - you could put a mover's dolly upside down on the deck of the trailer/under the box - the dolly would stay in place on the trailer but with the wheels facing up the bottom of the box would roll very nicely. When the box was far enough off off the trailer you could set the free end on another mover's dolly and then roll the box off the trailer "wheelbarrow style" with handles on the front. Installation would be the reverse of removal.

Another way: I often use the rails of my garage door to support and lift things - you could build the box with hooks or handles at the corners, and use ropes with hooks on both ends - one end would hook over the garage door rail, the other end would hook onto the trailer box. The box probably wouldn't be too heavy that one person couldn't lift a corner of it a couple of inches to hook up the rope. When all 4 corners were hanging on the ropes, you could roll the trailer out from underneath, and then remove the ropes from one end of the box at a time and set the box on mover's dollys.

If the box ended up being too heavy to lift an end to put a dolly underneath or hook up a rope from above, it wouldn't be too hard to work out something with a lever or a jack to lift the end the necessary amount.

There are lots of other ways it could be done, these are just a few quick ideas.

Obviously this photo isn't in a garage, but it was easy to edit the original drawing to lift the box a few inches and add the ropes...

Landscape3a_zpsio4wweys.jpg


Thanks for the ideas. Yes, that is the box that I am thinking about.
I was also thinking about putting rollers on the bottom, so that way I can roll it off the trailer with ramps and using straps to secure to the trailer for traveling. for the box to be light enough, what material do you recommend to use?
 

cr500taco

Adventurer
Another follower of this project had this to say:


That could be done very nicely with TrailTop parts...

TrailTopCargo1_zps7701502b.jpg
[/URL]

I am really liking this idea. Actually, the reason why I was thinking of the campbox on a 4X6 is to be able to haul my dirt bikes with the trailer as well. Hence, the reason why i want to remove the box.
 
Last edited:

cr500taco

Adventurer
That's a cool idea! I always see cheap popups for sale, but not a huge fan of soft sides, best of both worlds.

That is actually a good idea. But, I put a new canvas on my popup trailer, recently then my roof started leaking and now it needs to be fixed or replaced. A rooftop replacement would be nice. lol
 

jscherb

Expedition Leader
Thanks for the ideas. Yes, that is the box that I am thinking about.
I was also thinking about putting rollers on the bottom, so that way I can roll it off the trailer with ramps and using straps to secure to the trailer for traveling. for the box to be light enough, what material do you recommend to use?

I don't know about putting rollers on the bottom of the box, that might make it hard to secure to the trailer in a way that prevents movement of the box on the trailer when in motion.

The real expert in building small camp boxes like this is Scott Chaney, who owns Compact Camping and runs the Tventuring forum (http://tventuring.com/trailerforum/index.php). He's done a book on building "Explorer Boxes" (https://compactcampingconcepts.com/explorerbox.html) that provides step-by-step info. You might want to check out the resources he's got and the threads on his forum about camp boxes like this.

manual-eb.jpg
 

jscherb

Expedition Leader
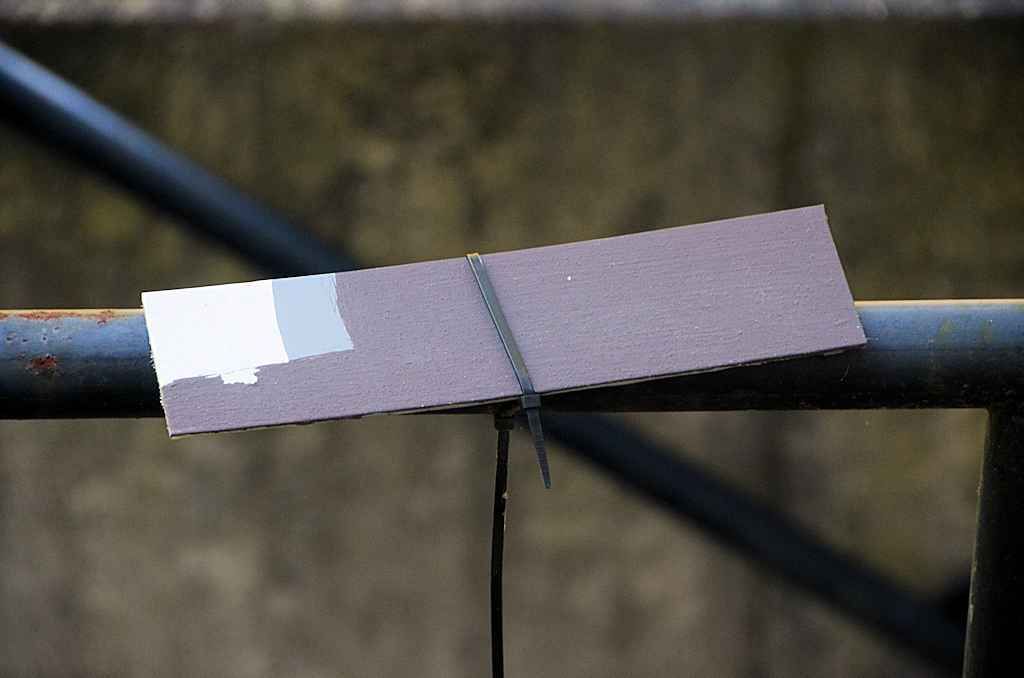
It was just over one year ago that I started my experiment with using Olympic Rescue It deck coating on the tilt-up camper top. http://www.expeditionportal.com/for...per-building-components?p=1654490#post1654490

Last September I strapped one of the test samples from the post above to a railing outside my workshop, and it's been outside in the weather ever since - a very tough winter and all summer. I took the photo below yesterday - the sample is exactly as I left it a year ago - no deterioration whatsoever.

RescueItTest1Year_zpsdxgcvull.jpg


The trailer top looks great too, although right now the big flat top is serving as a workbench in the garage so i won't post any current photos of it :).

Based on this one-year test, I have no hesitation in recommending products like Rescue It for trailer use. Since I did this test some of the companies offering these products have come out with smoother finish versions (the version I used has grit in it to form a non-skid surface); the smooth finish versions might be even nicer than this in many applications. I'm planning a chuck wagon top for my military trailer on that I'll use a smooth finish so I'll report on that when I do it.
 

Forum statistics

Threads
188,382
Messages
2,906,454
Members
230,117
Latest member
greatwhite24
Top