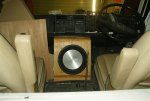
Quick up date for this month. Most of the time has been spent on the heavy duty cabling between the battery banks and the rest of the truck. This is one of the main battery bank - two 75AH Optima 31A batteries. I have 200A fuses on the + terminals of each battery. The thing at the back of the box with all the wires going to it is the 200A shunt for the NASA Marine BM2 battery monitor.

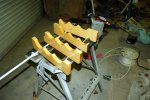
The batteries are held in place with M10 threaded rod and to stop them from moving around I made these inserts.
I changed my mine in using the single 200A continuous switches to isolate each battery bank, and decided to change a Blue Sea Marine heavy duty dual battery switch - Model # 9001e
Cranking Rating: 10 sec. 2,000 Amps
Cranking Rating: 1 min. 1,000 Amps
Intermittent Rating: 5 min. 600 Amps
Continuous Rating 350 Amps
The winch wiring was tricky. The winches are powered off the cranking battery, so during operation the alternator would provide 50-100A, and the cranking battery the rest. This would cause the VSR to isolate the house batteries which is what I want to protect all the house stuff from the large current spikes of winching. I used 16mm2 cable between the house battery banks and the VSR as it will only see about 100A max. I will be able to "jump start" the truck from the house batteries bypassing the VSR and the 16mm2 cable.
The reduction gear starter motor has 50mm2 cable, both + and - wires. The 140A alternator has 16mm cable for the connection to the battery, and another one to the main truck positive bus.
The winches used 70mm2 cable, since the winch is supposed to be rated at 450A maximum - I think that both the wiring, the switches and the battery should be enough. This is the battery box and fuel tank in place - if you look above the tank on the right hand side you can see the battery isolator switch. There will be another one attached to a bracket behind the battery box for the winches.

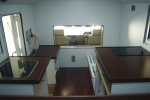
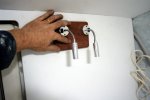
Since I have started the wiring, I decided to get a proper wire crimping tool - this one was expensive, $90USD but the crimps are perfect. Since I have about 300 of these to make for the relays, fuse boxes, connectors and switches, I think it will be money well spent - hopefully limiting connection problems. The first things to wire up was the overhead lights in the camper - this way I have decent light to work in without resorting to lead lights etc. The two flat lights give off a great light - pull about 2amps though so not something that we will have running all the time. I have lots of smaller lights - 6 reading lights and three "ambient" lights.
As "Murphy's Law" has it, I have just discovered that there is now a new and improved version these light that came out last month - with "warm" LEDs, two power settings and a built in switch. I have just ordered two new ones and will use one of these in the cab, and the other in the Land Rover.
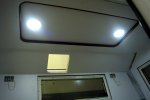
I also fitted the drawer runners for drawers under the bed - the drawers are being made this week, so by next weekend I should have them fitted. I had to space them out by 10mm to clear the cabinets. I added a lot of sound deadening to reduce the resonance - the aluminium box has a very drum like effect, amplifying the noise of water pumps. Photos when I get them installed. I have some combination lock catches for the drawers, that look great, and I can also lock them.
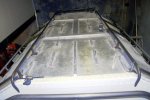
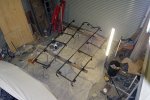
Most of the work the past two weekends has been on the roof rack/solar panel protection. This has been quite a tricky thing to sort out. It involves a lot of climbing up and down ladders. I used a lot of masking tape and spacers to set the bars up.Once the height and length is sorted, I made up all the little stand off brackets - there will be 26 of them eventually. I used the heavy masking tape to hold them in position and at the right angle. At first I had a 90 degree bend on the end, but I changed that to great a bit of a loop - it just looks better. I will finish of the ends with a plate when I get it all sorted.
Getting the right distance above the solar panel was tricky - I have to make sure they are above the panels to be able to protect them, but not cast any shadows on the solar cells.
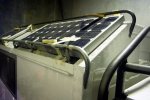
Them make all the cross links to protect the edges of the panels. I have to make sure I can still remove the solar panels. Once this is all finished, I will use my trusty Sikaflex 252 to glue the roof rack onto the roof. The steel base plates are 65mm x 100mm - and with the Sikaflex tear strength of 7N/mm2 - or tensile strength of 3Mpa each plate is supposedly good for between 1.5ton and 4.5ton each depending on how the load is applied - and there are 26 of them.

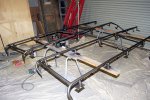
From here I took the welder up onto the roof and made enough tack welds to remove the whole side frame off the roof, and welded it up properly on the floor. It does not weigh much, but is too cumbersome to fit on one piece, so I will make the other half the same, and then bolt it together on the roof. I will also add all the lighting - I have 8 sets of these on the roof, attached to the roof rack

Two at the back, two on each side, and two on the front - each pair will be independently switched, but I will have a master switch that switches them all on at one. The draw around 1A each, and give off a great light. The two at the front will double up as a daytime running light and clearance light.


