What did you do to your Mitsubishi today?

Dprisner

Observer
Power antenna replacement

OK, I know most everyone on here could care less about their power antenna...However, mine has been flying at half mast for waaay too long. Yes, this new ride of mine IS a garage queen and yes I replaced that broken piece of chrome sticking out of my fender today! It really was bugging me... :ylsmoke:
 

Atrais

Adventurer
would it be possible to pm me pictures of the build? or perhaps the mouting brackets and what not...im thinking of building something similar. Thanks!

Or you could post up pics in a build thread so everyone can see and learn from it.

It looks really well done.

Thanks, I'll start a build thread tonight I guess with some details on the bumper. Here it is as of last night, I'm priming and painting it today:

12928320_10101004967803688_7086748481651256069_n.jpg
 

Marutuk

KK6WFB
Not too much, just general maintenance (oil change) and looks like my battery's dying so time to look for a good replacement.
 

Atrais

Adventurer
Done. I'll start a build thread for my truck and at least write how I made the mounts and stuff for those that want to know. I didn't take many pictures (too busy!) but I can at least give you some pointers. Would have done it by now but I've been super busy haha.

12932814_10101006503366408_6195243870906231486_n.jpg
 

Monterado

Observer
What started as a deep clean to scrub out some of the daily driver coffee stains in the carpet has turned into seat removal, a center console overhaul, and LED replacements on some old bulbs.
I got my first taste of upholstery today. My cup holder was shot, so I yanked it out and replaced it with a piece of wood wrapped in toolbox liner. It will be a great place for my phone to rest out of the way. My armrest was also showing its age, so I took it off and added some batting for some extra padding.
20160404_173216.jpg
20160404_173806.jpg
20160404_173938.jpg
20160404_182048.jpg
20160404_182820.jpg

I think I'll splice into the ashtray light and run a second light to the main compartment of the center console. Ordered these today. http://www.amazon.com/uxcell%C2%AE-Wedge-Bulbs-Dashboard-Lights/dp/B00LGJ4WIA/ref=sr_1_1?s=automotive&ie=UTF8&qid=1459828085&sr=1-1&keywords=uxcell%C2%AE+6+x+Wedge+Base+T5+5050+SMD+1+LED+Bulbs+Dashboard+Gauge+White+Lights

I am loving the brighter, newer feel that the LED's provide.

I also got the running boards off finally. This was the fastest and most dramatic change you can make in under 30 minutes.

Next up will be to remove and replace the rusted out lower tailgate hinge. I picked up these last weekend off of a scrapped '95. Dang, these are heavy duty. Now, I just need t buy some beer so I can get a buddy over here to help hold the door while I make the swap. Has anyone changed hinges? I'd appreciate any advice you have.
20160404_183044.jpg
20160404_182958.jpg
 

Attachments

  • 20160404_173150.jpg
    20160404_173150.jpg
    538.7 KB · Views: 22
Last edited:

cornfarmer

Observer
Car stereo fun. All my front speakers were shot. After trying out some budget drivers from Crutchfield last week, I yanked that crap out and put in something better. Got some much better Kicker speakers from Amazon and replaced all 4 front door and dash speakers. Rears are still sounding OK so I'm leaving them alone for now. Still using the stock Infinity CD deck, that's next on the list after I fix the antenna. More importantly, I'm invesigating my oil consumption issue this coming week.

I'm sure other people have tried Crutchfield before, but buyer beware. First off, their car database, i.e. what equipment fits your make/year/model isn't really accurate. The actual speaker manufactuer's website would be a better place to check. Secondly, Crutchfield's mounting/adapter hardware was a total joke. Tiny little mounting screws/brackets/cheap plastic adapters that didn't line up much at all. I didn't expect perfection, but the stuff just didn't inspire any confidence. Thirdly, the adapter/mounting hardware they include for 'free' isn't really free if you end up returning stuff. I'm shipping my order back but they said they'll charge me for the 'free' stuff if that isn't returned too.
 
Last edited:

cornfarmer

Observer
Put in a new PCV valve, changed my oil to 10w30 and added Lucas stabilizer. Going to see if that slows down the oil consumption before looking into the valve stem seals.
 

MoabRefugee

Observer
Dust Intrusion/HVAC Filtration Fix

So after a recent trip that took me through Beef Basin, Bobby's Hole and over Elephant Hill, I decided that I was fed up with the level of dust intrusion. I adjusted all doors and siliconed the seals when I took ownership, so the first suspect(s) were the flow through vents at the rear corners. A little Pajero research, indicated this was indeed a problem with the early production NM's(I have an '01), in addition to the lack of a cabin air filter added to later production.

Long story short, cut into the blower housing and installed a panel of furnace filter media, as a proof of concept, and also because $50 for a Cabin Filter from Australia, seems a wee steep. Decided to do the same thing to the rear flapper vents and to see why I was accumulating "sand painting" levels of particulate.
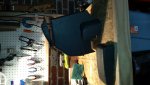
The housing:IMG_1218.jpg

Simply cut a panel of filter media to fit, closed the flap, and taped it shut. The cabin filter from an NL will likely occupy this role, as soon as some more $$ occupies my wallet. I am in the process of sourcing this filter domestically, so stay posted for filtration efficiency info and pricing for what may become a group buy for anyone interested.

So on to the rear, which I presumed to be the real culprit, based upon dust accumulation on the interior grills near the Pass. A/C and subwoofer. Removed the left side first, and, though filthy, the flappers were intact and functional.

The same couldn't be said for the the right side. It wasn't fully inserted, and the lower portion of the frame had been bent, all allowing massive flow by when the interior was in a negative pressure, such as having the sunroof venting, windows open, etc. Two-stroke guys know that a reed cage that doesn't allow the petals to close is no bueno...same case here:IMG_1225.jpg

As a recovering OCD that has recently taken "perfection is the enemy of good enough" to heart, and after contemplating some plastic welding, I decided simply to duct tape the malfunctioning reed cage. We seldom carry passengers, and the 3rd row has long since been removed, so why not. Additionally, as it adds more restriction to passive positive flow, I figured it would further help creating a positive cabin pressure.IMG_1229.jpg

View from Exterior:IMG_1221.jpg
Note that one side of the media has a smoother mesh "face".


I placed filter media both on the interior and exterior. The media I used was very fibrous, and even the smooth side, had individual fibers sticking up enough to prevent the flaps sitting fully closed. A quick trim and everything sealed well. Be certain the flaps lay flush, or you just added filter media for your "open all the time rear vents".

The exterior:IMG_1231.jpg

In position:IMG_1224.jpg

So how does it work? Awesome! Drove an extremely dusty road, located by a local gravel operation back and forth in several states of A/C On/Off, Recirc On/Off, Sunroof, Venting, etc. Windows open creates dust, barely, and even with the roof vented, and driving through my own dust cloud...NO DUST. I may ultimately replace the filter with some material from Unifilter or something similar, but for now, dust free and loving it!

Total time: 1.5 hours, including the road blast. WIN.
 
Last edited:

Forum statistics

Threads
186,716
Messages
2,887,410
Members
227,160
Latest member
roamingraven
Top