Yeti and the Marshmallow

Basement Yeti

Explorer
Thanks. My moms boyfriend advised me not to have the oil pan gasket fixed as there sometimes tends to be seepage and there is acceptable loss of oil between changes. But the mechanics said it wasn't seepage but a full blown leak, and seemed to think it could get worse and if it got worse in nowhere Kansas and I had to make a huge jump outside of my gas budget to some mechanic who would use half ******** labor and parts (To take nearly the entire drive train out to access the oil pan) then it could cost A LOT more and be a lot more of a headache. So I decided to have it done right, with good parts, and good labor.

I got miss Marshmallow back today. They did a great job, and even added the gas they used for a test drive! The new VIN key and cylinder work a treat! I faxed all my invoices to the dealer so here's hoping he'll cover the $350.00 tab for that stuff like the mirror and cylinder, I said I'd cover the unforeseeable stuff like the oil pan and such. It doesn't matter either way.

I'm still sick, my doc wants me to rest, so today I just made Irish soda bread (I'm a teensy bit Irish) and marked some holes for the camera mount on the license plate box, and bulkhead (can't drill until my drill gets here though anyway)

I called up a few junkyards and they all have Astros, so what I want to do is go and pick up a wheel, and plastic for my passenger side pillar. That is, after I get my interior sorted out.

Other than that, just waiting for parts/tools.
 

Basement Yeti

Explorer
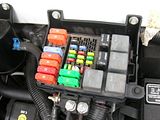
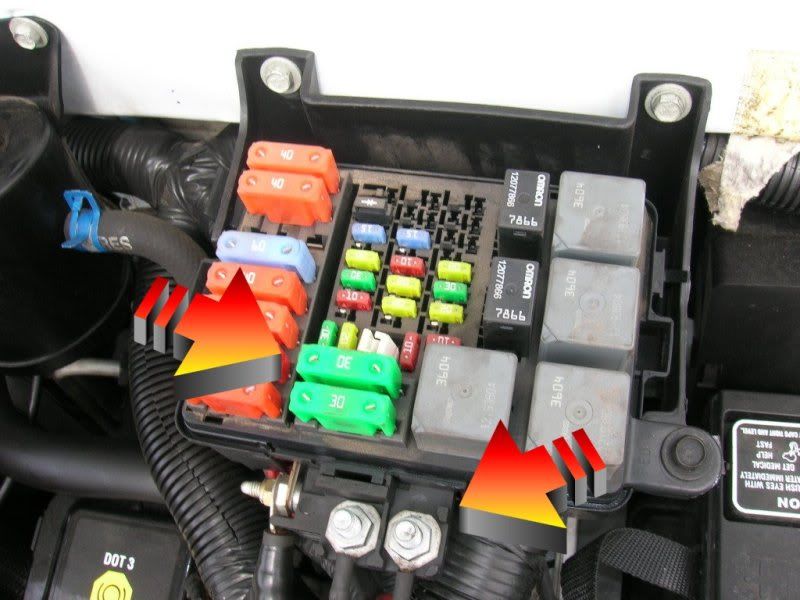
First to Nick, I remembered you had asked for pictures of my fuse box. Sorry man, I totally forgot until earlier. Here ya go.


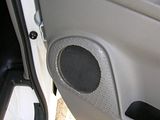
Today I tried to install my new speakers. After finding out the speaker grill didn't come off I tried to pry the door panel off but was thwarted by the c clamp my manual crank window handle and the need for a special tool to remove it and the panel itself. So I hacked the crap out of my speaker grill out of spite.


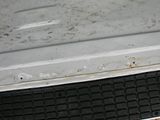
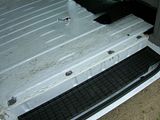
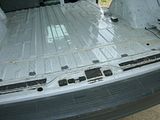
Then I patched the holes in my van.


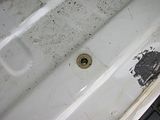
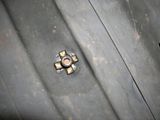
I left these bigger holes because they have some weird threaded collar on them I need to figure out how to remove. But they leak so they need to be removed and sealed.


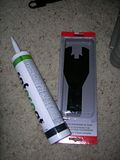
I went downtown to get the c clamp and door puller tool. Found this cool combo tool for 5 bucks. The caulking/insulation is from the store I got my insulation, for holes and stuff.

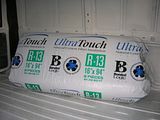
Got some insulation too. :]


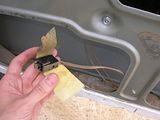
And hey Aaron, look what I found in my door!


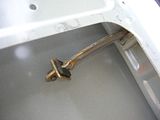
Also found this weird bunch of wires hanging out below my license plate box inside the door.

I tore the rubber doodad off so I can make 2 new sets of holes for my camera.
 

RocKrawler

Supporting Sponsor
The best c-clip door crank removal tool is a shop rag - slide it behind the crank on the open side of the "C" and pull it back & forth, takes the clip right off much easier than the specal tool.
 

Basement Yeti

Explorer
Well, if it doesn't work for getting the c clamp off at least I can use it to pry the door panel off, or to put jelly on my toast...
 

MrBeast

Explorer
melc.jpg


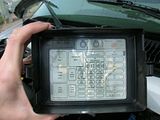
Those 2 green 30 AMP fuses are the fuses that supply the 2 Studs that the second arrow is pointing to.

This is the exact same MELC as is in my HD wrecker, you can upgrade the fuses to 60 amps, and run your accessories off of these studs, but you will want to include seperate fuses down stream to protect the individual devices.

Painless wiring makes a few such nice fuse panels that are not too terribly expensive.
 

Basement Yeti

Explorer
melc.jpg


Those 2 green 30 AMP fuses are the fuses that supply the 2 Studs that the second arrow is pointing to.

This is the exact same MELC as is in my HD wrecker, you can upgrade the fuses to 60 amps, and run your accessories off of these studs, but you will want to include seperate fuses down stream to protect the individual devices.

Painless wiring makes a few such nice fuse panels that are not too terribly expensive.

Thanks. That's pretty awesome. My camera and monitor both have in-line fuses. The camera and monitor together are only 1.5 amps together.

So it's just a matter of disconnecting the negative terminal on my battery, pulling the 30 amp fuses and replacing them with 60 amp fuses, unbolting the two terminals and adding the loop crimps from my camera and monitor to the terminal?

Does it matter which terminal I add accessories to, or can I just add things to terminals within capacity of the extra 30 amps on each side?
 

Herbie

Rendezvous Conspirator
Thanks. That's pretty awesome. My camera and monitor both have in-line fuses. The camera and monitor together are only 1.5 amps together.

So it's just a matter of disconnecting the negative terminal on my battery, pulling the 30 amp fuses and replacing them with 60 amp fuses, unbolting the two terminals and adding the loop crimps from my camera and monitor to the terminal?

Does it matter which terminal I add accessories to, or can I just add things to terminals within capacity of the extra 30 amps on each side?

One terminal is constant-on (direct to battery), the other is "accessory" or "switched" power, and is only "hot" when the engine is running (technically, when the key is in the "on" position). I don't recall which is which, but a quick check with a meter or probe-lamp will tell you. I would only connect stuff like cameras and monitors to the "accessory" connection, otherwise you run the risk of flattening the battery when parked.

Also, I wouldn't mess with the 30 amp fuses if you don't NEED more than 30A! Why buy the big expensive fuses and run in a non-stock configuration if you don't have to?
 

MrBeast

Explorer
Thanks. That's pretty awesome. My camera and monitor both have in-line fuses. The camera and monitor together are only 1.5 amps together.

So it's just a matter of disconnecting the negative terminal on my battery, pulling the 30 amp fuses and replacing them with 60 amp fuses, unbolting the two terminals and adding the loop crimps from my camera and monitor to the terminal?

Does it matter which terminal I add accessories to, or can I just add things to terminals within capacity of the extra 30 amps on each side?

The inline fuses you have there will be fine, just put them in a place where they will stay dry and be easy to get to incase you ever have to check or replace them.

I would sugjest running a piece of #12 from the stud under the dash then using one of those fuse blocks mounded up under the dash, and then run your wires from there.

You can simply run it straight to the in line fuses supplied by using a barrel crimp and a piece of #12 but keep in mind that you will want to add other things later, and that is what the large gage feeder is for.

On my truck I actually ran #10 but that is because I have some items with serious pull. Also I would seperate the studs, use one stud for everything inside of the van, use the other for things on the outside such as offroad lights and what not.

You do not want an external issue, such as a light that has filled with water and shorted out causing you to lose your stereo and backup cam or GPS.
 

Basement Yeti

Explorer
One terminal is constant-on (direct to battery), the other is "accessory" or "switched" power, and is only "hot" when the engine is running (technically, when the key is in the "on" position). I don't recall which is which, but a quick check with a meter or probe-lamp will tell you. I would only connect stuff like cameras and monitors to the "accessory" connection, otherwise you run the risk of flattening the battery when parked.

Also, I wouldn't mess with the 30 amp fuses if you don't NEED more than 30A! Why buy the big expensive fuses and run in a non-stock configuration if you don't have to?

Ok cool. Well I don't know what is currently running on those fuses right now, what if the accessory fuse is right up near 30 amps now? I think that's why he suggested upgrading them.

It's rained the past two days and I haven't been able to work on my van. :/

The inline fuses you have there will be fine, just put them in a place where they will stay dry and be easy to get to incase you ever have to check or replace them.

I would sugjest running a piece of #12 from the stud under the dash then using one of those fuse blocks mounded up under the dash, and then run your wires from there.

You can simply run it straight to the in line fuses supplied by using a barrel crimp and a piece of #12 but keep in mind that you will want to add other things later, and that is what the large gage feeder is for.

On my truck I actually ran #10 but that is because I have some items with serious pull. Also I would seperate the studs, use one stud for everything inside of the van, use the other for things on the outside such as offroad lights and what not.

You do not want an external issue, such as a light that has filled with water and shorted out causing you to lose your stereo and backup cam or GPS.

I don't think I'm following you. I should run a heavy gauge wire from one of the poles to a separate fuse box under my dash and wire all my accessories from there? Then just wire my camera/monitor directly to the fuse box? So adding a bunch of circle crimps directly onto the poles instead of to a separate fuse box isn't a good idea?

Now the wiring that came with my camera/monitor is 22 gauge, I bought 22 gauge wire to wire the system, are you saying I should use heavier gauge wire for my system?
 
Last edited:

MrBeast

Explorer
One terminal is constant-on (direct to battery), the other is "accessory" or "switched" power, and is only "hot" when the engine is running (technically, when the key is in the "on" position). I don't recall which is which, but a quick check with a meter or probe-lamp will tell you. I would only connect stuff like cameras and monitors to the "accessory" connection, otherwise you run the risk of flattening the battery when parked.

Also, I wouldn't mess with the 30 amp fuses if you don't NEED more than 30A! Why buy the big expensive fuses and run in a non-stock configuration if you don't have to?

I wonder if that is an astro only thing because on my truck they are both constant hot.
 

MrBeast

Explorer
Ok cool. Well I don't know what is currently running on those fuses right now, what if the accessory fuse is right up near 30 amps now? I think that's why he suggested upgrading them.

It's rained the past two days and I haven't been able to work on my van. :/

The reason I sugjested upgrading is that in the future I know you are going to have more stuff in the back of the van, like a 12v fridge, lights, a computer ECT that will all be run off of that circuit.

Right now it does not appear that you have much of anything hooked up to it. It appears that there is a wire going from each, but I do not know what they go to, and your van's configuration may be a bit different than my 96 3500HD.
 

Basement Yeti

Explorer
So the wire that came with my pioneer speakers, well I don't know. I tried the 18/22 butt splices I had, the speaker wire from my Pioneer speakers slipped right out, I went down to radio shack and got 22/26 and the speaker wire slipped right out. I broke my door panel getting it off. I took off tons of wire in the door trying to get the crimp to work. I sliced my hand open.

I'm done, I'm bringing it to have the speakers professionally installed. I could go down and buy more stuff but I've wasted enough money, I'm just going to bring it and have someone do it.
 

Forum statistics

Threads
187,255
Messages
2,892,581
Members
228,046
Latest member
evilgirl
Top