You are using an out of date browser. It may not display this or other websites correctly.
You should upgrade or use an alternative browser.
You should upgrade or use an alternative browser.
Yetti's 2007 Outfitter Apex project.
- Thread starter Pacific Northwest yetti
- Start date
Pacific Northwest yetti
Expedition Medic
Jack, I am not so fond of them myself. Although, the paint came off easier then the dang duct tape residue.
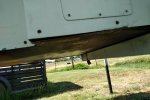
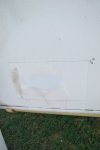
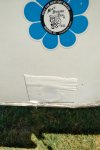
You can see the dark area behind the tape sealant, as the areas that were open. The first is behind the cab and was the biggest, no water damage under/behind it though. ( that I could find) and a few more areas where I sealed exterior holes,
You can see the rub areas on the edge of the fiberglass tub, and some water damage to the first few layers of fiber board.
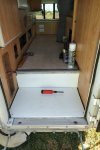
The new floor, platform. I will add some edging/sealant to clean it up. It looks way better though, the fresh tank drain valve i " built" to replace the old exterior plastic one.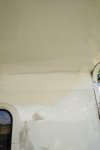


Pacific Northwest yetti
Expedition Medic
Pacific Northwest yetti
Expedition Medic
I will also say, coming back from Portland with it and through the gorge my truck handled it well, had no problem maintaining 75, However i averaged about 8mpg doing that. Which is what i expected. about 45#s in the rear airbags worked well. Ill just need to figure out a better mounting system, and build some folding wood sides to match.
BackBeyond
Member
It is sad that someone would let a camper deteriorate like that.
Pacific Northwest yetti
Expedition Medic
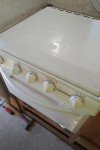
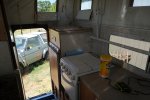
It really is, they just never took care of it. The stove, was never cleaned. The windows I thought were limo tint, nope just filthy. The definition of rode hard and out away wet, in this case no longer in reference to horses.
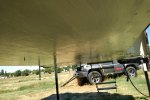
I coated the entire under body with a rubber sealant, turned out great; unless you were that one big horse fly. I will add cleats ( so it does not sit on the fiberglass tube) and on the overhang I will add another coated piece of plywood for extra support and protection.
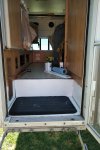
I have a little more clean up, to do in the entrance. But all the white is rubber coated paint, and I may do the same about 3 inches around the entire bottom of cabinets. I have yet to hear back from the mfgr, about the replacement cabinet doors.
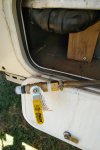
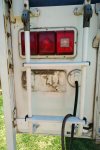
They plate had been secured using anti tamper screws, it had obviously never been removed nor washed. I had to grind a grove in the heads so i was able to remove them with a Flathead and drill.
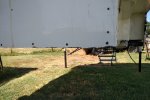
where, they had punched through the rear wall with the ladder I sealed the holes with silicone and covered with flex seal tape, then bolted and sealed some flatiron to it. The flat iron will distribute the weight and should prevent any future problems, from becoming a weak spot. It did not turn out as well as I would of liked though, but it fully functional. I will have to replace some of the rungs.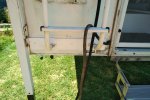
I coated the entire under body with a rubber sealant, turned out great; unless you were that one big horse fly. I will add cleats ( so it does not sit on the fiberglass tube) and on the overhang I will add another coated piece of plywood for extra support and protection.

I have a little more clean up, to do in the entrance. But all the white is rubber coated paint, and I may do the same about 3 inches around the entire bottom of cabinets. I have yet to hear back from the mfgr, about the replacement cabinet doors.

They plate had been secured using anti tamper screws, it had obviously never been removed nor washed. I had to grind a grove in the heads so i was able to remove them with a Flathead and drill.

where, they had punched through the rear wall with the ladder I sealed the holes with silicone and covered with flex seal tape, then bolted and sealed some flatiron to it. The flat iron will distribute the weight and should prevent any future problems, from becoming a weak spot. It did not turn out as well as I would of liked though, but it fully functional. I will have to replace some of the rungs.

Pacific Northwest yetti
Expedition Medic
Last night I installed the elevator bolts in the deck of my flatbed. 3/8. double nutted with washers on both sides for the torklift fast guns. The new ladder rungs ill put in today, and load it on my truck for NWOR. I also installed " cleats" to the bottom so the weight of the camper is not sitting on the edge of the fiberglass tub. No pictures of that yet though, or the elevator bolts.
I added eternabond tape as an edge protector to seal the lip between the fiberglass and rubber coated wood.
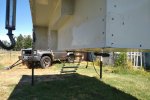
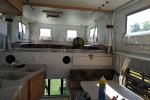
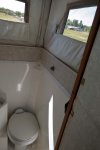
These outfitters have hard walled bathrooms. At some point the wall started to cut into the canvas sides, the previous owner just kept layering it with rubber patch kits as a rub point. Im unsure if I will keep the hard wall or not, but clipped the corner off with a skill saw so it wont rub anymore, im trying to type match the edging for it. The rear roof seems to be about 1/2 inch further to the driver side when up then it should be.
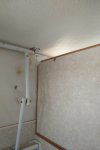
Id eventually like to get the entire lift mechanism re painted, so far ive only done a little on the places with the most rust. Lots to still do though, and im hoping to install the battery meter tonight as well as one of the event covers.
I added eternabond tape as an edge protector to seal the lip between the fiberglass and rubber coated wood.

These outfitters have hard walled bathrooms. At some point the wall started to cut into the canvas sides, the previous owner just kept layering it with rubber patch kits as a rub point. Im unsure if I will keep the hard wall or not, but clipped the corner off with a skill saw so it wont rub anymore, im trying to type match the edging for it. The rear roof seems to be about 1/2 inch further to the driver side when up then it should be.

Id eventually like to get the entire lift mechanism re painted, so far ive only done a little on the places with the most rust. Lots to still do though, and im hoping to install the battery meter tonight as well as one of the event covers.

Pacific Northwest yetti
Expedition Medic
Replaced the burnt out old bulbs with LED- should not have to worry about them again. They had moss growing inside 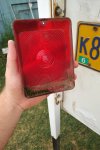
This came with Torklift fast guns, the old owner had them tightened down way tighter than they ever should of been.
https://www.torklift.com/
So I called and asked if i could buy just the springs and rebuild them, explaining that i purchased it used and the springs no longer held any elasticity.
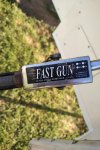
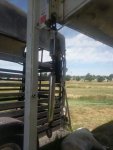
The guy I talked too, was Jordan; which is funny as when i called back I asked to speak to Jordan. When she asked whom may I say is calling, I also said Jordan. ( my name) this caused lots of giggling from her end.
Jordan Explained that he was sorry as I could not purchase springs to rebuild them, but if i sent in pictures and a video of the springs they would warranty them FREE OF CHARGE!!! they are sending all new ones to me, and I will send the old ones back once received. Talk about amazing customer service, and friendly staff. I will be a torklift customer for life now, they are located in the PNW- Kent Washington.

This came with Torklift fast guns, the old owner had them tightened down way tighter than they ever should of been.
https://www.torklift.com/
So I called and asked if i could buy just the springs and rebuild them, explaining that i purchased it used and the springs no longer held any elasticity.


The guy I talked too, was Jordan; which is funny as when i called back I asked to speak to Jordan. When she asked whom may I say is calling, I also said Jordan. ( my name) this caused lots of giggling from her end.
Jordan Explained that he was sorry as I could not purchase springs to rebuild them, but if i sent in pictures and a video of the springs they would warranty them FREE OF CHARGE!!! they are sending all new ones to me, and I will send the old ones back once received. Talk about amazing customer service, and friendly staff. I will be a torklift customer for life now, they are located in the PNW- Kent Washington.
jscusmcvet
Explorer
Looks like you are knocking things out as needed. I admit I laughed out loud when I saw the moss in the tail light  Post some pictures of it mounted on your truck.
Pacific Northwest yetti
Expedition Medic
I am, actually making quite a bit of progress. At NWOR I added a better voltage meter, that will eventually be wired behind an switch as right now its always on. Before we left I added a vent cover up top whilst loading the kayaks. I have a few pictures but they are not great.
One of the reasons I originally had decided on a Northstar VS Outfitter was the outfitter has a basement that is almost 8 inches deep. So on my flat bed that added 8 inches of height to the already higher deck of the flat bed. So I have WAY more room between the top of the cab and the camper then I would like. I will look into some sort of- well I dont know yet.
I will build some sides specifically for when the camper is on, most likely that fold out like " Tables". Right now i only have the 1/2 sides on which does not help the " goofy" look.
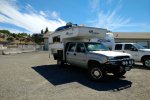
The truck handles it really well, about 40#'s in the airbags and the icon stage 2 seem to match well.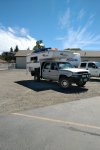


Pacific Northwest yetti
Expedition Medic
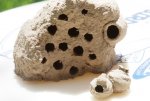
It currently has a 3 way rv fridge, that is giving me nothing but troubles thus far. Well, it could be worse. The gas worked when I was at work and up until I left when I switched it to 12volt, once I got to overland rally the propane would not start up, it was sparking when it was supposed to. But would take a long time to light, at rally I pulled it and got 4 fist sized mud dauber nests out from around it. It would then light but only run for a few hours and shut back off. I was going to plan on keeping it and replacing with 12volt when it kicked the bucket, that may end up being sooner rather than later. I think maybe just the burner assembly and relight have built up, its safe to say they obviously never cleaned that either.
haha, some of the stuff is just ridiculous. For example one of the reasons he was selling is he could not get the rear door to seal, it took me one look and my leatherman, to move the latch plate " back" so the door shut tight again.......

Looks like you are knocking things out as needed. I admit I laughed out loud when I saw the moss in the tail lightPost some pictures of it mounted on your truck.
haha, some of the stuff is just ridiculous. For example one of the reasons he was selling is he could not get the rear door to seal, it took me one look and my leatherman, to move the latch plate " back" so the door shut tight again.......
Pacific Northwest yetti
Expedition Medic
locrwln
Expedition Leader
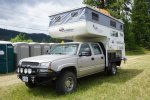
The truck and camper combo looks great. I agree that the space between the cab and camper is pretty large. Makes for a serious wind catcher. I don't care for basement model campers for that very reason, but you got a deal, so sometimes you have to accept the good with the bad.
Jack
Jack
Pacific Northwest yetti
Expedition Medic
Thank you Jack! It really was a trade off,and I can get a lot of fuel for the money I saved. I was able to average 10mpg if I kept it at 70ish. I never had any trouble with it pourposing except for once, but I was driving against 30+MPH cross and head wind the entire 4 hour drive. I'm thinking some sort of " V" under it to direct air flow. But I don't want a permanent install either. I have not quite figured it out yet.The truck and camper combo looks great. I agree that the space between the cab and camper is pretty large. Makes for a serious wind catcher. I don't care for basement model campers for that very reason, but you got a deal, so sometimes you have to accept the good with the bad.
Jack
Similar threads
- Replies
- 4
- Views
- 1K
- Replies
- 5
- Views
- 3K
- Replies
- 33
- Views
- 10K
- Replies
- 9
- Views
- 4K
Forum statistics
Members online
- Desertdave
- mhiscox
- SVTRIT
- Jack Mac
- granny_gear
- Umbrarian
- JWag21
- RealTruck
- dstefan
- NOPEC
- SDDiver5
- Jtvs
- warrpath4x4
- Shek
- Gabe357
- twowheels19
- 1Goat
- Voayageue
- mssyrjan
- PDXSting
- Smksignals
- bwdmax
- luthj
- Sid Post
- NikonRon
- Leighsjor
- wackyhacky76CO
- White Dog
- jgdisco2
- mark5280
- OVRLND
- jkexp
- H3LV
- shopowner93
- jaywo
- KirkL
- 67390FE
- gluceth
- Scott Lee
- deeppurpleman
- bjorn240
Total: 1,860 (members: 47, guests: 1,813)

