2001 R50 Pathfinder Build-up.

wreckdiver1321

Overlander
My GF loves all of it. She likes to backpack, hike, and be outside. I'm working on getting her into the offroad/overland scene too. She's enjoying it a lot so far. Whenever I say, "we should drive here," she just says, "okay, when?" She also totally gets why I mod my truck. She actually encourages it. :) I'm a lucky dude.
 

Weekender41

Ready to Learn
My GF loves all of it. She likes to backpack, hike, and be outside. I'm working on getting her into the offroad/overland scene too. She's enjoying it a lot so far. Whenever I say, "we should drive here," she just says, "okay, when?" She also totally gets why I mod my truck. She actually encourages it. :) I'm a lucky dude.

That's great to hear man, and it looks like you have had some fun snow wheeling! and for the vehicle rescues, keep it up :)

Small Updates
So there has been very small changes but they have made this vehicle better for me. No pictures of them because they are simple and... well you will understand.

First up, a while ago I cut the bottoms out of my air intake reservoir to increase air going into the air intake. Sounded cool at the time. It was dumb. Anyways I basically just used chaulking adhesive and a plastic cap and but a cover over the reservoir hole and cut off the entire reservoir. If you plug the main hole there is literally zero reason to keep it.

Next was to change my steering wheel cover. Yes this sounds dumb but I have catalogued pretty much everything since then so why not. Anyways the one I had had this little chrome looking strip that lined up perfectly with the holes in the steering wheel so I got it. Yeah well when the sun hit it .... reflection was terrible so I got an all black one. Much better.

Following that I tugged a FedEx truck out of a drift. He was stuck and trying to unstick himself by going downhill so I figured the pathfinder could yank him out. Sure enough I attached the 40K lbs tow rope (overkill yes but I never get to use it so I had to) with a shackle through my tow ring in front and he put the condura eye of the end around his square bumper and pop, out he came. Easy peasy. Well I had to mess with that shackle a bit to tighten it because of how the bumper is molded around the tow ring. And simply because I had free time and a nice little saw I went about moving the edge of the bumper further up. Basically just cut about 3 inches of plastic off the bottom in between both the tow rings and gave it a nice rounded look. A little stupid hot water and some sanding wheel and it looks factory.

Upcoming Stuff
-Well the appointment with CBI offroad is JAN 22. Rear bumper will be on whenever that is complete.
-Found some metal jerry cans at the unit and asked if I could have them (the do not use this style on the HMMWV anymore) so I waited until they went to trash em and now have two 20L cans that will go on the rear bumper mount.
-Ordered special bolts from Baller-Bolts to use on my front skidplate. This was because taking off a normal bolt inside that fourtreks washer is damn hard and so I got some bolts that have a button head to fit inside it and are tightened with an allen head so no worries!
-For Christmas my gf got me a Garmin Nuvi 500 with lifetime maps and the topo 24K software for ID, MT, WY, ND, SD, MN. Unfortunately she is not letting me mount it early so the gazetteer will do for now. It has some sweet mount as well.
-I have a new CV axle for my driver side since my outer boot is blown. Will install next week.
-Also bought a new ignition coil from partsgeek. At 35 bucks I misspoke when I told Stioc the price before (my apologies). That will go in next week as well.

Other then that it is all groovy. Getting some backroad time tomorrow out by rawhide buttes road and surrounding area. Without a front skid plate (waiting for bolts...grrrr) I wont be going off road too much, just the easy forest service roads and backcountry roads. Should be fun either way.
Happy Travels
 

Weekender41

Ready to Learn
Finally! Someone who agrees! I think it looks dorky on pretty much everything but camel trophy trucks and the other kind of trophy truck haha Especially the big round ones. An LED light bar is more passable, but integration is usually not clean enough for my liking.

Yeah we are definitely a rare exception in ExPo though haha
 

Weekender41

Ready to Learn
Soo Im kind of excited, Yesterday I went into the garage and my dad had my front bumper off and was measuring stuff... Asking wth was going on he said 'your mother is getting me a welder for xmas, I just know it.' so....? 'so that means im going to make a front bumper for this thing so that damn winch can get out of my garage, and you can finally practice welding because right now you are terrible.' haha :) so I showed him how the TAG bumper attaches with two in-line bolts per side and I showed him how the tow hooks are on the same flat plane as well so using the 4-5 bolts per side and cutting off the frame horn looking things it'll be pretty easy to have a solid attachment. I held up the winch so he could see the space a bumper has to stick out and I also showed him the dumb large washer fluid reservoir. He suggested installing a smaller one around the pump already there (possibility). He said after I get my rear bumper from CBI on and the weather starts improving (although it is about 50 degrees right now) we can start making a mock up and get this thing finished. Im thinking now ill start sticking things I want in the vehicle in the garage so my dad gets all mad and motivated to get them on my vehicle and off his floor. Good father-son times.
 

Rebelord

Semper Fi
A cheater way, is to pick up a XJ winch bumper and do the slight modding it needs to fit and fabing up extra mounts to reach down to where the tow hooks attach.
 

Weekender41

Ready to Learn
A cheater way, is to pick up a XJ winch bumper and do the slight modding it needs to fit and fabing up extra mounts to reach down to where the tow hooks attach.

I did read theexbrit did that over on npora, unfortunately saw no photos so idk how it looks (I forgot about it until you mentioned it) my only issue with that is the xj is very boxy and old school styling. Many of the bumpers are very simple and boxy. I don't think that would complement the pathfinder very well and I want it to share some similarities with the rear bumper. So when the rear is complete I will definitely post photos and build something that would share aspects with it. If I were to go the xj route I would pick the smittybilt xrc bumper for two reasons: Not a rectangle tube, I have their winch haha. Honestly though building one with my dad will cost about 20% of buying one.

I am glad you mentioned it, I totally forgot about that.
 

Allof75

Pathfinder
I agree, I like the concept, and it seems like a relatively easy way to go for a winch bumper, but I personally don't think it would look that good on the post facelift pathy. For me, I love the ARB look, but lack the $$$ hahaha
 

Rebelord

Semper Fi
I agree the the Smittybuilt one would probably be best suited. However I dont have a welder nor know how to weld. So picking one up for ~400 is fine for me.
Have you made some good sliders yet? That would be a good project.
 

Weekender41

Ready to Learn
I agree the the Smittybuilt one would probably be best suited. However I dont have a welder nor know how to weld. So picking one up for ~400 is fine for me.
Have you made some good sliders yet? That would be a good project.

That would be a good project but with out a bender they would be square on corners :) haha that would actually be some good practice! Tube stock is way cheap and thats good flux core practice! Hmmm. Luckily rocky road outfitters makes pretty good sliders that i have. I will be welding a skinny half circle to them to the back for a step or kick out. The only thing i dont like about the rocky road sliders is how slick they are (i put skateboard grip tape on right below door which was perfect) and how they attach with only a flat piece along the unibody frame rail. I would want a ' |_| ' looking bracket where the bolt can just go through bracket and frame and tightening it basicall goes through sub frame amd clamps down against it. ' |=| ' if that makes sense. Fortunately these do seem very strong as is.
 

Weekender41

Ready to Learn
Tired of Waiting

Well CBI told me they could work on my vehicle if they had time in between other customers whose projects were going longer than expected, they would also need the pathfinder to be in their shop the whole time. Eh, scheduled this back in late Oct for the end of January so I don't really want my vehicle to be an after thought project. Maybe that is just me but I also cant go without the vehicle that long. Anyways so I decided to make my own rear bumper. Here goes.
The following pictures will all have been taken from my iphone so the quality is not the greatest but I will use the better camera later on.

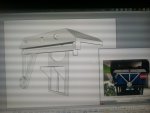
First was to use Google Sketch-Up for the basic design. Simple idea to have a single swing arm that could hold the 32" tire and two 20L gas/water containers. Sounds easy enough. Sketch-Up is not AutoCAD but it gets the job done.
iphone photos 424.jpg
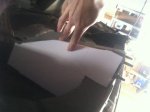
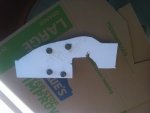
After that was to buy 3/16" foam board from an office supply store. This stuff is more stiff than cardboard and is a perfect thickness. First I made the mounting wings that attach with 4 bolts to the subframe on each side. It will be easy to add the tabs later if I need more bracing but it seems solid.
iphone photos 426.jpg
On the photo above you can see the bolts sticking out and where the foam ends. So I cut the ear that the two bolts were on so the subframe is smooth all the way to the end of the rail. When I finished making the mounts in the final design in foam with the bolt holes lined up I noticed part of the vehicle sheet metal would mean I would have to cut a slot in the mounting plate to go around it. Well that reduces strength big time so I just just a little 1" x 1/4" chuck out right in-line with the frame rail. No biggie as it will be behind view anyways.
iphone photos 436.jpg
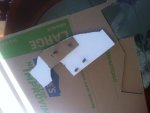
As you can see in the photo above, past where the curve is the mount has to stick farther out. Unfortunately this is because the rear hatch of pathfinders have a very rounded shape. To be able to have a swing arm go vertical with no problems to mounts have to extend the bumper out about 4". That's also why there is a curve to the mounts.
next was to space the two mounts out (which is exactly 36") and mock up about the size of the bumper. To clear the spindle from the hatch and have it extend to the edges of the vehicle, the main bumper body (which I am using 3" x 4" x 3/16") has to be 62" or longer. If you wanted a stubby bumper then that doesn't matter but with how a pathfinder flows, a stubby bumper would look out of place. Anyways the subframe is not exactly flat as I found out so I had to make a 3/16" shim to fit the gap. Too easy
iphone photos 437.jpg
Next was the mock up
iphone photos 429.jpg
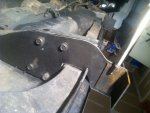
After that was to just transfer it to metal and try it out. 3/16" L brackets will be welded to the mounts then the bumper will be welded to the brackes. This ensures the largest surface area of weld. The mounts are 1/4" and the shim is underneath but it is 3/16". The l brackets are clamped on right now as it is of utmost importance that they are completely perpendicular to the ground so when the bumper is welded onto them it is very squared up. I don't want any tilt at all as going backwards would make the swing arm hit the hatch, and going forward would look ridiculous. Anyways here is the mounts and brackets
iphone photos 440.jpg
iphone photos 439.jpg
I have the main bumper body sitting in the garage right now with the different stuff soap marked into it but tomorrow will just be putting the l brackets onto the mounts and then I can worry about the bumper.

The bar on the ground is my front sway bar, that is getting put back on and I think my pathfinder is starting to show signs of the death wobble so I will put in the order for the rear trailing arm bushings from 4x4parts because right now, to be frank, the pathfinder is sketchy to drive on the highway in wind. It goes back and forth from side to side in a bad way. I am not sure what to check on the trailing arms but I can grab them and rotate and move them around by hand really easily so I am hoping the bushings will help. Any input would be great. NPORA had ways to fix the issue put no one had a clear explanation of what the death wobble was (that I could find, the search bar eludes me)
 

Weekender41

Ready to Learn
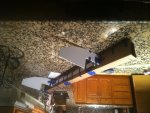
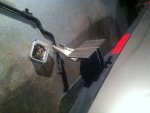
Okay so they are all upside-down.....well that's never happened before. I will look into fixing them tomorrow morning, my bad.
 

Allof75

Pathfinder
Looks great! And very sorry to hear about the death wobble, I have the same issue with the trailing arms' movement, but don't have the wobble. I'm having trouble finding the right terminology to explain, but here's a link to the death wobble thread. It's the lower control arms' bushings which cause the issue.
 

Forum statistics

Threads
186,880
Messages
2,888,969
Members
227,437
Latest member
Top Jimmy
Top