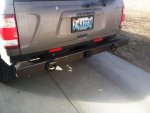
2001 R50 Pathfinder Build-up.

Weekender41

Ready to Learn
Okay so that last part might be confusing.... You guys will see as I begin to build it. I will just have to wait for the next paycheck to order the spindle and metal for the swing-arm. If you want any drawings for clarifications just let me know. I will post up my drafting pics next.
 

Weekender41

Ready to Learn
It must be fun to do things by yourself, but I'm too lazy for that :ylsmoke:. Really nice work with your pathy ^_^.

I just hate that the pathfinder has turned into a momfinder in 2013! Pure insult for these cars :(

Greetings :)

haha yeah the new ones are frightening minivan looking!
 

Weekender41

Ready to Learn
Jumbled Drafting Pics

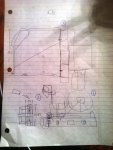
Okay before you judge too bad, you have to understand that when a mechanical engineer and an architectural engineer brainstorm... you get some crazy napkin sketches. I will number these so they can be explained.
Okay so 1, this was a sketch of the bracing design for the tire, it shows how we were showing 2 tires are sometimes attached. The circle around the left part of the bumper shows where I cut it off and how the latch wouldn't be on that part so the welds didn't need to be great. This sketch is probably the one that will be closest to the final even though it is very jumbled. Number two is very hard to see but to the lower left of it shows the length of a jerry can and how I will be making a square on both sides of the swing arm to attach the AT jerry can mounts to so the cans will be directly over the swing arm to give the most support. Number 3 shows the jerry can holder... its really bad so don't try and decipher it. HAHA wow these are cluttered! Its amazing I can recall what they are! :Wow1:
013.jpg
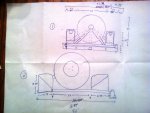
This one is pretty easy. Nothing is to scale but all the measurments are accurate. This was to see how to mount the jerry cans. Found out that there is no way to mount the cans on their sides (this lead to making the square on both sides of the swing arm to support the cans) The final design will be 2 Adventure Trailers can mounts right next to each other close to the latch.
014.jpg
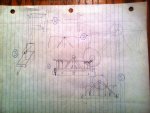
Number one is what I had originally thought for how I wanted it. The tire far to the right was just to explain something. Number two is how the arms would have to be to make more since and easier cuts since the design from number one was over complicated and had too many gussets. Number 3 was me trying to explain to my dad how the jerry can mount looks. Number four is how the plate the tire bolts to needs to be made. I was thinking the right, but that wouldn't be as strong as how my dad showed (the left) so we are going with that. Number five was what I thought would be perfect. Big strong arms for the tire. The gussets for the arms would also serve to bolt the can mounts to and everything would be great. The problem is to fit that with the jerry cans.... the tire would be over the roof line haha.
015.jpg
The reason I am posting this is to show anyone who wants to fabricate something themselves, that the design will change about a thousand times. Every piece has changed on this thing except the side of the vehicle I wanted the hinge and the hitch sleeve. There is a lot involved with a rear bumper but after the building today and the new idea to use the linch pin and stud to secure it, I think we are finally at a final version. I don't have 32" tires to mount up so I will have to use cardboard to space things out and just remember to give 10" of clearance from the tires mounting plate to the rest of the swing arm. But I learned that with this, taking things one at a time and being willing to change is a GOOD thing. Im hoping to have the wings done tomorrow and the rest will have to wait for about 2 weeks :/
Sorry im long winded.
Cheers!
 

Weekender41

Ready to Learn
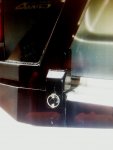
THIS! you can not believe how long this took to find. Hope it helps. This is similar to how I will be securing mine
016.jpg
 

stioc

Expedition Leader
Looks fantastic! great job on it so far. Can't wait to see the finished product. are you using a 4x4 tube for the main bumper body? 1/8"?

Oh and keep those frame mount templates for me ;)
 

Weekender41

Ready to Learn
Recovery Points Made

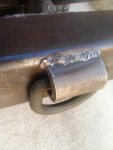
Today I got the recovery rings welded on. Many people use the clevis mounts so they can unscrew the rings when not in use. This would have been the preferred method for me but those get stolen here ALL the time if you leave the clevis in :( so I just decided not to deal with it. So I am stuck to this method because I really don't feel like having to replace them. This bumper isn't pretty...yet (ok well it may never be) but it is very sturdy and functional so these 15000 lbs mounts are fitting.
004.jpg
On the passenger side the weld was going fine then randomly the welding tip started melting...never had that happen before so I will have to grind that down to nothing and redo it ... ugh!
003.jpg
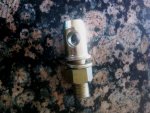
As for the linchpin attachment I mentioned last night, here is the part I will use. A 1/2" hole is drilled through one side of the main bumper and this is bolted in. The tip will stick out 1 1/4" and the hole is about 1/2 inch from where the bumper is. This hole fits the 7/16" linch pin really well. This was the most practical way to close the swingarm.
002.jpg
005.jpg
I held off on welding the wings on until this thing is fully done right before paint. I learned the hard way that cosmetic enhancements should be made last.
 

wreckdiver1321

Overlander
Hey it's definitely getting somewhere!

You by chance ever do any wrecker work? Nobody else refers to them as a "clevis." I have a buddy that was part of a wrecker crew for a while, and he still gives me crap about it even 5 years on. Technically, they are called "bow shackles." :D

He also looks like he wants to ********** me when I say "rattle gun."
 

Weekender41

Ready to Learn
Hey it's definitely getting somewhere!

You by chance ever do any wrecker work? Nobody else refers to them as a "clevis." I have a buddy that was part of a wrecker crew for a while, and he still gives me crap about it even 5 years on. Technically, they are called "bow shackles." :D

He also looks like he wants to ********** me when I say "rattle gun."

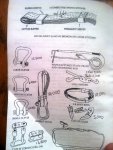
ha-ha yeah I don't doubt I call many things by an incorrect name. I knew these as clevis because with an air assault unit that is what they are called. Then again it may be slightly different.... but I have slung loads using a "bow shackle labeled" WARN haha.
This is from our handbook and they drill these names and load limits into your head.
006.jpg
Anyways, getting somewhere.. ha-ha yeah you could say that. As Shanfari noted...it looks very basic. But once the spindle comes in I can finish up the swing arm and start making it look better. Good thing I have lots of flap discs so I can reweld and grind until I get the look I want. I am not sure how to add style to it quite yet though. Usually bumpers are made out of pieces angle welded to give a more curved look. With how cheap the tube I got was I went with that and so adding curves to it is challenging. It may come down to the very end where I add the wings to see if I can clean it up in other ways.
Question here.... If I were to add a flat plate from the top of the bumper to the body of the vehicle, would that help it look more complete? Once everything else it built I will look into this but I believe it would look better but when the swing arm is closed, it wouldn't be noticeable anyways. Also it may be easy to get mud trapped up underneath it. Doing this would however make it much easier to make the wings more sturdy.
Can anyone post a picture of an aftermarket bumper they have and show a close-up of how it gets close to the vehicle's sheet metal?
 

Weekender41

Ready to Learn
I don't know that I'd bother. But then you would still have that gap, and that'd bug me too.

Right? It looks ..I don't know a good adjective but good is not it and something that I have built I want it to look good. Just have to wait and see I suppose. I mean my drawers don't even have a good fascia on them so maybe this will just add to the "hey I didn't feel like spending more money and it works so....yeah" look I have going on. :victory:
 

wreckdiver1321

Overlander
Right? It looks ..I don't know a good adjective but good is not it and something that I have built I want it to look good. Just have to wait and see I suppose. I mean my drawers don't even have a good fascia on them so maybe this will just add to the "hey I didn't feel like spending more money and it works so....yeah" look I have going on. :victory:

Haha I've seen my fair share of that on this site. Yours is among the best. :sombrero:
 

Weekender41

Ready to Learn
Haha I've seen my fair share of that on this site. Yours is among the best. :sombrero:

I will accept that with... pride haha. That is okay. The rear drawers cost about $55 total because I didn't use nice handles and drawer slides, with that said they still work great. CBI quoted me $2350 (at first it was 1500) for the rear bumper. By the time this is over I will have put approx. $300 into it. I will eventually buy a jeep and spend money for the very best (for my purpose) to put on it but the pathfinder is this stupid reliable beast that I am upgrading to find out what I like in terms of upgrades. Plus, if you knew me then function over form has always worked best. If you saw my old truck you could get an idea. She aint pretty... but with 277xxx miles and still getting 19.5 mpg and has not ONCE failed to start or run, im hoping the pathfinder will be the same. Ill spend good money on tires :elkgrin:
Haha if the Nissan expo group ever had a MOAB meet or something of the like, mine aint winning the beauty contest :victory:
 

Weekender41

Ready to Learn
Mud Flaps And Tire Info

So neat little WY doesn't require mudflaps..but I always feel like its nice to have them (shoot I made the pathfinder's stock rear mudflaps longer). Anyways is there a good way to mount them so they can flex forward/backwards? Almost like they are held on by strings... Im not attaching them with strings (im not even that ghetto) but any ideas?

Also I am looking for tire suggestions as my local big o will be doing their very short lived buy 2 get 2 sale in about two months and that would be the absolute best time to get the set of 5. I have been looking at the Cooper AT3's because of the praise that was given by Scott Brady. Also on the list are General Grabber AT2 (I hear they are not so great in snow though so eh..) and the third is Cooper ST Maxx. For reference I am running Cooper Discoverer M+S
2-x-225-75-r16-115q-cooper-discover-m-s.jpg

which are not very aggressive looking at all but their traction on snow and ice is incredible. They are chipping apart on the outside of the tread and the sipes are getting filled with little rocks and becoming less effective. They have 30k miles on them and once the new tires are on they will possibly be used as winter tires.
What I am looking for in a tire is a stout tread and sidewall with good traction on snow and ice in case I don't run the current ones as winter tires. The tires are used 80% Paved 20% Everything else. I want an AT tread due to the better highway and drivability. Size is 235/85R16 because that size looks good so a tire that is very close to actually measuring to that size would be nice! I am planning trips to grand canyon, moab (but not driving on the tough trails, just the scenic stuff) lots of time in different national forest and going back to Ouray and Durango area for more of the San Juans.
Any and all input is appreciated!
 

Forum statistics

Threads
186,884
Messages
2,888,977
Members
227,437
Latest member
Top Jimmy
Top