Blender, My LX450/FZJ80 + FJ45esk + GM + Land Rover crazy concoction

Metcalf

Expedition Leader
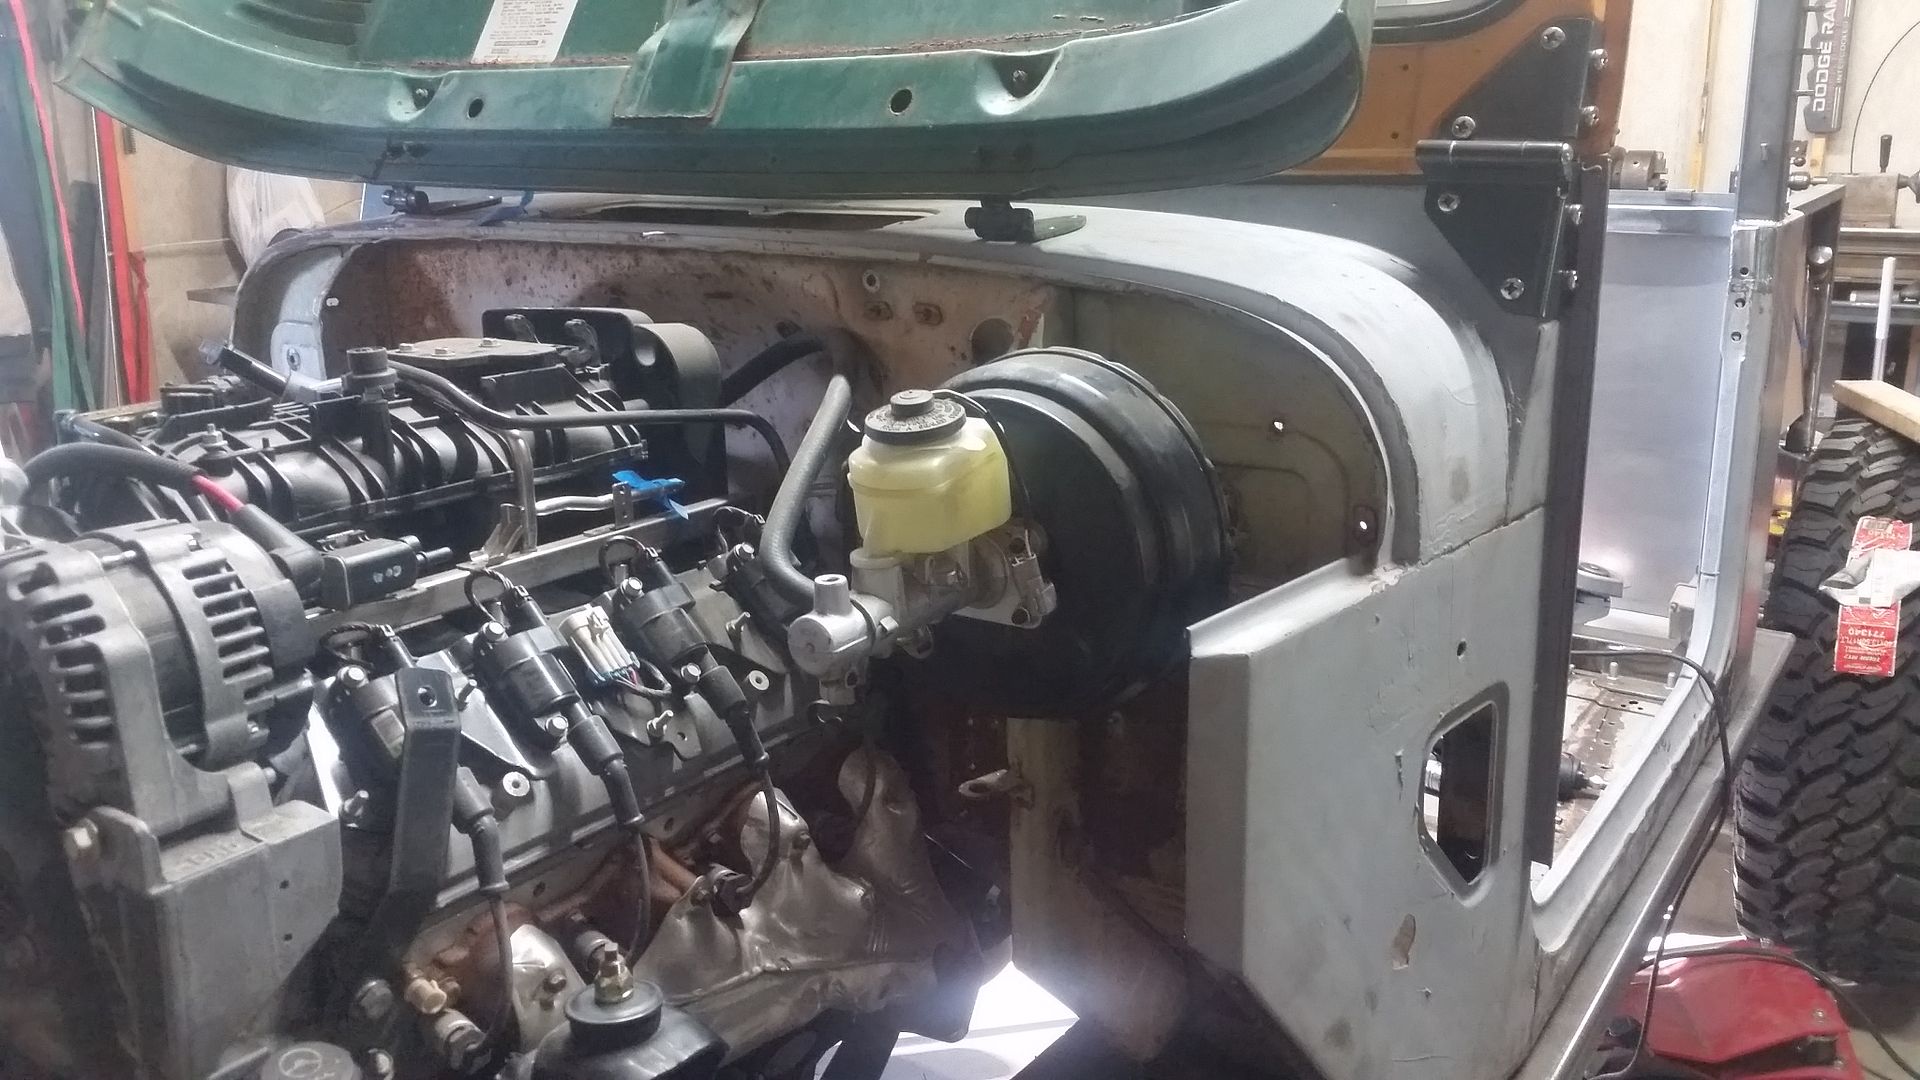
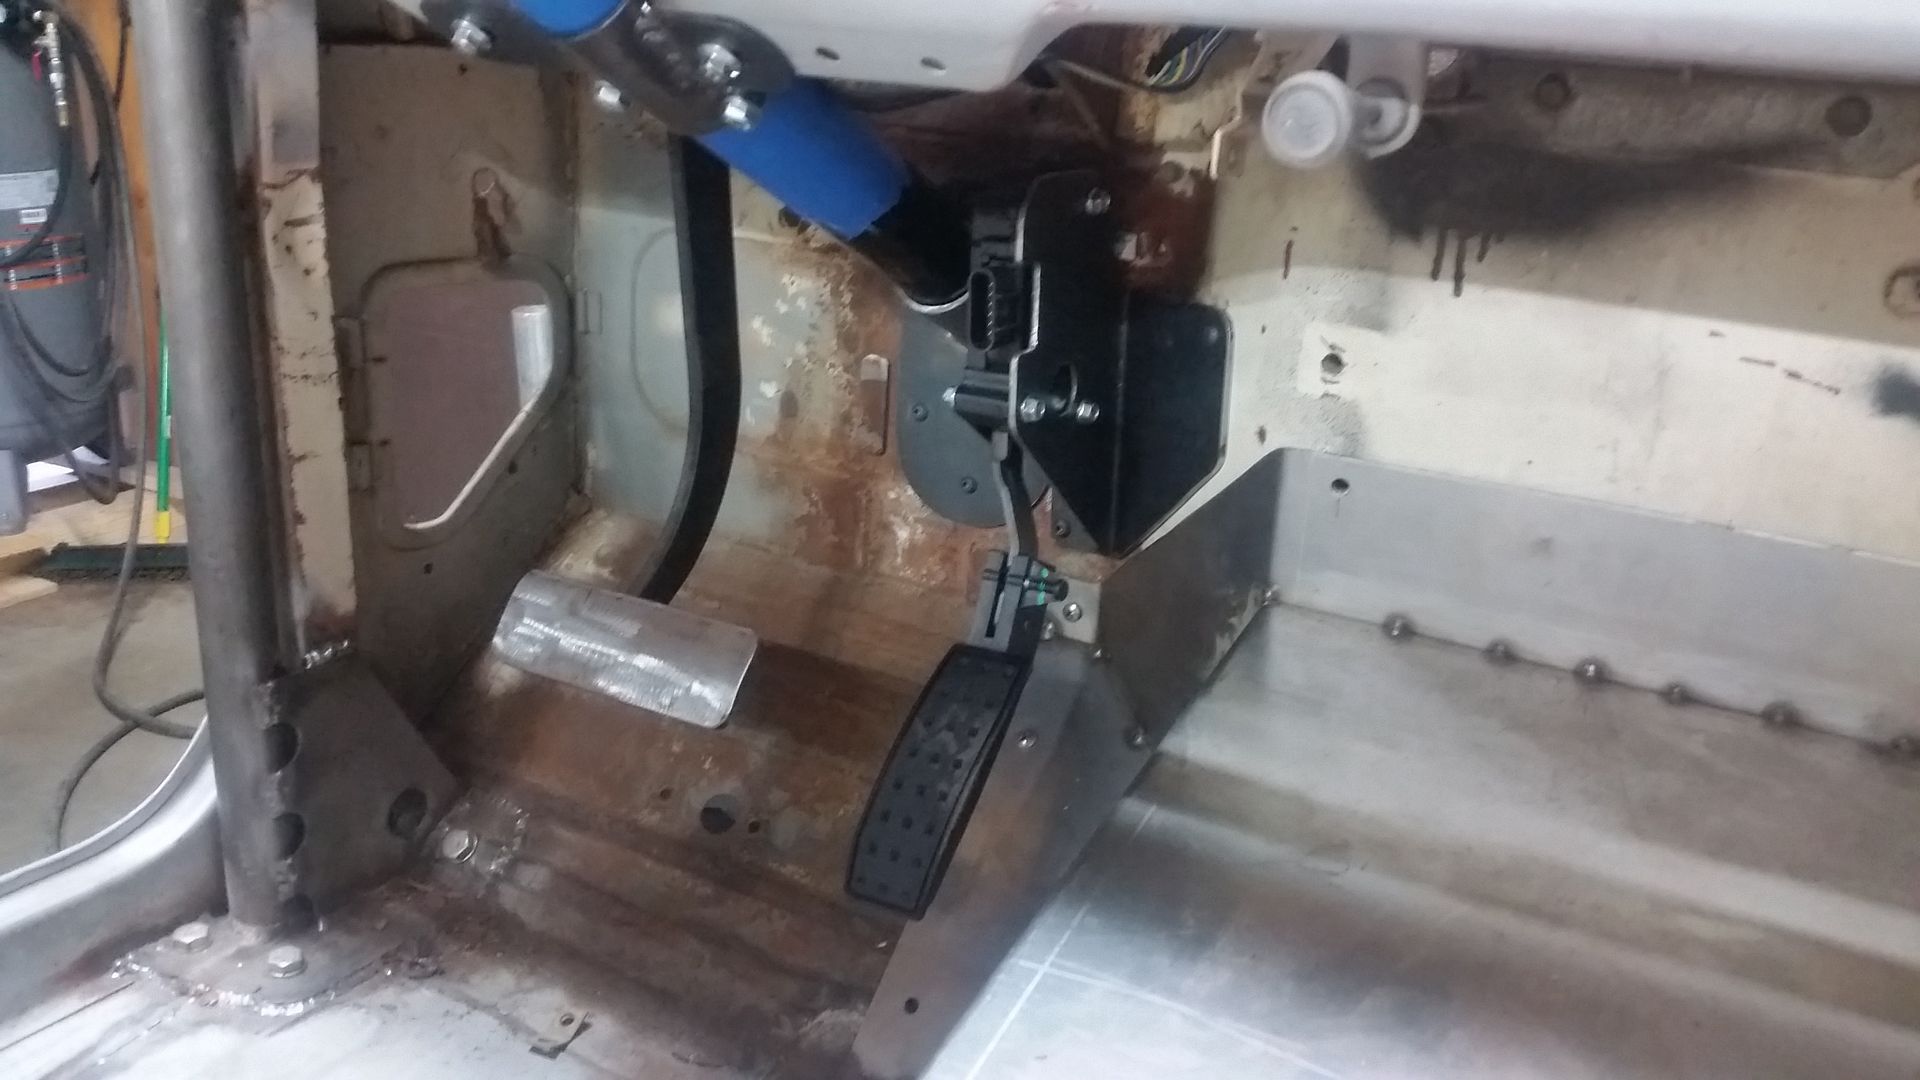
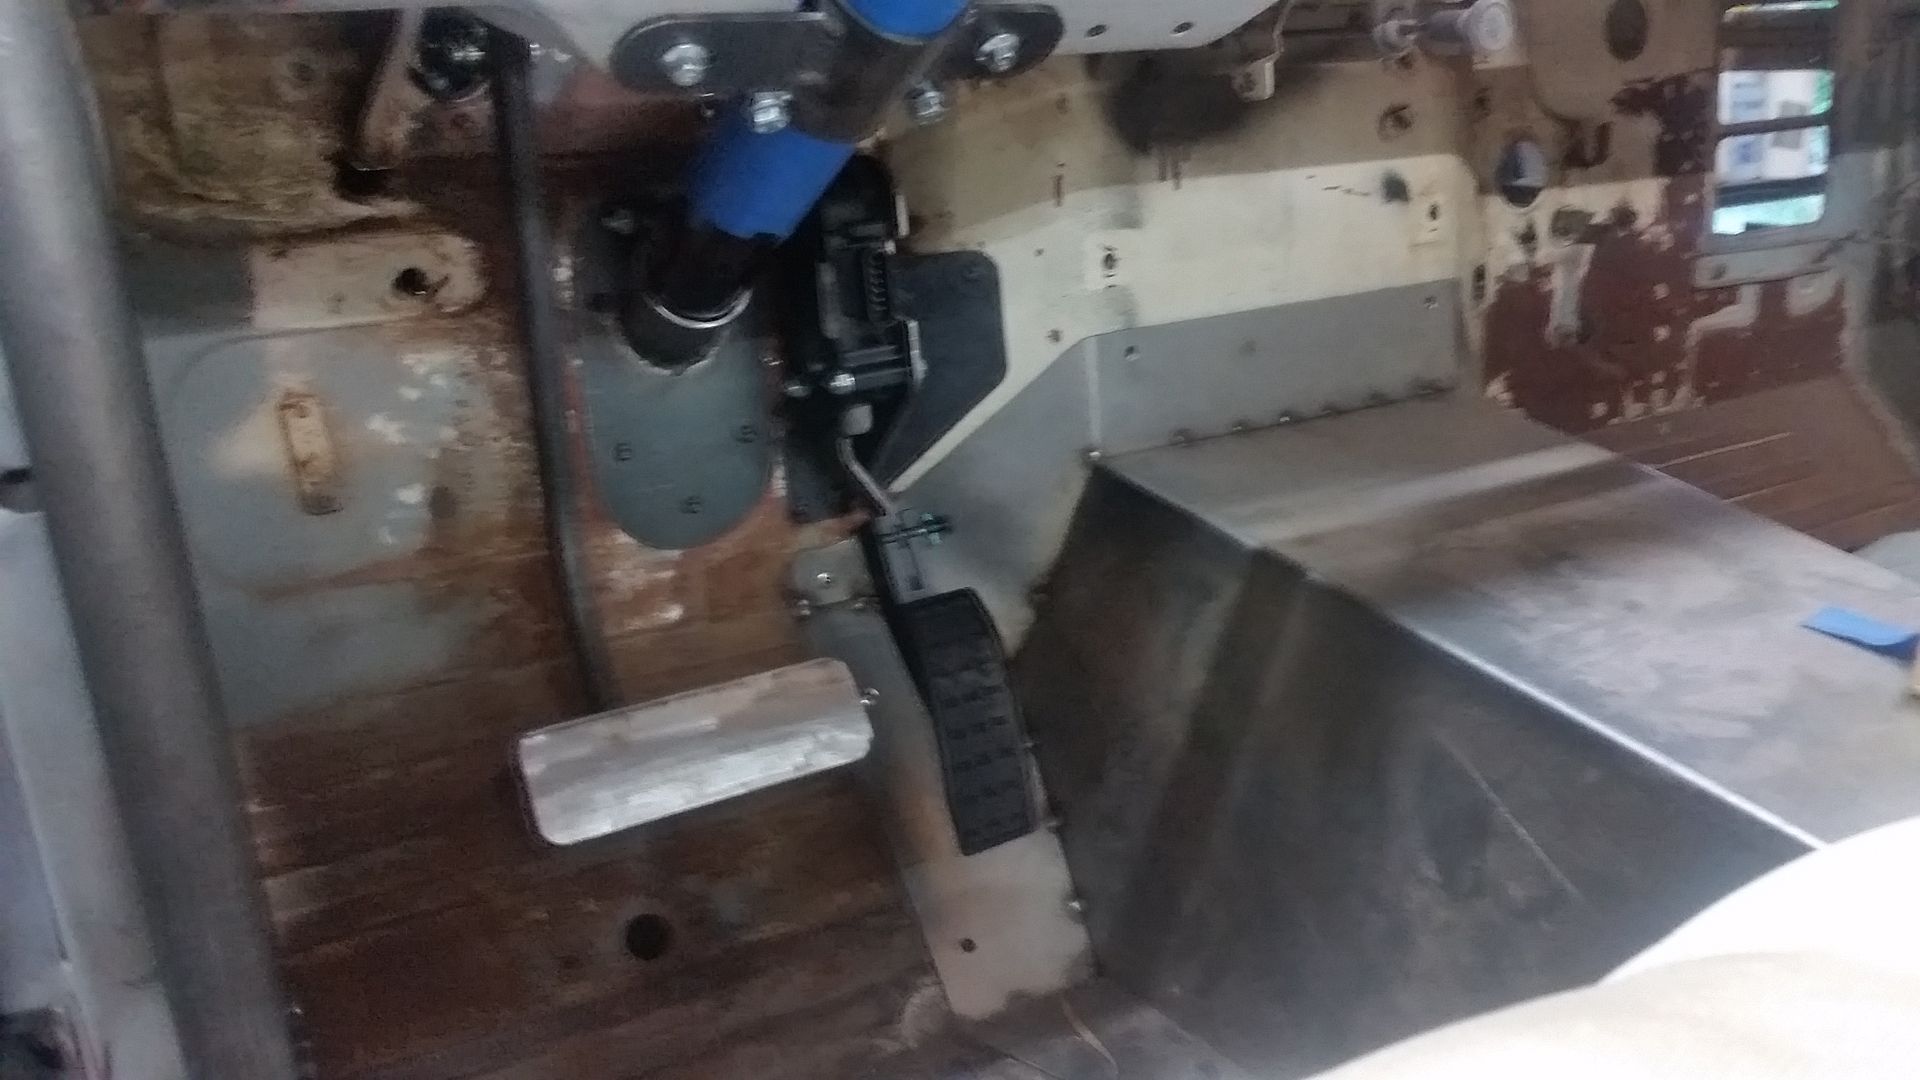
I finished off the details on the brake booster/master adapter bracket.


Final position on the booster and master. Overall pretty happy with how things turned out. I still need to make an extension for the clevis, but need to track down a fine thread metric nut for that.


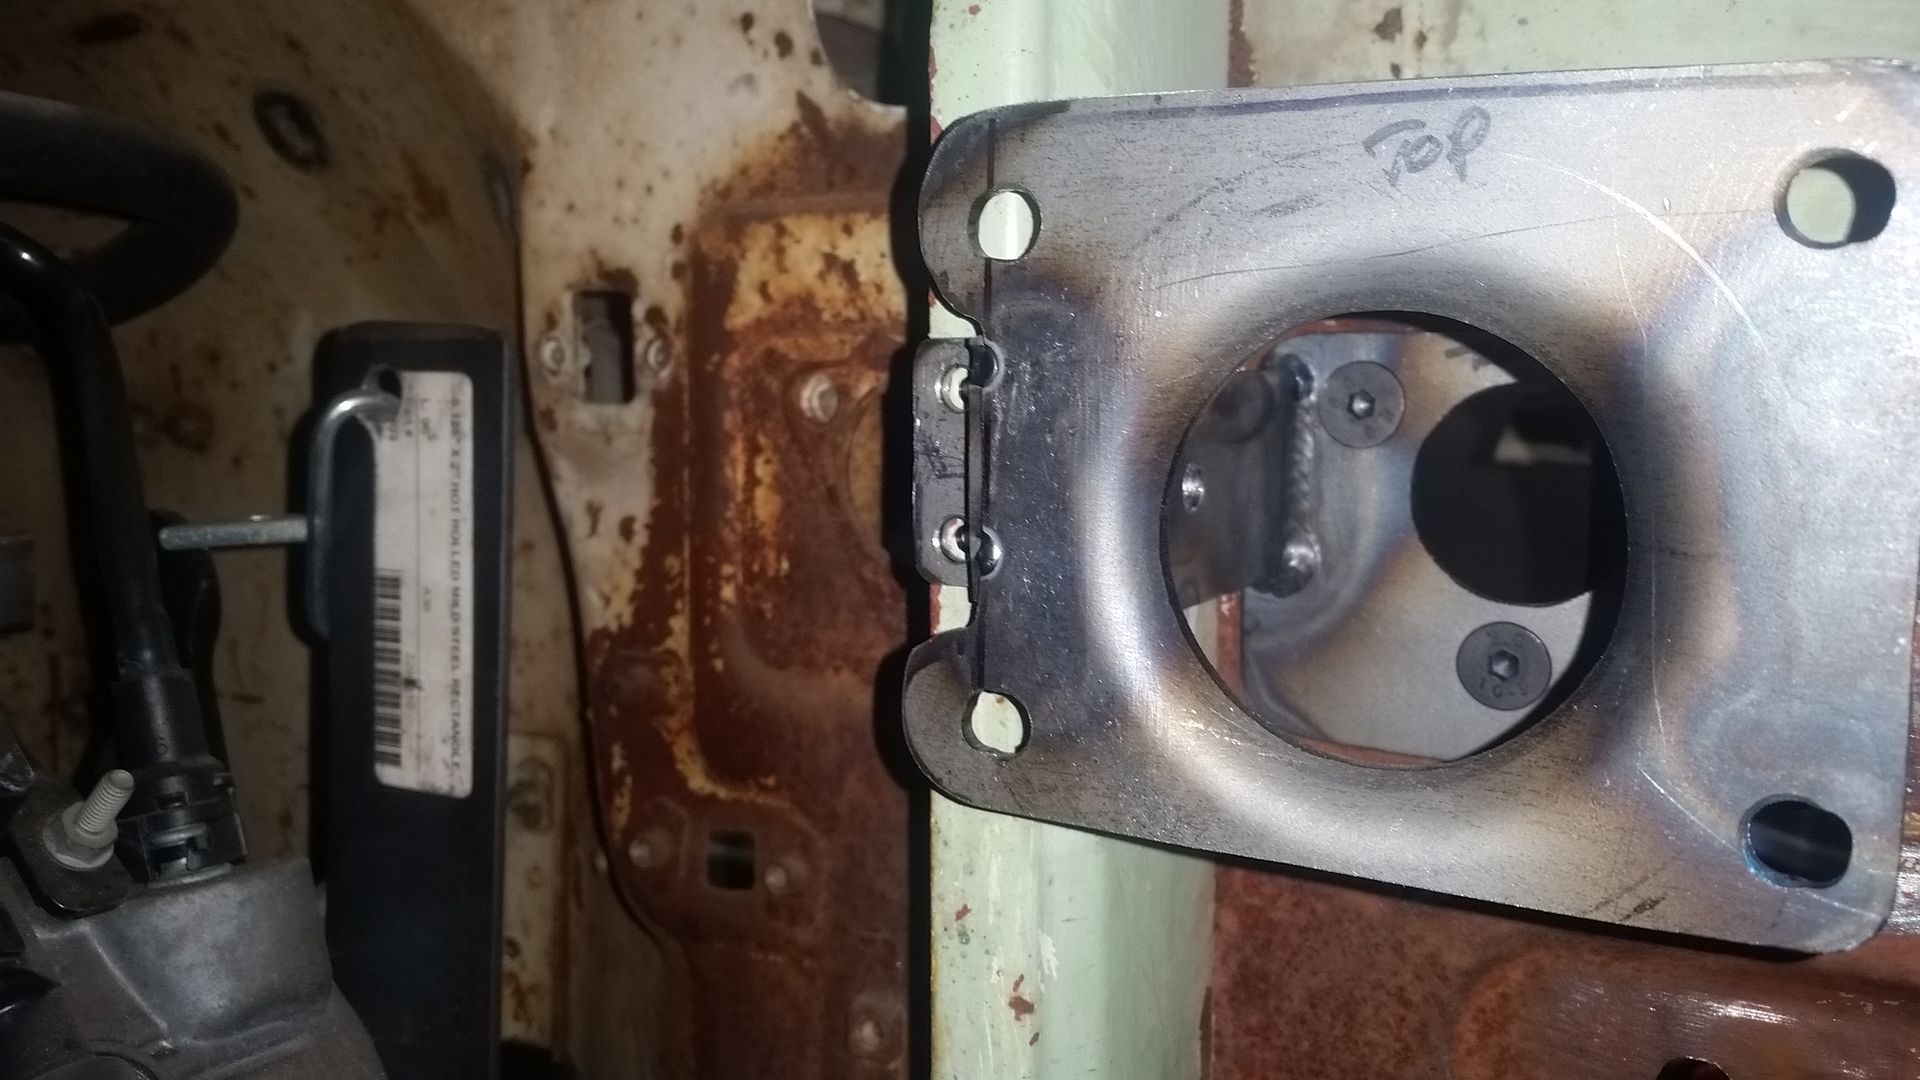
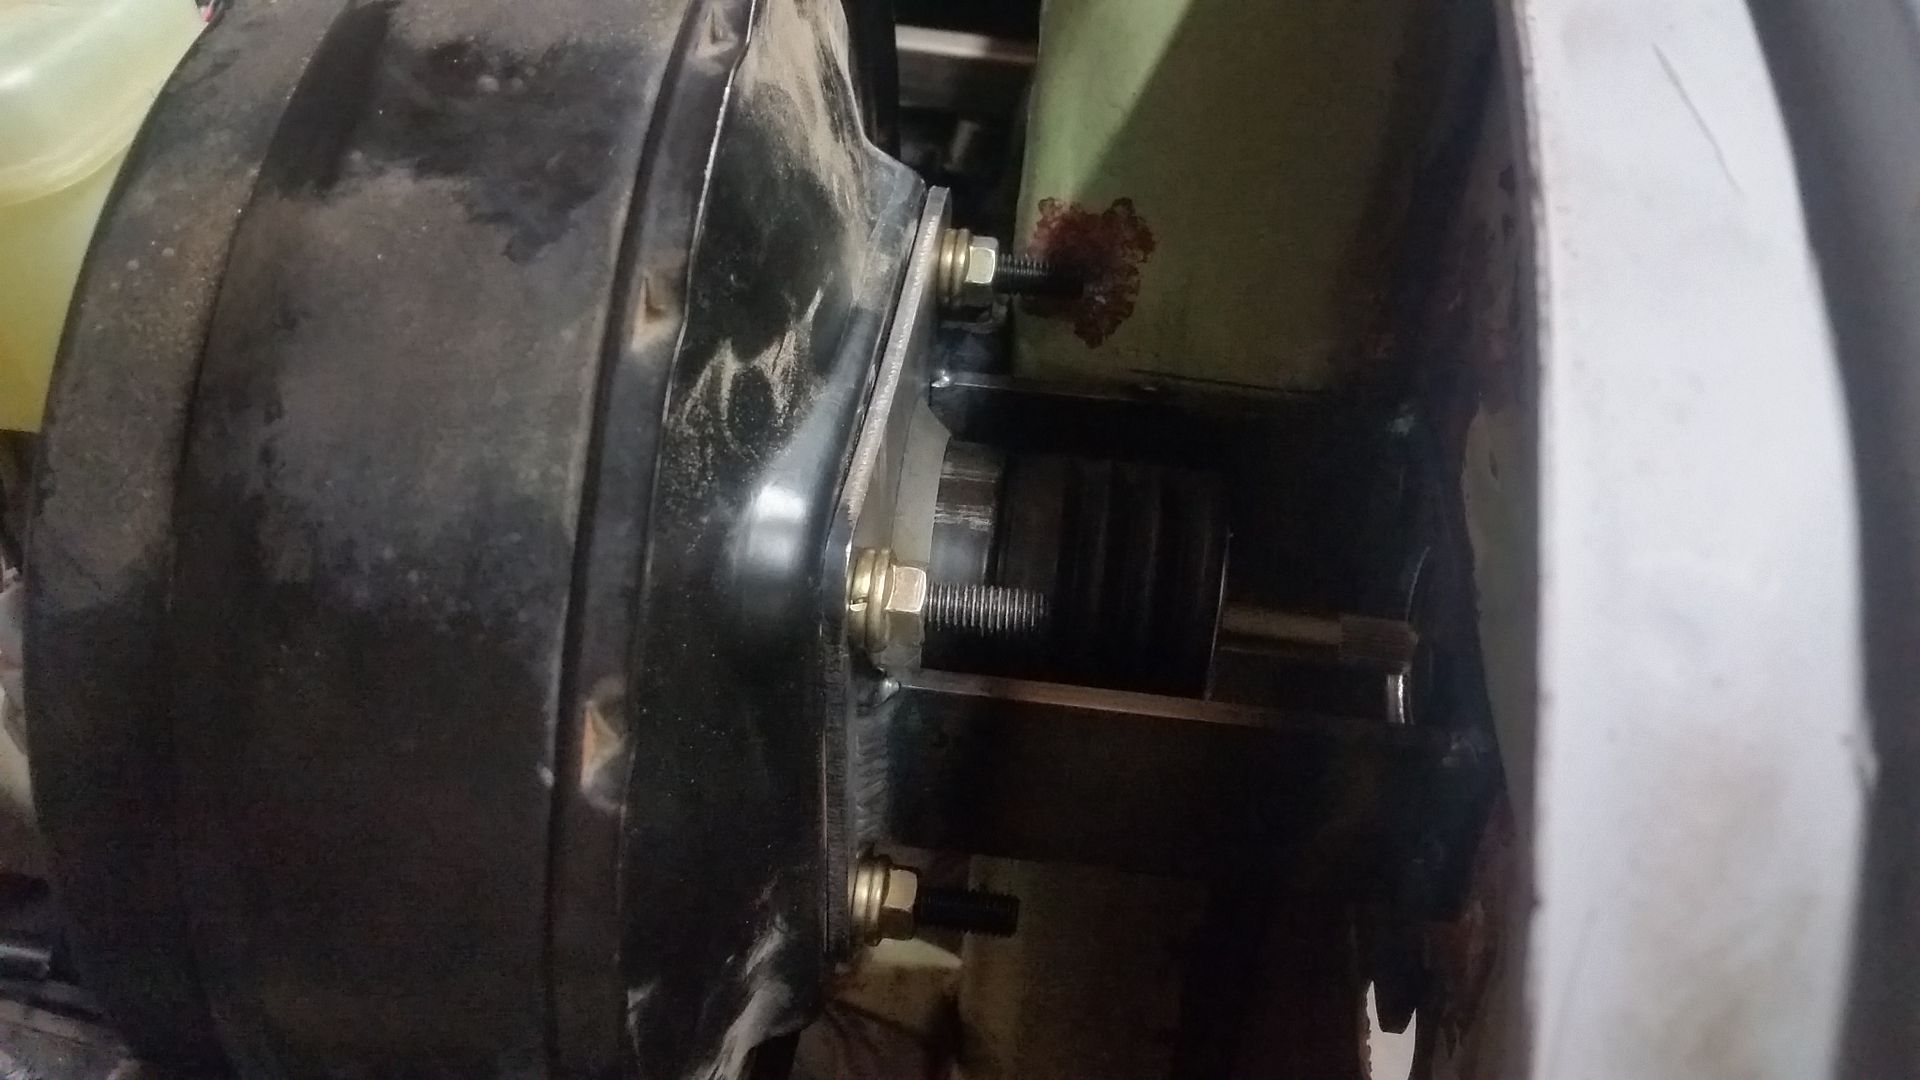
I added a few other fasteners to spread out of the load a little more. There is another 8mm bolt on the large vertical wall on the rib. Also another little tab on the front flange section that uses two 6mm bolts.


It was tight to get the pushrod centered with the factory rib. I ended up having to dent the rib in two places in order to clear the long studs on the 80 series booster.

Fun stuff.

Now onto the column mount and then the DBW pedal mount. I should probably throw the seat back in soon. Anyone have any good ideas for a steering wheel. I kinda want to get the column in before I decide on a diameter. Most of the aftermarket wheels with adapters just seem kinda meh these days....
 
Smart to brace the booster for side loading. I hate to see them jiggle.

Do you not have a lathe? Or access to one? If you do, make the long nut from 1/2" to 3/4" round stock.

Steering wheels have to match two things: personal preference and vehicle character. It is a vintage rig, so something with a vintage vibe would be appropriate, but it is also a very modern rig, so high tech would also be appropriate. Are you going to use any sort of quick release hub? If not, then your wheel choices just got that much more limited.

That looks like a GM column (?), and I've always liked the look of late 70's to mid 80's Corvette steering wheels - http://www.mamotorworks.com/Corvette/product/lecarra-3-spoke-custom-steering-wheel-612048-1 They are basically a nicer looking version of a circle track steering wheel and I think it would fit the character of your truck. I am a Momo guy though, probably due to my racing background, but a Momo probably wouldn't be the right choice for this truck, except for the basic classic three spoke variety.

This is the one I have in my '83 Toyota.


Metcalf

Expedition Leader
Smart to brace the booster for side loading. I hate to see them jiggle.

Do you not have a lathe? Or access to one? If you do, make the long nut from 1/2" to 3/4" round stock.

Steering wheels have to match two things: personal preference and vehicle character. It is a vintage rig, so something with a vintage vibe would be appropriate, but it is also a very modern rig, so high tech would also be appropriate. Are you going to use any sort of quick release hub? If not, then your wheel choices just got that much more limited.

That looks like a GM column (?), and I've always liked the look of late 70's to mid 80's Corvette steering wheels - http://www.mamotorworks.com/Corvette/product/lecarra-3-spoke-custom-steering-wheel-612048-1 They are basically a nicer looking version of a circle track steering wheel and I think it would fit the character of your truck. I am a Momo guy though, probably due to my racing background, but a Momo probably wouldn't be the right choice for this truck, except for the basic classic three spoke variety.

This is the one I have in my '83 Toyota.


I'm not set for ID threading Metric on the lathe. I don't even know if this lathe would do metric. TIG'n a nut on a section of small DOM tubing will be fine. Everything is in compression for pedal forces.

I'm still up in the air on a steering wheel. Some of the wheels seems rediculous in price also for what you get. ICON had their CAT wheel with the gm splined middle so you don't need an adapter.....

I'll do the mounts 1st. I want to measure how much space I have for the wheel with the pinched in cabin width.
 

Metcalf

Expedition Leader
One more small project done....


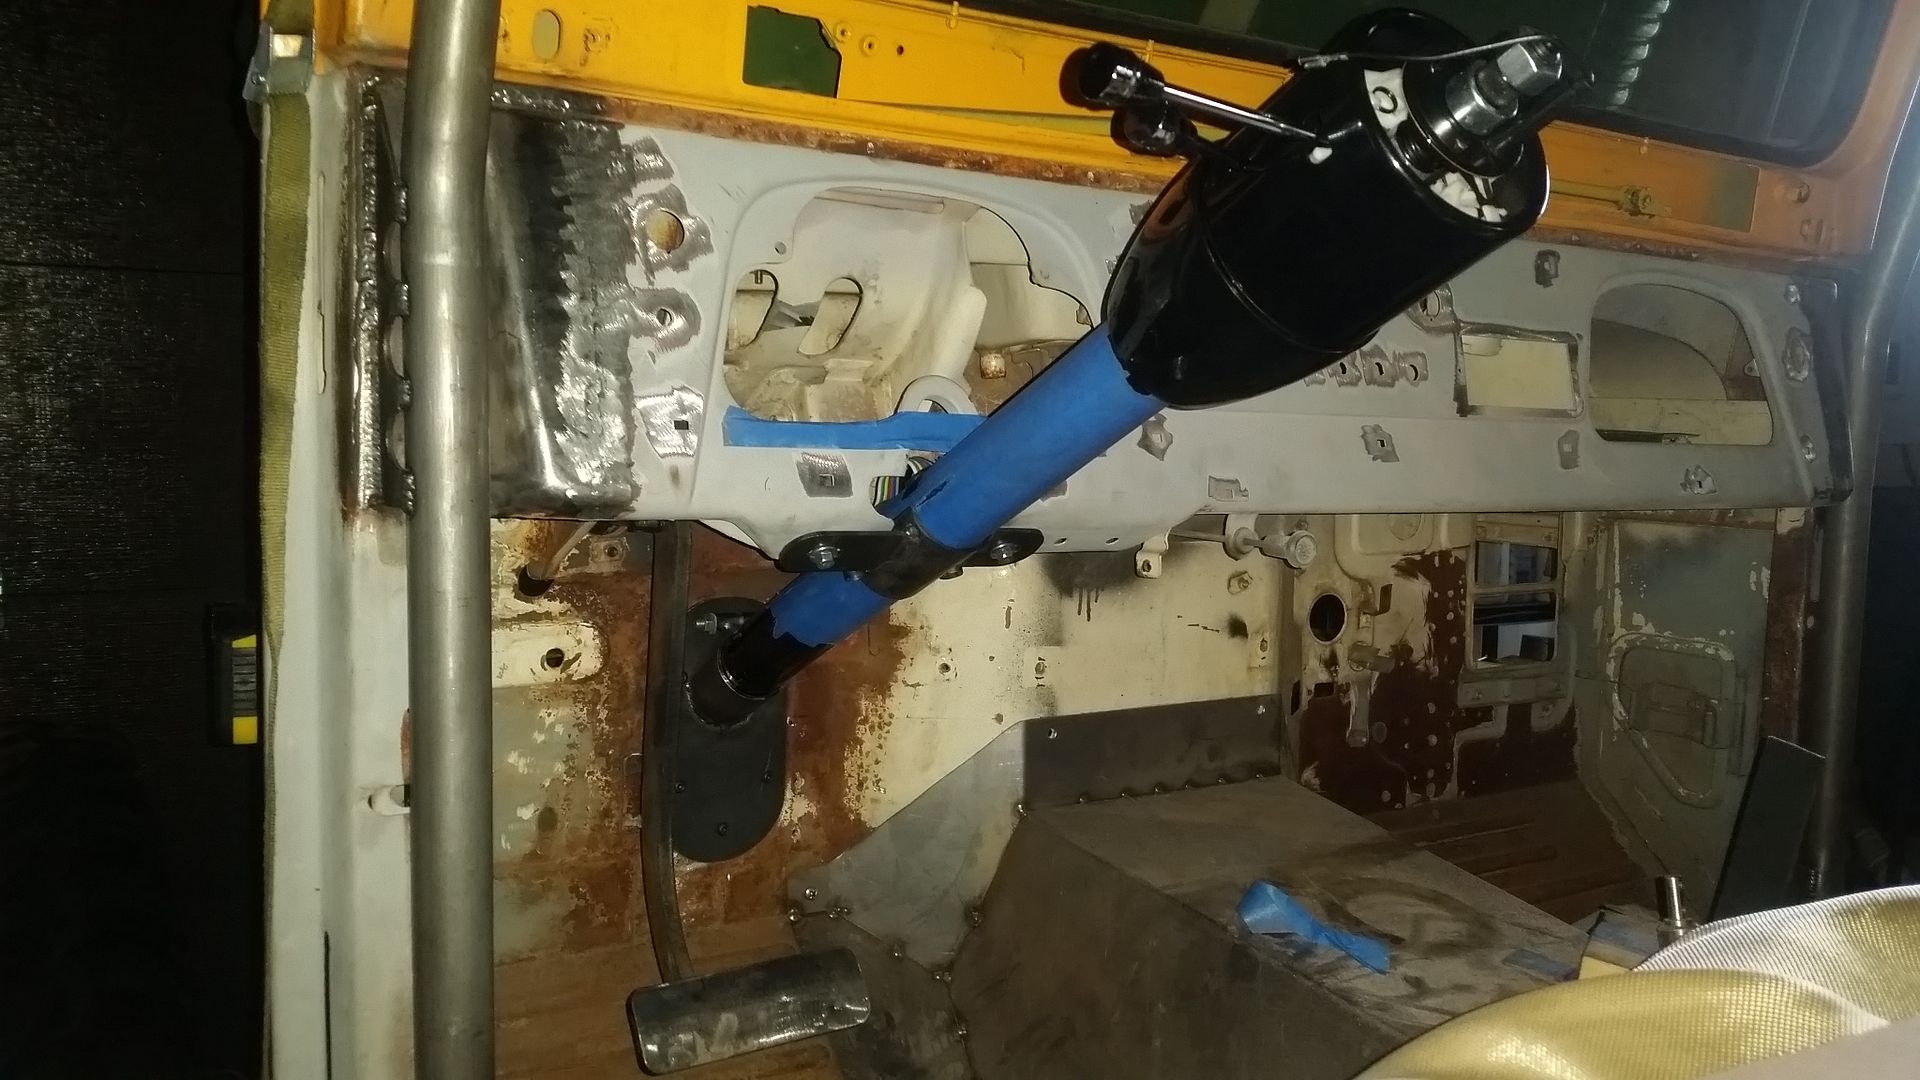
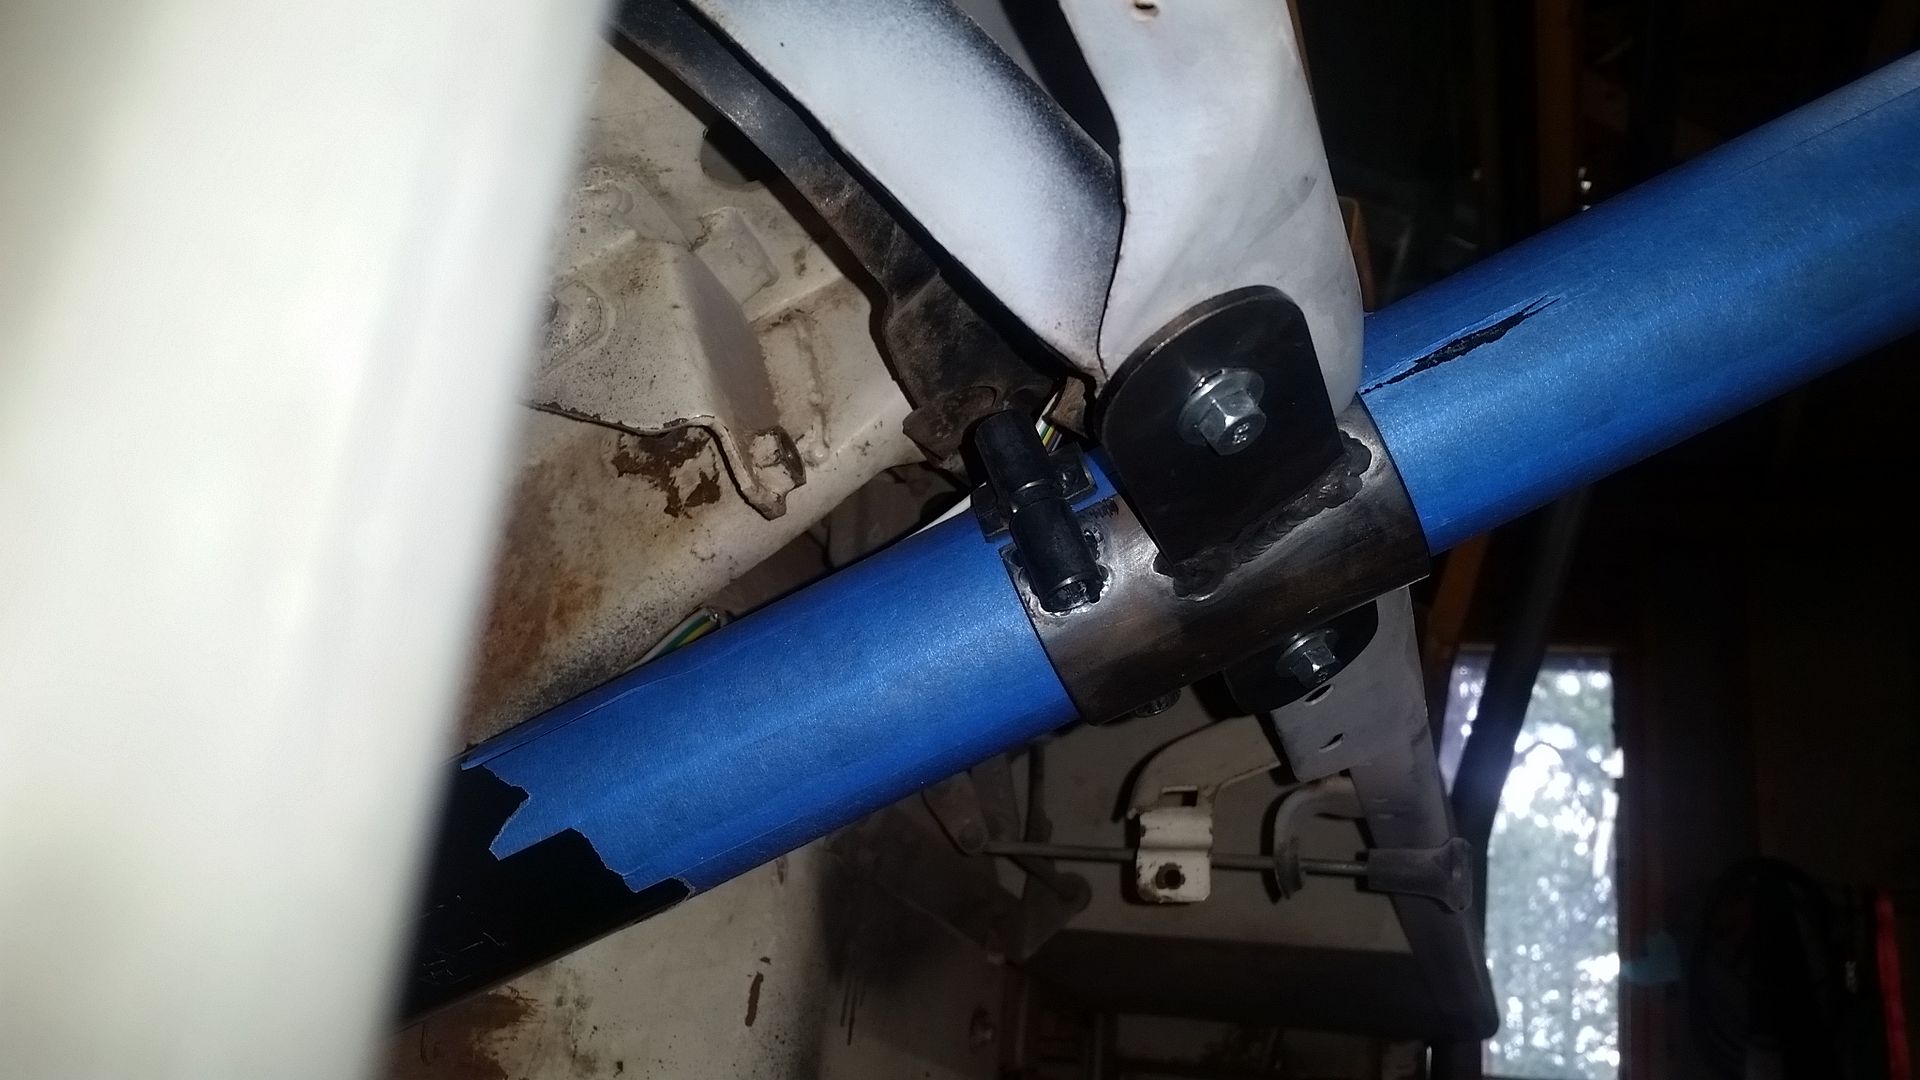
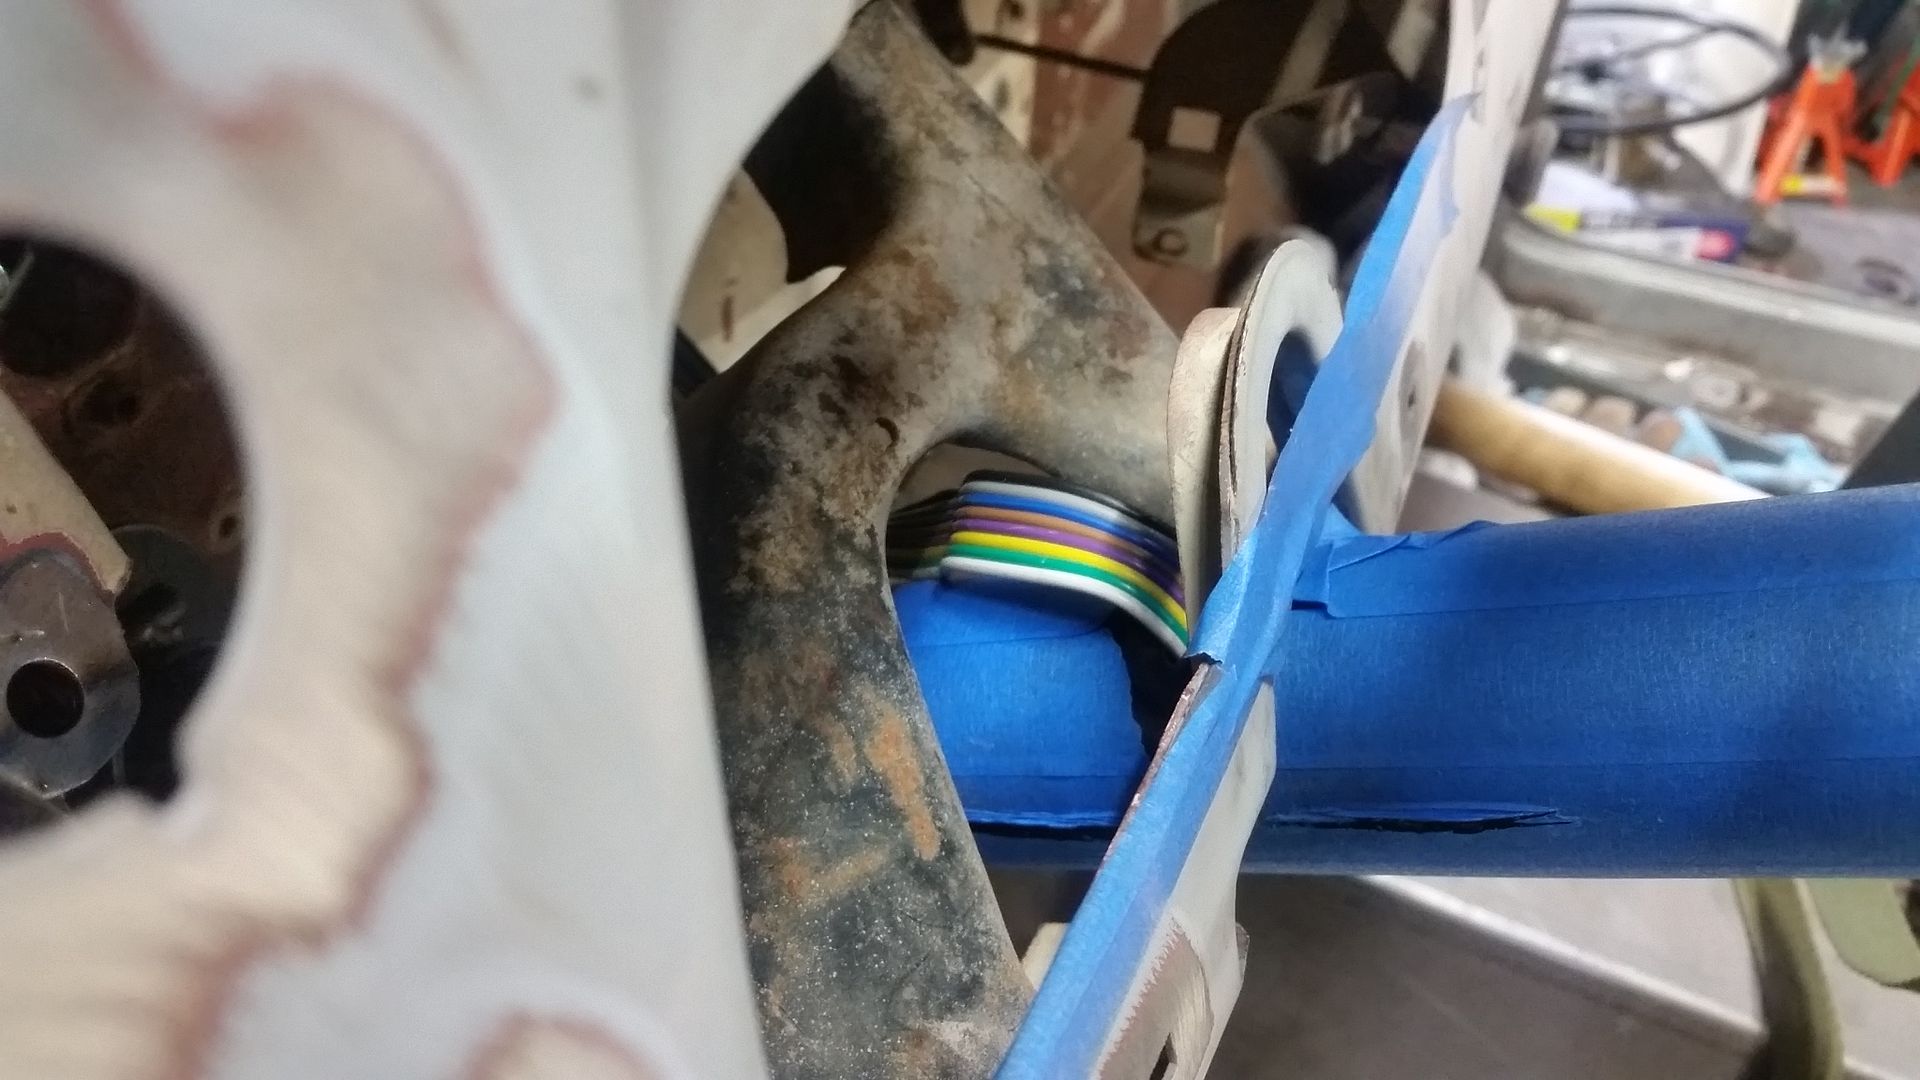
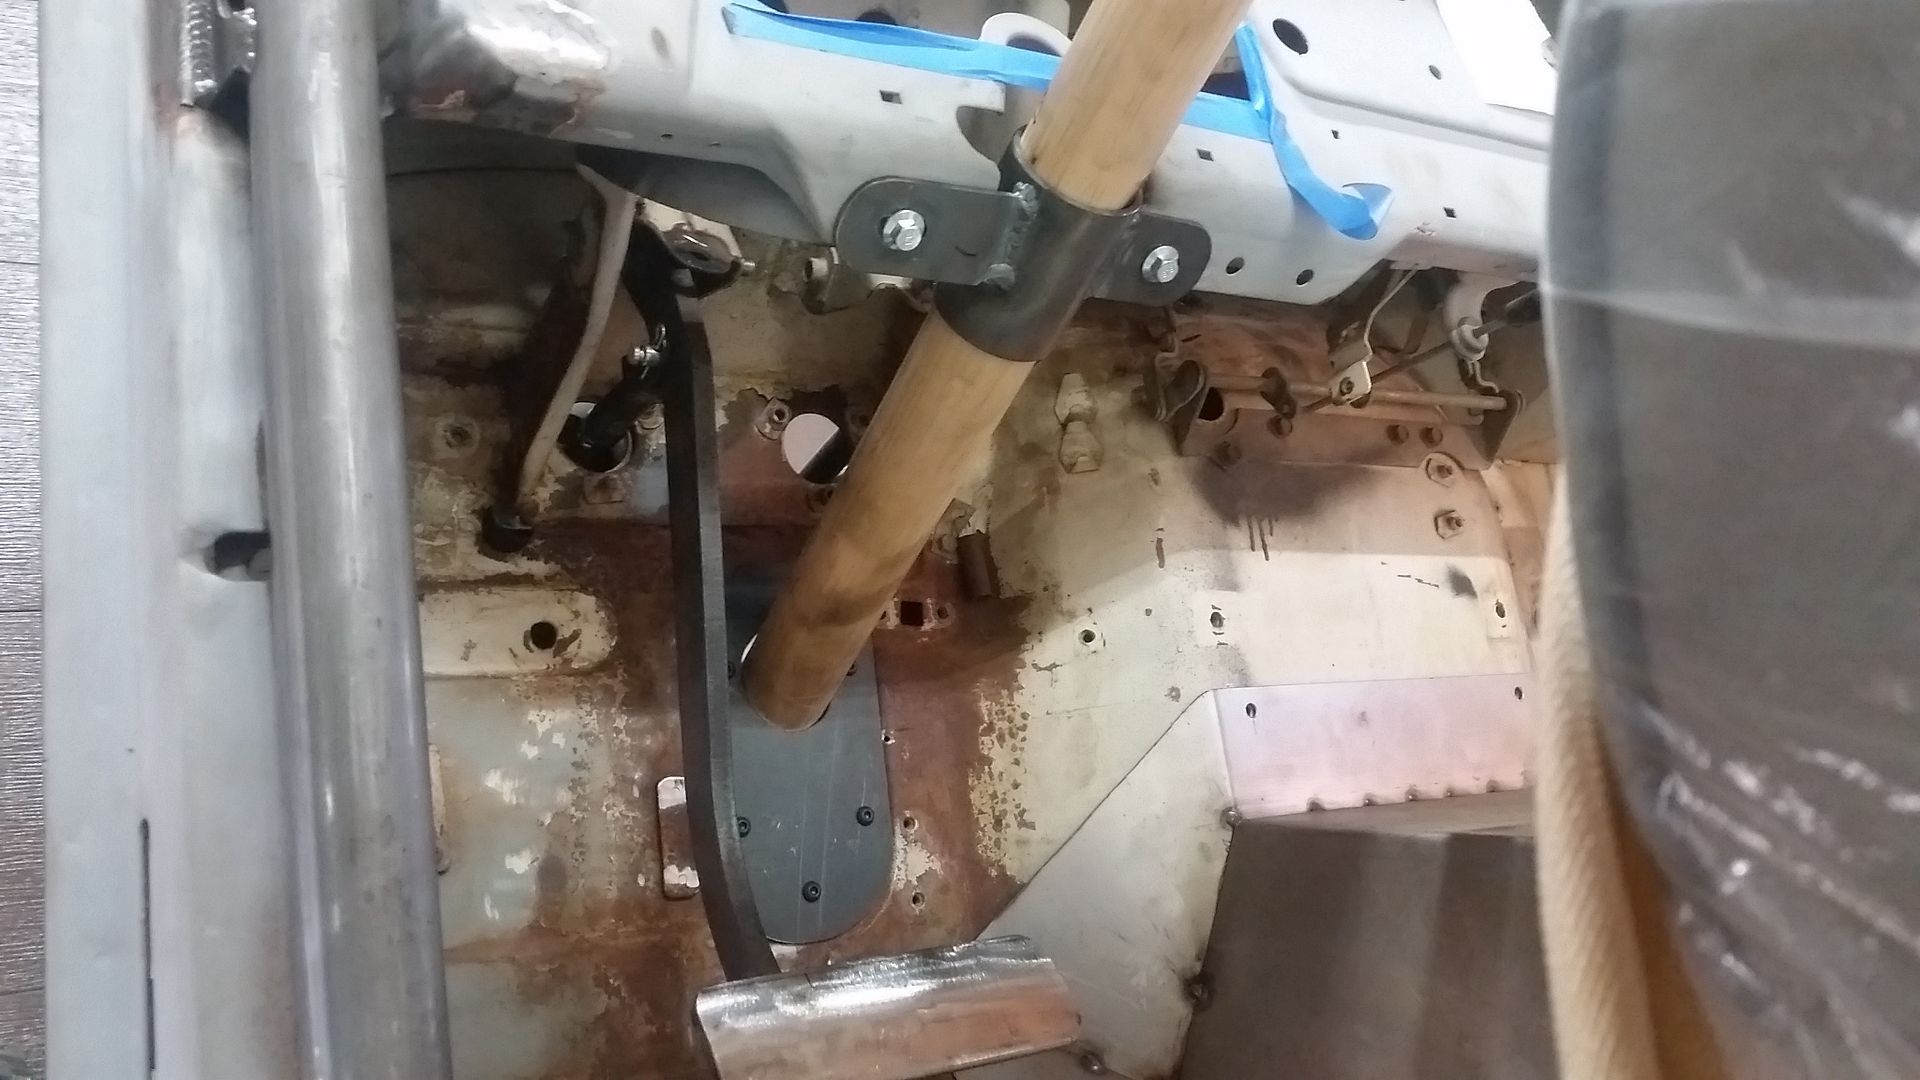
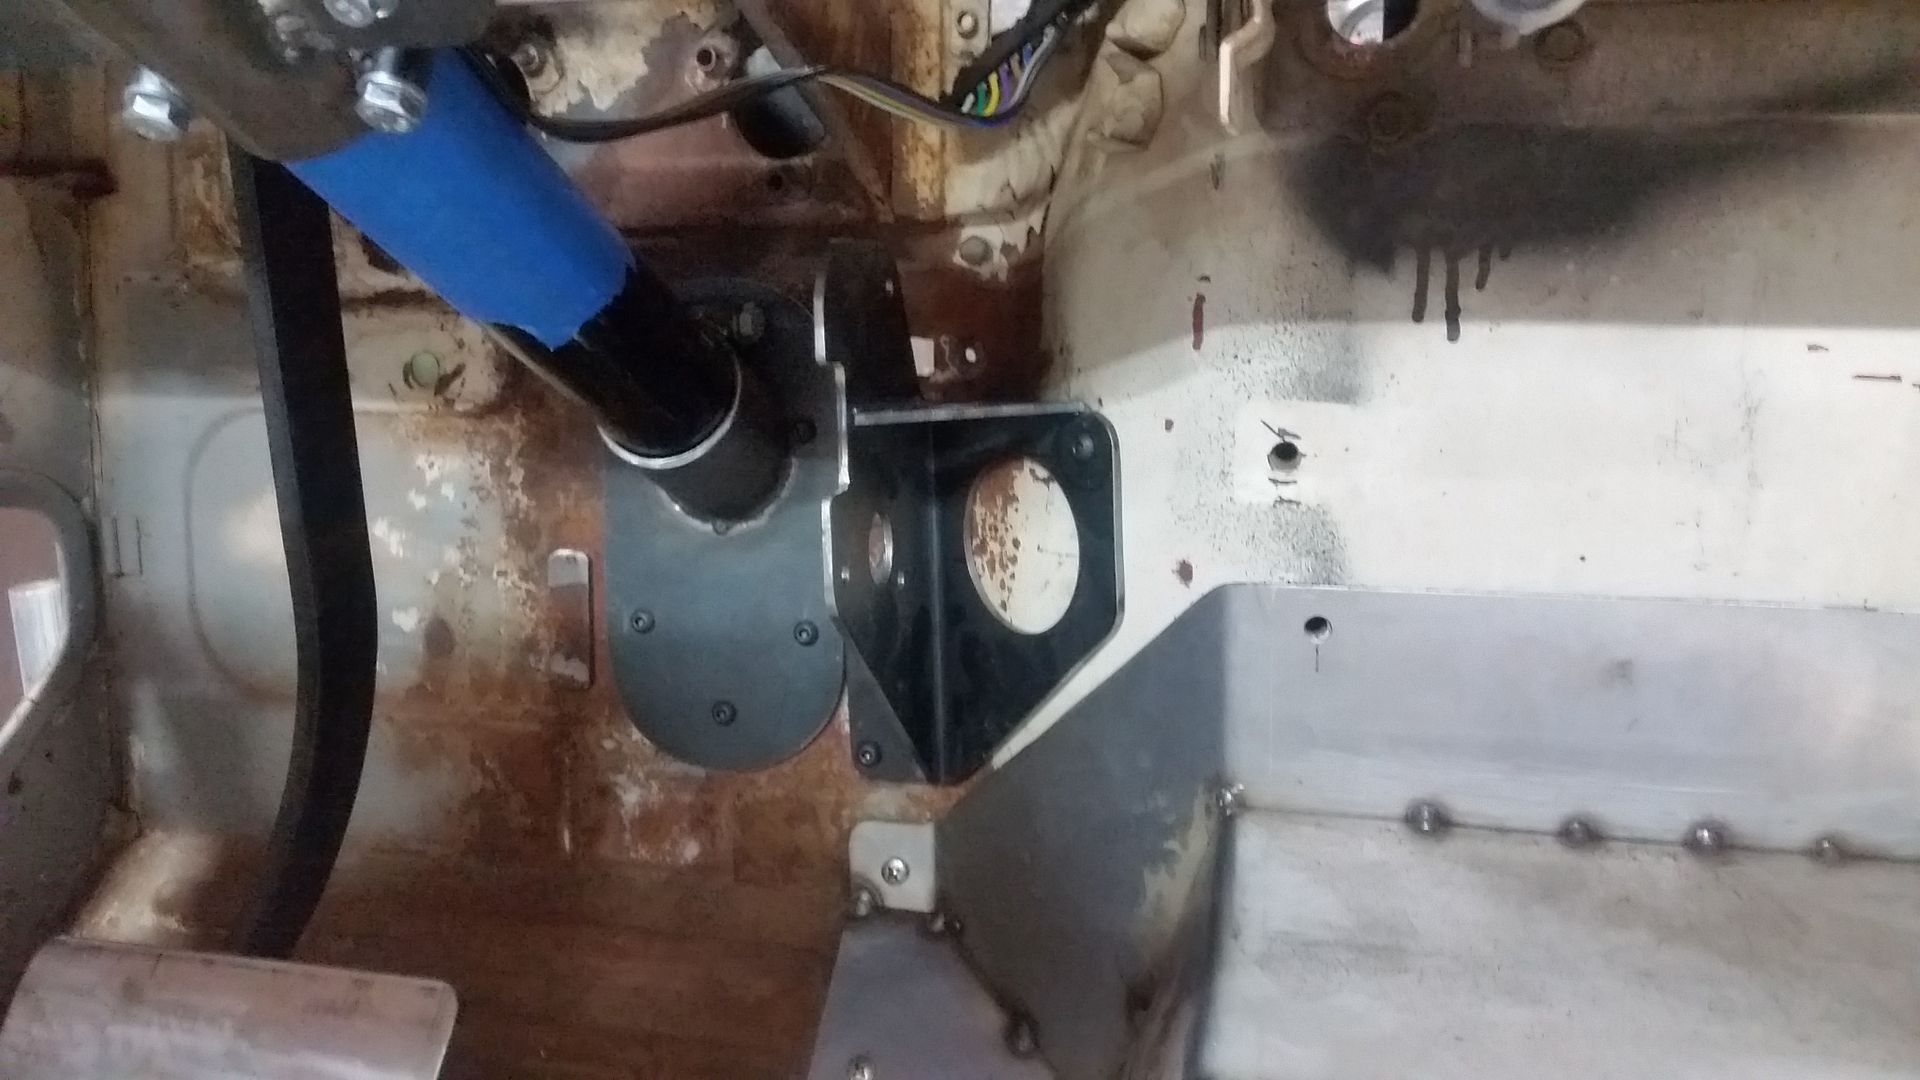
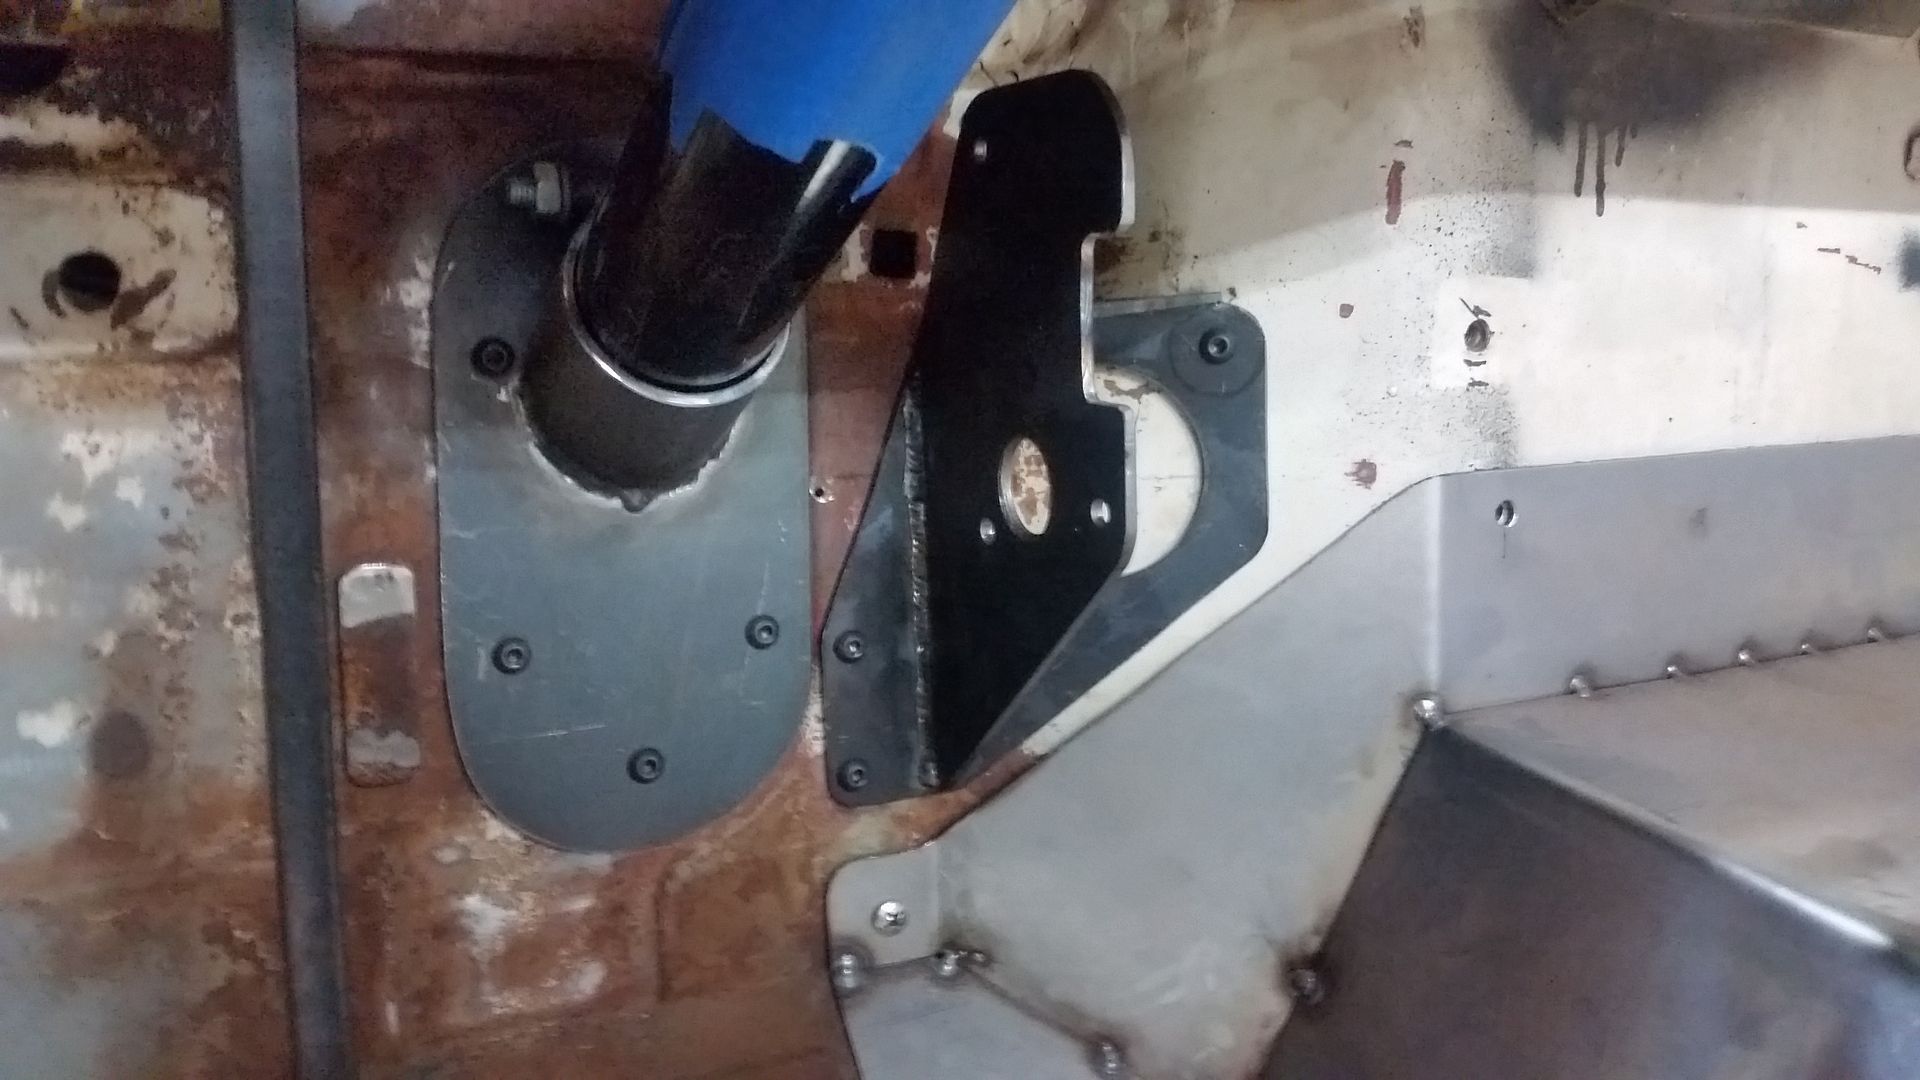
Steering column mounts are done. I ran into a few little hick-ups. The output for the column wiring is right in the middle of the upper mount. I ended up having to trim the mount a bit when I converted it into a 2pc clamping unit. I think I am going to try and extend the dash gauge panel a bit to cover any gap on the top of the column where you might be able to see the wiring exiting the column.


Upper clamp on the back of the saddle mount. I need to pick up some more 8mm bolts for this. I will add some locking nuts for final assembly.


Where the wiring ended up exiting. A pain in the rear for location.


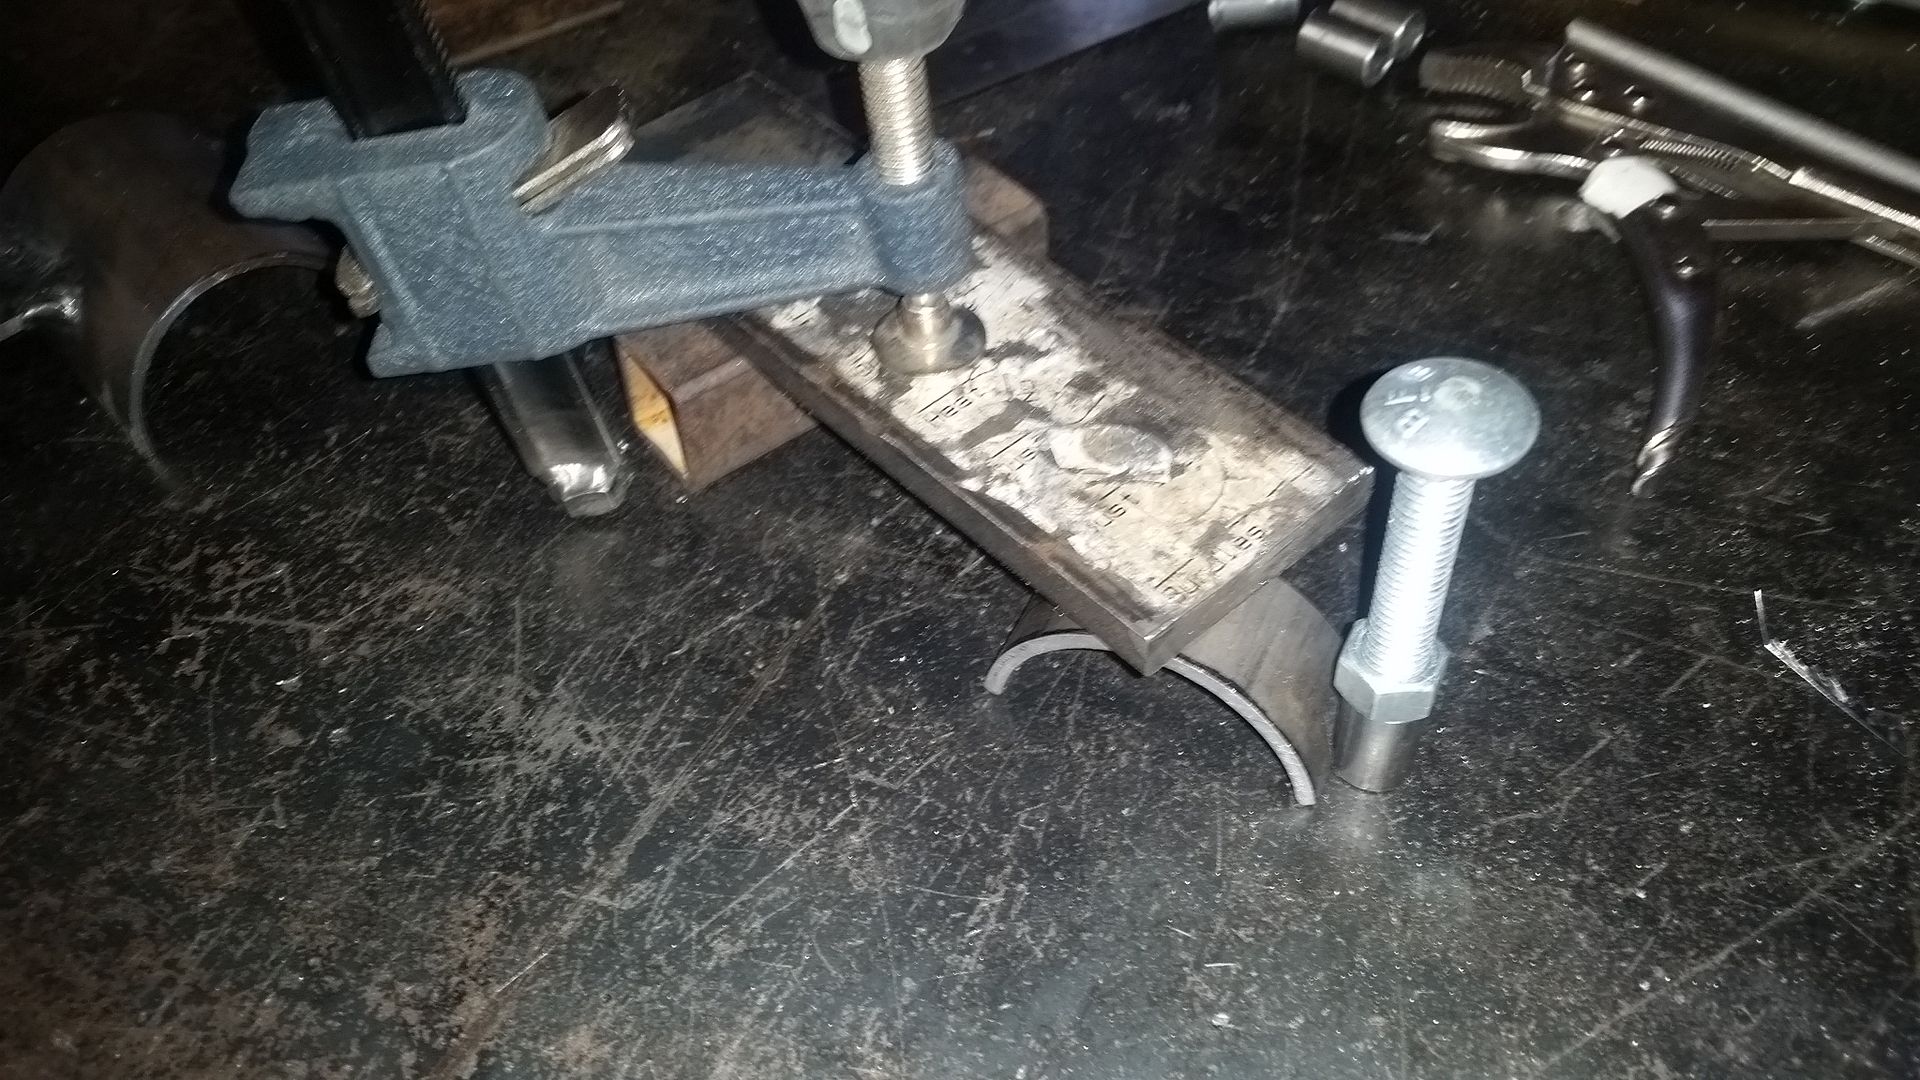
Scrap clamps for on my welding table the hold things down for tack welding.


A 2" wood dowel works very well for mockup. It saves a little bit of wear and tear on the column finish and is a lot lighter to work with....
 

Metcalf

Expedition Leader
More pedal....


I was able to get the mount mocked up for the DBW pedal done. I still need to pull it for a gusset and final welding. Overall I am pretty happy with is. I ended up using this pedal instead of the stock truck pedal. This is the GM Performance parts ( or Caddy ) version. I can use it unmodified which is nice for future replacement.

The mount ended up using 3 of the factory 6mm fasteners in the firewall with nice captured nuts. The 3rd fastener is up on the firewall 'hump' which puts all the pedal loads against that surface with the leg on the bracket.

Overall, just another time killer detail project.
 

Metcalf

Expedition Leader
Just finishing up the DBW pedal stuff....


The bracket is all done except paint. I even TIG welded it for extra practice. I was able to add in a gusset and a little bit of lightness with some big holes.

Now onto the next thing....
 

redthies

Renaissance Redneck
I ran into a few little hick-ups.

Are those like hill-billy hiccups?? :sombrero:


It's good to see things getting accomplished. I work out of town 4-5 days a week and it really plays havoc with getting my projects done.
 

Metcalf

Expedition Leader
My weekend chore...


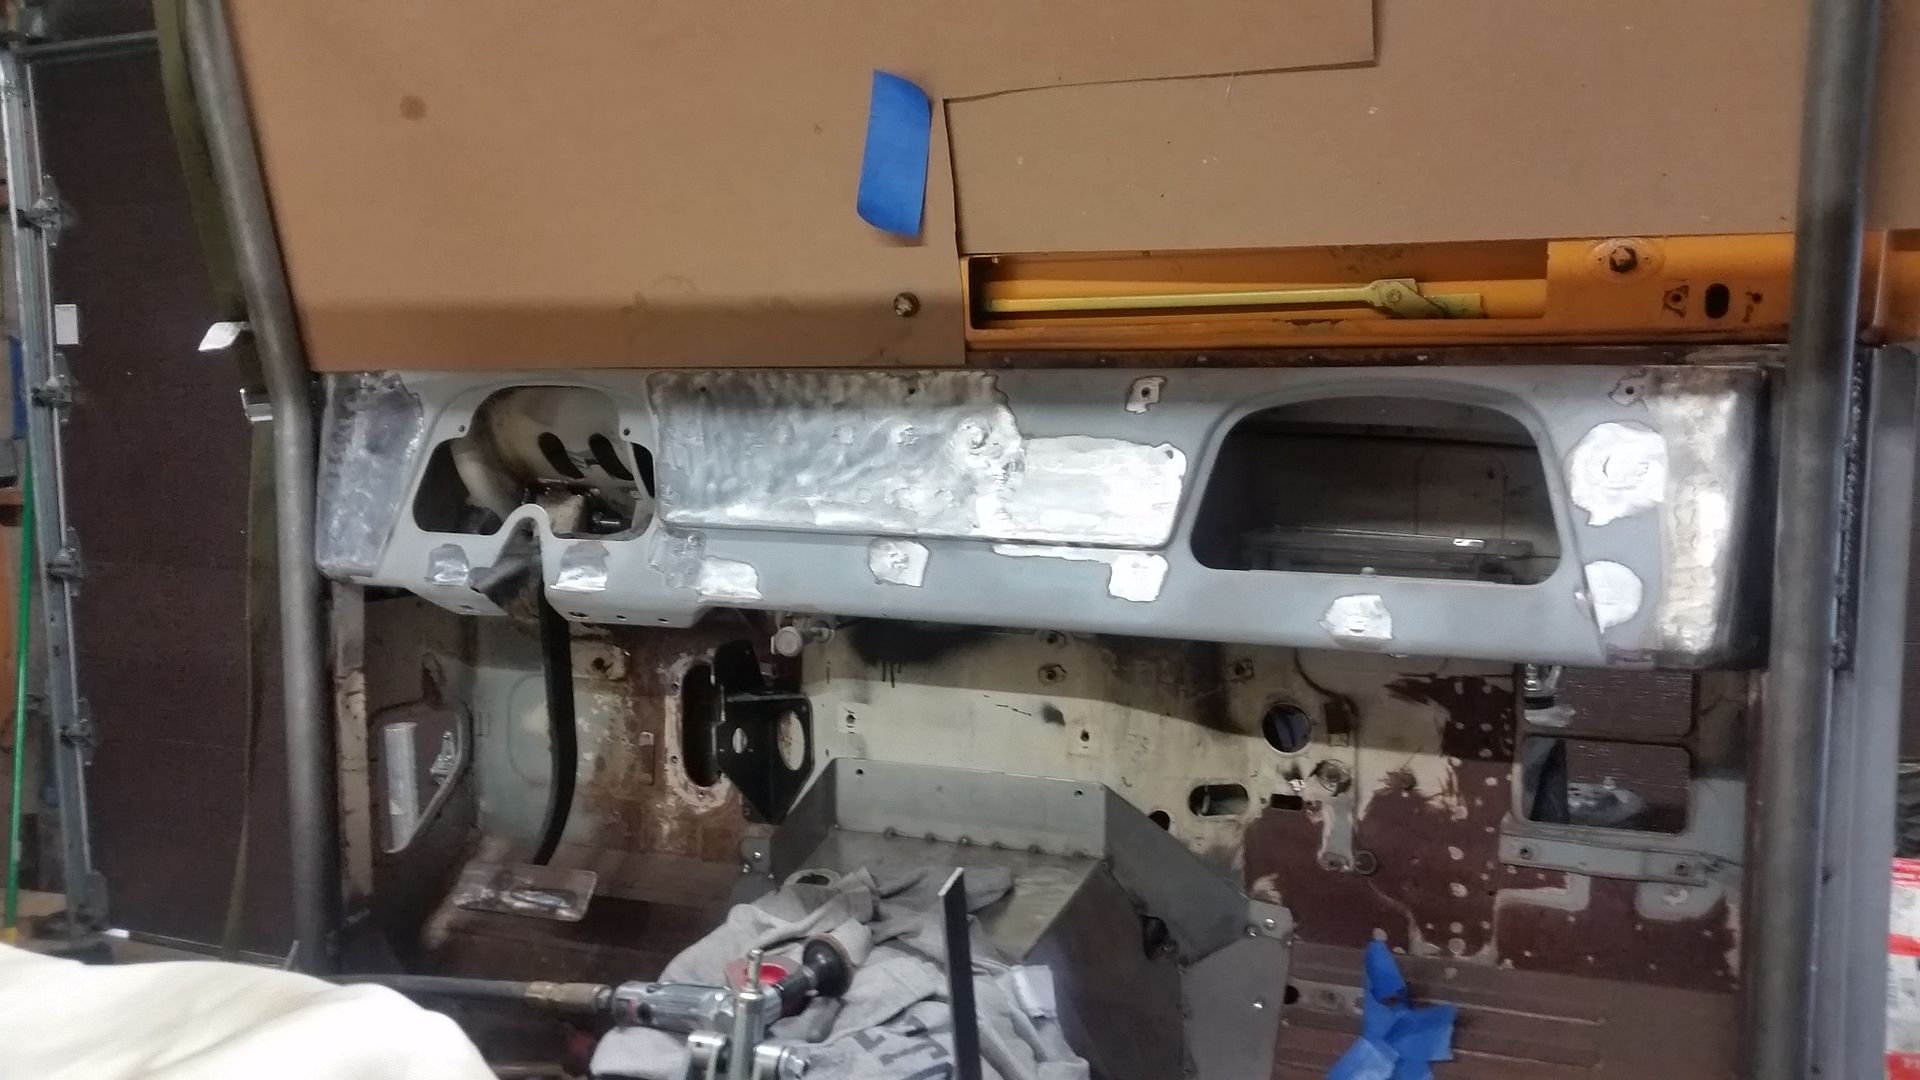
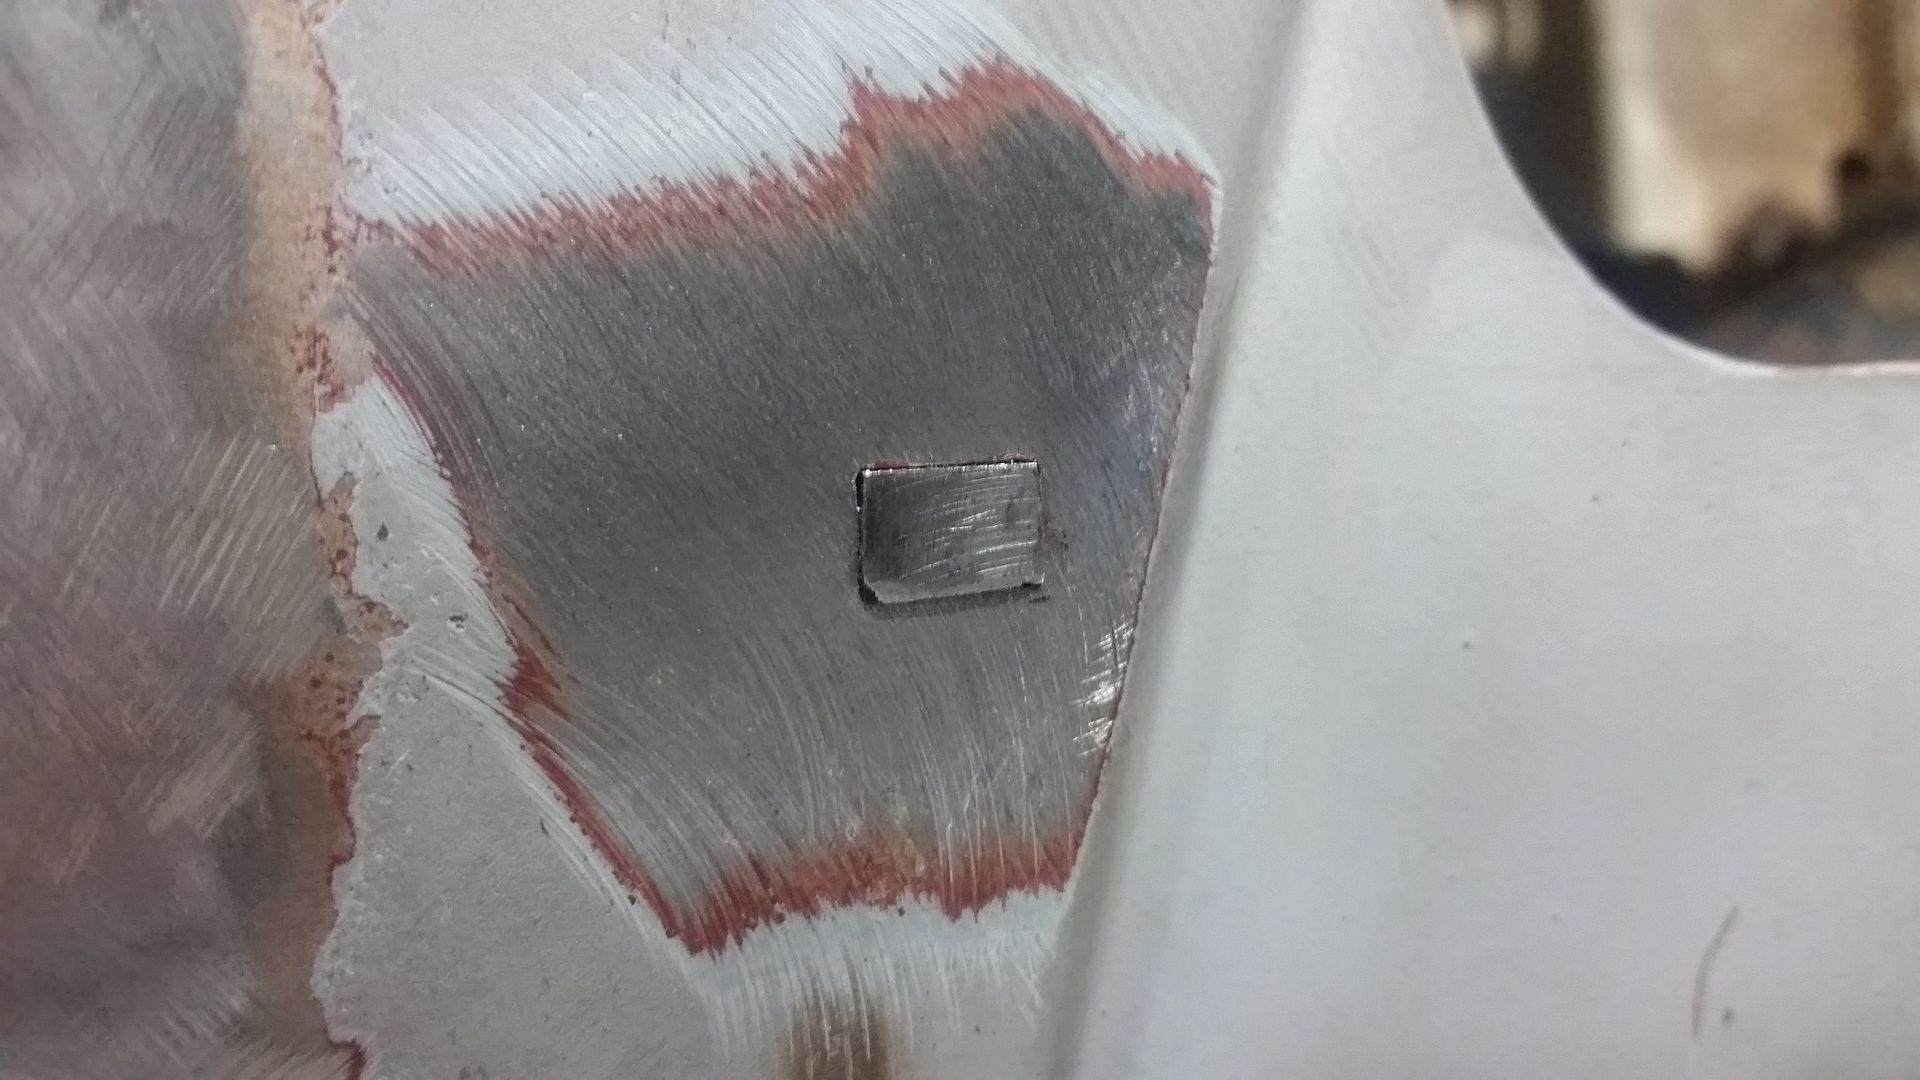
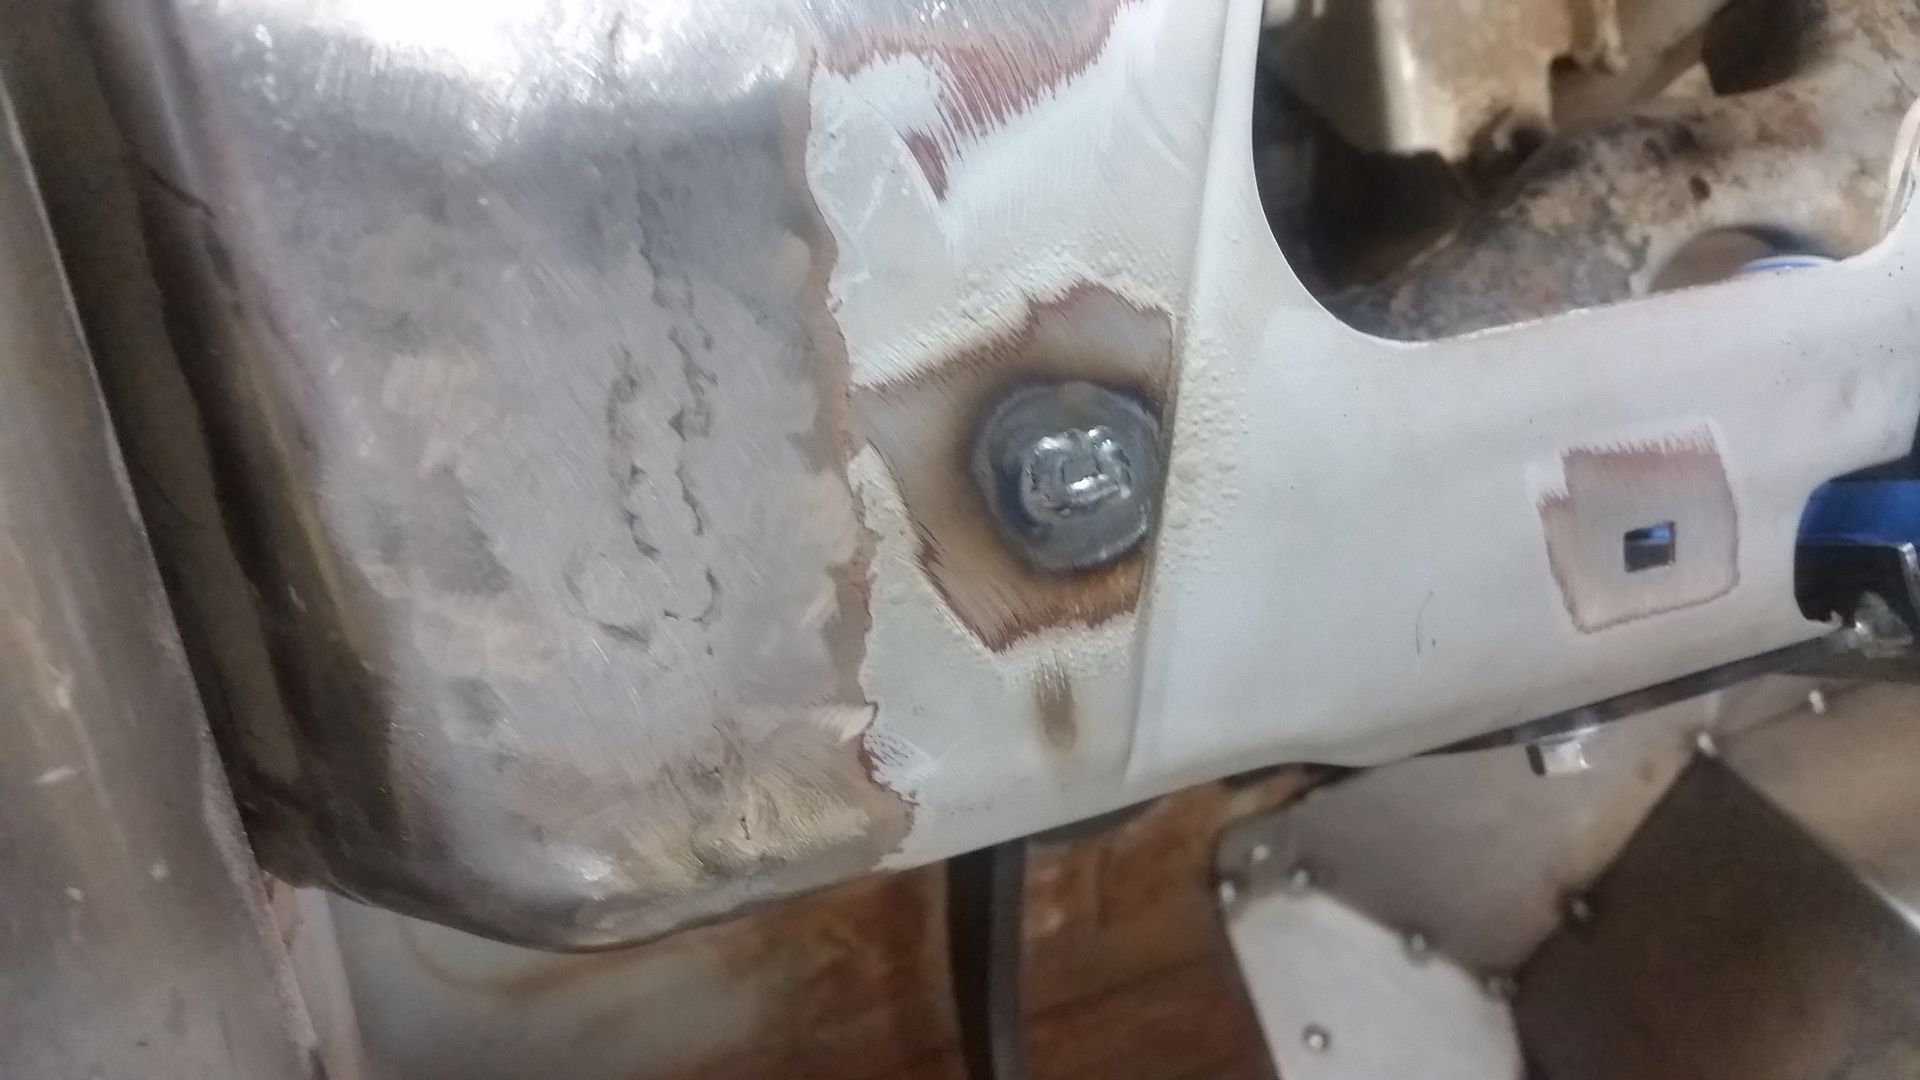
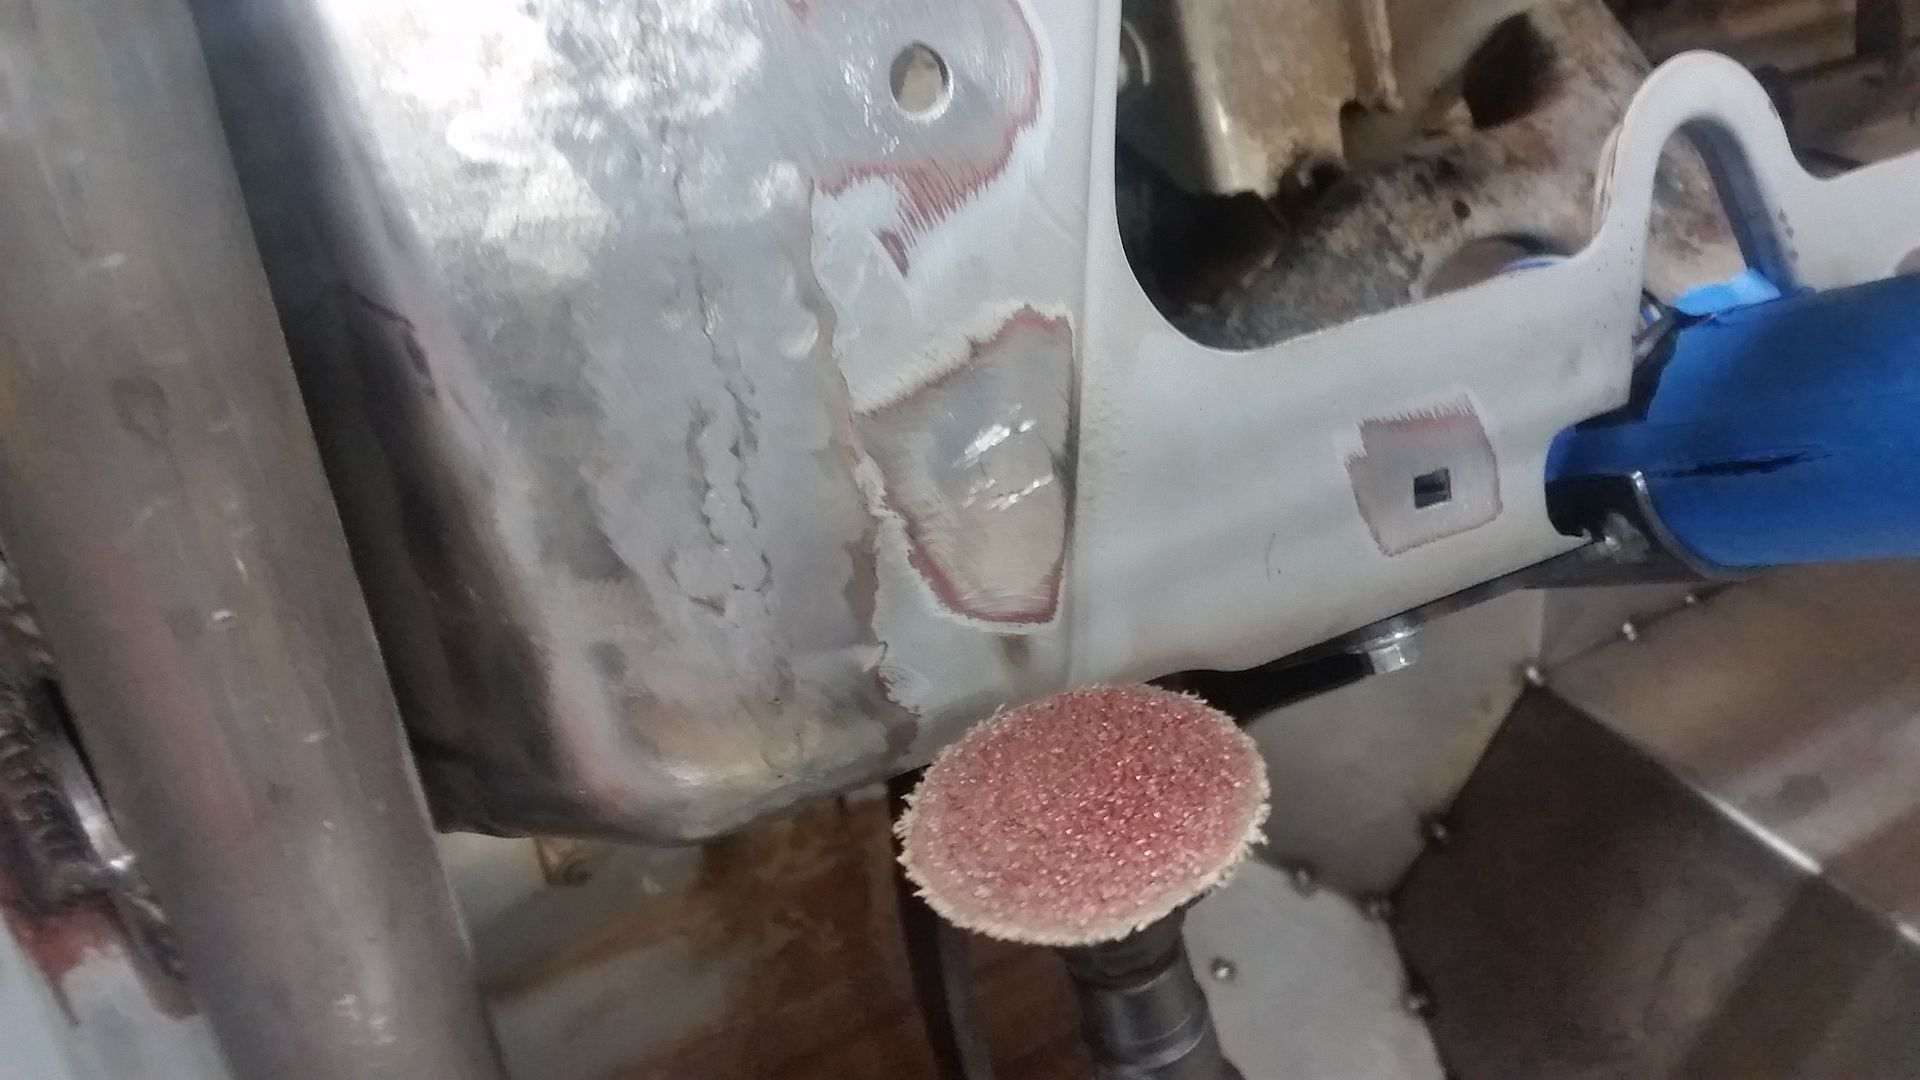
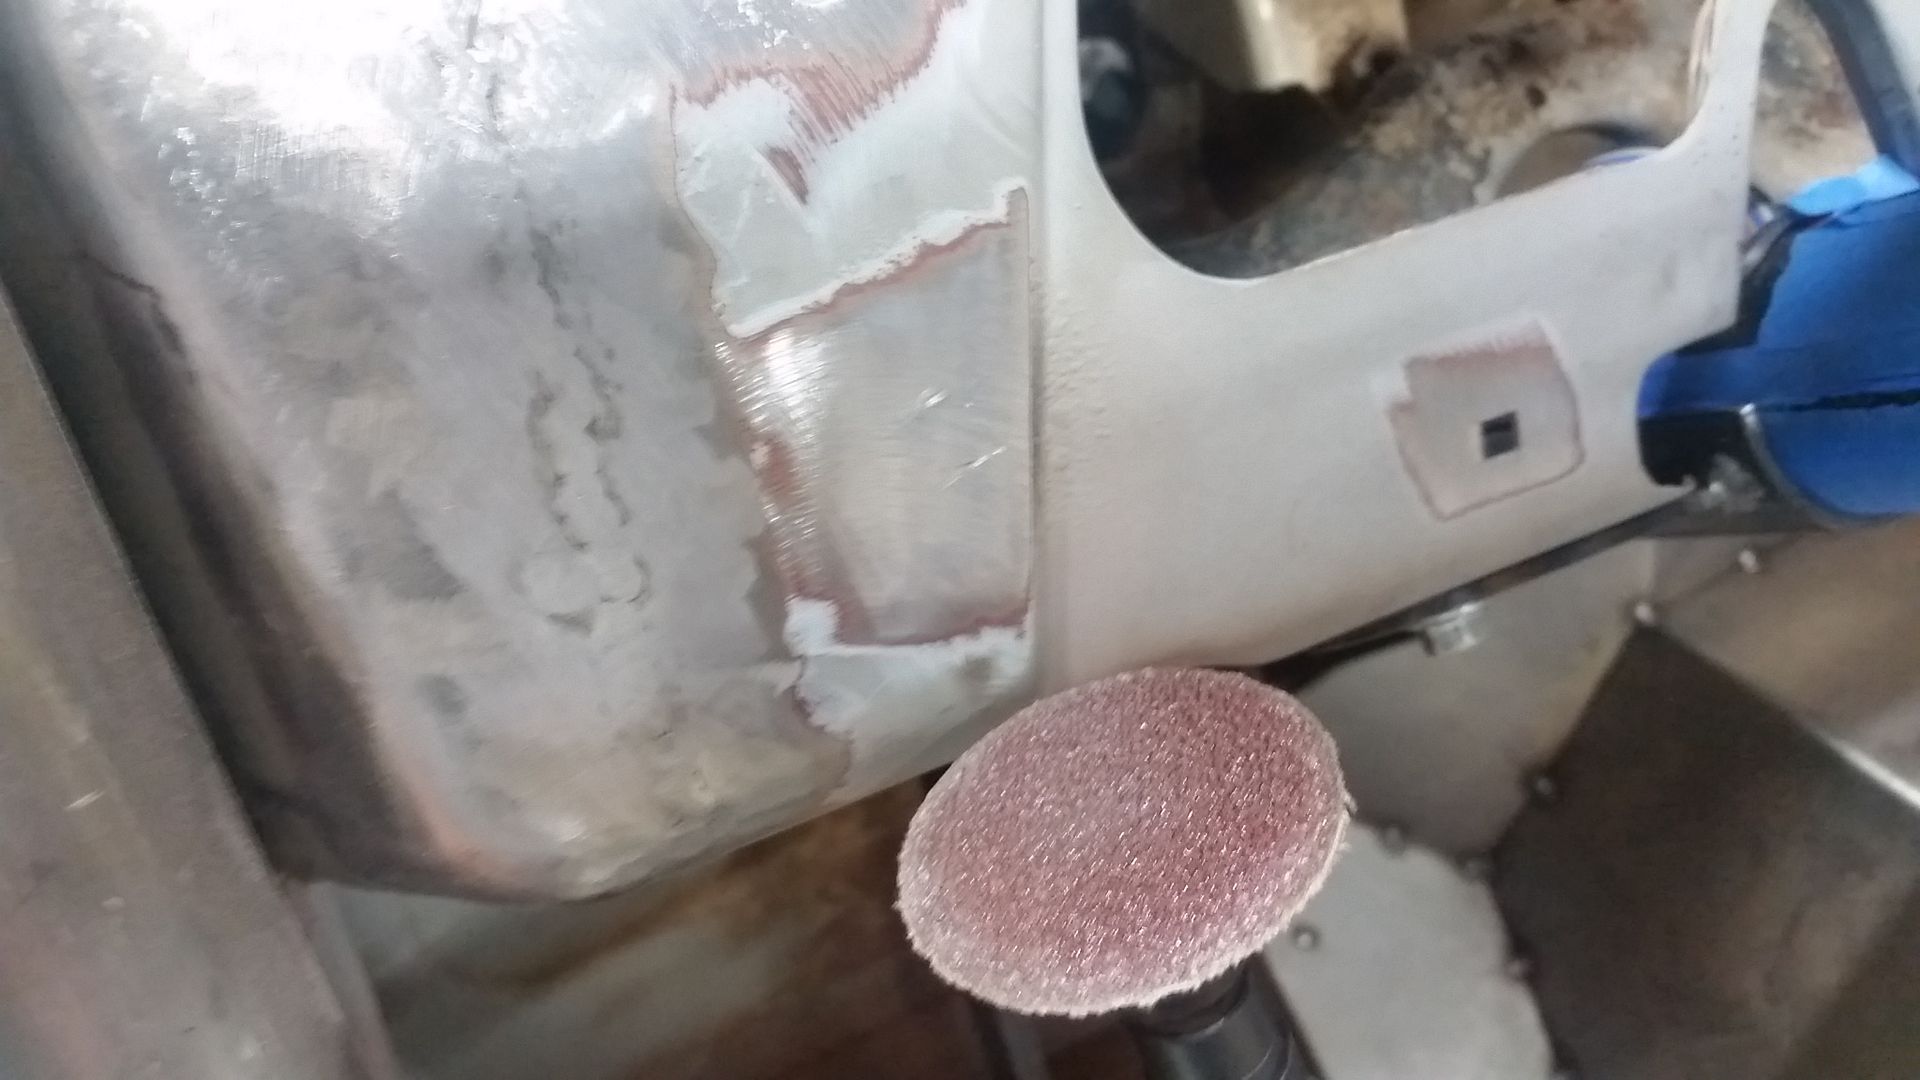
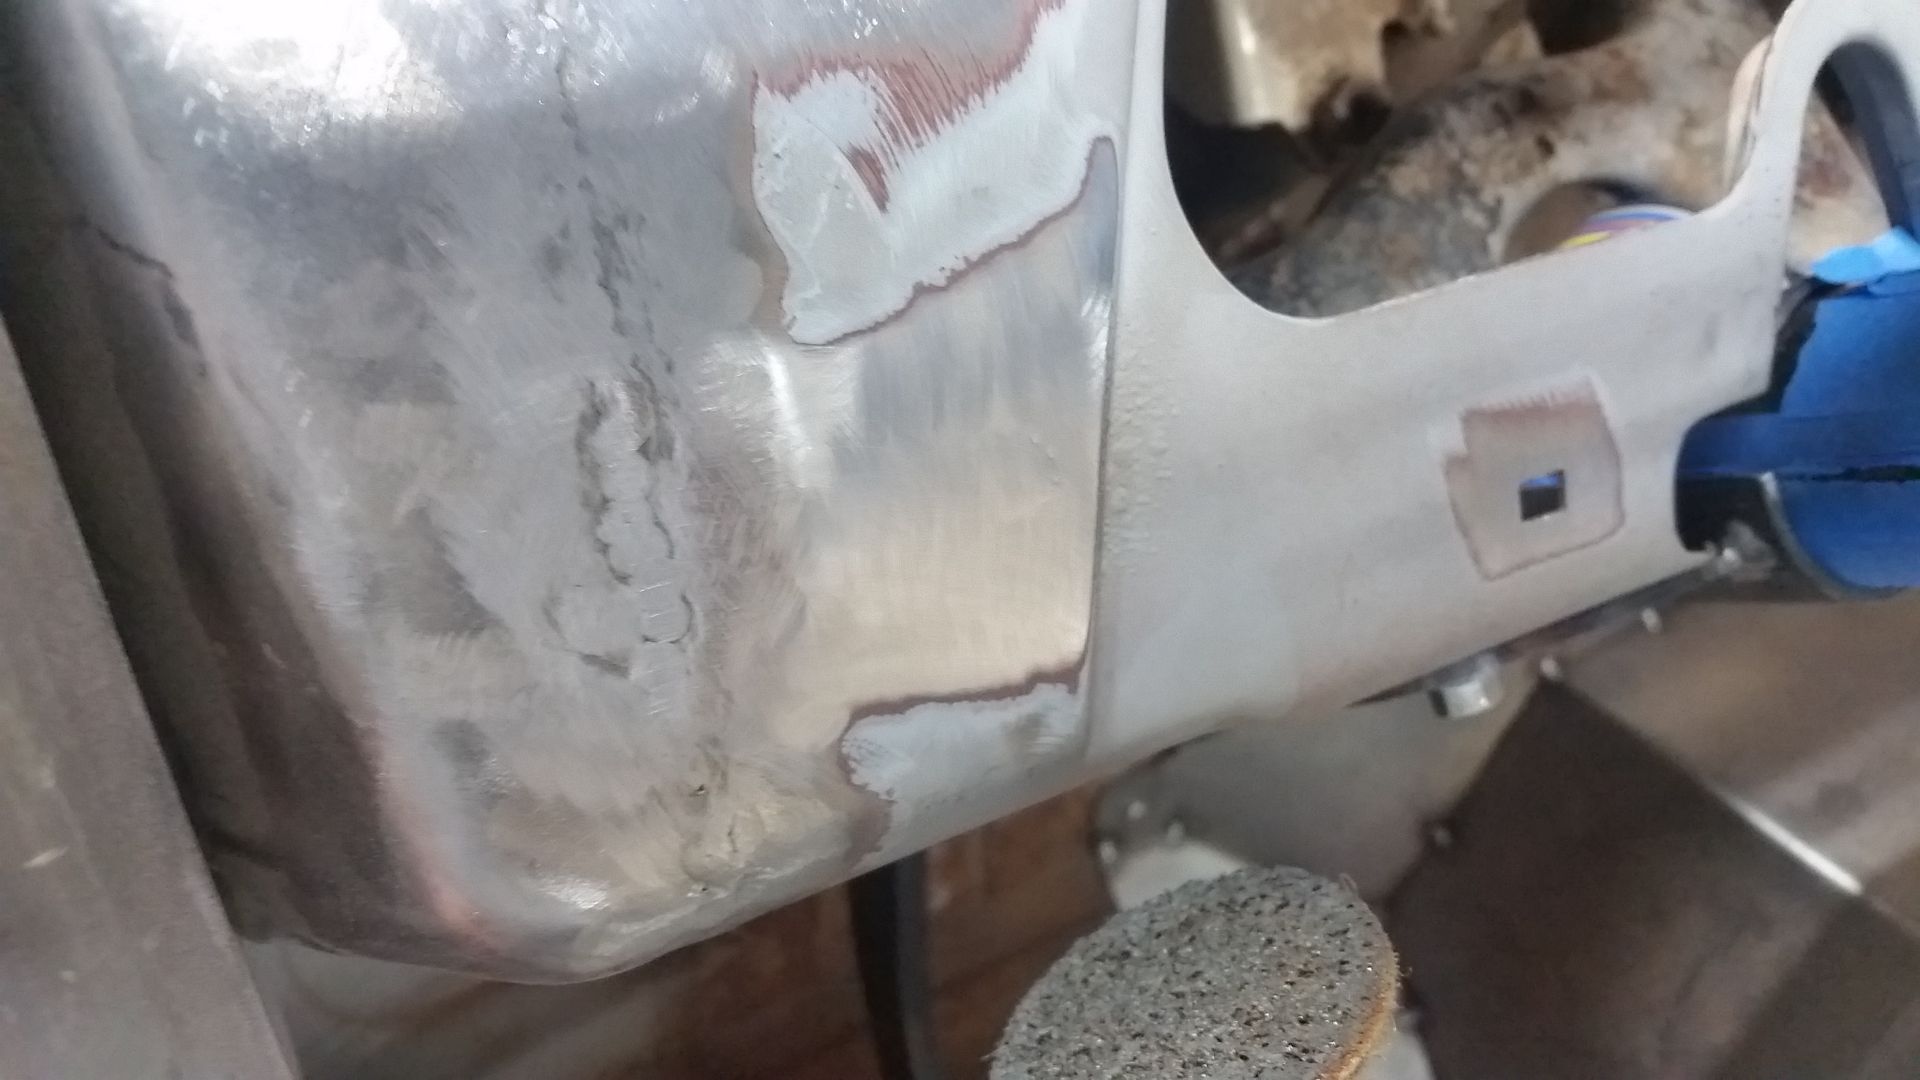
I TIG welded all the holes shut on the dash so I could have a clean starting point for future layout.

Here is the general technique I used....


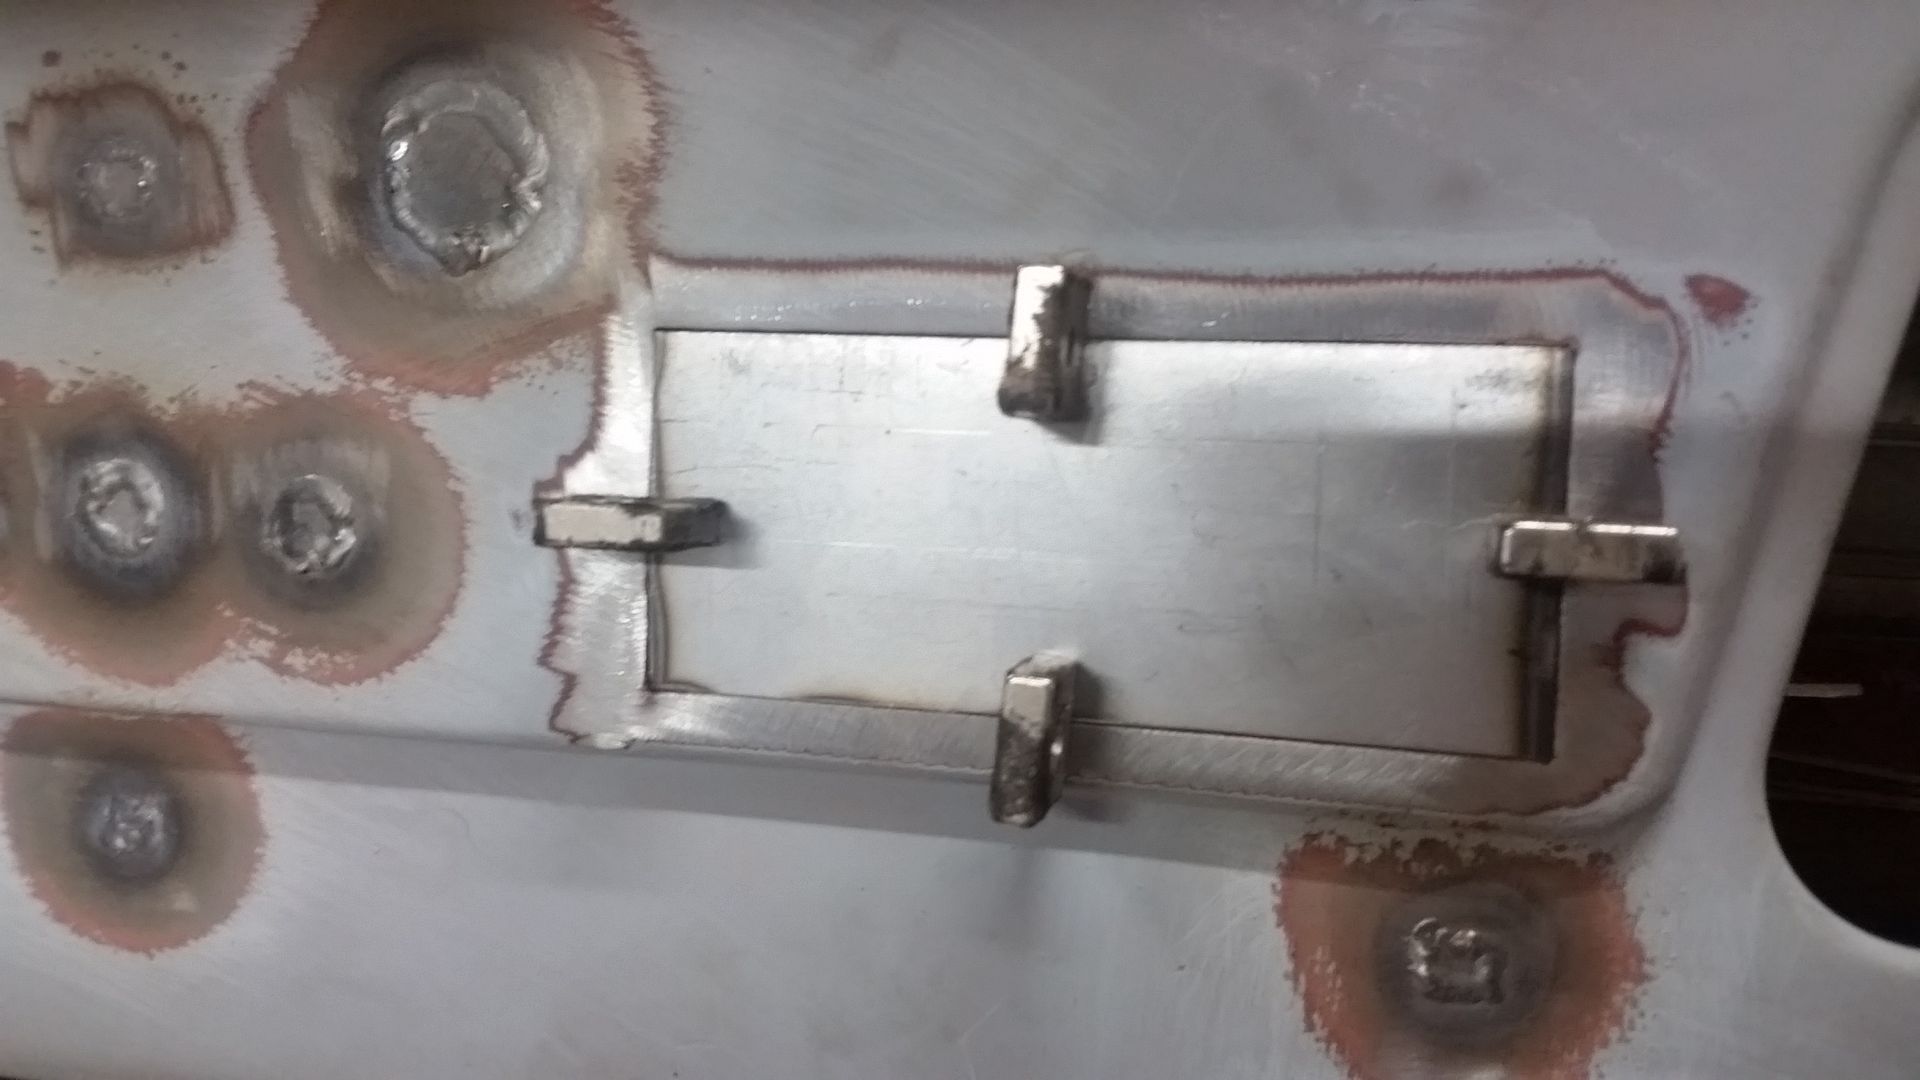
Make a small patch panel for the hole. Making these little tiny ones for the dash pad rectangle holes was kinda fun. For these I cut out the rough size with the body saw, that seemed to give me the best edge in a part that small. These there only about .330 x .220. When filing them for final shape I held them in some small vise grips. Getting a good fit is nice when using a TIG welder. I used a magnet on the back to hold them in place for a few tack welds. I also filed the inside edges to get rid of as much of the old primer/paint as I could.


I used my tig machine to weld them in place. I have the best luck using about 1amp per .001 thickness in material for a base setting. I can back off the pedal if needed towards the end, but having enough amps to get going quickly is nice. For filler I am using .045 which seems to feed in really nice on lower amperage thin stuff.


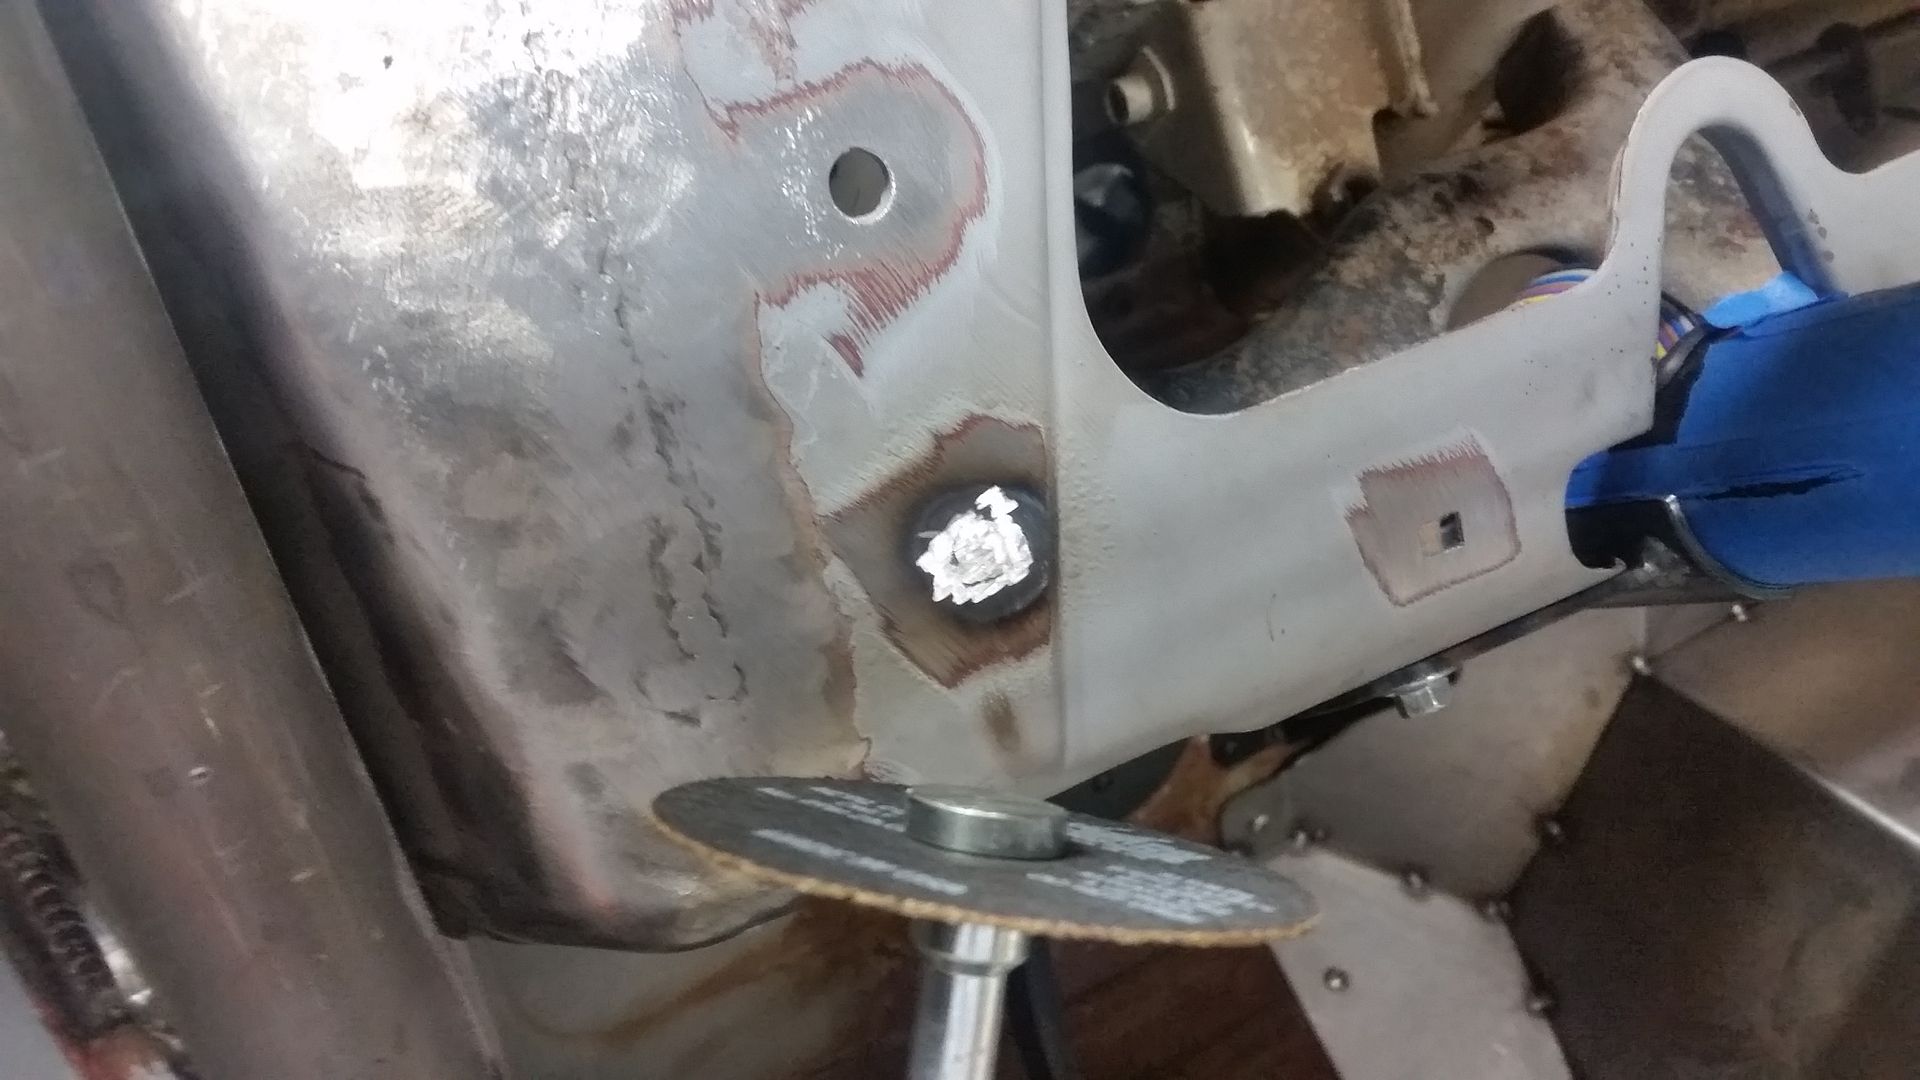
To knock down of the proud part of the weld, I have found that using the edge of a 3" cut off disk spun by a 1/4" air grinder to work the best. You just have to be careful to stop at the right time. A little less is a lot better than too much.


Next I hit things with 36 grit on a 2" roll-lock pad driven by a 1/4" right angle grinder. These are quick and easy to change which saves times. The small discs last longer than I thought they would, but you do go through them pretty quick.


A quick hit with 80 grit to make the scratches a bit less noticeable.


Lastly I dress things out with a brown Scotchbrite disc.
 

Metcalf

Expedition Leader


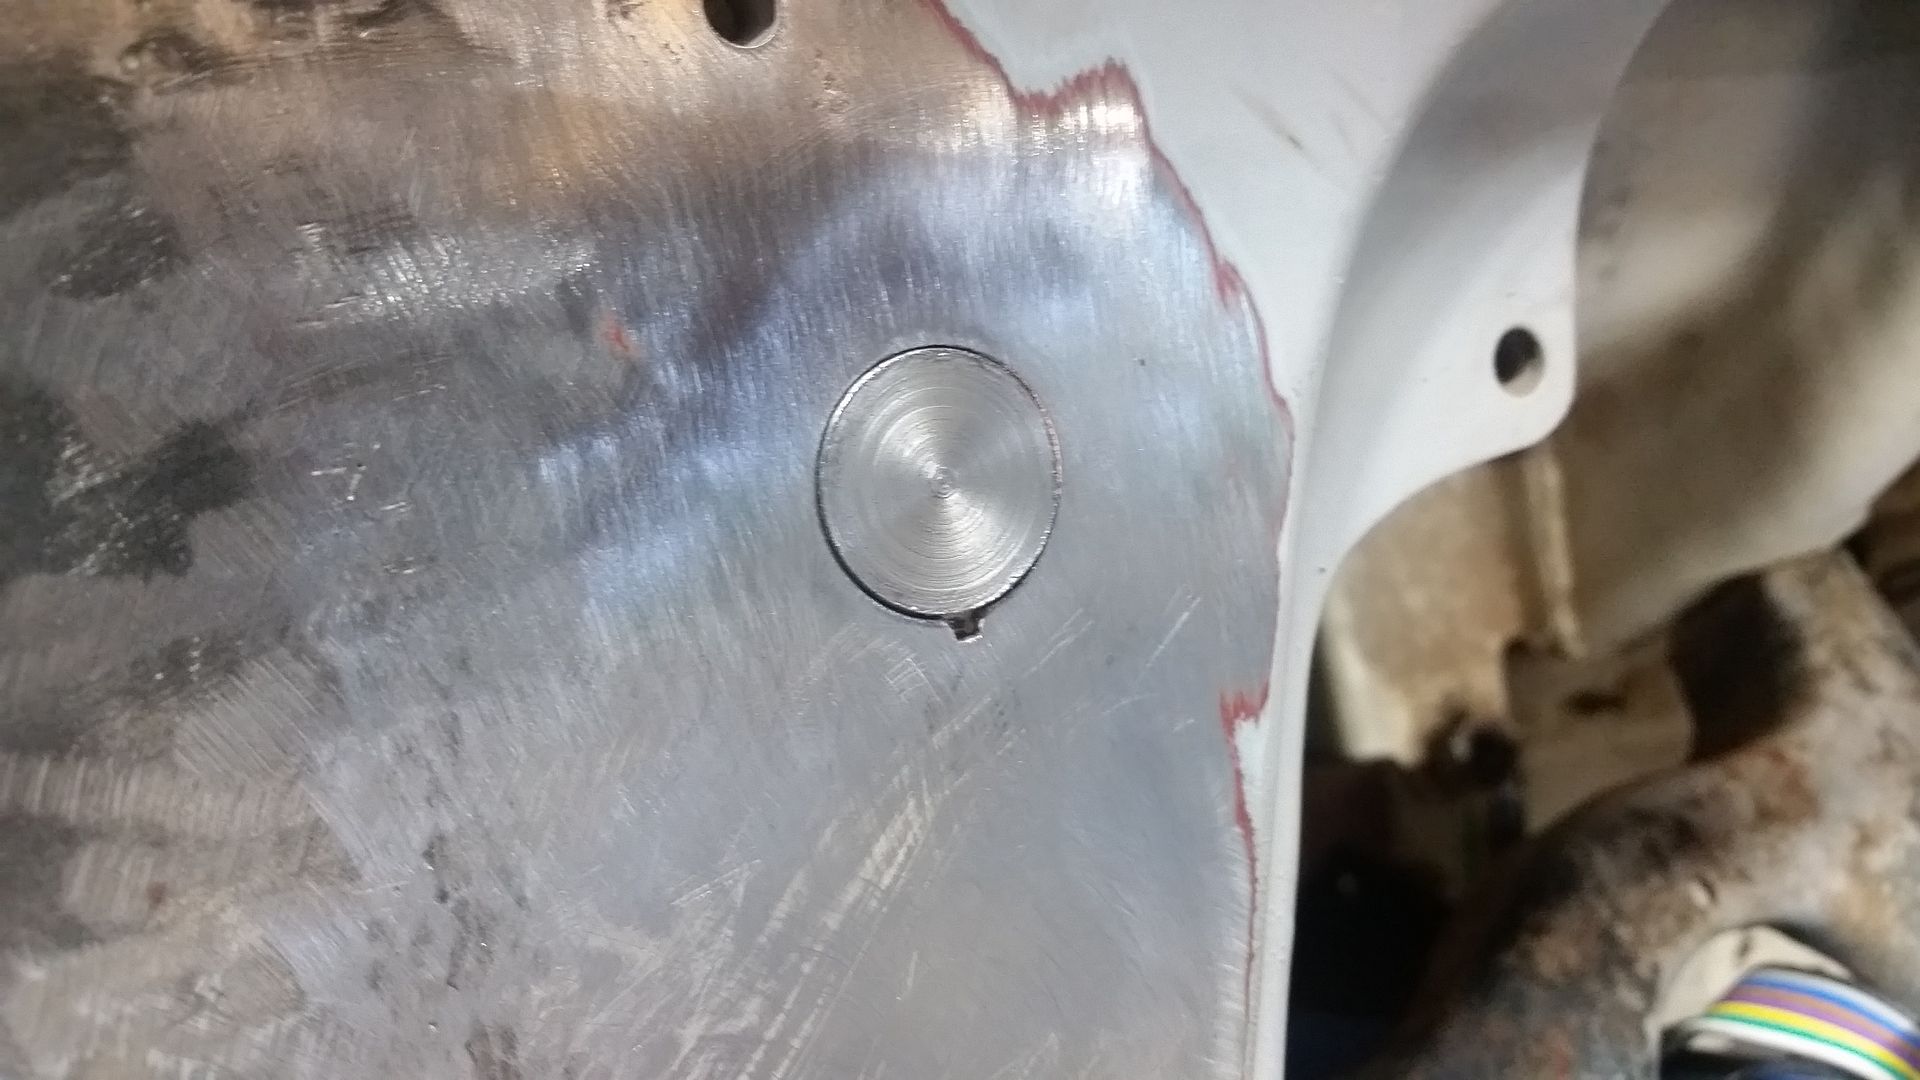
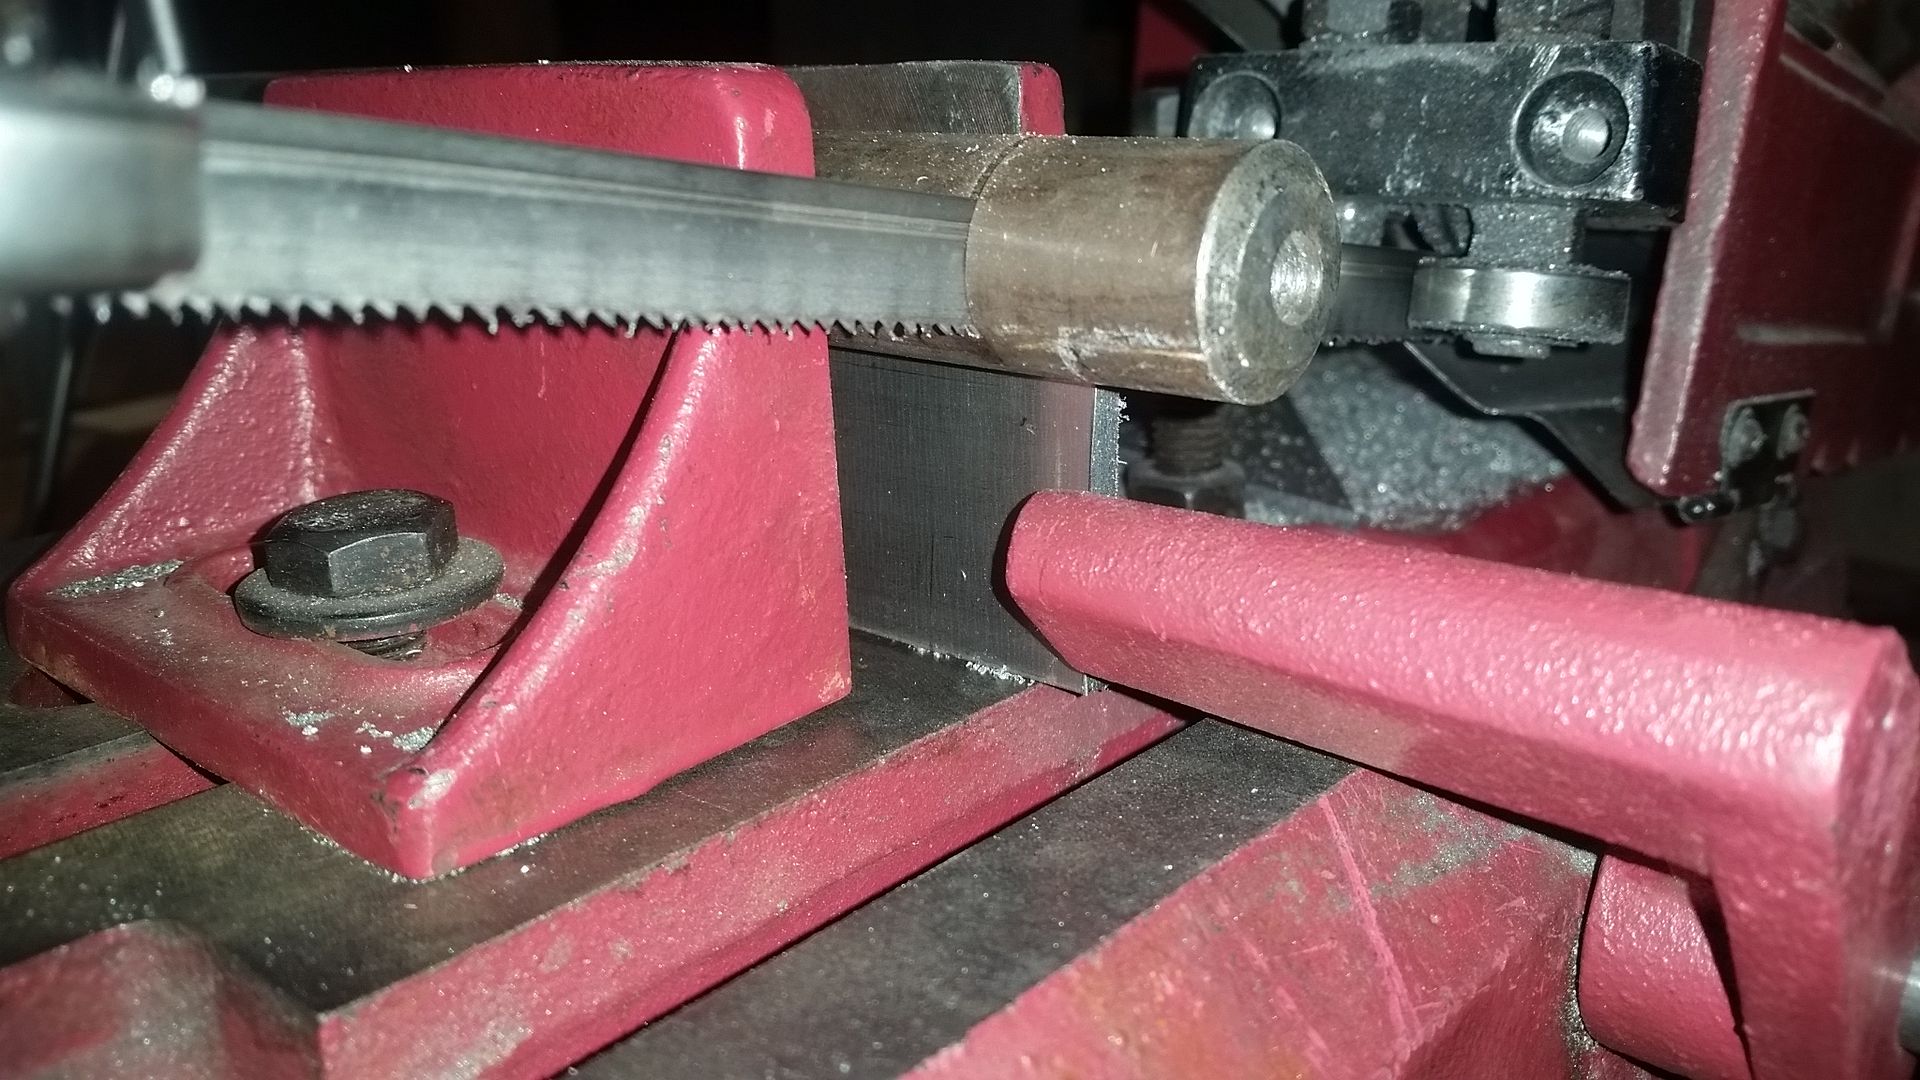
For round holes I have found it easiest to use some round bar stock that is the right diameter for the hole. I can turn the end of a short section of bar to fit exactly on the lathe if needed. You can also dill the holes out to the next stock size if you don't want to turn something, or if the hole is an odd punched shape. To make the proper thickness of material I slice off section in my bandsaw. With a little setup I can get .040 to .060 discs which are great for most sheetmetal patches.


To do this I set the little stop on the HF saw. The only real issue is when you need to cut off some stock once you set the stop to make more patches. For this, I just insert a scrap of bar stock under the part I need to cut off. This gets the part above the stop so you can maintain the fine/thin setting on the stop and not have to set it up again.


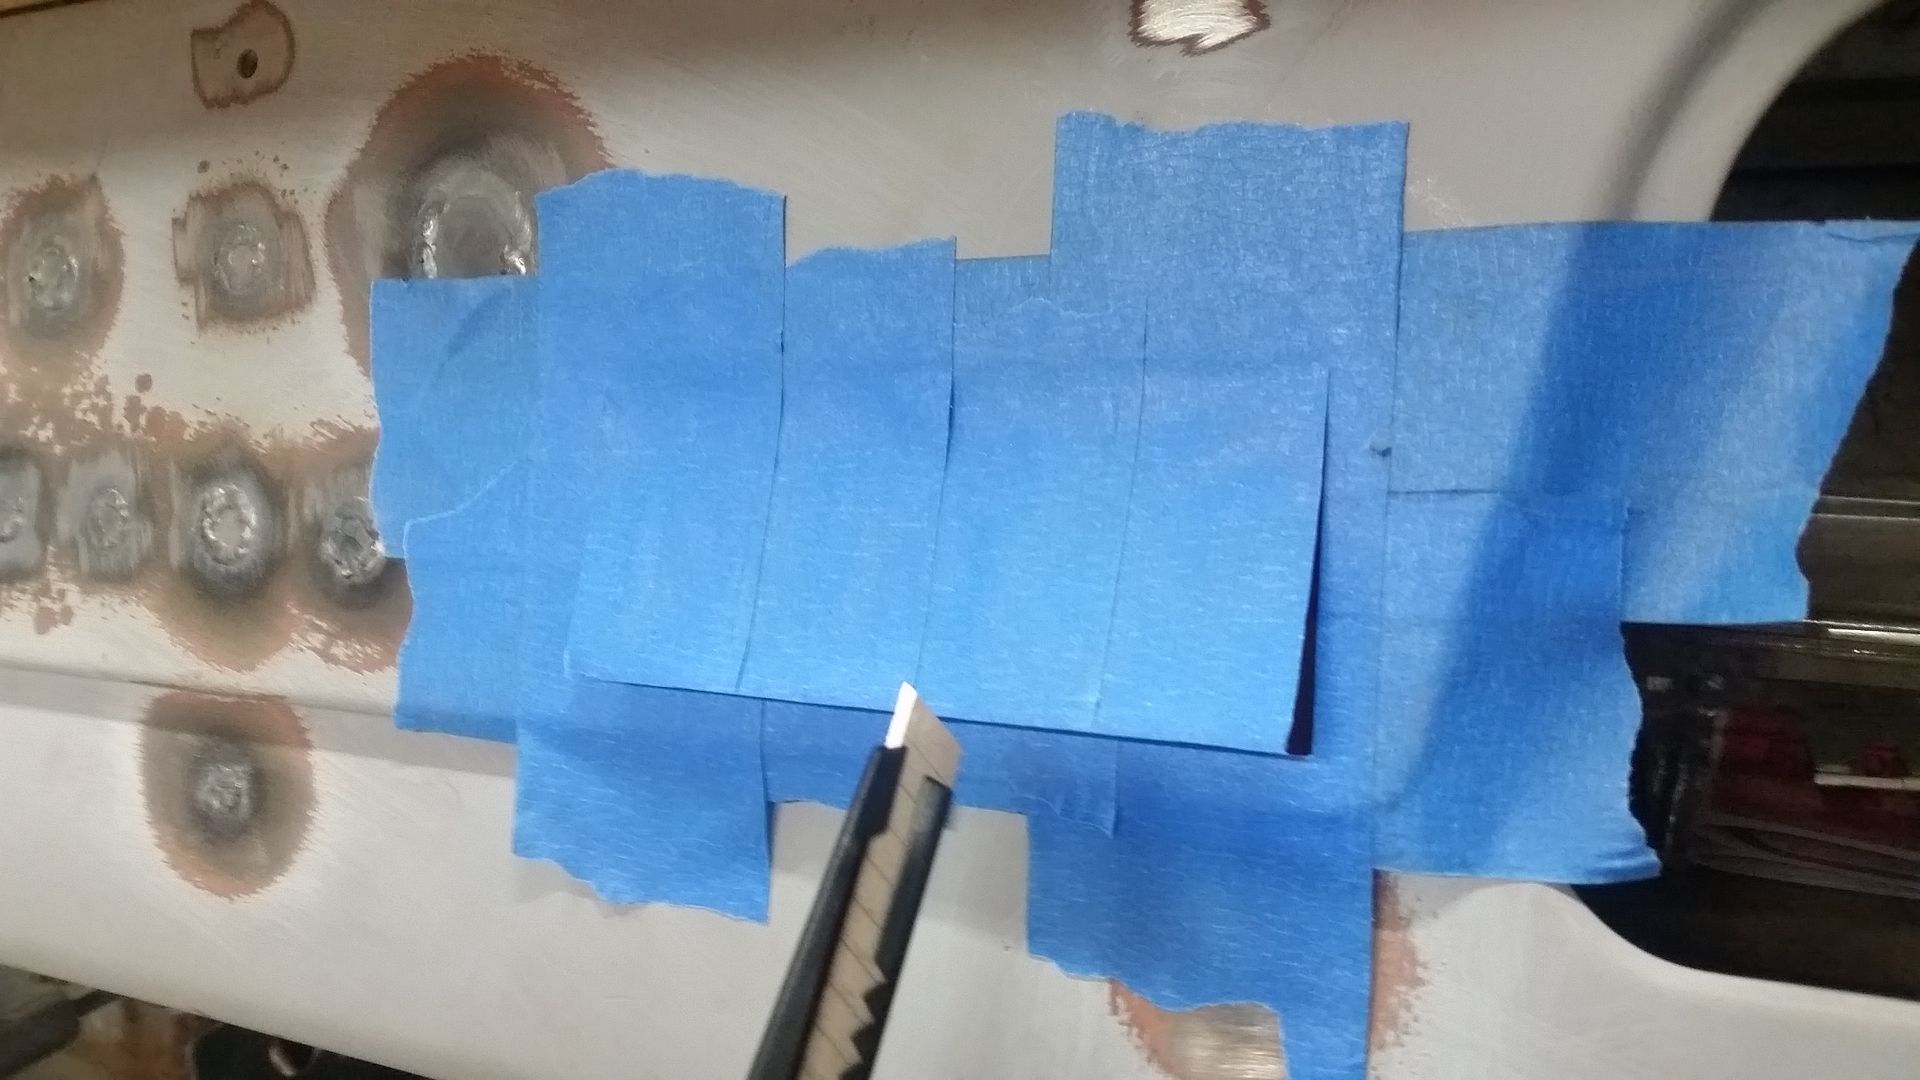
If you need to make a pattern for a large, or odd, hole coat the area in two layers of masking tape. If you can press from back all the better. Then cut out the shape you need with the thinnest razor edge you have. That template can then be stuck directly onto the metal you need to cut the template out of.


When you are done you get a patch that should fits like this that takes very little after cut cleanup.


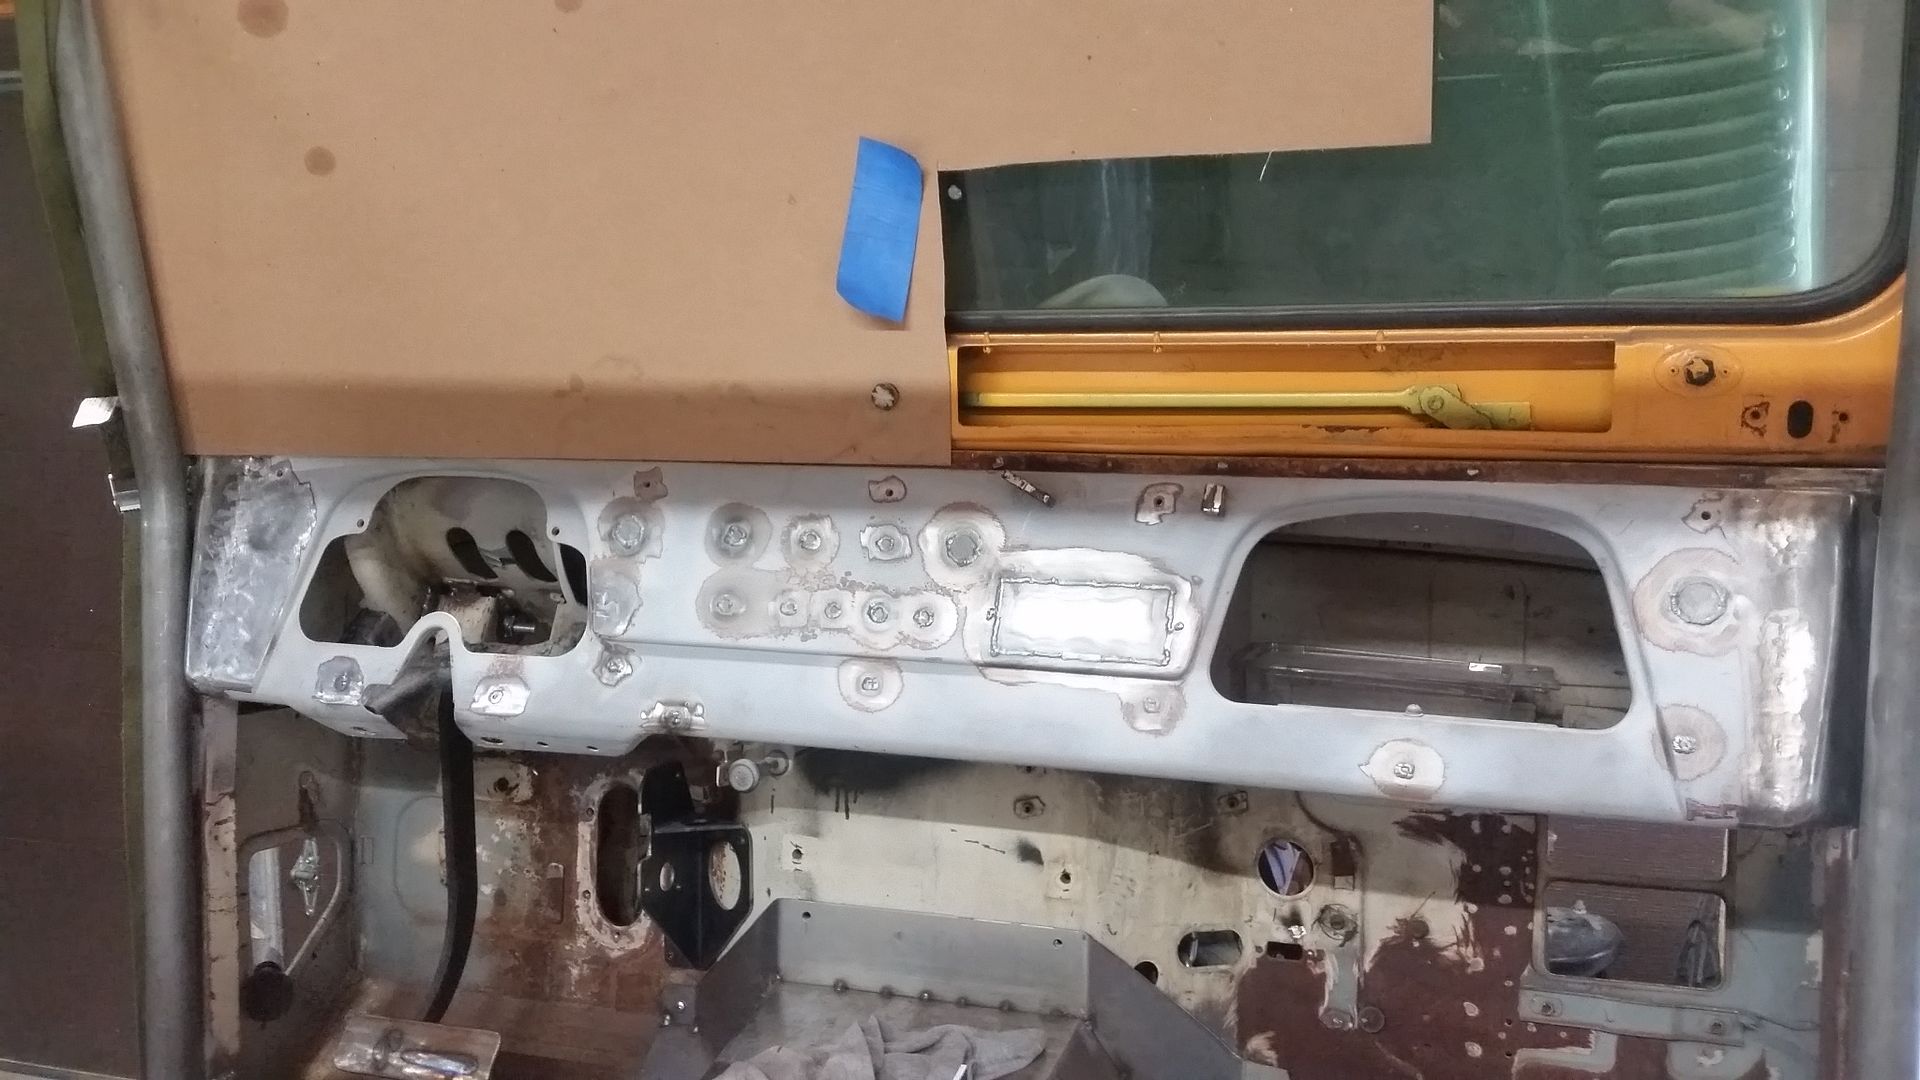
This is what the dash looked like with all the holes welded shut prior to clean up. Lately, I am really liking the TIG welder for stuff like this other than having to be all out of position and needing 3 limbs to do everything. I ended up having to set the pedal on a milk crate to get it into a position I could run with my foot hanging out the door.

I still have a little more clean up work to do on things, but overall I am pretty happy.
 
Nice work.

On the subject of sanding disc lifespan, I am a cheap bastard. I use large discs on the small mandrel for general finishing. When those wear out, I cut them to the smaller size with a scissors. It only takes about 15 seconds to cut one to size. Now I get two for the price of one.

I'm curious. Did the dash flex out of shape after all that welding?
 

Metcalf

Expedition Leader
Nice work.


I'm curious. Did the dash flex out of shape after all that welding?

Thanks.

The only part of the dash that seems to have pulled annoyingly is the upper left of the radio hole where it was close to the other weld. I think a little hammer and dolly in that area and it will be ok.

In general, I am not patient enough to chase a no body filler flat panel. I am going to put a table mount in the middle of the upper part of the dash. All the switches will be in the lower rail section I think.
 

Forum statistics

Threads
188,027
Messages
2,901,344
Members
229,411
Latest member
IvaBru
Top