Blender, My LX450/FZJ80 + FJ45esk + GM + Land Rover crazy concoction

I really like sheet metal work (for myself). I am not nearly as skilled at it as you two guys are. Keeping the heat out of the surrounding metal is always first in my mind when prepping to weld. The patience required is what puts me over the edge if I am under the gun in the shop, my mind goes to all the other stuff I could be getting done while farting around getting a panel welded up.

I like watching the OP's forming methods, creative and then some. Truly inspiring. We are talking about expanding the shop and a couple sheet metal tools are on the radar. I have a hand bead roller but a powered model would be great. Have you ever checked out this guy?
https://www.youtube.com/user/lazzemetalshaping/videos

I too like watching what Brennan comes up with. He is quite imaginative.

I hear what you're saying about patience. It does require restraint to not just run and grab the MIG and weld er' up. TIG is much more time consuming up front, but the time saved in metal finishing is worth the wait.

I figure there are four parts to any builder's shop; mechanic's tools, sheet metal tools, heavy metal tools and machine tools. I have all the mechanic's tools I'll ever need and most of the machine tools, so when I think about what tool I want next, I have a hard time deciding between heavy metal and sheet metal. I think I will focus on sheet metal tools for a while.

Lazze is close to me and I've thought of taking some of his classes. My insurance agent, who is also an old friend of mine, started taking his classes about 15 years ago and now he builds wide body Porsches, all metal, by hand, and he gets huge amounts of money for them. Seems like a sound investment to me. I just need to find the time...
 

Metcalf

Expedition Leader
I too like watching what Brennan comes up with. He is quite imaginative.

I hear what you're saying about patience. It does require restraint to not just run and grab the MIG and weld er' up. TIG is much more time consuming up front, but the time saved in metal finishing is worth the wait.

I figure there are four parts to any builder's shop; mechanic's tools, sheet metal tools, heavy metal tools and machine tools. I have all the mechanic's tools I'll ever need and most of the machine tools, so when I think about what tool I want next, I have a hard time deciding between heavy metal and sheet metal. I think I will focus on sheet metal tools for a while.

Lazze is close to me and I've thought of taking some of his classes. My insurance agent, who is also an old friend of mine, started taking his classes about 15 years ago and now he builds wide body Porsches, all metal, by hand, and he gets huge amounts of money for them. Seems like a sound investment to me. I just need to find the time...

Thank you. I like learning how to fab just about as much as anything else.

Lazze style tools are on my list for the future, but I wold likely make them myself. If you notice he doesn't do a lot of banging on things. He basically does 'quiet' shaping with a wheel, shrinker, and bead roller. Very neat stuff.

On the flip side of things, I have an appreciation for efficiency in fabrication of vehicles. Fabricating everything by hand may not always be the best answer these days. It is all a balance.
 
Fabricating everything by hand may not always be the best answer these days. It is all a balance.

When most of the work is one off, it's hard to justify spending the time to design things on paper. By the time I get the design going, I can usually have something roughed out of metal and be well on the way to getting it done.

There is a balance for sure, but I do this stuff because I like it.
 

Healeyjet

Explorer
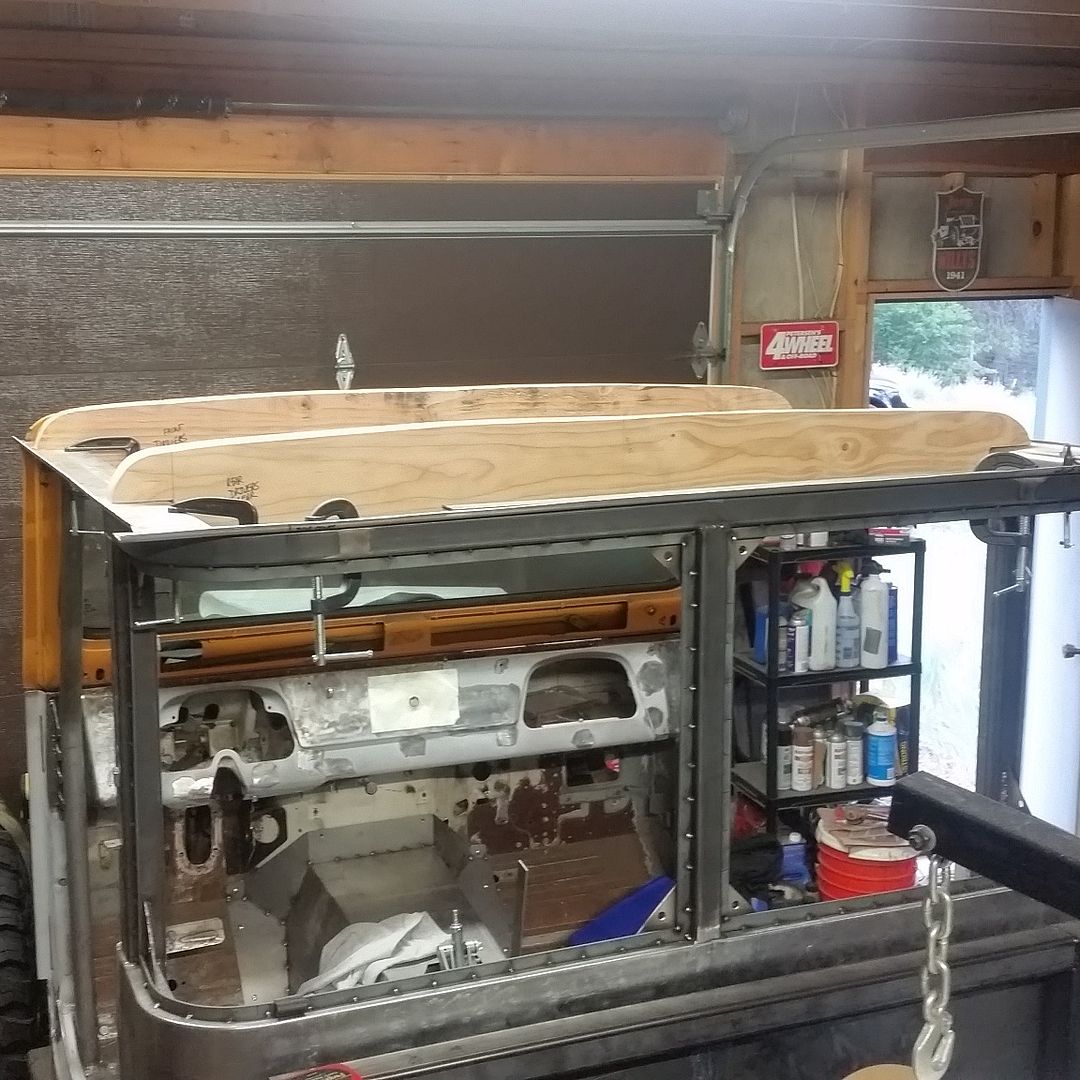
I think it's time for you to step away form this project for a while! And while you are back there take some photos of it so we can see how everything is coming along!!! A photo or two of how it sits right now would be great. I am trying to piece everything together from the photos you have posted so far but would love to see it from a bit further back.

Ward
 

Metcalf

Expedition Leader
I think it's time for you to step away form this project for a while! And while you are back there take some photos of it so we can see how everything is coming along!!! A photo or two of how it sits right now would be great. I am trying to piece everything together from the photos you have posted so far but would love to see it from a bit further back.

Ward

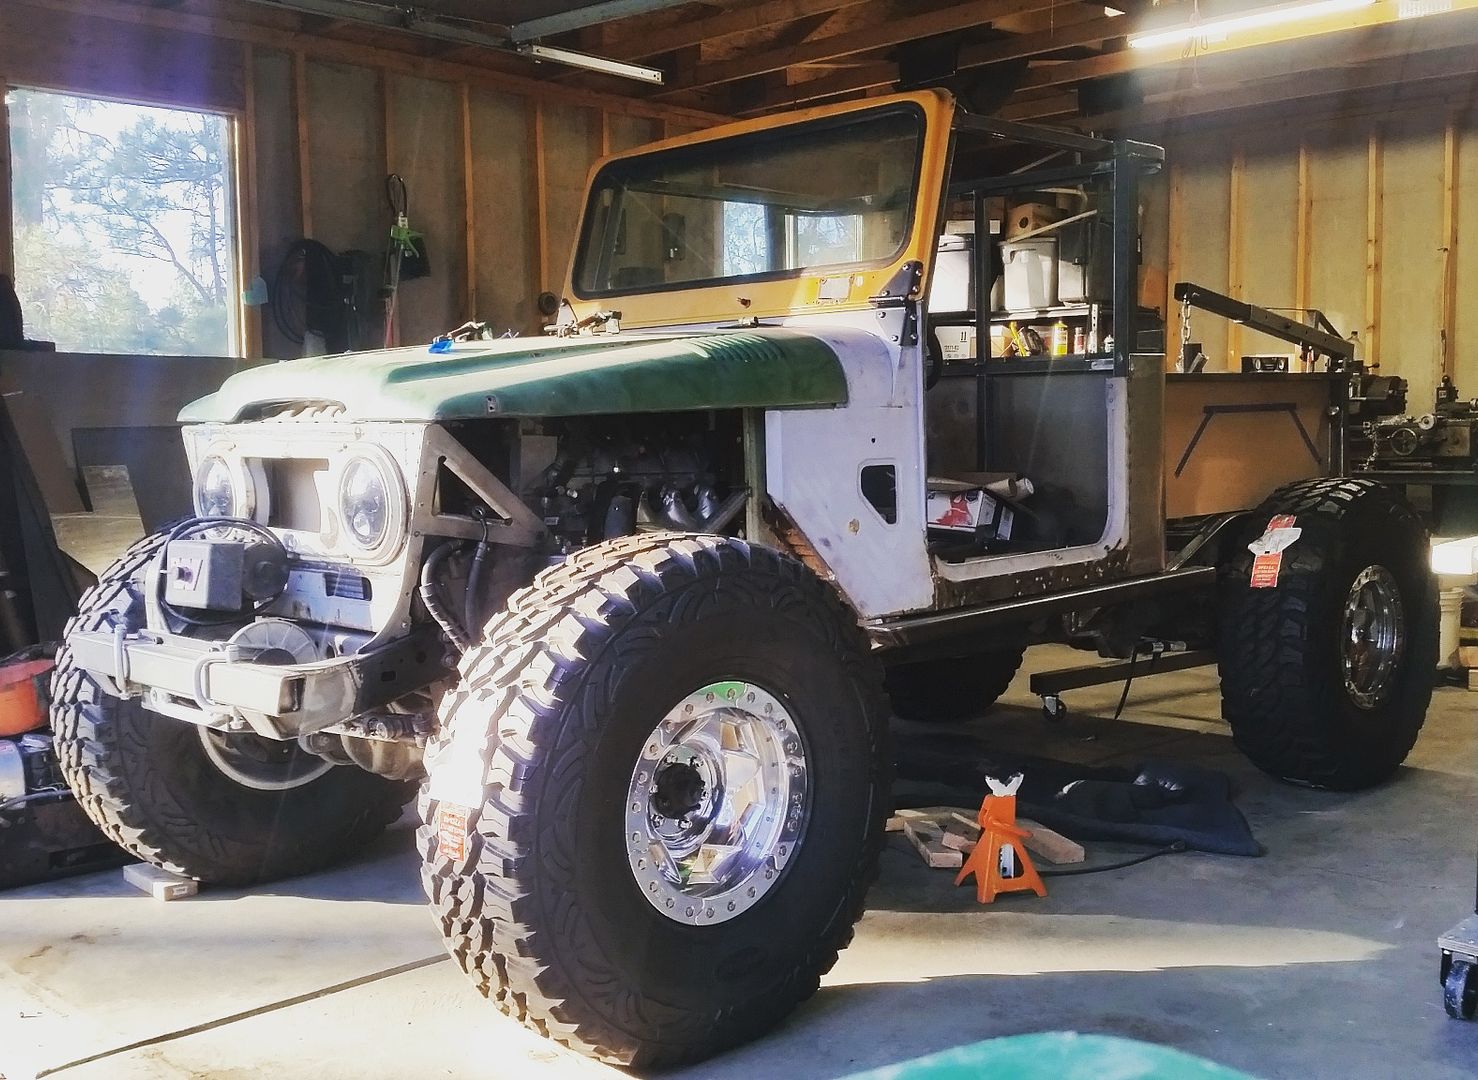
This is about as far away as I can get right now in my garage.


Metcalf

Expedition Leader
When most of the work is one off, it's hard to justify spending the time to design things on paper. By the time I get the design going, I can usually have something roughed out of metal and be well on the way to getting it done.

There is a balance for sure, but I do this stuff because I like it.

I think it depends on the project. I can see that storing information for certain projects, but not for others.

I to like fabbing stuff....
 
I'm really liking the proportions. It's not too wide, the front end is clipped for a compact approach, and the ride height is perfect. It reminds me of an old Power Wagon, but scaled down.
 

Metcalf

Expedition Leader
I'm really liking the proportions. It's not too wide, the front end is clipped for a compact approach, and the ride height is perfect. It reminds me of an old Power Wagon, but scaled down.

Thank you. With the doors pinched it gives it a bit of different proportions since the cabin is only 56" wide now.
I can't wait to roll it outside to get more than a few feet away from it.
 

Metcalf

Expedition Leader
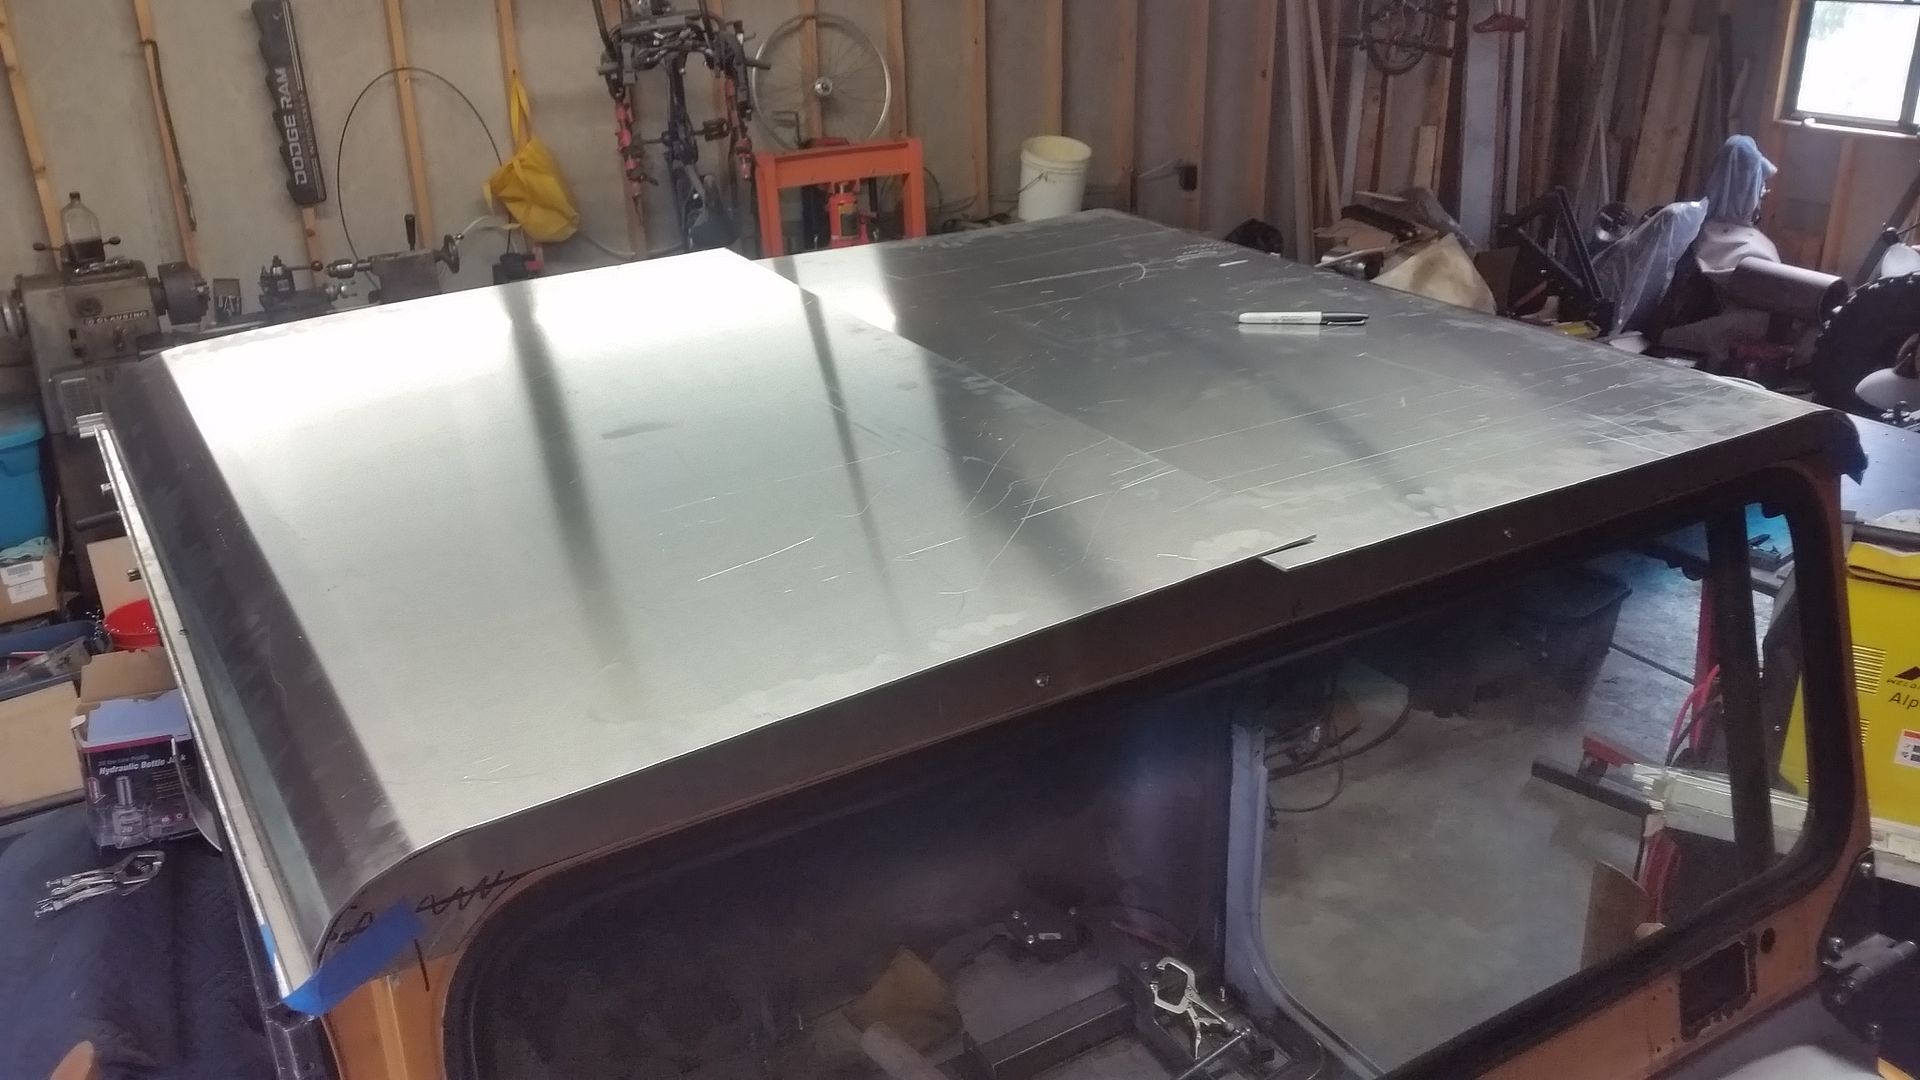
Phase one of making the top.


I don't know about this non-metallic stuff. It's all warm and full of life. Ew.
These ribs will come in handy to help define the shape of the main top panel to the same arch as the top of the windshield.


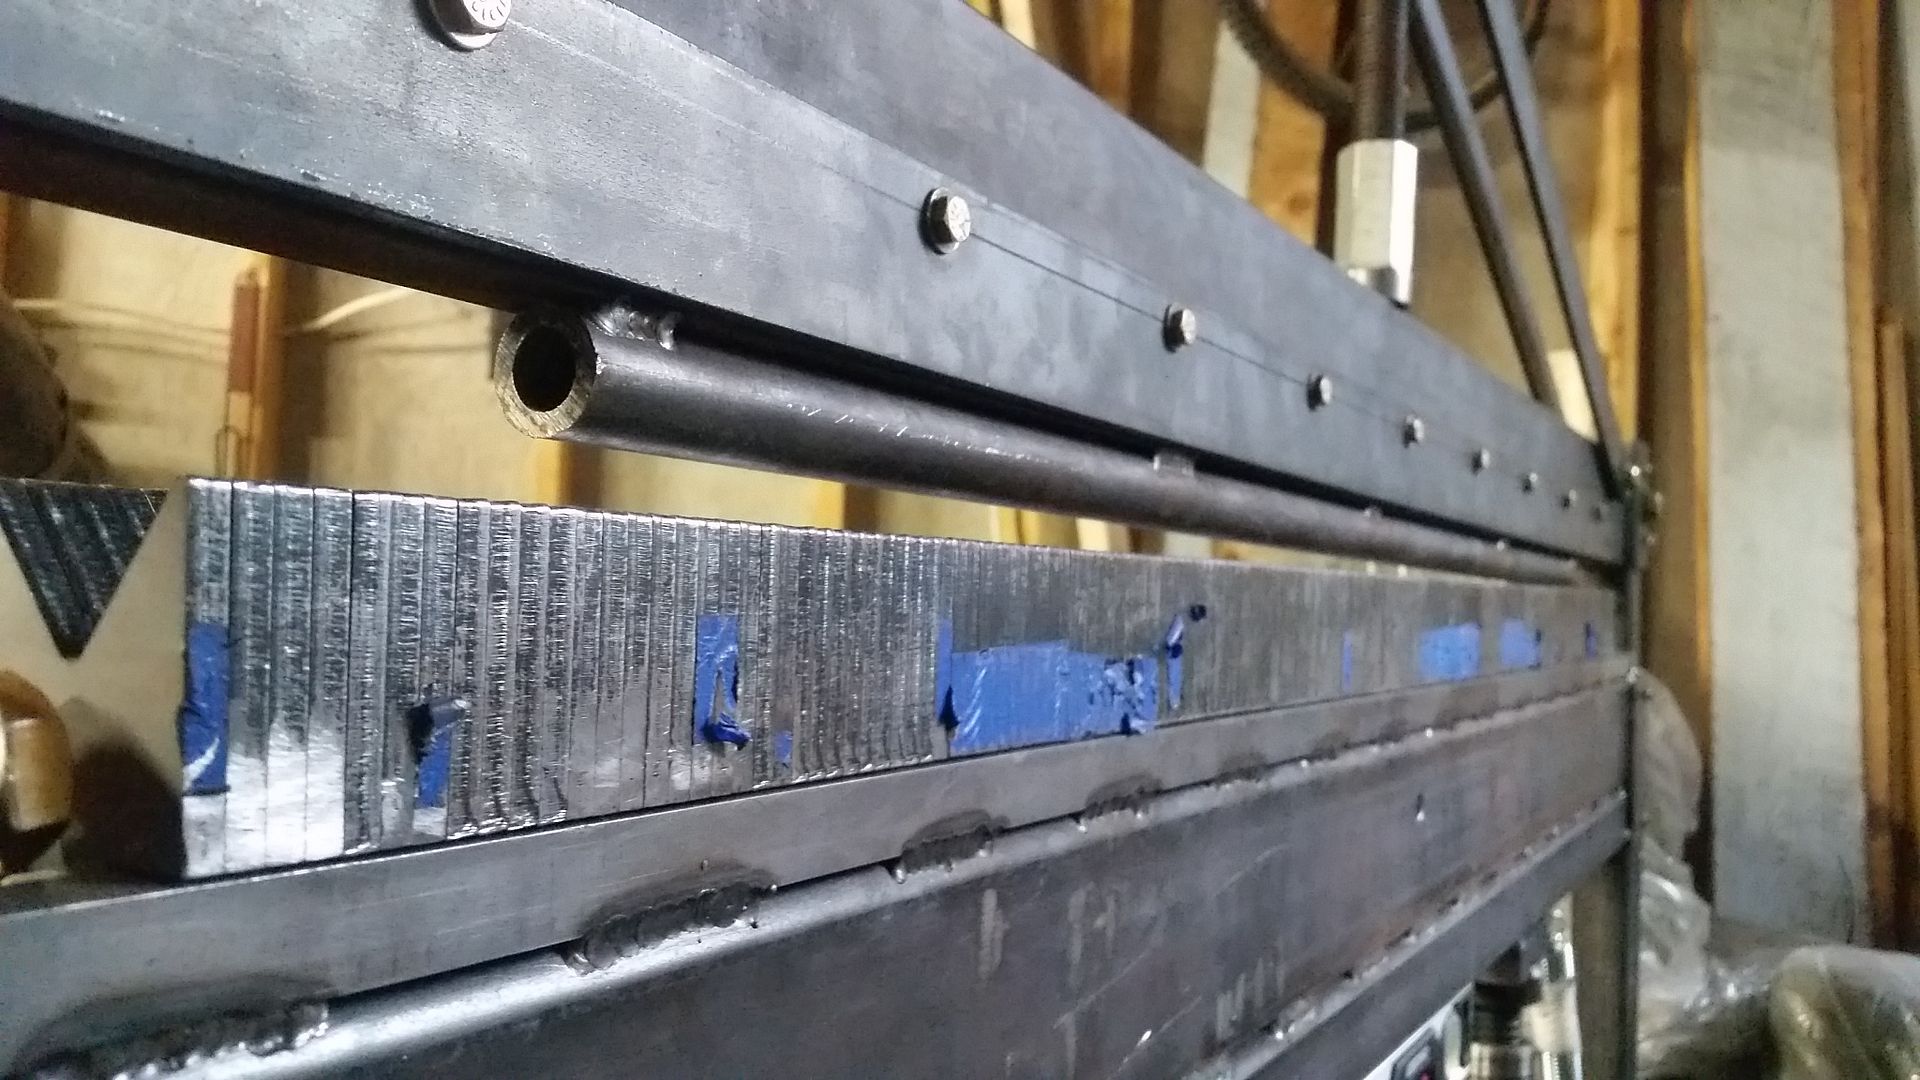
I also knocked up a new top die for my experimental project with a larger radius. This is 1" heavy wall tubing for a 1/2" radius. With the way the top is designed I can weld anything to a 1" thick tang and it can be held in the top of the press by the clamp plates.


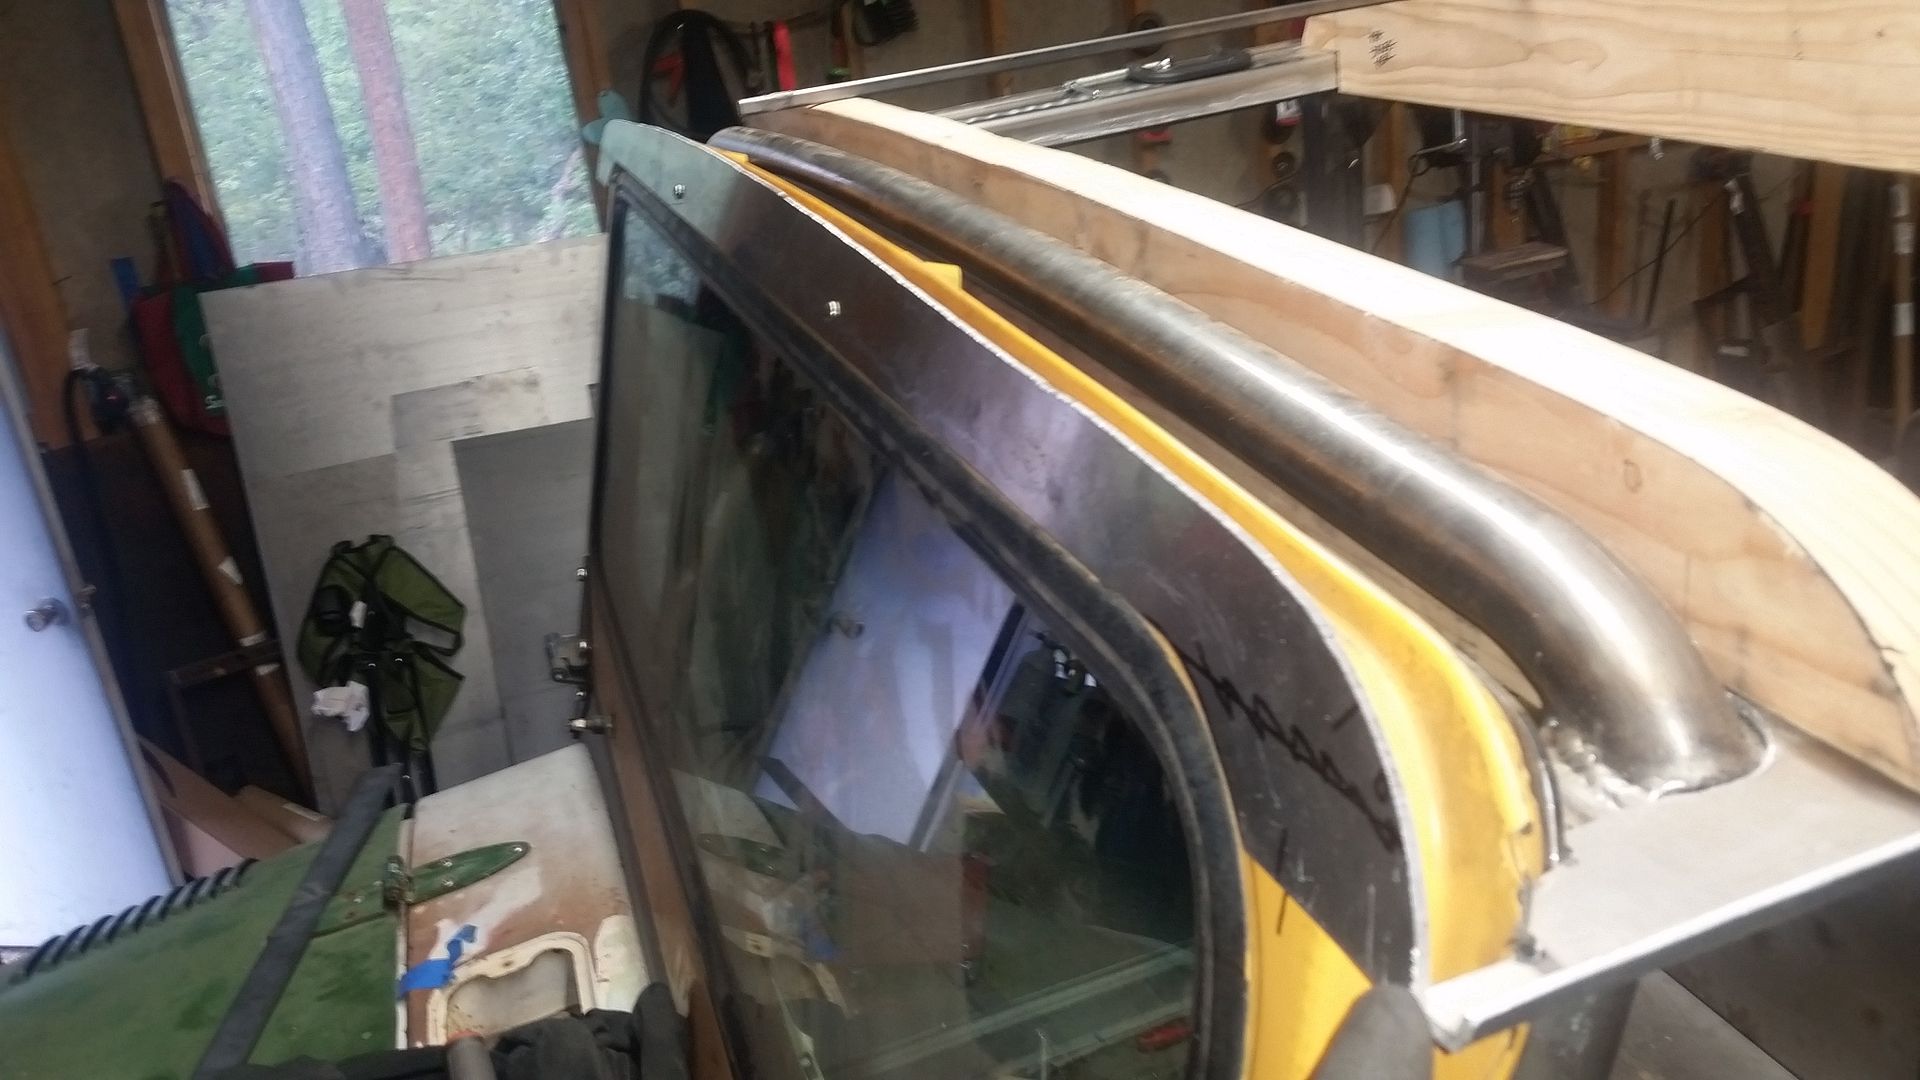
The front wall of the top will wrap around the front of the windshield frame where there is two 6mm fasteners stock. I will be using the spine on the top of the windshield frame for a bulb seal I think.


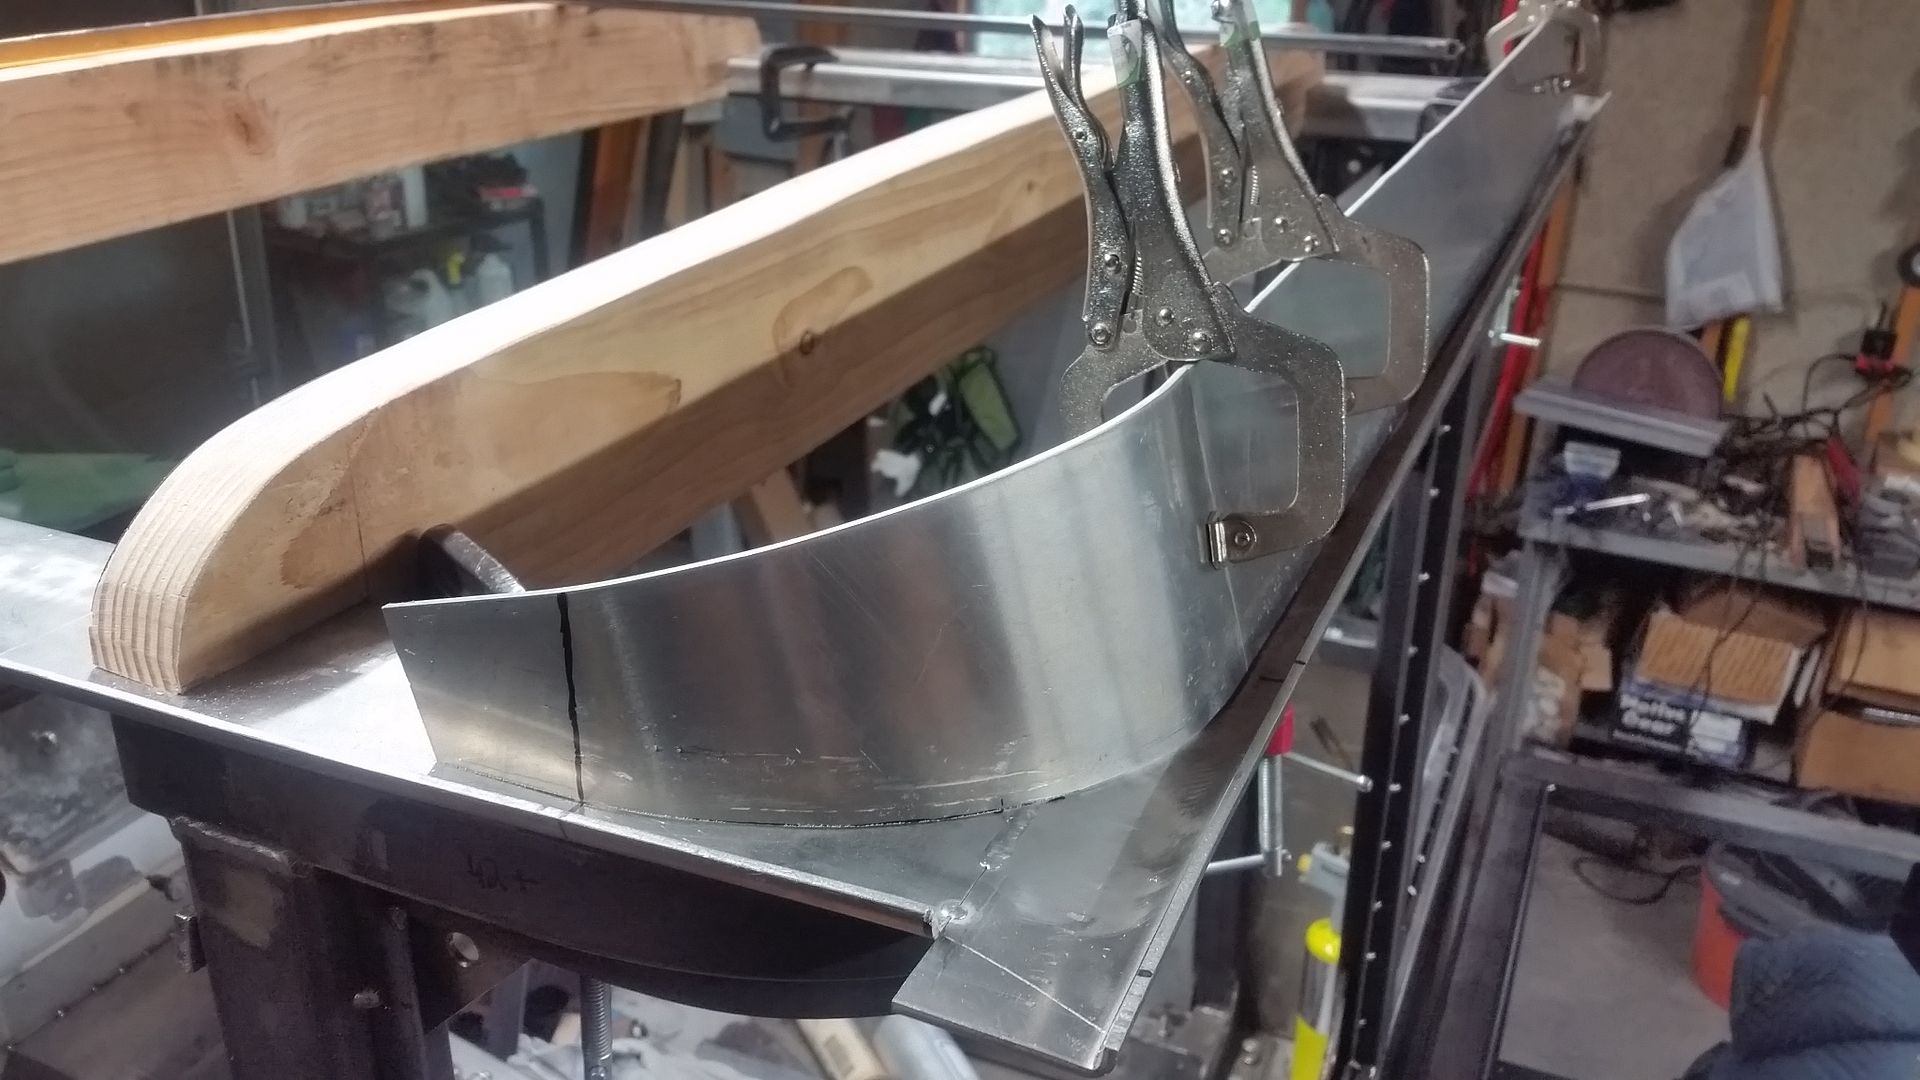
The rear wall of the top is at the same angle as the front windshield part, but also has to transition around the rear corners. I had to do this in a few parts. This will also be trimmed to the top profile using the wooden bucks as a guide.


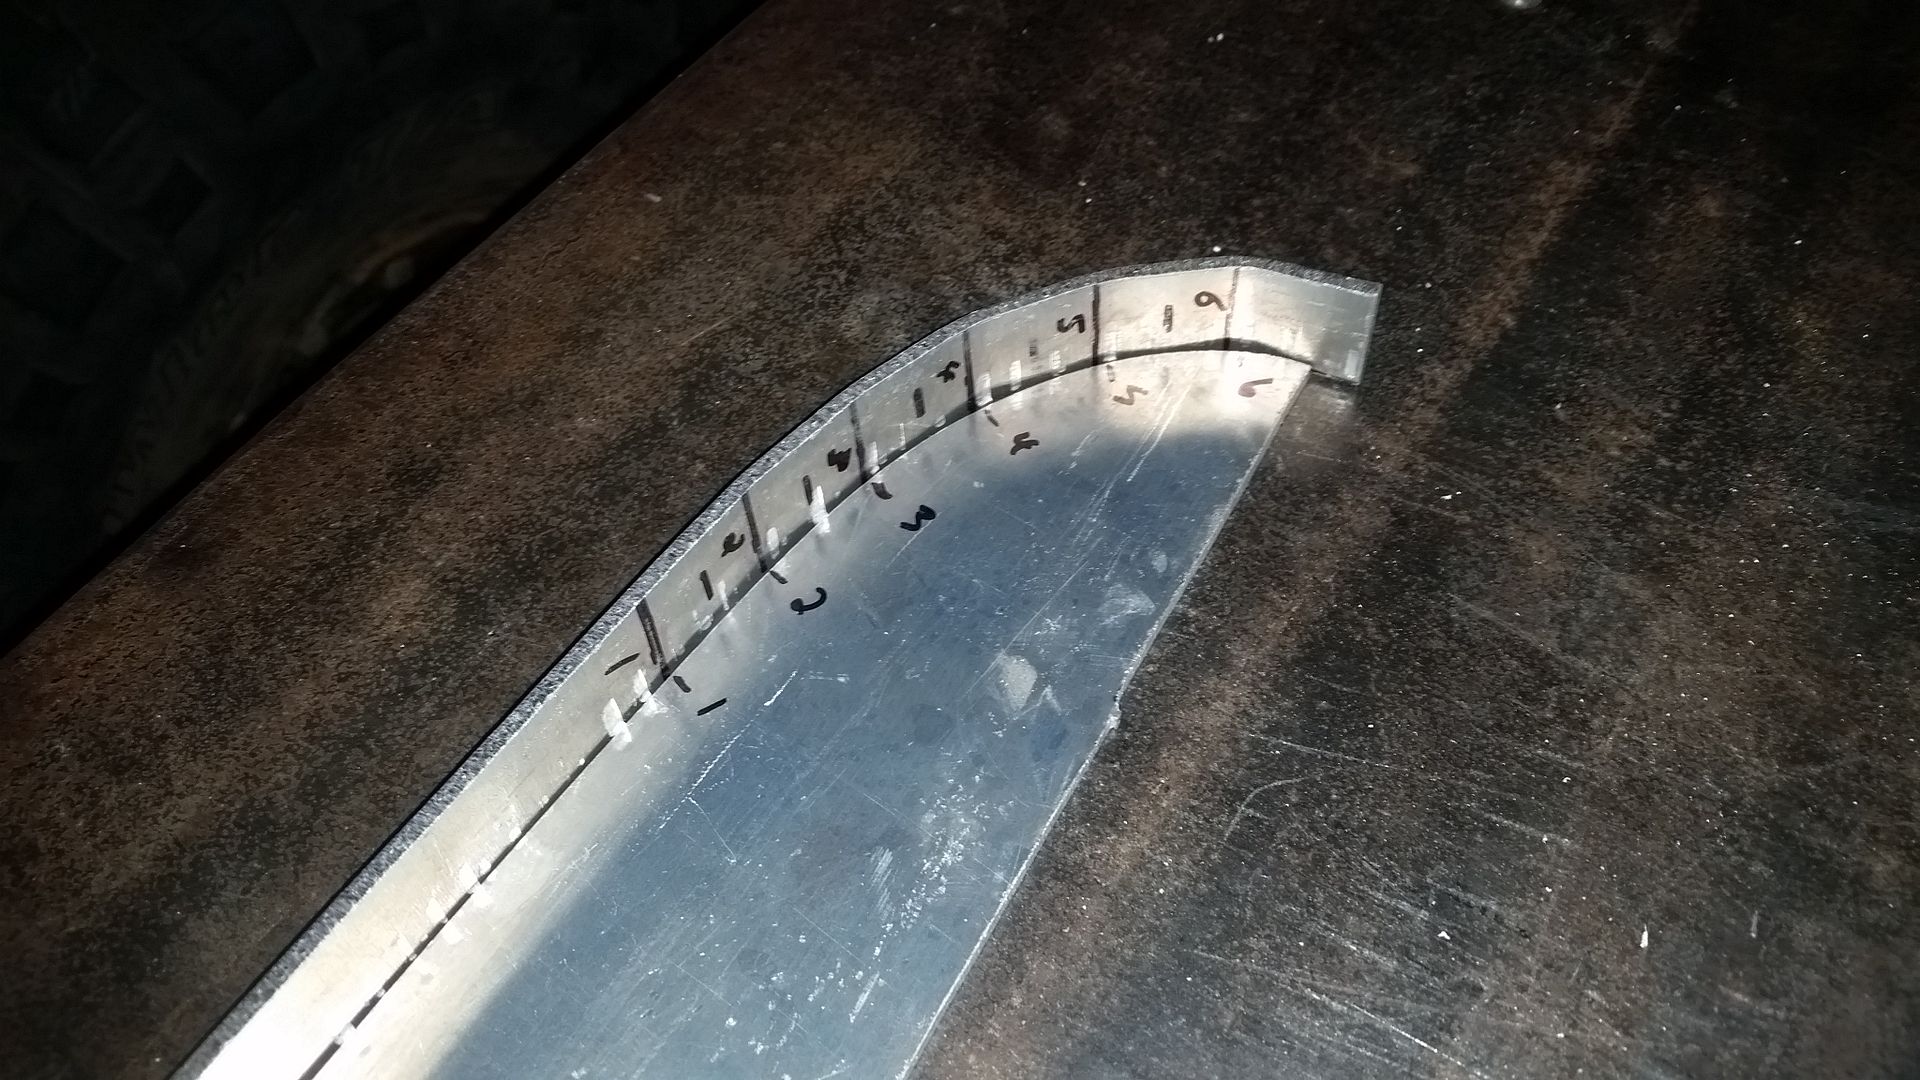
There was a slight learning curve with how to form the top panels. The 1st test part I did I bent from the tight end to the loose end....which would be 6 towards 1 in this pic. That just didn't work as well as I wanted. I ended up reversing that so I started on the 1 side and bent things tighter and tighter towards the edge of the panel. This ended up working a lot better.


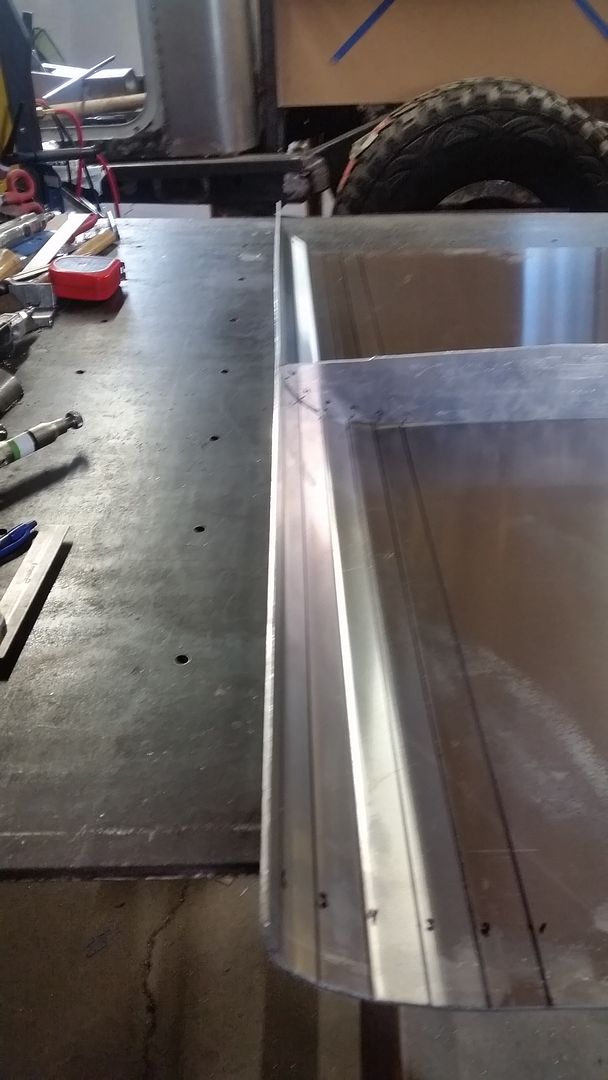
This is what the top panels looked like after a little tweaking of the press brake. I ended up needing to add a decent amount of top truss tension to the press to keep the bend angle consistent across length of the part. 43" of 1/8" 5052-H32 aluminum does cause a workout on the top truss design.

This bend is basically a bump-formed shape where the radius is variable or larger than the top die radius.


Now to spend the next week trimming all this stuff to fit and tacking it into an assembly....

I will follow this up with some shop tip stuff. Photobucket is giving me fits.
 

Sal R.

Active member
Thanks for the tips and sharing the info. Learned a lot. This is a great build and look forward to see the end product.
 

Metcalf

Expedition Leader
Sorry, I have been slacking a little. FB and instagram make it to easy to do mini updates. I am still working on the top panel if that gives you any idea how much work that ended up being....
 

Forum statistics

Threads
188,289
Messages
2,904,957
Members
229,961
Latest member
bdpkauai
Top