You are using an out of date browser. It may not display this or other websites correctly.
You should upgrade or use an alternative browser.
You should upgrade or use an alternative browser.
Cummins Canoe (A Stepvan Story)
- Thread starter PlethoraOfGuns
- Start date
Bikersmurf
Expedition Leader
Something that was on the list of things to do, but then the engine blew up and this went to the back burner, is the brakes. Well, this build added a lot of weight, so lets double check those bakes.
View attachment 661852
When we drove the van home after the purchase, the brakes worked great. Upon initial inspection showed pads and shoes about 50% life left. But recently, it's been feeling like the one or both of the front brakes are dragging for a little bit after hitting the brake pedal. After awhile, they don't drag anymore. Now you might call me crazy, but in my experience I've found that old rubber brake lines get weird inside. They sometimes let pressure through to the caliper, but don't release the pressure once you take foot off brake pedal. Just change the rubber hoses! Saves so many headaches.
View attachment 661853
Changing hoses, yea. But while we got it all apart, lets just change all the pads too.
View attachment 661854
Pretty anticlimactic. Both calipers needed a quick shot of heat to loosen up the bleeder valves. Please use never-seize on those threads so they can easily be removed next time. One day when time and funding allows us, we'll upgrade the rear brakes to disc brakes. The old drums should do us good for now as the shoes have some meat on them and even the parking brake works. Hopefully a wheel cylinder will start leaking so we'll be more encouraged to do disc brake conversion.
View attachment 661855
We also pulled the fridge out again. Installed a thermometer probe. I'm curious to see what the temperature is back there when the fridge is operating.
View attachment 661856
Got a bunch of thermometer probes. Not sure how hot is too hot behind a fridge, but we're looking at about 16 degrees warmer back there than inside the living space of the rig. What temperatures behind the fridge do you think we should start being concerned?
#1-Fidge
#2-Freezer
#3-Behind fridge
In-Interior
View attachment 661857
We put up a map to give us motivation to get up and go. But looking west, we see a lot of mountains that we think the lil 4 cylinder is gonna struggle with. There is no replacement for displacement...
View attachment 661858
...or is there?
Rear discs are on the wish list here also. However, I already poured a bunch of money into the rear drums... and now that they’re working right, they work very well. They’ll be cheap to keep working as the cylinders are dirt cheap... so I’ll run them for quite a while. Water crossings are the biggest concern with drum brakes, and since I have no plans to do them, they aren’t a concern.
Never having to screw with adjustment is my number one reason I love disc brakes... and that they hate to lock up.
PlethoraOfGuns
Adventurer
Haha, John Candy went the wrong way!
Rear discs would be nice. But I have a manual transmission and need a really good parking break. Need to make sure whatever conversion gets done ends up with a good dependable parking brake. My current parking brake is a lever on the dashboard. On the lever is a knob that you can turn to adjust the parking brake. It's a super nice setup and working great right now, so we're not gonna fix it if it ain't broke.
Rear discs would be nice. But I have a manual transmission and need a really good parking break. Need to make sure whatever conversion gets done ends up with a good dependable parking brake. My current parking brake is a lever on the dashboard. On the lever is a knob that you can turn to adjust the parking brake. It's a super nice setup and working great right now, so we're not gonna fix it if it ain't broke.
Bikersmurf
Expedition Leader
Very wise... don’t fix what’s not broken.Haha, John Candy went the wrong way!
Rear discs would be nice. But I have a manual transmission and need a really good parking break. Need to make sure whatever conversion gets done ends up with a good dependable parking brake. My current parking brake is a lever on the dashboard. On the lever is a knob that you can turn to adjust the parking brake. It's a super nice setup and working great right now, so we're not gonna fix it if it ain't broke.
Disc Brakes make brakes more of an issue for conversions. Unless you’re replacing the whole axle with one that already has them.
MANUCHAO
Aventurero
Disc Brakes make brakes more of an issue for conversions. Unless you’re replacing the whole axle with one that already has them.
^^^^ THIS...!!!
PlethoraOfGuns
Adventurer
So there just so happens to be a replacement for displacement, and it's turbochargers! Yes, we could have swapped in a Cummins 6 cylinder, but time and budget are a factor and we ended up rebuilding the Cummins 4 cylinder. Besides, my engine hoist couldn't pick up the 6 cylinder, so that was the final deciding factor, and I'm sticking to that. But I bet we could squeeze just a lil bit more out of the lil engine that could, or couldn't.

The old setup has a turbo, stock from the factory for this van application. But as in other factors in life, size does sometimes matter. And the old little one got the job done for the van, but she wants to get up to speed faster sometimes and in a more efficient manner. You can also see the air intake setup. Not sure what went on there, but someone took some scrap metal brackets and exhaust pipe and welded up this horrendous attachment for the air filter, bolted to the exhaust manifold. I'm very glad to throw all that into the trash.
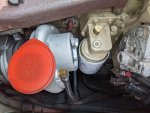
So first thing is first, mount the new turbocharger. Of course it barely clears the exhaust manifold and butts up against the oil filter. No way to get a rubber elbow on that to clear it. This turbocharger is much longer than the old one. If we had a 6 cylinder, this would be no problem. Maybe this is a sign we should just get a larger engine?
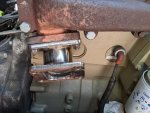
Options were:
A-get a larger engine
B-get new oil filter plate and turn oil filter sideways
C-get new oil filter plate and retrofit the oil filter into a completely different location
D-flip exhaust manifold upside down and mount turbocharger on top of engine and make new exhaust
E-try to change the angle of the turbocharger to give clearance for intake boot
Well, we went with option E. It was the cheapest and easiest solution. Being a step van, we had plenty of clearance in the engine bay for whatever we wanted. And access all around, front and back. Did I mention how easy it is to work on step vans?
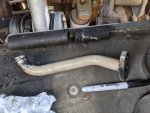
Got turbocharger mounted and the intake boot will clear the oil filter. But now the turbocharger is up and away from the engine block so the oil return won't reach. Simple enough, just need to replace hose with a longer one.
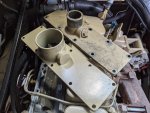
Now that the exhaust manifold side of things is mostly done, lets run over to the intake manifold. The old piping wasn't going to fly. I did all the cfm calculations, which called for 2.6" pipe. That puts us at using 2.75" pipe at a minimum. The pipe coming out of the new turbocharger is 3" and we found an old 3" intake manifold off Ebay at a good deal, so we're using 3" pipe. Yes, there could be potential for some turbo lag, but we're not gonna worry about it. This isn't a race car. Better to go a little bigger than a little smaller.
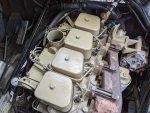
Cleaned up the new intake manifold and gave it some paint. It was pretty well used and used somewhere that allowed it to get pretty corroded. Surprisingly I was able to get it mounted up without removing the fuel injector lines.
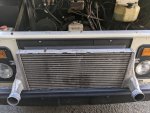
Some people have expressed concern about added heat. So to combat the heated up air from the pressurization of the turbocharger, we're gonna install a intercooler. We picked this 2nd Gen Dodge Cummins intercooler up for $10, score! Not sure how we're gonna fit it, but the tape measure says it will fit in there. Tape measure don't lie right?

Unfortunately, upon cleaning it up, there were 3 small holes. Total bummer. Looks like some kind of bracket was rubbing against the metal. These aluminum tubes are very thin. At first I thought oh well, at least I can use it as a template to make some mounting brackets and order a new intercooler. Ok, great.
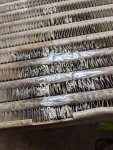
But new intercoolers are like $500 and we blew that money on the turbocharger, so we gonna fix these small holes and hope for the best! The aluminum was super thin, and there wasn't a good way to clean the interior, so there was no way I was going to attempt to TIG weld it. So I opted to braze it instead. Was not easy. Aluminum radiators like this are really good at sucking up heat and making it disappear. I had to use quite a bit of heat from the oxyacetylene torch. The middle one had a weird blowout nowhere near where I was heating and working the filler. We'll pressure test it and see if it holds.
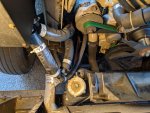
Had to move the radiator out of the way and install intercooler down in through the inside of the engine bay. Just fits, with 3/16" of clearance on each side. Now need to fab up some brackets and get some plumbing done.

The old setup has a turbo, stock from the factory for this van application. But as in other factors in life, size does sometimes matter. And the old little one got the job done for the van, but she wants to get up to speed faster sometimes and in a more efficient manner. You can also see the air intake setup. Not sure what went on there, but someone took some scrap metal brackets and exhaust pipe and welded up this horrendous attachment for the air filter, bolted to the exhaust manifold. I'm very glad to throw all that into the trash.

So first thing is first, mount the new turbocharger. Of course it barely clears the exhaust manifold and butts up against the oil filter. No way to get a rubber elbow on that to clear it. This turbocharger is much longer than the old one. If we had a 6 cylinder, this would be no problem. Maybe this is a sign we should just get a larger engine?

Options were:
A-get a larger engine
B-get new oil filter plate and turn oil filter sideways
C-get new oil filter plate and retrofit the oil filter into a completely different location
D-flip exhaust manifold upside down and mount turbocharger on top of engine and make new exhaust
E-try to change the angle of the turbocharger to give clearance for intake boot
Well, we went with option E. It was the cheapest and easiest solution. Being a step van, we had plenty of clearance in the engine bay for whatever we wanted. And access all around, front and back. Did I mention how easy it is to work on step vans?

Got turbocharger mounted and the intake boot will clear the oil filter. But now the turbocharger is up and away from the engine block so the oil return won't reach. Simple enough, just need to replace hose with a longer one.

Now that the exhaust manifold side of things is mostly done, lets run over to the intake manifold. The old piping wasn't going to fly. I did all the cfm calculations, which called for 2.6" pipe. That puts us at using 2.75" pipe at a minimum. The pipe coming out of the new turbocharger is 3" and we found an old 3" intake manifold off Ebay at a good deal, so we're using 3" pipe. Yes, there could be potential for some turbo lag, but we're not gonna worry about it. This isn't a race car. Better to go a little bigger than a little smaller.

Cleaned up the new intake manifold and gave it some paint. It was pretty well used and used somewhere that allowed it to get pretty corroded. Surprisingly I was able to get it mounted up without removing the fuel injector lines.

Some people have expressed concern about added heat. So to combat the heated up air from the pressurization of the turbocharger, we're gonna install a intercooler. We picked this 2nd Gen Dodge Cummins intercooler up for $10, score! Not sure how we're gonna fit it, but the tape measure says it will fit in there. Tape measure don't lie right?

Unfortunately, upon cleaning it up, there were 3 small holes. Total bummer. Looks like some kind of bracket was rubbing against the metal. These aluminum tubes are very thin. At first I thought oh well, at least I can use it as a template to make some mounting brackets and order a new intercooler. Ok, great.

But new intercoolers are like $500 and we blew that money on the turbocharger, so we gonna fix these small holes and hope for the best! The aluminum was super thin, and there wasn't a good way to clean the interior, so there was no way I was going to attempt to TIG weld it. So I opted to braze it instead. Was not easy. Aluminum radiators like this are really good at sucking up heat and making it disappear. I had to use quite a bit of heat from the oxyacetylene torch. The middle one had a weird blowout nowhere near where I was heating and working the filler. We'll pressure test it and see if it holds.

Had to move the radiator out of the way and install intercooler down in through the inside of the engine bay. Just fits, with 3/16" of clearance on each side. Now need to fab up some brackets and get some plumbing done.
Last edited:
TheRealPapaK
Active member
Very nice. Everything needs boost in my opinion. I’m glad to see you went with an intercooler. They make a world of difference!
PlethoraOfGuns
Adventurer
Just a little bit of boost. We were maxing out at 7psi before. We'll see what we end up with. Hope that intercooler repair holds!
TheRealPapaK
Active member
I don’t know if this is a terrible idea, but I’ve had had the thought to repair small holes like that with a high quality aluminum pop rivet with a retaining mandrel. I figure the softness of the metal would seal it tight. But like I said. Maybe a terrible idea
PlethoraOfGuns
Adventurer
I don't know. The metal where it had to be repaired is almost pop can thin.
PlethoraOfGuns
Adventurer
Ugh, this is a lot of work using many different skills!
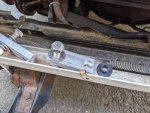
So these are the lower mounts for the intercooler that we fabricated up. Super simple recess for the rubber isolators and threaded the other hole to mount aluminum bracket.
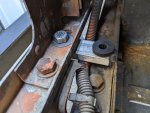
Intercooler sits right on there with a post. Just clears everything.
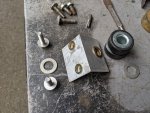
And the upper mount. Using lots of rivnuts. These things are great and save so much time, especially when mocking up stuff and installing and removing intercooler so many times.
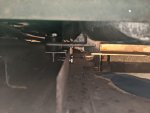
As the great Ace Ventura would say, like a glove!
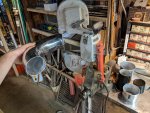
Time to weld up some plumbing. Pipe cutter was too small for this pipe. Bandsaw was also too small. Made this with a portaband, which barely fit the 4" intake pipe.
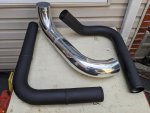
Intercooler piping all welded up and painted.
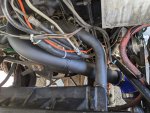
Everything fits great! Time to pressure test before we turn the key!
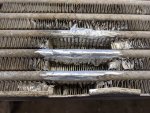
And of course that patch we brazed leaks. Cut out lots of the cooling fins and did an even deeper clean. Tried many times and the leaks kept getting worse. It's like the air is squeezing out though so many micro holes like a sponge. Probably the issue is all the oils and contamination that is on the inside of the tubing that I just can't get clean. Throwing in the towel, spent too much time on this piece of junk. Gonna go work the weekend and buy a new one. This whole intercooler thing better be worth it!

So these are the lower mounts for the intercooler that we fabricated up. Super simple recess for the rubber isolators and threaded the other hole to mount aluminum bracket.

Intercooler sits right on there with a post. Just clears everything.

And the upper mount. Using lots of rivnuts. These things are great and save so much time, especially when mocking up stuff and installing and removing intercooler so many times.

As the great Ace Ventura would say, like a glove!

Time to weld up some plumbing. Pipe cutter was too small for this pipe. Bandsaw was also too small. Made this with a portaband, which barely fit the 4" intake pipe.

Intercooler piping all welded up and painted.

Everything fits great! Time to pressure test before we turn the key!

And of course that patch we brazed leaks. Cut out lots of the cooling fins and did an even deeper clean. Tried many times and the leaks kept getting worse. It's like the air is squeezing out though so many micro holes like a sponge. Probably the issue is all the oils and contamination that is on the inside of the tubing that I just can't get clean. Throwing in the towel, spent too much time on this piece of junk. Gonna go work the weekend and buy a new one. This whole intercooler thing better be worth it!
Last edited:
ambulancemonkee
Observer
I wonder if just covering it with jb weld or steel stick would do anything.
Yeah, I'm pretty sure they don't need any more JB Weld encouragement....
Bikersmurf
Expedition Leader
Hey, so far the JB welded crank is holding up fine.
PlethoraOfGuns
Adventurer
Haha, don't knock the JB Weld! We were just trying to do at least one thing the right way by the books. But a new intercooler is like $1000!!! Ok, where is that tube of JB Weld...
Similar threads
- Replies
- 19
- Views
- 1K
- Replies
- 7
- Views
- 1K
- Replies
- 5
- Views
- 574

